Утилита очистки диска (Disk Cleanup) позволяет администратору быстро очистить системный диск Windows Server, удалив ненужные и временные файлы, в том числе очистить каталог WinSxS от файлов устаревших компонентов, которые остались после установки обновлений. Утилита Disk Cleanup (cleanmgr.exe) по умолчанию уже установлена в графической версии Windows Server 2016/2019 (Desktop Experience), однако в предыдущих версиях Windows Server (2012 R2/ 2012/ 2008 R2) утилита cleanmgr.exe по-умолчанию отсутствует.
Содержание:
- Очистка диска с помощью Disk Cleanup в Windows Server 2016
- Очистка диска с помощью cleanmgr.exe из командной строки
- Запуск cleanmgr в Windows Server 2012 R2/ 2008 R2 без установки Desktop Experience
- Использование Disk Cleanup в Windows Server Core
Очистка диска с помощью Disk Cleanup в Windows Server 2016
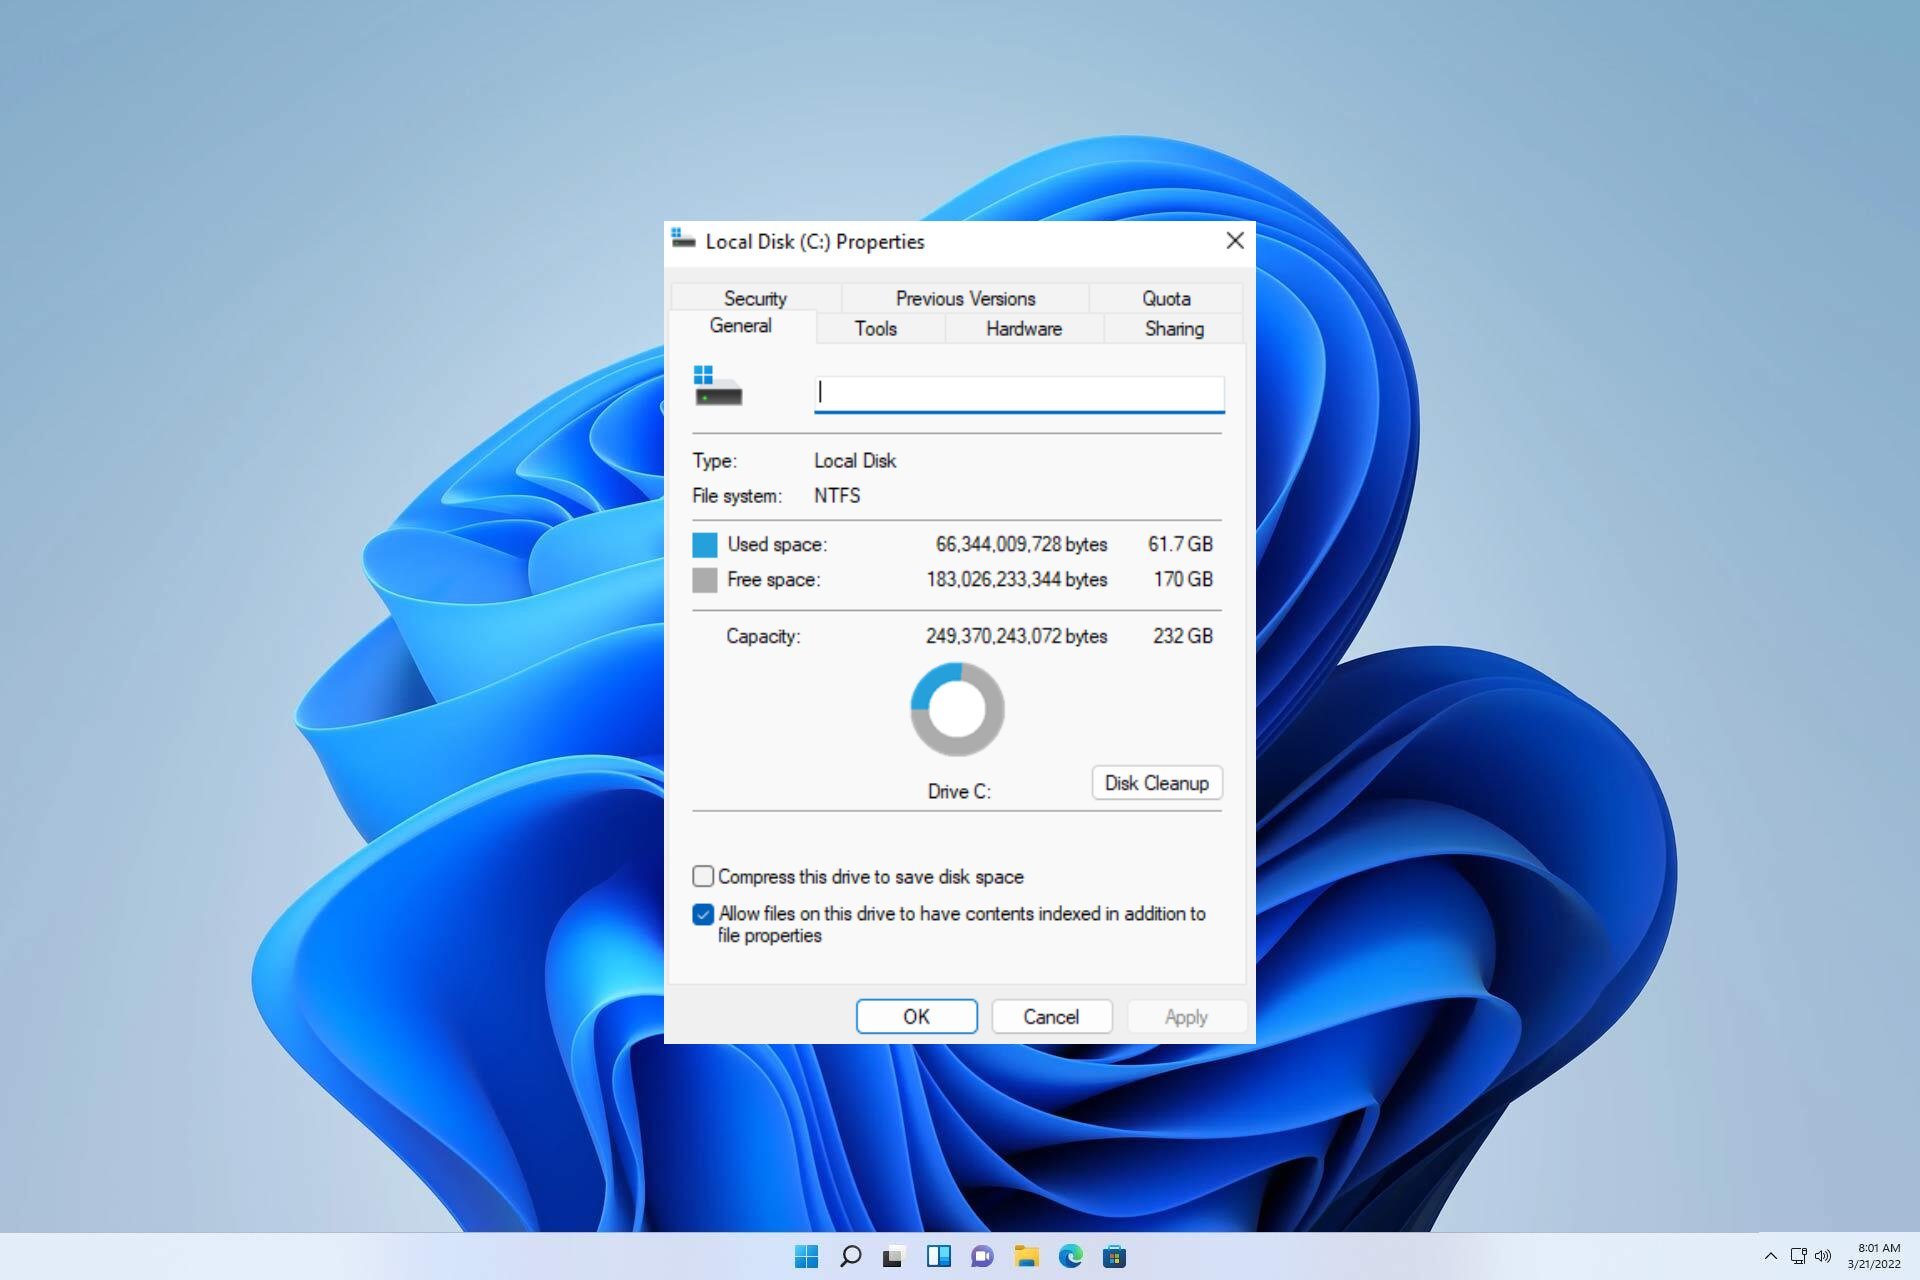
Чтобы очистить системный диск от ненужных файлов в Windows Server 2016 с помощью утилиты Disk Cleanup, нужно в File Explorer открыть свойства диска и нажать кнопку Disk Cleanup.
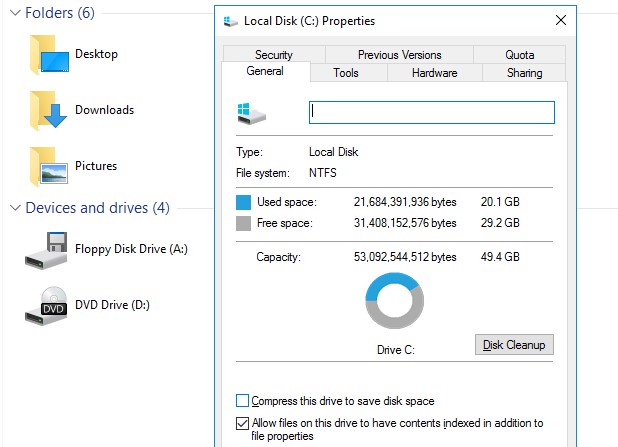
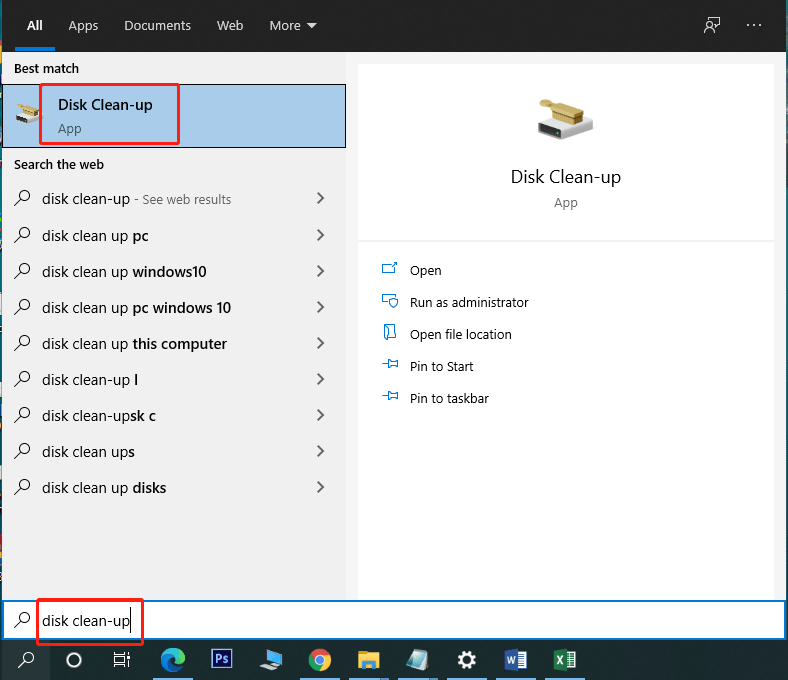
Также можно в поисковой строке набрать «disk cleanup» или cleanmgr.exe.
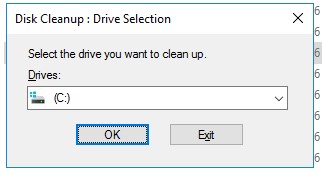
Выберите диск, который вы хотите очистить.
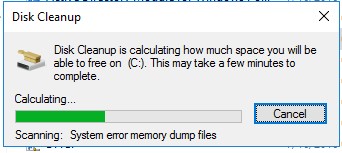
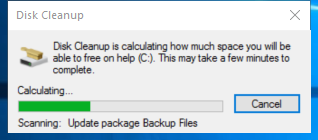
Дождитесь пока мастер очистки проверит ваш диск и найдет ненужные файлы, которые можно безболезненно удалить.
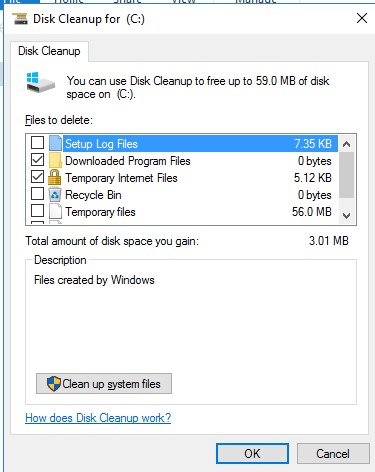
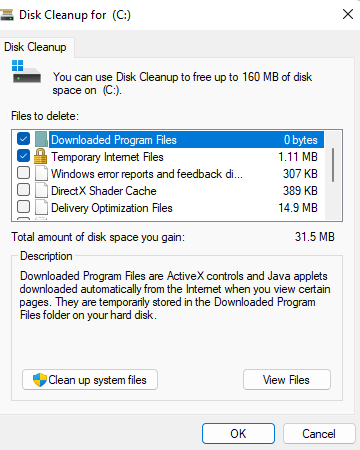
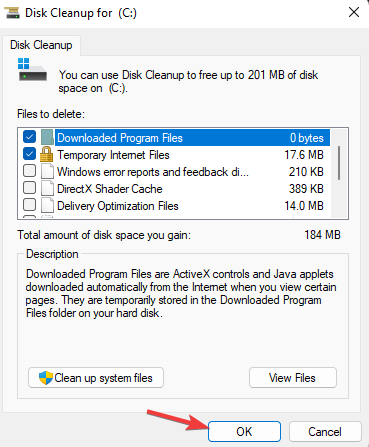
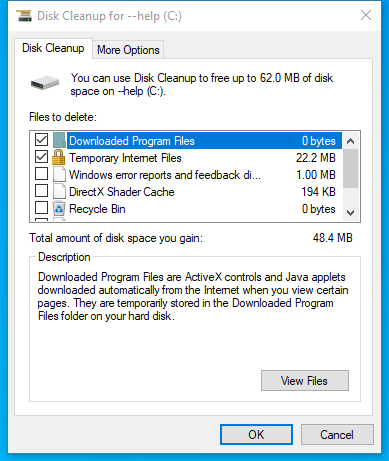
Вы можете выбрать компоненты, файлы которых можно удалить. Вам предлагается удалить следующие временные файлы:
- Setup Log Files
- Downloaded Program Files
- Temporary Internet Files
- Recycle Bin
- Temporary files
- Thumbnails
Чтобы удалить ненужные системные файлы нажмите на кнопку Clean up system files.
Дополнительно предлагается очистить:
- Устаревшие файлы Windows Defender
- System archived Windows Error Reporting (каталог C:\ProgramData\Microsoft\Windows\WER\ReportQueue)
- System queued Windows Error Reporting
- Device driver packages
- Windows Update Cleanup — при этом выполняется очистка хранилища компонентов в каталоге WinSxS. Удаляются старые версии компонентов, которые остались после установки обновленных версий.
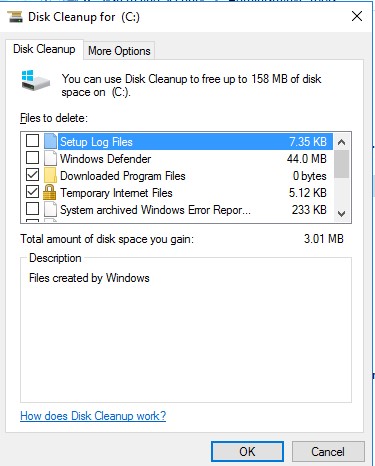
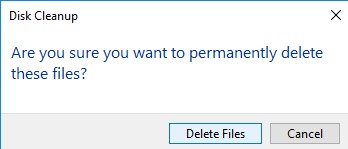
Выберите нужные опции, при этом Disk Cleanup покажет количество места, которое освободится. Нажмите Ок и подтвердите удаление временных файлов.
Дождитесь, пока утилита cleanmgr.exe удалит ненужные файлы.
Очистка диска с помощью cleanmgr.exe из командной строки
Утилита
cleanmgr.exe
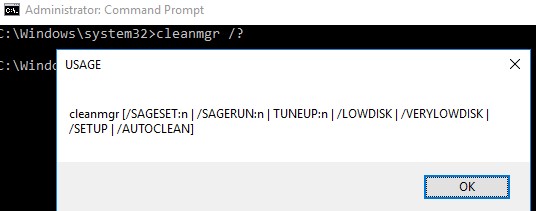
имеет различные параметры командной строки, которые позволяют использовать ее в различных сценариях автоматической очистки системного диска. Их можно использовать как в Windows Server, так и на рабочих станциях пользователей с Windows 10.
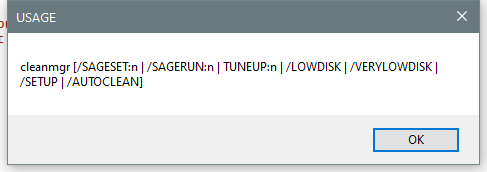
cleanmgr [/d driveletter] [/SAGESET:n | /SAGERUN:n | TUNEUP:n | /LOWDISK | /VERYLOWDISK | /SETUP | /AUTOCLEAN]
Ключ
/AUTOCLEAN
используется для очистки старых файлов, оставшихся после апгрейда билда Windows. Параметр
/SETUP
позволяет удалить файлы, оставшиеся от предыдущей версии Windows (если вы выполняли in-place upgrade).
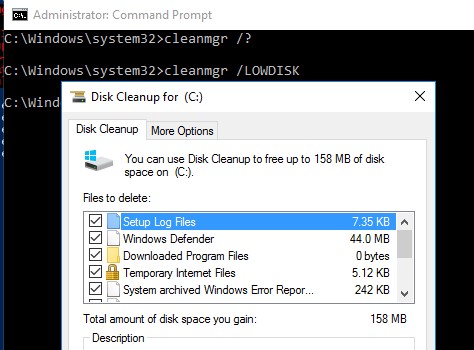
Команда
cleanmgr /LOWDISK
– запускает графический интерфейс Disk Cleanup с уже выбранными параметрами очистки.
Команда
cleanmgr /VERYLOWDISK
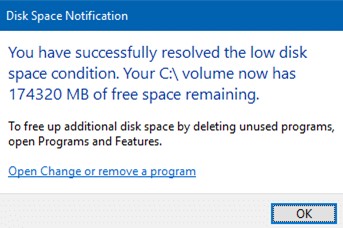
выполняет автоматическую очистку, а после окончания оторажает информацией о выполненных действиях и свободном месте.
You have successfully resolved the low disk space condition. Your C:\ volume now has 10000 Mb of free space remaining.
С помощью параметров
/sageset:n
и
/sagerun:n
вы можете создать и выполнить настроенный набор параметров очистки.
Например, выполните команду
cleanmgr /sageset:11
. В открывшемся окне выберите компоненты и файлы, которые нужно автоматически очищать (я выбрал все опции).
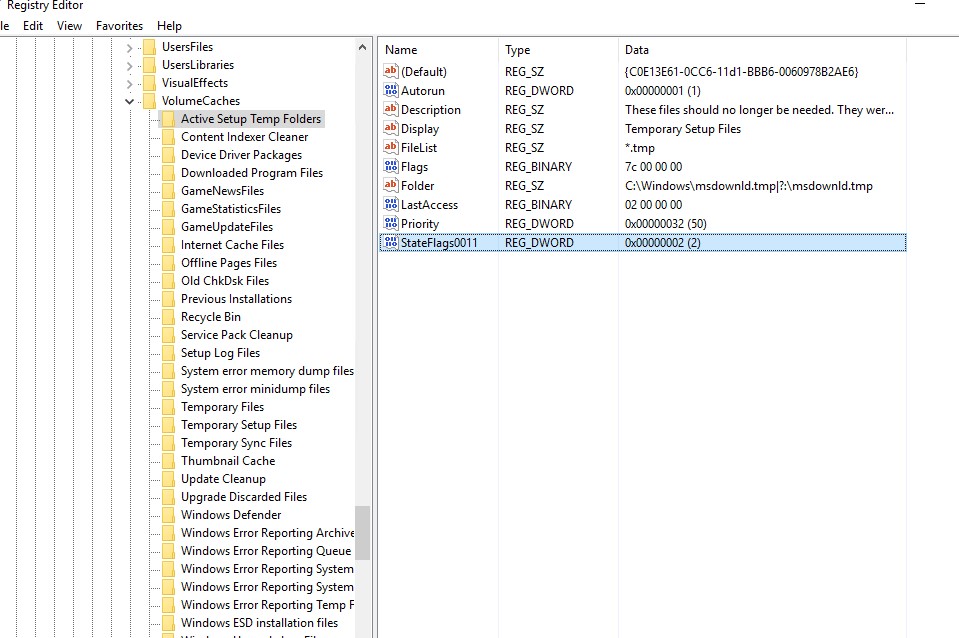
Эти настройки сохраняются в ветке реестра HKEY_LOCAL_MACHINE\SOFTWARE\Microsoft\Windows\CurrentVersion\Explorer\VolumeCaches. В этой ветке перечислены все компоненты Windows, которые можно очистить с помощью Disk Cleanup. Для каждой опции, которую вы выбрали создается параметр типа DWORD с именем StateFlags0011 (
0011
это число, которое вы указали в параметре sageset).
Чтобы запустить процесс очистки с выбранными параметрами, выполните команду:
cleanmgr /sagerun:11
Если вам нужно настроить автоматическую очистку дисков на компьютерах (или серверах) в домене, вам достаточно экспортировать эту ветку реестра и распространить ее через GPO.
Для автоматического запуска очистки системного диска на рабочих станциях с Windows 10 можно создать задание в планировщике со следующим PowerShell скриптом:
Start-Process -FilePath CleanMgr.exe -ArgumentList '/sagerun:11' -WindowStyle Hidden -Wait
Запуск cleanmgr в Windows Server 2012 R2/ 2008 R2 без установки Desktop Experience
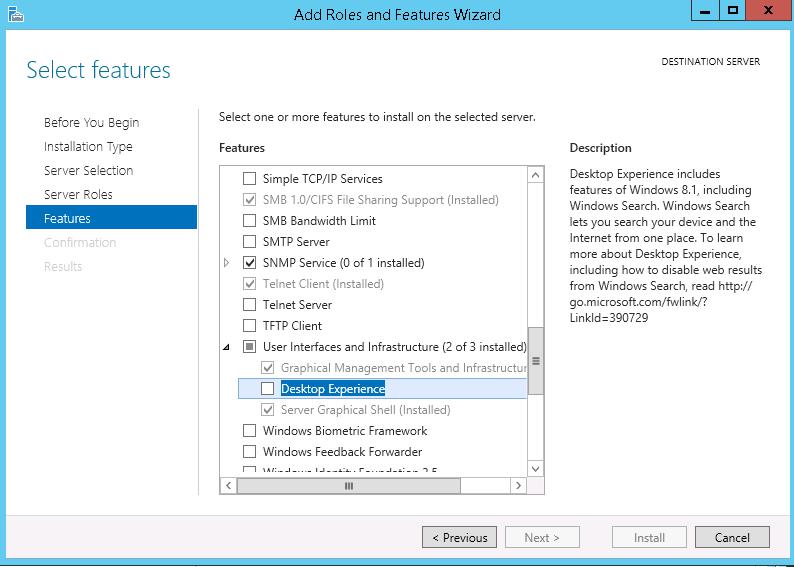
В Windows Server 2012 / R2 и 2008 /R2 по умолчанию не установлена утилита очистки диска Disk Cleanup (cleanmgr.exe). Чтобы воспользоваться утилитой cleanmgr сначала нужно установить отдельный компонент сервера Desktop Experience (Возможности рабочего стола) с помощью Server Manager или PowerShell (
Install-WindowsFeature Desktop-Experience
).
Но вместе с Desktop Experience устанавливается множество других компонентов, которые абсолютно не нужны на сервере:
- Windows Media Player
- Темы рабочего стола
- Поддержка AVI для Windows
- Windows SideShow
- Windows Defender
- Disk Cleanup
- Sync Center
- Запись звука
- Character Map
- Snipping Tool
Для запуска мастера очистки дисков в Windows Server можно воспользоваться более простым методом: достаточно скопировать в системный каталог два файла из каталога WinSxS: Cleanmgr.exe и Cleanmgr.exe.mui. Ниже представлены команды для копирования файлов cleanmgr из каталога WinSxS для разных версий Windows Server (во всех случаях используется путь для английских редакций ОC).
| ОС | Команда копирования файлов cleanmgr |
| Windows Server 2008 R2 x64 |
copy C:\Windows\winsxs\amd64_microsoft-windows-cleanmgr_31bf3856ad364e35_6.1.7600.16385_none_c9392808773cd7da\cleanmgr.exe C:\Windows\System32\
|
| Windows Server 2008 x64 |
copy C:\Windows\winsxs\amd64_microsoft-windows-cleanmgr_31bf3856ad364e35_6.0.6001.18000_none_c962d1e515e94269\cleanmgr.exe C:\Windows\System32\
|
| Windows Server 2012 x64 |
copy C:\Windows\WinSxS\amd64_microsoft-windows-cleanmgr_31bf3856ad364e35_6.2.9200.16384_none_c60dddc5e750072a\cleanmgr.exe C:\Windows\System32\
|
Windows Server 2012 R2 x64
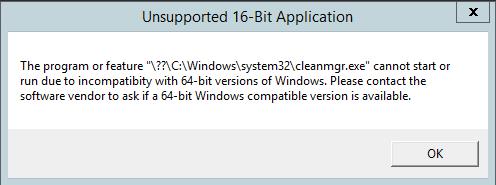
Рассмотренный выше трюк не работает в Windows Server 2012 R2 из-за изменений, внесенных обновлением KB2821895. Дело в том, что после установки данного обновления для хранения бинарных файлов компонентов стала использоваться компрессия. При попытке запустить скопированный cleanmgr.exe появляется ошибка:
The Program or feature \??\C:\Windows\system32\cleanmgr.exe cannot start or run due to incompatibility with 64-bit version of Windows
В качестве обходного решения можно воспользоваться такой методикой:
- Установить компонент Windows Desktop Experience:
Install-WindowsFeature Desktop-Experience - Перезагрузить сервер;
- Скопировать файлы %windir%\system32\cleanmgr.exe и %windir%\system32\en-US\cleanmgr.exe.mui в произвольный каталог (c:\temp)
- Удалить компонент:
Uninstall-WindowsFeature Desktop-Experience - Перезагрузка;
- Скопировать файлы cleanmgr.exe и cleanmgr.exe.mui в указанные выше каталоги
В дальнейшем эти два файла можно скопировать и на все другие сервера или интегрировать в шаблоны виртуальных машин с Windows Server 2012 R2.
Ссылка на скачивание готового комплекта файлов cleanmgr.exe.mui + cleanmgr.exe для Windows Server 2012 R2 на ЯндексДиске (thks Alex Kornev).
Для запуска утилиты очистки диска теперь достаточно выполнять с правами администратора команду
cleanmgr.exe
.

Совет. Для очистки устаревших файлов компонентов, оставшихся после установки обновлений, в Windows Server R2 можно воспользоваться командой DISM:
dism.exe /online /Cleanup-Image /StartComponentCleanup /ResetBase
В Windows Server 2008 R2, чтобы cleanmgr могла удалять устаревшие файлы обновлений нужно установить отдельный патч KB2852386.
Использование Disk Cleanup в Windows Server Core
В Windows Server Core 2016, в котором отсутствует полноценный графический интерфейс, утилита Disk Cleanup также не установлена. Если вы хотите использовать cleanmgr.exe для очистки диска в Server Core, достаточно скопировать следующие файлы из каталога WinSXS:
copy C:\Windows\WinSxS\amd64_microsoft-windows-cleanmgr_31bf3856ad364e35_10.0.14393.0_none_9ab8a1dc743e759a\cleanmgr.exe C:\Windows\System32\
copy C:\Windows\WinSxS\amd64_microsoft-windows-cleanmgr.resources_31bf3856ad364e35_10.0.14393.0_en-us_8b4adb68af596a23\cleanmgr.exe.mui C:\Windows\System32\en-US\
You can access cleanmgr via Run dialog and use it for disk cleanup
by Loredana Harsana
Loredana is a passionate writer with a keen interest in PC software and technology. She started off writing about mobile phones back when Samsung Galaxy S II was… read more
Updated on
- With the cleanmgr your disk cleanup process should be done with ease.
- Users can properly use cleanmgr to scan and free up space in their hard drives.
XINSTALL BY CLICKING THE DOWNLOAD
FILE
Unsurprisingly, many users find themselves perplexed by the cleanmgr.exe feature. However, fear not! In this article, we’ll delve into its definition and guide how to utilize cleanmgr.exe properly.
In a recent piece, we delved into the intricacies of disk cleanup in Windows 11. Yet, we are now confronted with a comparable scenario.
Nevertheless, it is essential to determine the root cause before attempting to resolve the current problem.
What does Cleanmgr stand for?
Microsoft’s cleanmgr.exe is an automated tool for disk cleanup in Windows, designed to liberate space on your hard drive.
How we test, review and rate?
We have worked for the past 6 months on building a new review system on how we produce content. Using it, we have subsequently redone most of our articles to provide actual hands-on expertise on the guides we made.
For more details you can read how we test, review, and rate at WindowsReport.
Its primary objective is to scan and evaluate your hard drive for unnecessary files, eliminating them without manual intervention.
What is the use of Cleanmgr?
Cleanmgr does the following:
- You can use cleanmgr to remove temporary files from your PC.
- It can also be used to free up space on your device.
- Easier management of file storage.
How can I use Cleanmgr properly?
Launch Cleanmgr via Run command
- Hold Windows + R keys together, type the following command, and tap OK:
cleanmgr.exe
- Once the disk cleanup window pops up.
- Now you can tick the box of your choice you want to clean and click OK.


How to run cleanmgr.exe from the command line
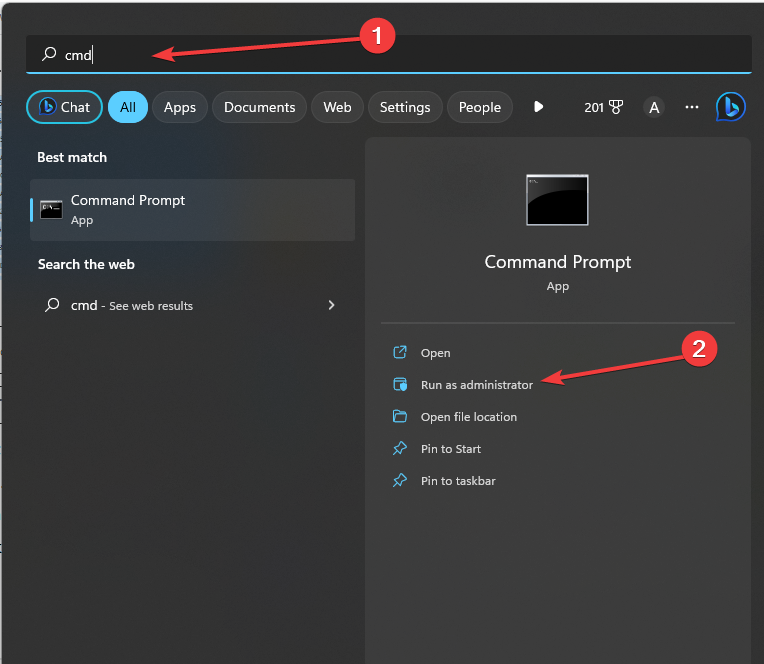
- On your home screen type in cmd in the search bar and select Run as Administrator, once the UAC pops up click Yes.

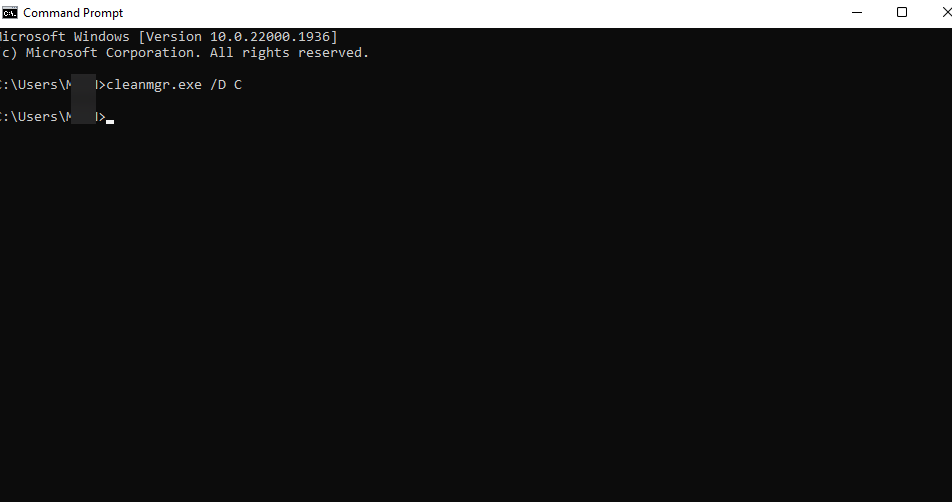
- Copy and paste this command and click Enter:
cleanmgr.exe /D C
- Now you can tick the box of your choice you want to clean and click OK.

What cleanmgr.exe options can I use?
- /d <driveletter> – It specifies drives letter.
- /sageset:n – Stores settings in the registry.
- /sagerun:n – Runs specific task assigned to n value.
- /tuneup:n – Run /sageset and /sagerun for the same n.
- /lowdisk – Run with the default settings.
- /verylowdisk – Run with the default settings, no user prompts.
- /? – Displays help at the command line.
As you can see, using cleanmgr.exe from the Run dialog is incredibly simple.
- How to Download & Install Microsoft LifeCam Drivers on Windows 11
- How to Quickly Turn Off Accents on Keyboard in Windows 11
- CredentialUIBroker.exe Error: How to Fix it on Windows 11
Is it safe to use Cleanmgr?
Using this tool has several benefits:
- It cleans up files.
- Frees up space.
- Manage file storage.
However, it comes with several drawbacks:
- It can delete previous Windows installations.
- It will delete files from Recycle Bin.
In general, this software is relatively safe to utilize. However, it is important to exercise caution as there is a possibility of losing certain files if one fails to take appropriate measures.
We have created this guide to alleviate any concerns you may have and provide you with valuable information.
We trust that our manual has provided you with some insightful tips on how to use cleanmgr.exe. If you encounter any other problems, we suggest referring to our extensive guide on Disk Cleanup missing. It offers comparable solutions that can assist you in resolving the issue at hand.
Your feedback is highly appreciated, and we would be thrilled to hear your thoughts. Please feel free to leave a comment below and share your perspective with us.
![]()
If your Windows PC is running low on storage space, clean out the junk using these fast Command Prompt utilities.
Keeping your computer free from clutter can help improve performance and free up tons of storage space. Windows comes with several built-in system-cleanup utilities, such as the Disk Cleanup tool. However, one lesser-known way to clean your computer is via the Command Prompt.
Here are a few ways to clean up a slow Windows computer using Command Prompt.
Why Clean Up Your Computer Using Command Prompt?
Command Prompt is a built-in command processor available on almost all Windows versions since Windows 3.1. While the graphical user interface is handy for most people, some may prefer the Command Prompt to perform several tasks for its efficiency and performance benefits.
If you are new to Microsoft’s popular command processor, check out our beginner’s guide to the Windows Command Prompt.
The Disk Cleanup tool and the Storage Sense feature in Windows 10 make it fairly easy to clean up your computer. If any unwanted files remain, you can remove them manually by, for example, clearing your temp folder. You can speed up this process with the help of commands to access the Disk Defragmenter, diskpart, and the Disk Cleanup tool.
Commands to Clean Your Computer Using CMD
Below is the list of commands to launch the disk cleanup utility, clean temporary files, memory cache, and more.
Some of these commands may require you to open Command Prompt as administrator. Here’s how to do it.
- Type cmd in the Windows search bar.
- Right-click on Command Prompt.
- Select Run as administrator.
How to Defragment Hard Disk With Command Prompt?
While disk fragmentation on traditional hard disks is a natural occurrence, it can cause performance issues. It affects the access and write speed of your disk, making your system slow.
Defragmentation rearranges fragmented data to help your disks work more efficiently. You don’t need to defragment your SSD storage devices (nor it is recommended), but if you use a mechanical drive, here’s how to defragment the hard disk with a command.
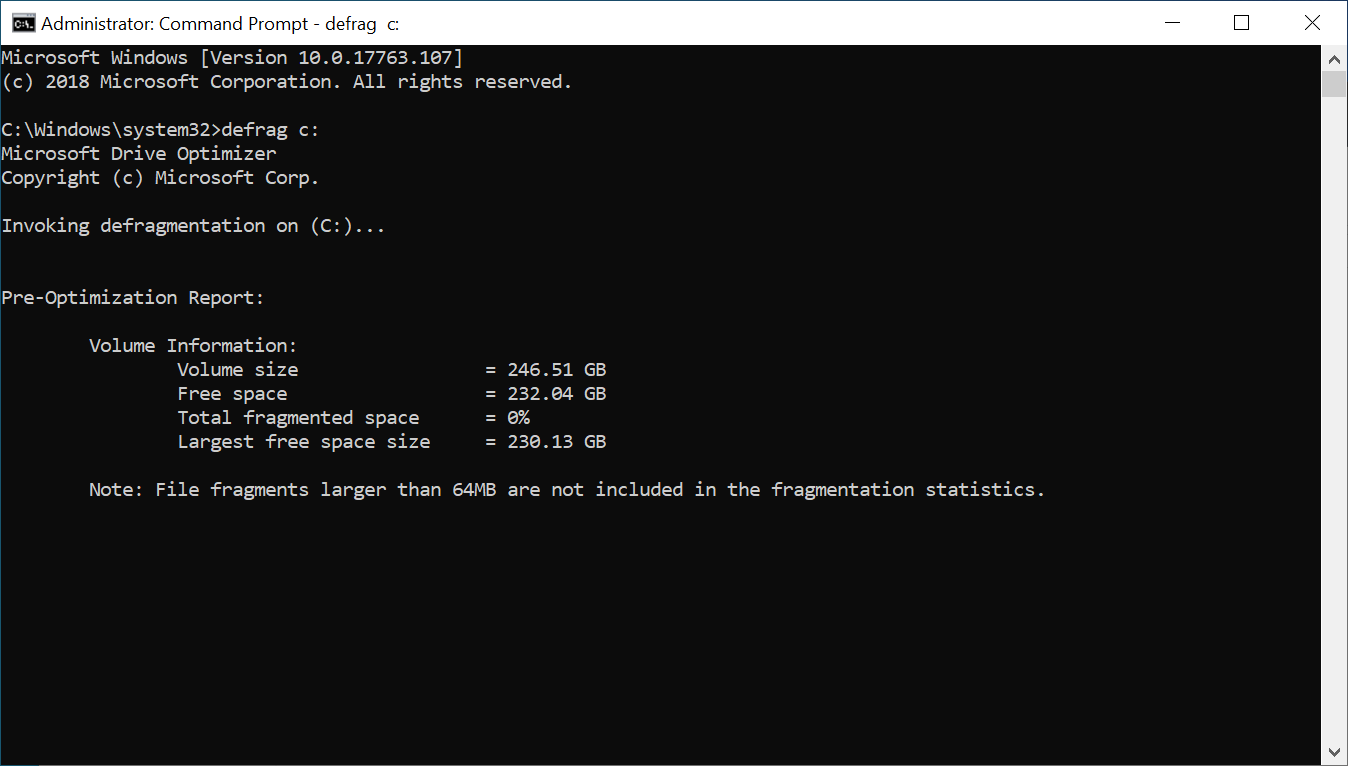
- Open the Command Prompt as administrator.
- In the Command Prompt, type the following command and hit enter:
defrag c: - In the above command, c: is the drive that you want to defrag. Change the drive letter if you want to defrag another drive.
You can run the defrag command with optional switches. This Microsoft Documentation offers more insight into using different syntax with the defrag command to perform analysis, add exceptions, change priority, and more.
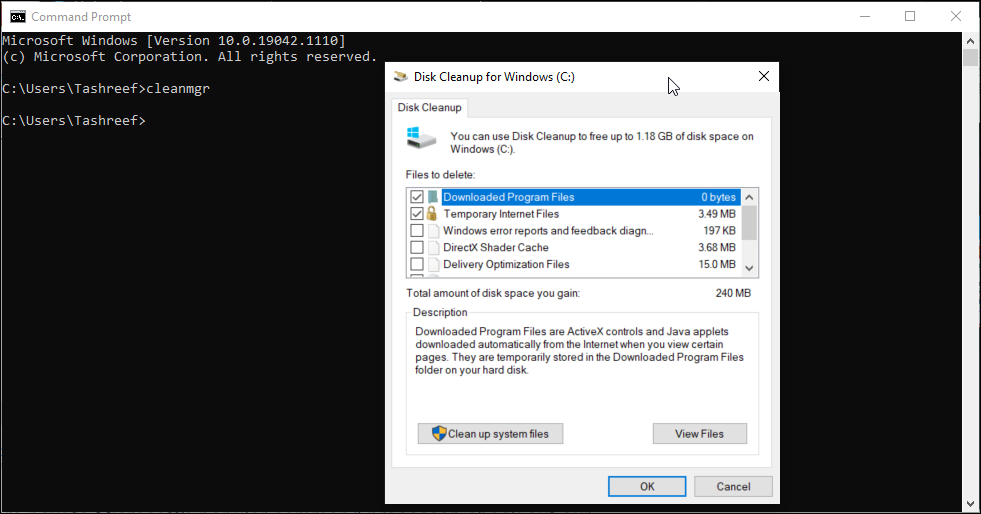
Quick Disk Cleanup Using the Run Box
You can use a Run command to perform a quick disk cleanup without even opening the Command Prompt. Useful if you want to free up a few gigabytes of storage in two steps. This requires you to start the Disk Cleanup tool and specify the disk you want to clean via the Run dialog.
To run Disk Cleanup using Run:
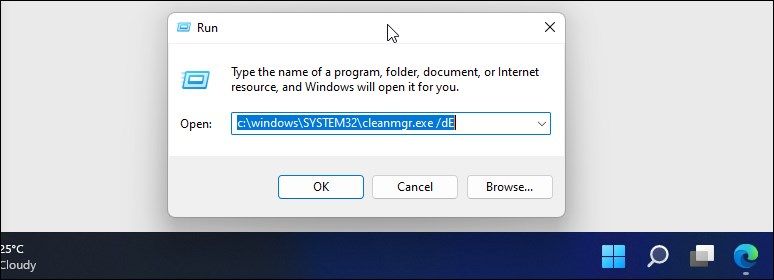
- Press Win + R to open Run.
- Type the following command in the Run dialog:
C:\windows\SYSTEM32\cleanmgr.exe /dDrive - In the above command, replace Drive with the disk drive letter you want to clean. For example, if you want to perform a quick cleanup for the E drive, then the full command will look like this:
C:\windows\SYSTEM32\cleanmgr.exe /dE - Click OK or press Enter to execute the command.
- Run will quickly launch the Disk Cleanup tool with your specified drive selected.
- Select the files to delete and click OK.
How to Use the Disk Cleanup Utility via Command Prompt
Disk Cleanup is a built-in Windows utility to help you free up space on your computer’s hard drive. It can clean up downloads, temporary internet files, recycle bin, and even system files.
You can use the Command Prompt to launch Disk Cleanup and perform some automated cleanup tasks directly. Here is how to use the tool and supported command-line switches.
Basic File Deletion
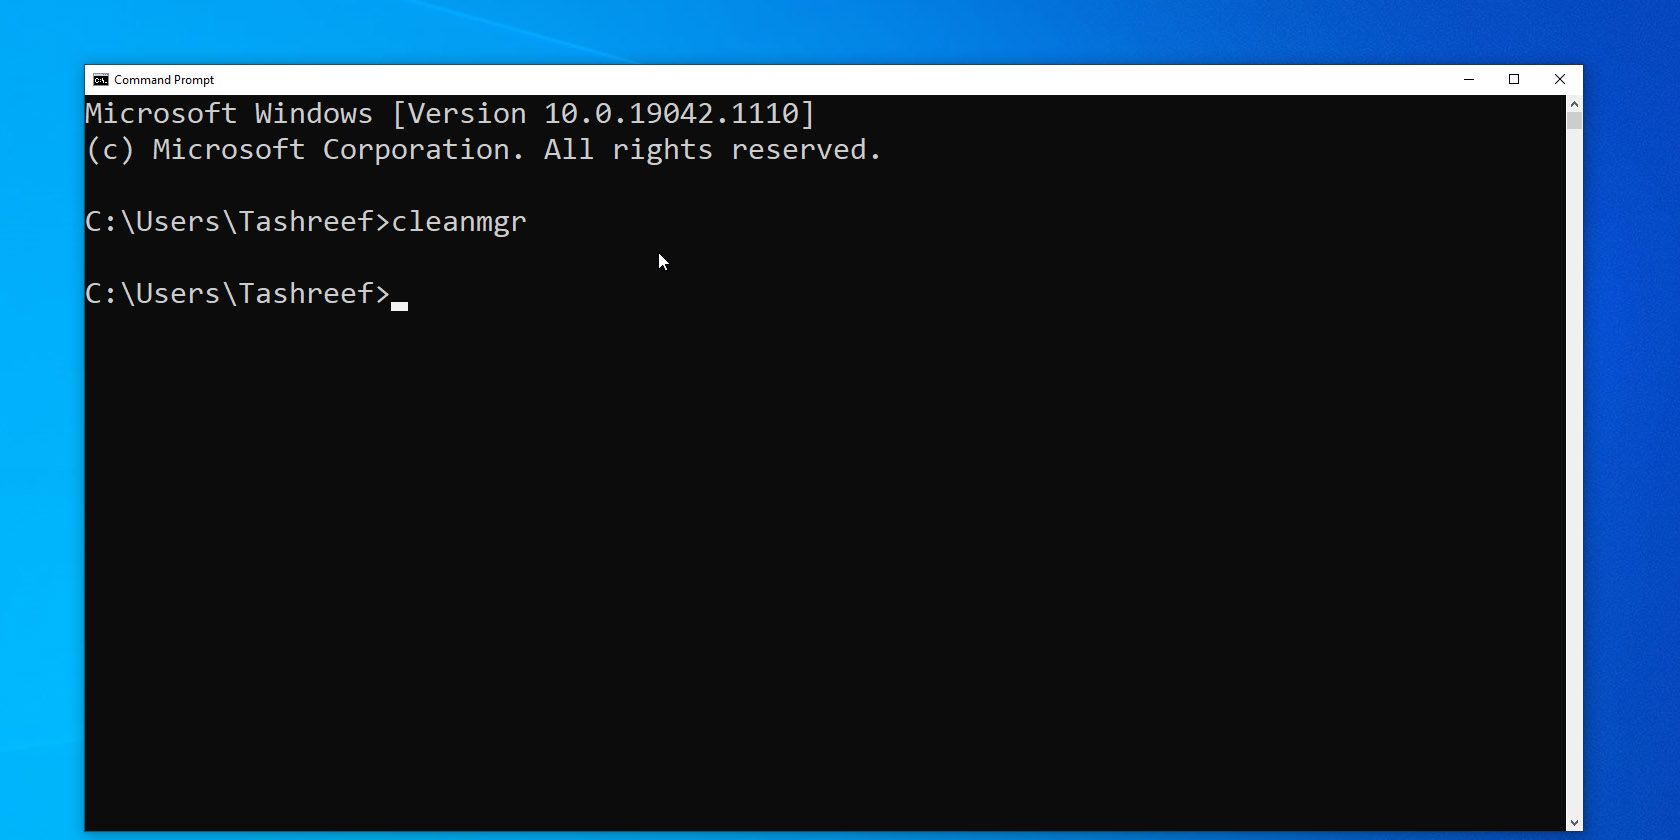
You can use the cleanmgr command to launch the Disk Cleanup tool using Command Prompt. To use it:
- Open Command Prompt, type cleanmgr, and hit Enter.
- In the Drive Selection window, select the drive you want to clean up and click OK.
- Next, in the Disk Cleanup window, select all the files you want to delete and click OK.
- Finally, click on Delete Files to confirm the action.
Skipping Drive Selection
cleanmgr /sageset
Executing this command skips the drive selection step and shows the Disk Cleanup settings window. From here, you can select the files to delete.
Delete Files Automatically
If you would rather let the Disk Cleanup utility decide what files to delete, use the cleanmgr /sagerun variant. Upon execution, it will scan your drives and delete junk files from your system.
cleanmgr /sagerun
Optimize for Low Space
The lowdisk switch, as the name suggests, is useful if you are running low on storage space on your hard disk. When executed, it automatically checks all the files categories by default.
When using this form of the command, enter the drive letter for the partition to free up space. The command will look something like this:
cleanmgr /lowdisk /d
When executed, Disk Cleanup will open with all junk files categories selected from the D: drive.
To delete all junk files quickly, without the user prompt, use the following command instead:
cleanmgr /verylowdisk /d
How to Clear Temporary Files Using Command Prompt?
Windows creates temporary files for momentary use. Temp files rarely occupy a large space on your hard drive and are essential for the smooth functioning of your system. When the task is complete, your system should automatically discard them from the temporary folders.
The Disk Cleanup tool cleans temporary files that are older than seven days. But if you have to clean the temp folder frequently, you can do it manually or using the Command Prompt.
To view temporary files, enter the following command in Command Prompt:
%SystemRoot%\explorer.exe %temp%\
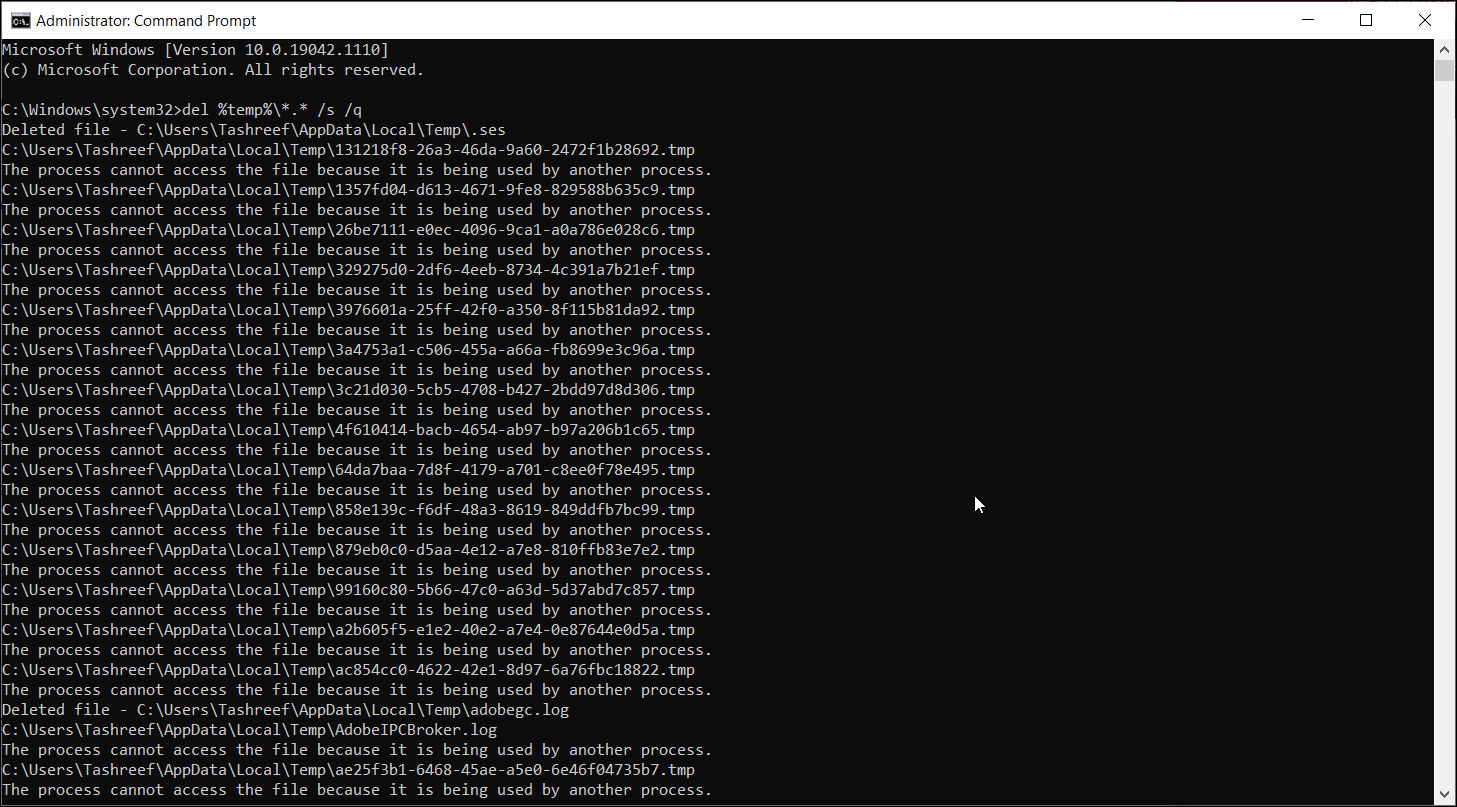
You can delete these files manually (Ctrl + A > Delete) from the File Explorer or use the following command to delete temp files:
del %temp%\*.* /s /q
Command Prompt will automatically skip any file that is currently in use, but it will delete the rest.
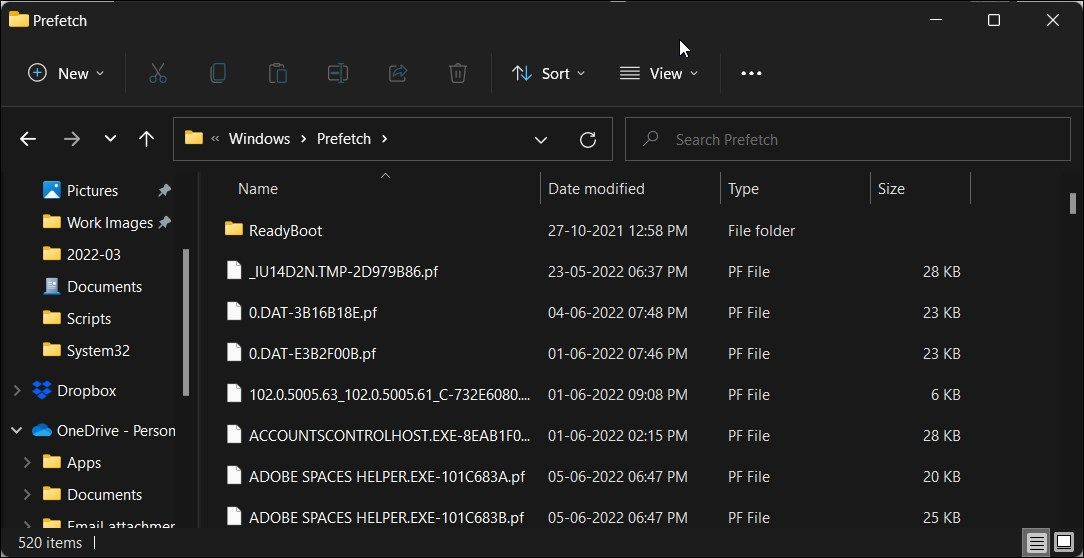
How to Delete Prefetch Files Using Command Prompt
Prefetch files are temporary files created when an application is run on your Windows system. These files contain information that is used to optimize the execution of programs.
Similar to other temporary files, prefetch files often don’t take up much space on your hard drive. However, if you need to delete prefetch files frequently, you can use the Command Prompt to cleanup these files on your system.
To delete prefetch files using Command Prompt:
- Open Command Prompt as administrator.

- In the Command Prompt window, type the following command to view the prefetch files:
%SystemRoot%\explorer.exe C:\Windows\prefetch\ - It will open the prefetch folder in File Explorer and show the prefetch files that you can delete.
- To delete the prefetch files, use the following command and hit enter:
del C:\Windows\prefetch\*.*/s/q - Command Prompt will show a list of all the deleted prefetch files.
Cleaning a Hard Disk Using Diskpart
If you want to wipe clean an entire disk, you can use the diskpart utility. Diskpart is a Windows command-line utility with support for over 38 commands for different functions.
To wipe clean a disk, you can use diskpart’s clean command. Upon execution, it deletes all the data and converts the disk into unallocated space.
Exercise caution when using the diskpart utility. Using incorrect objects can cost you all of your data, and you may not be able to recover any of it at all. Therefore, we recommended you create a backup of your important system data before using the diskpart tool.
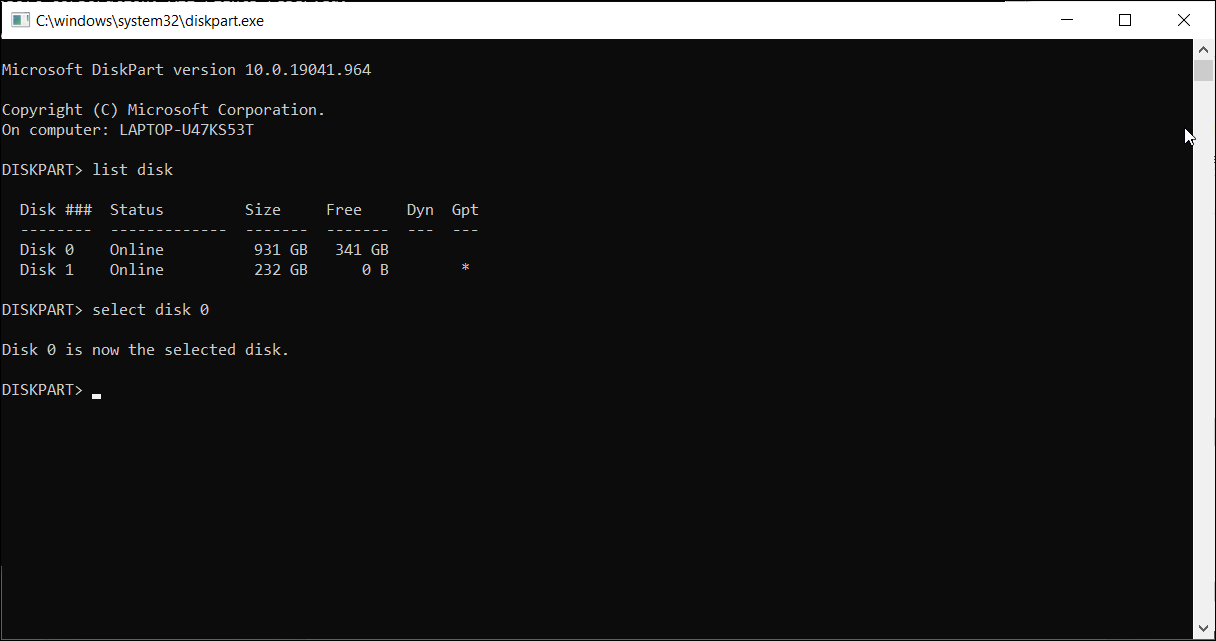
To clean a disk:
- Type diskpart In the Command Prompt and hit enter.
- Next, type list disk to view all the installed disks on your system
- Select the disk you want to wipe clean. For example:
Select disk 0 - If the disk status shows offline, type online disk and hit enter.
- To wipe clean your disk, type the following command and hit enter:
Clean all - Once completed, type exit to close diskpart.
Keep Your Computer Clean From Junk Files Using Command Prompt
You can use the Command Prompt to perform various advanced actions, including removing junk files from your computer. While you can use the GUI-based Disk Cleanup tool, Command Prompt makes it easy to clean up individual category files and wipe clean disks.
- File Path:
C:\Windows\system32\cleanmgr.exe - Description: Disk Space Cleanup Manager for Windows
Screenshot
Hashes
| Type | Hash |
|---|---|
| MD5 | D17E532DB343357FC9EBF5E559820BD4 |
| SHA1 | 6EDC7C835D5C3410909999690D0ECF3D3EDB480A |
| SHA256 | A43C79ECAE0D4726157FBB2E9E2E314D3622201678B56DB514AAE50EA84A09F9 |
| SHA384 | A6664786AEB39A5C0170F8BC80A592F0D85C95C267ABB9456DCA980BB0ED4DC548B220357767025C2D878E2D3DE43D80 |
| SHA512 | 225E4959335DEFFF69D91358DDE1DF86CF54A19325F0589A316F57923101BE6A5244F6E845A18CBBD9A017870F5BC150F3D2C8ABC007BD0EE1F125623F0C4778 |
| SSDEEP | 3072:bQVx/3xmYvearjjPFC2bbymKByAEPGRvQhRkKqUa9antF5hvvJkuXpZ:a57XgtmKBFE+ohSKq99UF5hvv/ |
| IMP | 05A7686561BB995BEAD3C54DB2591AD1 |
| PESHA1 | F03F295A9CE64F4891A49DC00A4BB4941894CC67 |
| PE256 | 007BBD0E071911888E111FCC487927AA67A2892703541D724A77216F67799AAF |
Runtime Data
Child Processes:
DismHost.exe
Window Title:
USAGE
Open Handles:
| Path | Type |
|---|---|
| (R-D) C:\Windows\Fonts\StaticCache.dat | File |
| (R-D) C:\Windows\System32\en-US\cleanmgr.exe.mui | File |
| (RW-) C:\Users\user | File |
| (RW-) C:\Windows\WinSxS\amd64_microsoft.windows.common-controls_6595b64144ccf1df_6.0.19041.488_none_ca04af081b815d21 | File |
| \BaseNamedObjects\C:*ProgramData*Microsoft*Windows*Caches*{6AF0698E-D558-4F6E-9B3C-3716689AF493}.2.ver0x0000000000000002.db | Section |
| \BaseNamedObjects\C:*ProgramData*Microsoft*Windows*Caches*{DDF571F2-BE98-426D-8288-1A9A39C3FDA2}.2.ver0x0000000000000002.db | Section |
| \BaseNamedObjects\C:*ProgramData*Microsoft*Windows*Caches*cversions.2 | Section |
| \BaseNamedObjects\NLS_CodePage_1252_3_2_0_0 | Section |
| \BaseNamedObjects\NLS_CodePage_437_3_2_0_0 | Section |
| \Sessions\1\Windows\Theme1175649999 | Section |
| \Windows\Theme601709542 | Section |
Loaded Modules:
| Path |
|---|
| C:\Windows\System32\advapi32.dll |
| C:\Windows\system32\cleanmgr.exe |
| C:\Windows\System32\combase.dll |
| C:\Windows\System32\GDI32.dll |
| C:\Windows\System32\gdi32full.dll |
| C:\Windows\System32\KERNEL32.DLL |
| C:\Windows\System32\KERNELBASE.dll |
| C:\Windows\System32\msvcp_win.dll |
| C:\Windows\System32\msvcrt.dll |
| C:\Windows\SYSTEM32\ntdll.dll |
| C:\Windows\System32\ole32.dll |
| C:\Windows\System32\OLEAUT32.dll |
| C:\Windows\System32\RPCRT4.dll |
| C:\Windows\System32\sechost.dll |
| C:\Windows\System32\SHELL32.dll |
| C:\Windows\System32\SHLWAPI.dll |
| C:\Windows\System32\ucrtbase.dll |
| C:\Windows\System32\USER32.dll |
| C:\Windows\system32\VSSAPI.DLL |
| C:\Windows\system32\VssTrace.DLL |
| C:\Windows\System32\win32u.dll |
| C:\Windows\System32\WS2_32.dll |
| C:\Windows\WinSxS\amd64_microsoft.windows.common-controls_6595b64144ccf1df_6.0.19041.488_none_ca04af081b815d21\COMCTL32.dll |
Signature
- Status: Signature verified.
- Serial:
3300000266BD1580EFA75CD6D3000000000266 - Thumbprint:
A4341B9FD50FB9964283220A36A1EF6F6FAA7840 - Issuer: CN=Microsoft Windows Production PCA 2011, O=Microsoft Corporation, L=Redmond, S=Washington, C=US
- Subject: CN=Microsoft Windows, O=Microsoft Corporation, L=Redmond, S=Washington, C=US
- Original Filename: CLEANMGR.DLL.MUI
- Product Name: Microsoft Windows Operating System
- Company Name: Microsoft Corporation
- File Version: 10.0.19041.1 (WinBuild.160101.0800)
- Product Version: 10.0.19041.1
- Language: English (United States)
- Legal Copyright: Microsoft Corporation. All rights reserved.
- Machine Type: 64-bit
File Scan
- VirusTotal Detections: 0/76
- VirusTotal Link: https://www.virustotal.com/gui/file/a43c79ecae0d4726157fbb2e9e2e314d3622201678b56db514aae50ea84a09f9/detection
File Similarity (ssdeep match)
| File | Score |
|---|---|
| C:\WINDOWS\system32\cleanmgr.exe | 66 |
| C:\Windows\system32\cleanmgr.exe | 71 |
| C:\Windows\system32\cleanmgr.exe | 68 |
| C:\Windows\system32\cleanmgr.exe | 71 |
| C:\Windows\SysWOW64\cleanmgr.exe | 66 |
| C:\Windows\SysWOW64\cleanmgr.exe | 74 |
| C:\Windows\SysWOW64\cleanmgr.exe | 71 |
| C:\Windows\SysWOW64\cleanmgr.exe | 66 |
| C:\WINDOWS\SysWOW64\cleanmgr.exe | 63 |
Possible Misuse
The following table contains possible examples of cleanmgr.exe being misused. While cleanmgr.exe is not inherently malicious, its legitimate functionality can be abused for malicious purposes.
| Source | Source File | Example | License |
|---|---|---|---|
| sigma | proc_creation_win_susp_run_folder.yml | - 'C:\Windows\System32\cleanmgr.exe' |
DRL 1.0 |
| sigma | proc_creation_win_uac_bypass_cleanmgr.yml | description: Detects the pattern of UAC Bypass using scheduled tasks and variable expansion of cleanmgr.exe (UACMe 34) |
DRL 1.0 |
| sigma | proc_creation_win_uac_bypass_cleanmgr.yml | CommandLine\|endswith: '"\system32\cleanmgr.exe /autoclean /d C:' |
DRL 1.0 |
| sigma | registry_event_bypass_uac_using_silentcleanup_task.yml | description: There is an auto-elevated task called SilentCleanup located in %windir%\system32\cleanmgr.exe This can be abused to elevate any file with Administrator privileges without prompting UAC |
DRL 1.0 |
| atomic-red-team | T1548.002.md | There is an auto-elevated task called SilentCleanup located in %windir%\system32\cleanmgr.exe This can be abused to elevate any file with Administrator privileges without prompting UAC (even highest level). | MIT License. © 2018 Red Canary |
Additional Info*
*The information below is copied from MicrosoftDocs, which is maintained by Microsoft. Available under CC BY 4.0 license.
cleanmgr
Applies to: Windows Server 2022, Windows Server 2019, Windows Server 2016, Windows Server 2012, Windows Server 2008 R2
Clears unnecessary files from your computer’s hard disk. You can use command-line options to specify that Cleanmgr cleans up Temp files, Internet files, downloaded files, and Recycle Bin files. You can then schedule the task to run at a specific time by using the Scheduled Tasks tool.
Syntax
cleanmgr [/d <driveletter>] [/sageset:n] [/sagerun:n] [/TUNEUP:n] [/LOWDISK] [/VERYLOWDISK]
Parameters
| Parameter | Description |
|---|---|
/d <driveletter> |
Specifies the drive that you want Disk Cleanup to clean.<p>NOTE: The /d option is not utilized with /sagerun:n. |
| /sageset:n | Displays the Disk Cleanup Settings dialog box and also creates a registry key to store the settings that you select. The n value, which is stored in the registry, allows you to specify tasks for Disk Cleanup to run. The n value can be any integer value from 0 to 9999. |
| /sagerun:n | Runs the specified tasks that are assigned to the n value if you use the /sageset option. All drives on the computer are enumerated and the selected profile runs against each drive. |
| /tuneup:n | Run /sageset and /sagerun for the same n . |
| /lowdisk | Run with the default settings. |
| /verylowdisk | Run with the default settings, no user prompts. |
| /? | Displays help at the command prompt. |
Options
The options for the files that you can specify for Disk Cleanup by using /sageset and /sagerun include:
-
Temporary Setup Files — These are files that were created by a Setup program that is no longer running.
-
Downloaded Program Files — Downloaded program files are ActiveX controls and Java programs that are downloaded automatically from the Internet when you view certain pages. These files are temporarily stored in the Downloaded Program Files folder on the hard disk. This option includes a View Files button so that you can see the files before Disk Cleanup removes them. The button opens the C:\Winnt\Downloaded Program Files folder.
-
Temporary Internet Files — The Temporary Internet Files folder contains Web pages that are stored on your hard disk for quick viewing. Disk Cleanup removes these page but leaves your personalized settings for Web pages intact. This option also includes a View Files button, which opens the C:\Documents and Settings\Username\Local Settings\Temporary Internet Files\Content.IE5 folder.
-
Old Chkdsk Files — When Chkdsk checks a disk for errors, Chkdsk might save lost file fragments as files in the root folder on the disk. These files are unnecessary.
-
Recycle Bin — The Recycle Bin contains files that you have deleted from the computer. These files are not permanently removed until you empty the Recycle Bin. This option includes a View Files button that opens the Recycle Bin.<p>Note: A Recycle Bin may appear in more than one drive, for example, not just in %SystemRoot%.
-
Temporary Files — Programs sometimes store temporary information in a Temp folder. Before a program quits, the program usually deletes this information. You can safely delete temporary files that have not been modified within the last week.
-
Temporary Offline Files — Temporary offline files are local copies of recently used network files. These files are automatically cached so that you can use them after you disconnect from the network. A View Files button opens the Offline Files folder.
-
Offline Files — Offline files are local copies of network files that you specifically want to have available offline so that you can use them after you disconnect from the network. A View Files button opens the Offline Files folder.
-
Compress Old Files — Windows can compress files that you have not used recently. Compressing files saves disk space, but you can still use the files. No files are deleted. Because files are compressed at different rates, the displayed amount of disk space that you will gain is approximate. An Options button permits you to specify the number of days to wait before Disk Cleanup compresses an unused file.
-
Catalog Files for the Content Indexer — The Indexing service speeds up and improves file searches by maintaining an index of the files that are on the disk. These Catalog files remain from a previous indexing operation and can be deleted safely.<p>Note: Catalog File may appear in more than one drive, for example, not just in
%SystemRoot%.
[!NOTE]
If you specify cleaning up the drive that contains the Windows installation, all of these options are available on the Disk Cleanup tab. If you specify any other drive, only the Recycle Bin and the Catalog files for content index options are available on the Disk Cleanup tab.
Examples
To run the Disk Cleanup app so that you can use its dialog box to specify options for use later, saving the settings to the set 1, type the following:
To run Disk Cleanup and include the options that you specified with the cleanmgr /sageset:1 command, type:
To run cleanmgr /sageset:1 and cleanmgr /sagerun:1 together, type:
Additional References
-
Free up drive space in Windows 10
-
Command-Line Syntax Key
MIT License. Copyright (c) 2020-2021 Strontic.
-
Home
-
News
- 12 Ways to Open Disk Clean-up on Your Windows Computer?
By Stella | Follow |
Last Updated
You can use Disk Clean-up, a Windows snap-in tool, to clean up your disk space on your computer. Do you know how to open Disk Clean-up on Windows? There are multiple methods. We will show you the methods we know so far in this MiniTool post.
What Is Disk Clean-up on Windows?
Disk Clean-up (cleanmgr.exe) is a Windows maintenance utility. It is one of the Windows built-in cleanup tools. You can use it to free up disk space on a Windows computer. This tool can search and analyze your computer’s hard drive for files that are no longer use and removes unnecessary files.
Disk Clean-up is a very useful tool. Do you know how to open it on your computer? In this post, we will show you some methods. You can choose a convenient method to use.
How to Open Disk Clean-up on Windows?
- Use Windows search
- Use Cortana
- Use the Start menu
- Use Control Panel
- Use Disk Clean-up shortcut
- Pin to the Start Menu
- Use Run
- Use Command Prompt or Windows PowerShell
- Use Task Manager
- Select the target drive to run this tool
- Use File Explorer
- Run its executable file
Way 1: Open Disk Clean-up via Windows Search
Windows search is a useful tool to search for files and apps on your computer, you can use it to search Disk Clean-up and open it for further use.
1. Click the Windows search icon or box to open the tool.
2. Type Disk Clean-up and select the first result.
3. The Disk Clean-up tool will open. You can expand the list for Drives and select the drive you want to clean.

4. The tool will begin to calculate how much space you can free on that drive.

5. On the next page, you can see some kinds of files are selected by default. These are the files you can feel free to delete. You can also select other files according to your situation to delete.
6. Click the OK button to run Disk Clean-up Windows 10 to delete the selected files.

Way 2: Go to Disk Clean-up Using Cortana
If you are using Windows 10, you can also use Cortana to open Disk Clean-up (enable Cortana).
You can say “Hey Cortana” or click the Cortana icon on your computer, and then say “Open Disk Clean-up” to open it.
You can also use the Start menu to get to Disk Clean-up if you are running Windows 7 or Windows 10.
On Windows 10
- Click Start.
- Scroll down the Start menu until you see Windows Administrative Tools. Click it to unfold it and you can see Disk Clean-up on the drop-down list.
- Click Disk Clean-up to open it.

On Windows 7
- Click Start.
- Go to All Programs > Accessories > System Tools.
- Click Disk Cleanup on the drop-down menu to open it.
Way 4: Run Disk Clean-up via Control Panel
This method works on all Windows versions including Windows 10, Windows 8/8.1, and Windows 7.
- Open Control Panel.
- Go to System and Security > Administrative Tools.
- The Administrative Tools folder will open. You can find the Disk Clean-up shortcut in the folder. Then, you can click it to open it.

Way 5: Pin Disk Clean-up Shortcut to the Taskbar
You can also directly pin the Disk Clean-up shortcut to the taskbar.
- Use Windows search to search for disk clean-up.
- Right-click the first result and select Pin to taskbar.
- The Disk Clean-up icon will show on the taskbar. If you want to use it, you can directly click it.

You can also directly pin the Disk Clean-up shortcut to the taskbar.
- Use Windows search to search for disk clean-up.
- Right-click the first result and select Pin to Start.
- Click Start and you can find this tool in the Start menu. You can click it to open it.

Way 7: Open Disk Clean-up Using Run
- Press Win+R to open Run.
- Type cleanmgr and press Enter to open the tool.

Way 8: Run Disk Clean-up Using Command Prompt or PowerShell
You can also run the cleanmgr command using Command Prompt or Windows PowerShell to open the disk clean-up tool.
- Open Command Prompt.
- Type cleanmgr and press Enter to open the tool.

Way 9: Open Disk Clean-up Using Task Manager
You can use Task Manager to add a task like Disk Clean-up. Here are the steps:
- Right-click the taskbar and select Task Manager.
- Click File from the top menu and then select Run new task.
- Type cleanmgr on the pop-up interface and press OK.
- Disk Clean-up will be running on your computer. Its window will not pop up. But you can find it on the taskbar. You can click it to open its interface.

Way 10: Select the Target Drive to Run Disk Clean-up
- Click This PC on your desktop.
- Right-click the drive you want to clean up and select Properties.
- Click the Disk Clean-up button under the General tab to open Windows 10 Disk Clean-up.

Using this method, you don’t need to select the target drive in the tool.
Way 11: Access Disk Clean-up in File Explorer
How to access Disk Clean-up on Windows 10 using File Explorer? Here is a guide:
- Open File Explorer.
- Type cleanmgr to the address bar and press Enter.
- The tool will open.

Way 12: Open Disk Clean-up by Running Its Executable File
Disk Clean-up is an executable file that is called cleanmgr.exe. You can find this file in the System32 subfolder of the Windows folder. The location of cleanmgr.exe is C:\Windows\System32. When you access this folder, you need to scroll down to find the cleanmgr.exe file and click it to open Disk Clean-up.

Which method do you prefer to use? Convenient is good.
About The Author

Position: Columnist
Stella has been working in MiniTool Software as an English Editor for more than 7 years. Her articles mainly cover the fields of data recovery including storage media data recovery and phone data recovery, YouTube videos download, partition management, and video conversions.