Папка автозагрузки Windows 10 добавлена для удобства пользователей, она позволяет получать мгновенный доступ к набору часто используемых программ и приложений, автоматически запускаемых системой при каждой загрузке компьютера. Первая её реализация состоялась в Windows 95.
Любые элементы, которые должны запускаться автоматически при загрузке, хранятся как ярлык в директории автозагрузки.
В автозагрузку может быть добавлен любой тип исполняемого файла, например, приложение для обработки текста, почтовый клиент, веб-браузер или даже определенные файлы или документы, которые будут открываться при каждом запуске системы. Также может быть полезно: «Где хранятся записи автозагрузки в реестре», «Где находится автозагрузка Виндовс 10».
Содержание
- Где находится?
- Как открыть?
- В проводнике
- В диалоговом окне
- Заключение
Где находится?
Во-первых, важно отметить, что на самом деле в Виндовс 10 находятся фактически две папки автозагрузки, одна из которых находится на системном уровне и применяется ко всем учетным записям пользователей, а вторая уникальна только для той которая используется в текущее время.
В качестве примера рассмотрим ПК с двумя учетными записями пользователей, где одна используется Машей, а вторая Алексеем. Поместим ярлык Google Chrome в папку для всех пользователей, а ярлык Microsoft Edge помещаем в личную папку Марии. Когда Маша зайдет в систему, запустятся Google Chrome и Microsoft Edge, но, когда воспользуется своей учетной записью Алексей, запустится только Chrome.
Папка «Все пользователи» находится по следующему пути:
C:\ProgramData\Microsoft\Windows\Start Menu\Programs\StartUp
Текущая папка пользователя находится здесь:
C:\Users\Username\AppData\Roaming\Microsoft\Windows\Start Menu\Programs\Startup
Копируя данный путь для вставки в адресную строку проводника, не забудьте заменить имя Username своим именем, перейдите в C:\Users, чтобы найти свое имя.
Как открыть?
Давайте рассмотрим, как найти папку автозагрузки, все думают, что она присутствует в меню «Пуск». Но это не так! Директория не доступна в «Пуске» начиная с версии Windows 8 с конца 2012 года.
В проводнике
Обратите внимание! Если вы решите использовать проводник, вам нужно включить параметр «Показать скрытые файлы».
Скопируйте один из адресов к нужной вам папке приведённых выше в тексте.
1. Нажмите Win + E, чтобы открыть проводник Виндовс 10.
2. Вставьте его в адресную строку.

3. Далее нажмите Enter/Ввод.
В диалоговом окне
Для более быстрого доступа к директории автозагрузки, можно воспользоваться диалоговым окном.
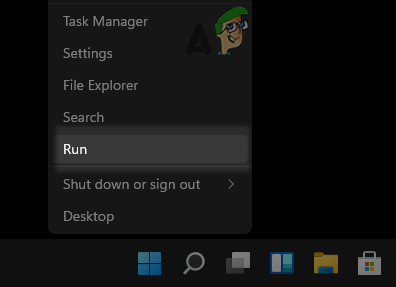
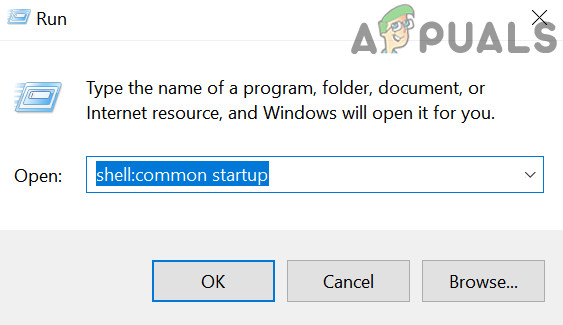
Нажмите Win + R, чтобы открыть окно «Выполнить»
Введите нужную вам команду:
- shell:common startup — доступ к общей папке;
- shell:startup — доступ к папке текущего пользователя.

После нажмите Enter.
Заключение
В качестве заключения важно отметить, что элементы, которые вы размещаете в папках «Все пользователи» или «Пользовательские автозагрузки», не будут загружаться сразу после входа в Windows 10.
Сначала загрузятся необходимые системные процессы и элементы отображенные в диспетчере задач, только после этого запустятся добавленные вами программы и приложения. Теперь вы знаете, как получить доступ к папке автозагрузки. Если вам известны другие действенные методы, поделитесь ими ниже в комментариях.
The Windows OS (since Windows 95) has a Startup folder that can be used to add applications and processes to the system that a user wants to launch at startup. Windows 11 and Windows 10 also have a Startup folder, although the Startup tab of its Task Manager does do a good job in adding/removing startup programs on Windows, the need to access the Windows startup folder is always there.

There are two types of Startup folders in any Windows version (Windows 10 or 11 included), one for a particular user and the other for all the users of the machine. The items present in the Startup folder for a particular user will launch only when a particular user is logged in, whereas, the items present in the Startup folder for All Users will launch for every user of the system. The method to open these folders is different as discussed below:
Open the Startup Folder of a Particular User
You can open the Startup folder either by the File Explorer or using the Run Command box.
Use the File Explorer to Open the Startup Folder for a Particular User
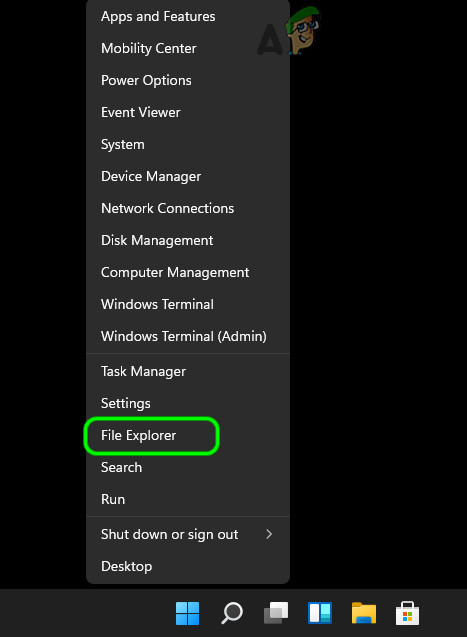
- Right-click Windows and select File Explorer.

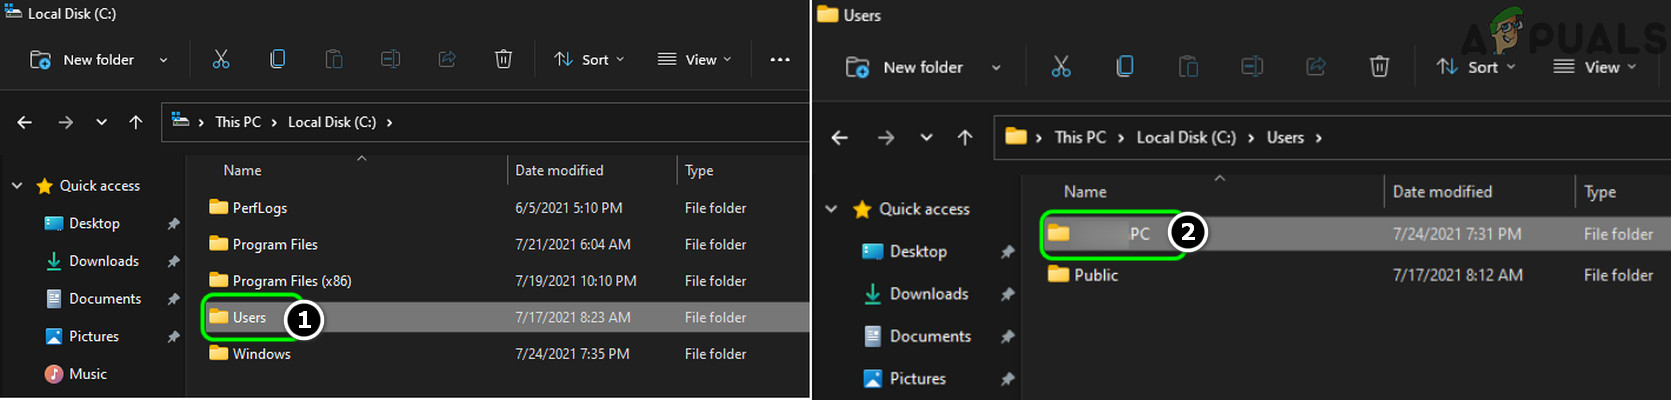
Open File Explorer from the Quick Access Menu in Windows 11 - Now open This PC and double-click on your system drive (usually, the C drive).

Open the System Drive of Windows 11 - Then select the Users folder and open the folder with your username.

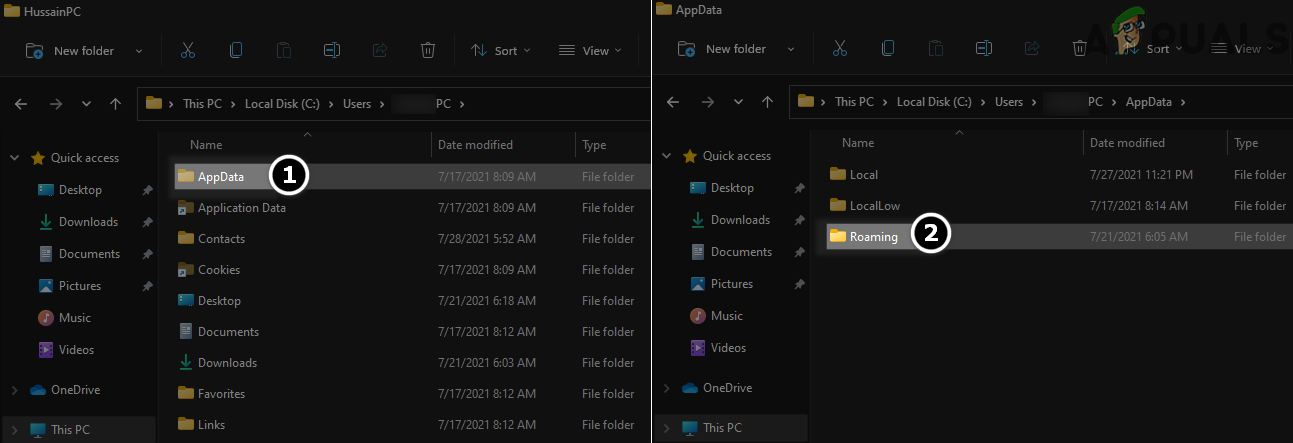
Open Your User Folder in the Users Directory - Now open the AppData folder (you may have to show the hidden files of the system) and double-click on Roaming.

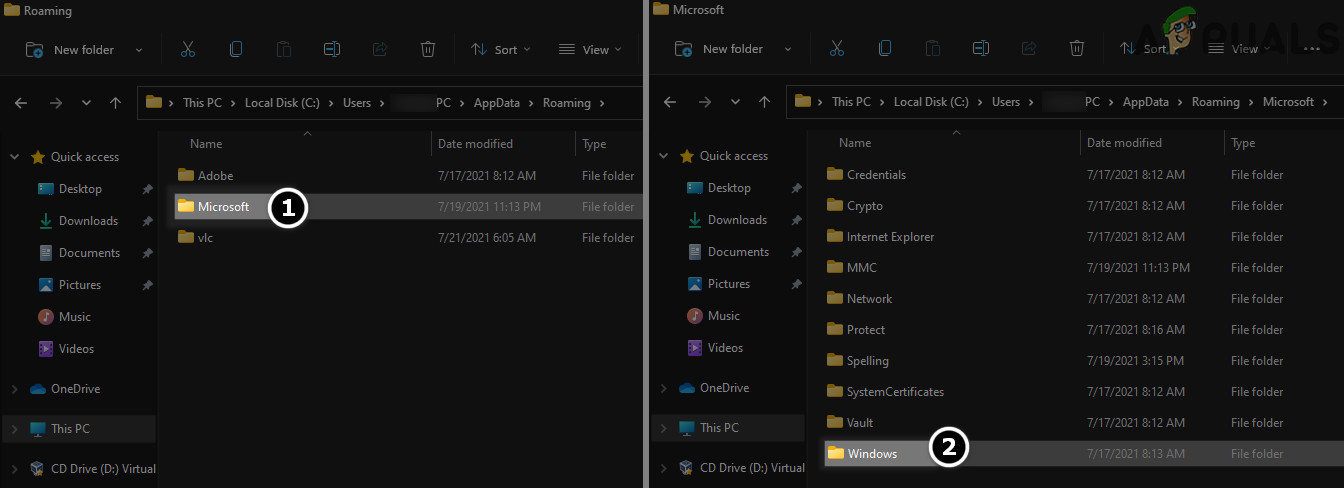
Open the Roaming Folder in the AppData Directory - Now open the Microsoft directory and double-click the Windows folder.

Open the Windows Directory in the Microsoft Folder - Then open the Start Menu directory and double-click on the Programs folder.

Open the Programs Folder in the AppData Directory - Now open the Startup folder and ta-da, you are in the Startup folder.

Open the User Startup Folder in Windows


The complete path of the folder will be as under:
C:\Users\<yourusername>\AppData\Roaming\Microsoft\Windows\Start Menu\Programs\Startup
Use the Run Command Box to Open the Startup Folder of a Particular User
Although you can open the Startup folder from the File Explorer, this process is a lengthy one, but some Run command box cmdlets can achieve the same with less effort.
Use the AppData and Users Commands
- Right-click on Windows and select Run.

Open the Run Command Box from the Quick Access Menu - Now execute the following:
%appdata%\Microsoft\Windows\Start Menu\Programs\Startup

Open Startup Folder - Hurray, you have opened the Startup folder of Windows 10.
- You can also open the Startup folder by executing the following cmdlet in the Run command box:
\users\%username%\AppData\Roaming\Microsoft\Windows\Start Menu\Programs\Startup
Use the Shell Command:
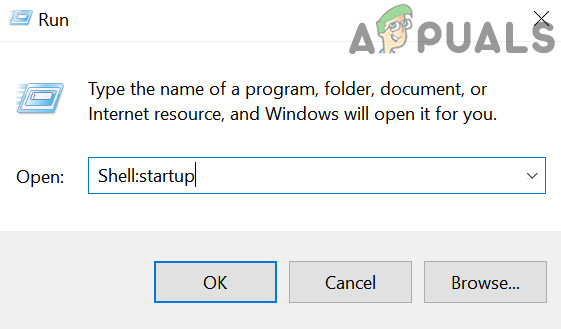
But it is quite difficult to remember the above-mentioned commands (although you can find them in the list of recent Run commands) but no need to worry, there is the following shorter command that can be used to open the Startup folder:
Shell:startup
Fun fact: You can copy the cmdlets mentioned in the Run command box section, paste it into the address bar of the File Explorer, and ta-da, it will still open the Startup folder of a particular user.
Open the Startup Folder for All Users of the Machine
You can open the Startup folder for all users by the File Explorer or through the Run command box.
Use the File Explorer to Open the Startup Folder for All Users
- Right-click Windows and open File Explorer.
- Now in the left pane, select This PC and open your system drive (usually, C drive).
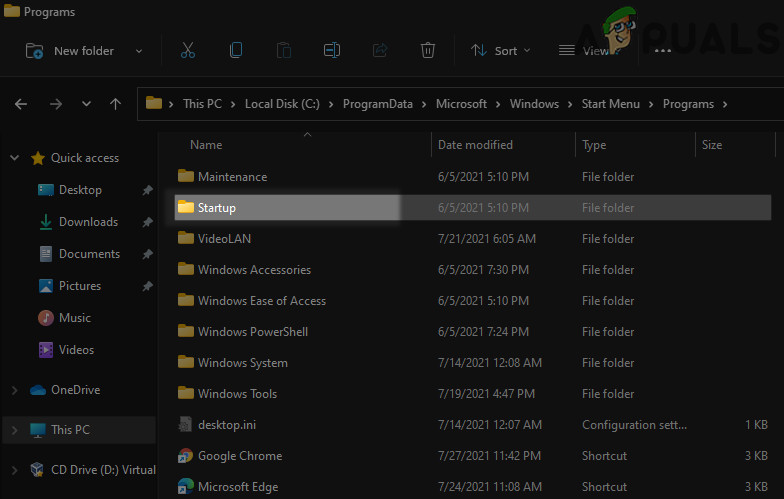
- Then open the ProgramData folder (if the folder is not shown, make sure the viewing of the hidden and protected system files is enabled) and double-click on the Microsoft folder.
- Now open the Windows directory and double-click on the Start Menu folder.
- Then open the Programs directory and double-click on the Startup folder.

Open the Startup Folder for All Users in Windows - You are now in the Startup folder.
The complete path to the Startup folder for All Users will be as under
C:\ProgramData\Microsoft\Windows\Start Menu\Programs\StartUp
Use the Run Command Box to Open the Startup Folder for the All User
The Startup folder for All Users can also be opened by the Run command box.
Use the ProgramData path
- Right-click Windows and select Run.
- Now execute the following:
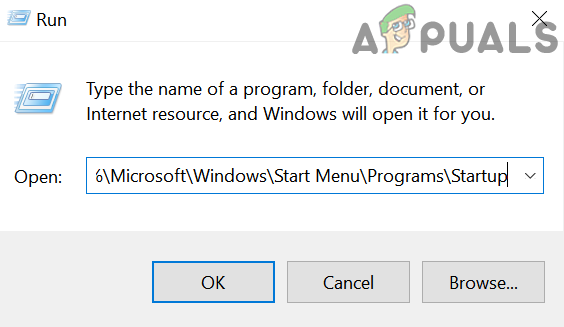
%ProgramData%\Microsoft\Windows\Start Menu\Programs\StartUp

Open the Startup Folder of All Users Through the Run Command Box - There you are, in the Startup folder for all users.

Use the Shell Command
You can also use the following shorter cmdlet in the Run command box to open the Startup folder for All Users:
shell:common startup
Remove an Item from the Startup Folder
Removing an item from the Startup folder (either for a particular user or All Users) is a straightforward process, simply delete the application/process/shortcut from the Startup folder.
Add An Item to the Startup Folder
Adding an application/process to the Startup folder of the Windows 10 is a bit trickier process (as compared to the deletion process), as discussed below:
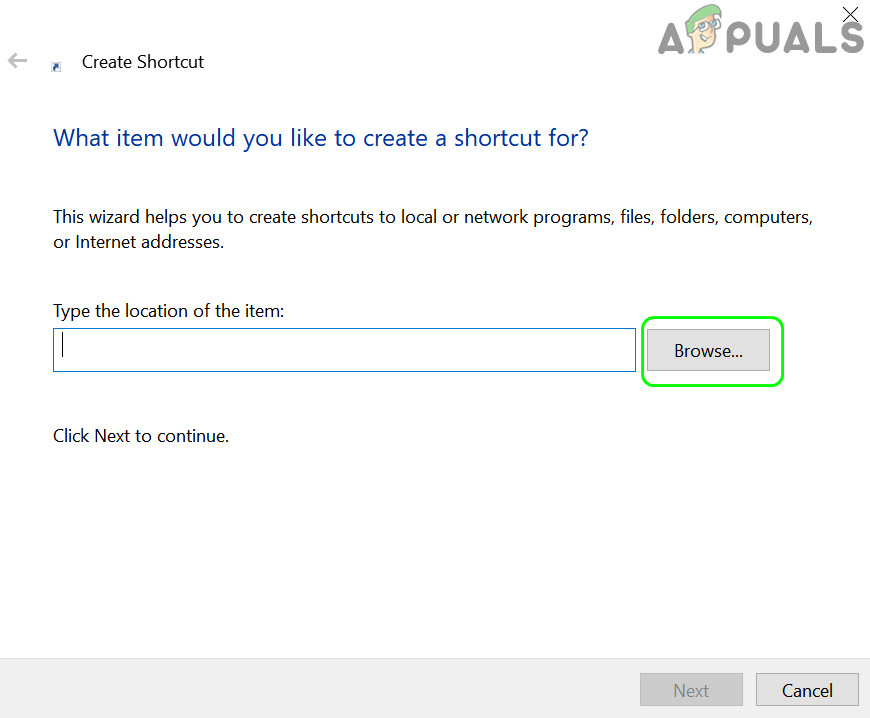
- Open the Startup folder (either for a particular user or All Users) and right-click on the empty area.
- Now hoover over New and select Shortcut.

Create a New Shortcut in the User Startup Folder - Then click on the Browse button and navigate to the folder where the application/process is located. For example, to add Chrome, navigate to the following path and select Chrome.exe:
This PC>> C>> Program Files (x86)>> Google>> Chrome>> Application>>

Browse for the Application to be added in the Startup Folder in the Shortcut Window - Now click on the OK button and in the resulting screen, click on Next.

Add Chrome’s Shortcut to the Startup Folder - Then enter the name of the Shortcut (like Google Chrome) and click on Finish.


Kevin Arrows
Kevin Arrows is a highly experienced and knowledgeable technology specialist with over a decade of industry experience. He holds a Microsoft Certified Technology Specialist (MCTS) certification and has a deep passion for staying up-to-date on the latest tech developments. Kevin has written extensively on a wide range of tech-related topics, showcasing his expertise and knowledge in areas such as software development, cybersecurity, and cloud computing. His contributions to the tech field have been widely recognized and respected by his peers, and he is highly regarded for his ability to explain complex technical concepts in a clear and concise manner.
The Windows Startup Folder was an important folder that was easily discoverable via the Start Menu in Windows versions past. It began as far back as Windows 95 and any programs located within the Startup Folder would boot up and run anytime the computer was powered on.
It used to be that whenever you booted up your Windows operated computer, it would seek out and execute a batch script called autoexec.bat. Anyone with knowledge of Power DOS could use a text editor to modify this script in order to add their favorite programs to boot up, along with the Windows operating system. This made it so that everything you wanted to use was already loaded once the computer booted.
The use of autoexec.bat continued all the way through the Windows NT years, but Microsoft was intent on moving users away from a scripted, command-line environment. It instead wanted to encourage the use of the graphical interface model with windows, files, and folders, and, in doing so, made all subsequent versions of their operating systems not require autoexec.bat.
They would eventually do away with it entirely, however, the Windows 10 Startup Folder can still be found today.
Back before Windows 95, batch scripts and command-line interfaces were essential in getting your computer to do anything at all. All of the clickable icons you take for granted today didn’t exist. Instead, to run something like Microsoft Word, it required that you opened a command-line interpreter and typed winword.exe.

Windows 95, though it still allowed for users to perform nearly every important task using a command line, such actions were easier through the graphical user interface. You could click on the Program Files folder and find icons labeled with the program you wanted to run. All that was needed was a quick double-click and the program was launched.
Windows 95 was the first step in changing how we access programs. Today, clicking a program to have it launch is commonplace. It feels as if this is how it has always been. Barely anyone uses commands to open programs anymore. However, interestingly enough with Windows 10, we’ve actually seen a small surge in the revival of command line access via the use of PowerShell.
The Startup Folder In The Start Menu

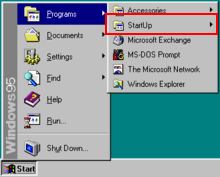
The Start Menu was first created in Windows 95 and slightly resembles the Start Menu we have today in Windows 10. It’s that little flyout menu that pops out when you click the Start or Windows icon in the lower-left corner of your desktop. In Windows 95, this is where you’d find the Startup Folder.
When Windows 8 was launched, Microsoft decided to eliminate the Start Menu. Even though all of the functionality was still present in the operating system, it was much harder to locate everything. Microsoft wanted users to go a different way with scheduling programs for automatic execution.
Much to Microsoft’s dismay, the pushback from the user community was so great that the Start Menu was quietly brought back in with Windows 10.
The Windows 10 Startup Folder is similar to the one found in Windows 7. However, it’s no longer accessible the same way. The Windows 10 Startup Folder no longer pops up in the Start Menu as it once did. The functions are still there, although some of the operational details have changed. Now, accessing the Windows 10 Startup Folder takes a bit of navigation.
Two Windows 10 Startup Folders

When it comes to the Windows 10 Startup folder, it can be found in two different locations. One Windows 10 Startup folder operates at the system level and is shared among all user accounts (All Users folder), while the other operates at a user level and is unique to that user’s account (Current User folder).
The second one only really matters if you have multiple accounts on your Windows 10 computer. Each account will contain a unique Startup Folder in addition to the universal Startup Folder.
Understanding the distinction between the All Users and Current User Startup Folders is important when it comes to troubleshooting. Attempting to understand why a certain application isn’t opening, or when working with applications that feature user-based licensing or access restrictions will require you know which Startup Folder to configure.
There is one area that enables you to interact with the Startup function, which contains all of the programs found inside of the folder. The only difference is that programs cannot be added or removed. You can only enable or disable those currently inside of the Startup folder. This location is the Windows Task Manager.

Accessing The Windows 10 Startup Folder
There are a few ways in which to access the Windows 10 Startup folder. To access the Windows 10 Startup folder, the first option is through File Explorer.
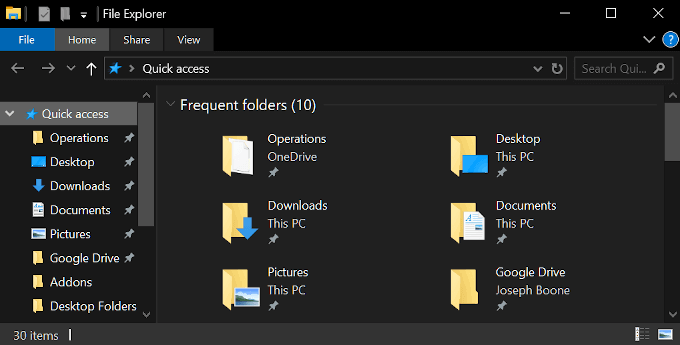
You’ll need to enable the “Show Hidden Files” option in order to see certain folders in the path. Open the File Explorer and drop one of the following paths into the Quick access bar.
- The All Users Startup Folder is located at the following path:
- C:\ProgramData\Microsoft\Windows\Start Menu\Programs\StartUp
- The Current User Startup Folder is located here:
- C:\Users\[User Name]\AppData\Roaming\Microsoft\Windows\Start Menu\Programs\Startup
From these locations, you can add or remove programs that you want executed whenever you boot up your Windows 10 computer.
An alternative way to do this is to jump directly to each folder with a Run command.
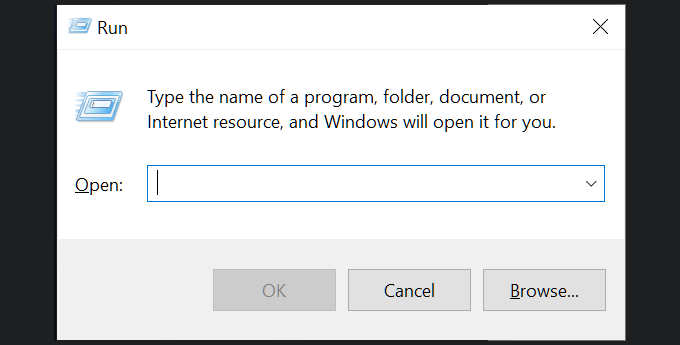
Open the Run function dialog box by pressing the Windows key + R key simultaneously.
- The All Users Startup Folder requires the following path:
- Shell:common startup
- The Current User Startup Folder requires:
- Shell:startup
These will take you directly to the folder containing the startup programs pertaining to the specified folder.
Enabling and Disabling Startup Programs

If all you want to do is enable or disable certain programs within the Windows 10 Startup folder, you can access this functionality through both the Windows Task Manager or Settings window.
To access Startup using the Task Manager:
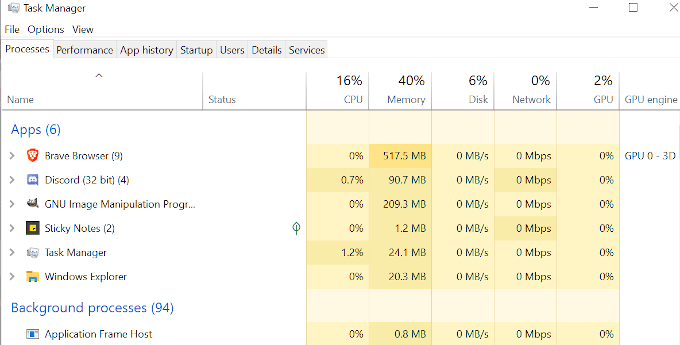
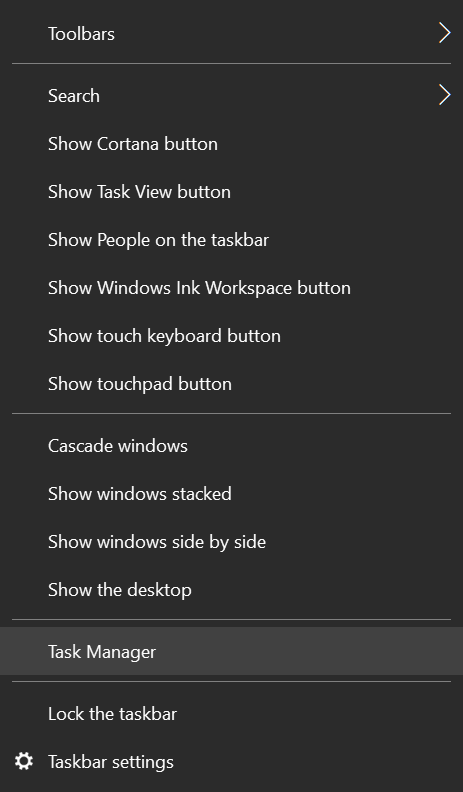
- Right-click the Taskbar and from the menu that pops up, select Task Manager.
- In the Task Manager window, click over to the Startup tab to see the programs.
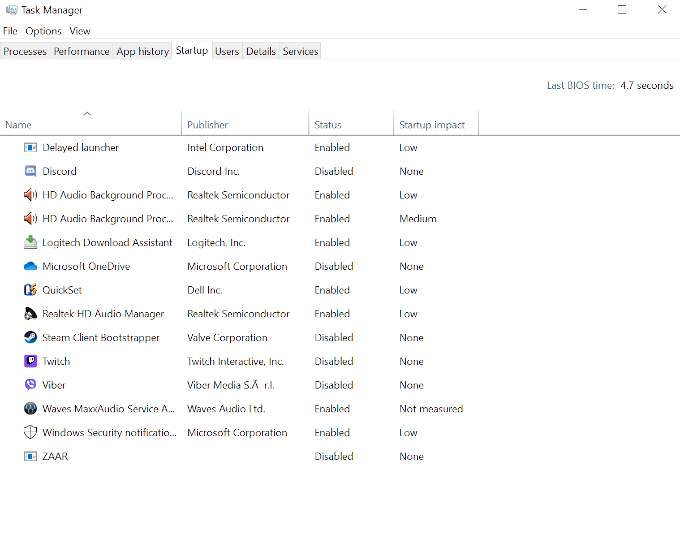
- Right-click a program. In the pop-up, select either enable or disable.
- The program will now adhere to the status set on your next boot up.
To access Startup using via Windows Settings:
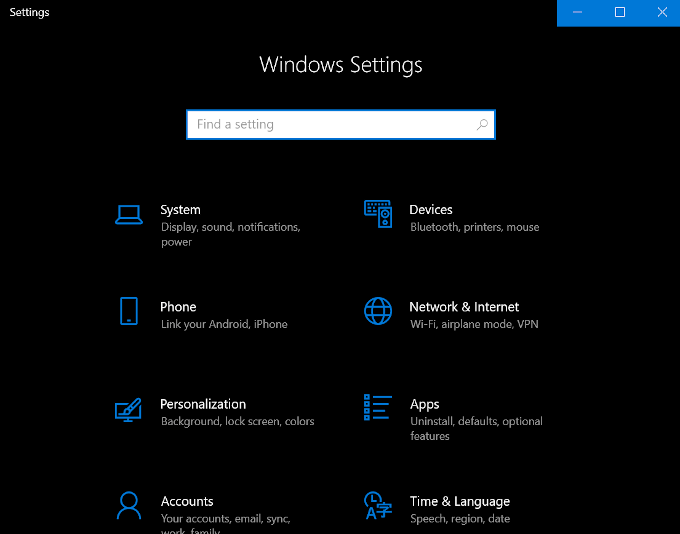
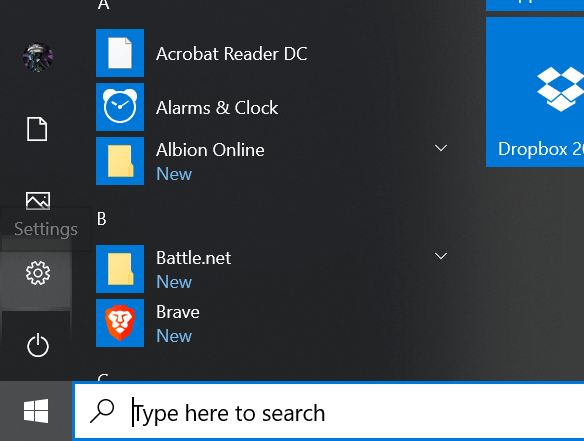
- Open the Start Menu by clicking the Windows icon in the lower-left portion of your desktop.
- From the menu, select Settings (Cogwheel icon).
- Choose Apps.
- On the left side menu, select Startup.
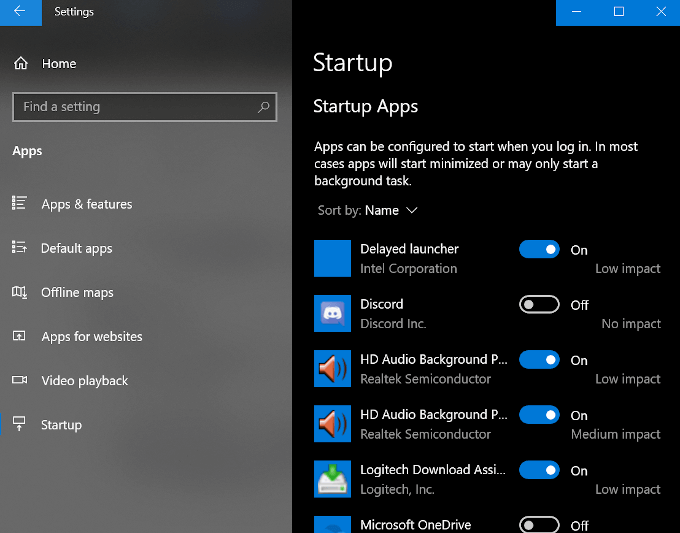
- In the main menu, click the toggles of those programs you want to enable or disable, to On or Off.
The Launch Order For The Windows 10 Startup Folder

Any item placed in either of the Startup Folders will not launch immediately upon login as it did back in the days of Windows 95. Instead, Windows 10 launches programs in a very specific order beginning with necessary system processes and any items in the Task Manager’s Startup tab. The programs you’ve added to the Startup Folders will follow after.
This usually doesn’t take long, but if you have lots of first- and third-party applications and services already configured to launch at boot, it could take a few minutes depending on the processing speed of your computer.
Too many programs in the Windows 10 Startup folder may run the risk of extensive downtime, slowing your computer to unworkable speeds while it attempts to launch each program. It’s a good idea to ensure that you only place necessary programs in these folders and keep the overall count to a minimum.
В Windows 7 и более старых версиях этой операционной системы, в меню «Пуск» всегда была папка «Автозагрузка». С ее помощью можно было быстро и легко добавить любую программу в автозагрузку Windows. Но, в Windows 10 в меню «Пуск» уже нет такой папки. Поэтому многие пользователи интересуются, где находится папка автозагрузка в Windows 10 и как найти ее расположение на диске.
Расположение папки автозагрузка в Windows 10
На самом деле папка автозагрузка никуда не пропала из Windows 10. Она присутствует в этой операционной системе и работает точно также, как и раньше. Все помещенные в нее программы или ярлыки автоматически запускаются при включении компьютера.
Найти папку Автозагрузка в Windows 10 несложно. Самый простой вариант это воспользоваться командой «shell:startup». Для этого нужно нажать комбинацию клавиш Win-R, ввести указаную команду и нажать клавишу ввода.

Альтернативная версия данной команды выглядит так: %APPDATA%\Microsoft\Windows\Start Menu\Programs\Startup.

После выполнения этой команды перед вами откроется следующая папка:
C:\Users\Имя пользователя\AppData\Roaming\Microsoft\Windows\Start Menu\Programs\Startup

Это папка Автозагрузка для вашей учетной записи в Windows 10. Можете добавить сюда ярлыки программ и они автоматически запустятся при включении компьютера и входе в вашу учетную запись.
Также в Windows 10 есть папка автозагрузка, которая работает для всех учетных записей. Чтобы ее открыть нужно точно также нажать Win-R и выполнить команду «shell:common startup»

Альтернативная версия данной команды выглядит так: %programdata%\Microsoft\Windows\Start Menu\Programs\StartUp.
После выполнения этой команды откроется папка:
C:\ProgramData\Microsoft\Windows\Start Menu\Programs\StartUp

Это общая папка Автозагрузка для всех пользователей Windows 10. Добавленные в эту папку программы будут автоматически запускаться для всех пользователей Windows 10.
Как найти папку Автозагрузка в Windows 10
Также вы можете найти папку Автозагрузка с помощью поиска. Для этого откройте системный диск Windows 10 и введите в поисковую строку слово «Автозагрузка». После того как система завершит поиск вы увидите две папки. Одна из папок это папка автозагрузки для вашей учетной записи, а другая общая автозагрузка для всех пользователей компьютера.

Использование поиска — это более простой способ, но он требует больше времени. Поскольку поиск данной папки выполняется довольно медленно.
Нужно отметить, что в Windows 10 есть и другие способы автозагрузки программ. Например, через реестр или планировщик задач. Более подробно об этих способах в статье:
- Как добавить программу в автозагрузку в Windows 10
Посмотрите также:
- Учимся использовать Msconfig
- Как добавить программу в автозагрузку Windows 7
- Как убрать программу из автозагрузки в Windows 7
- Как отключить автозапуск программ в Windows 7
- Как открыть автозагрузку в Windows 7 или Windows 10
Автор
Александр Степушин
Создатель сайта comp-security.net, автор более 2000 статей о ремонте компьютеров, работе с программами, настройке операционных систем.
Остались вопросы?
Задайте вопрос в комментариях под статьей или на странице
«Задать вопрос»
и вы обязательно получите ответ.
Как в Windows 10 удалить и добавить программу из автозагрузки?
Авто запуск программ очень удобен, ведь именно благодаря ему некоторые нужные и не очень программы запускаются автоматически при загрузке операционной системы. Любую программу можно добавить в автозагрузку или удалить от туда. Как это сделать и где находится автозагрузка в Windows 10 вы узнаете из этой статьи.
Содержание:
- Где находится автозагрузка в windows 10?
- Как добавить приложение в автозагрузку windows 10?
- как убрать программу из автозапуска на windows 10?
Где находится автозагрузка или как добавить программу в авто запуск Windows 10?
Со времен Windows XP многие привыкли, что папка автоматически запускаемых программ находилась прямо в меню “Пуск“. Для добавления туда программы было достаточно перетащить ее ярлык в эту папку.

Папка “Автозагрузка” в Windows 7
В Windows 10 разработчики почему – то убрали эту самую папку “Автозагрузка” из меню “Пуск” и тем самым усложнили жизнь обычным пользователям.
Все же в Windows 10 папка “Автозагрузка” есть, правда запихнули ее разработчики далековато.
Автозагрузка в Windows 10 бывает для конкретного пользователя или для всех.
Если вы хотите сделать авто запуск программы для одного конкретного пользователя, то вам нужна папка по следующему пути:
C:\Users\<имя пользователя>\AppData\Roaming\Microsoft\Windows\Start Menu\Programs\Startup\
Папка “Автозагрузка” в Windows 10 для конкретного профиля
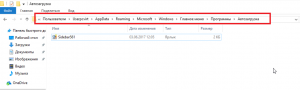
На русском языке путь к автозагрузке выглядит так:
C:\Пользователи\<имя пользователя>\AppData\Roaming\Microsoft\Windows\Главное меню\Программы\Автозагрузка\
Если вы хотите сделать автоматическую загрузку программы для всех пользователей компьютера, то добавлять ее ярлык нужно в папку по следующему пути:
C:\ProgramData\Microsoft\Windows\Start Menu\Programs\StartUp\
Папка “Автозагрузка” в Windows 10 для всех пользователей компьютера
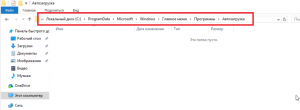
На русском языке:
C:\ProgramData\Microsoft\Windows\Главное меню\Программы\Автозагрузка\
Стоит учесть, что папки AppData и ProgramData являются скрытыми и для их отображение в проводнике Windows нужно включить отображение скрытых элементов.
Как добавить приложение в автозагрузку windows 10?
Процесс добавления программы в автозагрузку Windows 10 мы покажем на примере Aida64. Допустим вы хотите, чтобы при каждом включении компьютера запускалась эта программа, которая позволяет смотреть температуры процессора и видеокарты.
Для начала нужно зайти в папку с программой, которую вы хотите добавить в автозагрузку. Найти ее можно, скорее всего, в папке Program Files (x86) на диске C.
В папке с названием программы находим исполняемый файл. (Как правило это файл со значком программы). Жмем по нему правой кнопкой мыши и выбираем “Копировать“.
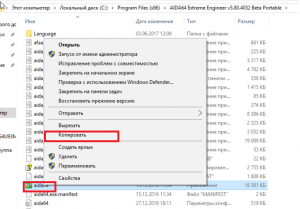
Копирование программы в автозагрузку windows 10
Далее переходим в одну из двух папок авто запуска Windows 10:
C:\Users\<имя пользователя>\AppData\Roaming\Microsoft\Windows\Start Menu\Programs\Startup\
или
C:\ProgramData\Microsoft\Windows\Start Menu\Programs\StartUp\
В ней жмем правой кнопкой мыши по любому свободному месту и выбираем “Вставить ярлык“.
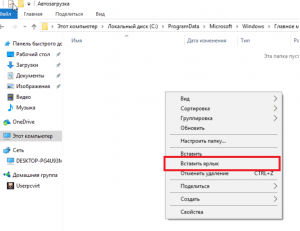
Добавление в автозагрузку windows 10
Вот и все. Теперь программа, ярлык которой вы поместили в одну из вышеописанных папок будет запускаться вместе с операционной системой Windows 10.
Как убрать программу из автозапуска на windows 10?
Для того, чтобы убрать программу из автозагрузки Windows 10, достаточно удалить ее из папок, в которые вы копировали ярлык программы. Но стоит учесть, что если программы была добавлена в автозагрузку через собственные настройки, как, например, мы добавляли Skype в автозагрузку, то ее ярлыка в этих папках не будет.
В таком случае удаление из автозагрузки происходит через диспетчер задач. Для его вызова кликните правой кнопкой мыши на любом свободном месте панели задач (та панель, на которой находится кнопка “Пуск“) и в открывшемся меню выберите “Диспетчер задач”.
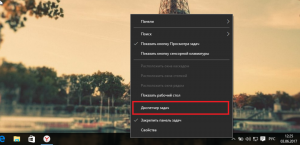
Диспетчер задач windows 10
В нем выберите вкладку “Автозагрузка“, найдите в ней программу, которую от туда нужно удалить, выделите ее кликом левой кнопкой мыши и нажмите на кнопку “Отключить” в правом нижнем углу окна диспетчера задач windows 10.
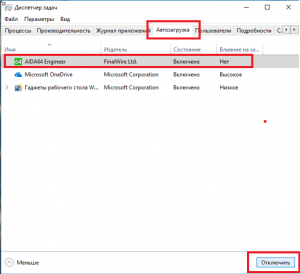
Отключение автозагрузки программ в windows 10
Если у вас остались вопросы, то оставляйте их в комментариях к статье. Мы обязательно на них ответим!