На чтение 9 мин. Просмотров 21.2k. Опубликовано
Ошибки типа «синий экран смерти», такие как ATTEMPTED_WRITE_TO_READONLY_MEMORY, могут вызвать много проблем в Windows 10, поскольку они часто перезагружают ваш компьютер, чтобы предотвратить повреждение. Эти ошибки могут вызвать нестабильность системы и потерю данных, поэтому сегодня мы собираемся показать вам, как исправить эту ошибку.
Как исправить ошибку ATTEMPTED_WRITE_TO_READONLY_MEMORY BSoD
Содержание .
- Обновите драйверы и Windows 10
- Запустите средство устранения неполадок оборудования
- Запустите сканирование SFC
- Запустить DISM
- Удалить проблемные приложения
- Сбросить BIOS по умолчанию
- Использовать восстановление системы или сброс Windows 10
- Проверьте ваше оборудование
Исправлено – ошибка ATTEMPTED_WRITE_TO_READONLY_MEMORY Windows 10
Решение 1. Обновите драйверы и Windows 10 .
Ошибки Blue Screen of Death часто бывают вызваны устаревшими или несовместимыми драйверами, поэтому важно обновлять их как можно чаще. Windows 10 в значительной степени зависит от драйверов для распознавания и использования определенного оборудования, а также если ваши драйверы повреждены или просто несовместимы с Windows 10, это приведет к появлению ATTEMPTED_WRITE_TO_READONLY_MEMORY или любой другой ошибке BSoD. Чтобы исправить эту ошибку, настоятельно рекомендуется обновить драйверы. Обновление драйверов в Windows 10 довольно просто, и вы можете сделать это прямо из диспетчера устройств, выполнив следующие действия:
-
Нажмите Клавиша Windows + X , чтобы открыть расширенное меню пользователя, и выберите Диспетчер устройств .

-
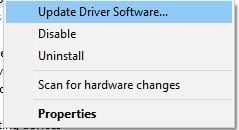
Когда откроется Диспетчер устройств , найдите устройство, которое хотите обновить, щелкните его правой кнопкой мыши и выберите в меню Обновить программное обеспечение драйвера .
-
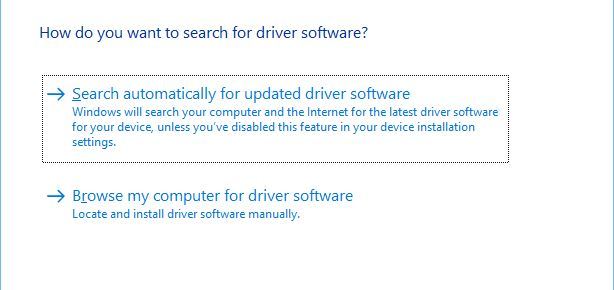
Выберите Автоматический поиск обновленного программного обеспечения драйвера и подождите, пока Windows 10 установит соответствующий драйвер для вашего устройства.
- Повторите шаги для всех устройств, которые вы хотите обновить.


Использование диспетчера устройств для обновления драйверов довольно просто, но некоторые пользователи утверждают, что диспетчер устройств не всегда загружает последние версии драйверов для вашего устройства. Чтобы загрузить последние версии драйверов, всегда лучше посетить веб-сайт производителя оборудования и вручную загрузить необходимые драйверы. Имейте в виду, что вам придется обновить как можно больше драйверов, чтобы решить эту проблему.
Обновлять драйверы автоматически
Поиск драйверов самостоятельно может занять много времени. Поэтому мы советуем вам использовать инструмент, который сделает это автоматически. Использование автоматического средства обновления драйверов, безусловно, избавит вас от необходимости поиска драйверов вручную и всегда будет поддерживать вашу систему в курсе последних версий драйверов.
Модуль обновления драйверов Tweakbit (одобрен Microsoft и Norton Antivirus) поможет вам автоматически обновлять драйверы и предотвращать повреждение ПК, вызванное установкой неправильных версий драйверов. После нескольких тестов наша команда пришла к выводу, что это наиболее автоматизированный решение.
Вот краткое руководство о том, как его использовать:
-
Загрузите и установите средство обновления драйверов TweakBit
-
После установки программа начнет сканирование вашего компьютера на наличие устаревших драйверов автоматически. Driver Updater проверит установленные вами версии драйверов по своей облачной базе данных последних версий и порекомендует правильные обновления. Все, что вам нужно сделать, это дождаться завершения сканирования.
-
По завершении сканирования вы получите отчет обо всех проблемных драйверах, найденных на вашем ПК. Просмотрите список и посмотрите, хотите ли вы обновить каждый драйвер по отдельности или все сразу. Чтобы обновить один драйвер за раз, нажмите ссылку «Обновить драйвер» рядом с именем драйвера. Или просто нажмите кнопку «Обновить все» внизу, чтобы автоматически установить все рекомендуемые обновления.
Примечание. Некоторые драйверы необходимо установить в несколько этапов, поэтому вам придется нажмите кнопку «Обновить» несколько раз, пока все его компоненты не будут установлены.


Решение 2. Запустите средство устранения неполадок оборудования .
Если обновление драйверов не помогло, давайте попробуем средство устранения неполадок Windows 10. Это универсальный инструмент, который в основном решает все виды проблем в Windows 10. И он также может быть полезен в вопросах BSOD.
Вот как запустить средство устранения неполадок Windows 10:
- Откройте приложение Настройки и перейдите в раздел Обновление и безопасность .
- Выберите «Устранение неполадок» в меню слева.
-
Выберите BSOD на правой панели и нажмите Запустить средство устранения неполадок .
- Следуйте инструкциям на экране для устранения неполадок.

Решение 3. Запустите сканирование SFC
Следующий инструмент устранения неполадок, который мы собираемся запустить, – это сканирование SFC. Это средство устранения неполадок командной строки, которое сканирует вашу систему на наличие потенциальных проблем и устраняет их (конечно, если решение возможно).
Вот как запустить сканирование SFC в Windows 10:
- Щелкните правой кнопкой мыши кнопку «Пуск» и откройте Командную строку (Admin).
-
Введите следующую строку и нажмите Enter: SFC/SCANNOW
- Подождите, пока процесс не будет завершен (это может занять некоторое время).
- Если решение найдено, оно будет применено автоматически.
- Теперь закройте командную строку и перезагрузите компьютер.

Решение 4. Запустите DISM .
DISM – это третье средство устранения неполадок, которое мы собираемся попробовать, если предыдущие два не смогли решить проблему. DISM расшифровывается как обслуживание образов развертывания и управление ими, и, как следует из названия, он перезагружает образ системы. Так что, возможно, этот процесс решит проблему BSOD.
Мы рассмотрим как стандартные, так и процедуры, которые используют установочный носитель ниже:
- Стандартный способ
- Щелкните правой кнопкой мыши Пуск и откройте командную строку (администратор).
-
Вставьте следующую команду и нажмите Enter:
-
-
DISM/Online/Cleanup-Image/RestoreHealth
-
DISM/Online/Cleanup-Image/RestoreHealth
-
- Подождите, пока сканирование не закончится.
- Перезагрузите компьютер и попробуйте обновить снова.

- С установочного носителя Windows
- Вставьте установочный носитель Windows.
- Щелкните правой кнопкой мыши меню «Пуск» и выберите в меню «Командная строка» («Администратор»).
-
В командной строке введите следующие команды и нажмите Enter после каждого:
- dism/online/cleanup-image/scanhealth
- dism/online/cleanup-image/restorehealth
-
Теперь введите следующую команду и нажмите Enter:
- DISM/Online/Cleanup-Image/RestoreHealth /source:WIM:X:SourcesInstall.wim:1/LimitAccess
- Обязательно измените значение X с буквой подключенного диска при установке Windows 10.
- После завершения процедуры перезагрузите компьютер.
- ЧИТАЙТЕ ТАКЖЕ: исправьте ‘Ошибка двигателя: не удалось загрузить клиент библиотеки’ в Windows 10
Решение 5. Удалите проблемные приложения .
Ошибки, такие как ATTEMPTED_WRITE_TO_READONLY_MEMORY, могут быть вызваны определенными приложениями, поэтому необходимо их найти и удалить. Пользователи сообщили, что причиной этой ошибки является программное обеспечение Gigabyte On/Off, поэтому, если у вас установлено это программное обеспечение, обязательно удалите его.
Другой распространенной причиной ошибок BSoD может быть антивирусное программное обеспечение. Пользователи сообщали, что такие инструменты, как NoVirusThanks, могут вызывать ошибки такого типа, и, согласно им, проблема была устранена после удаления этого инструмента. Мы должны упомянуть, что почти любая антивирусная программа может вызвать эту ошибку, и если вы хотите исправить эту проблему, вам придется удалить все сторонние антивирусные программы с вашего ПК. Чтобы полностью удалить антивирусную программу, мы настоятельно рекомендуем вам использовать специальный инструмент для удаления. Многие антивирусные компании имеют специальные средства удаления, доступные для его программного обеспечения, поэтому обязательно загрузите один для своей антивирусной программы. Если удаление антивируса устраняет проблему, вы можете загрузить последнюю версию той же антивирусной программы, которую вы использовали ранее, или вы можете переключиться на любое другое антивирусное программное обеспечение.
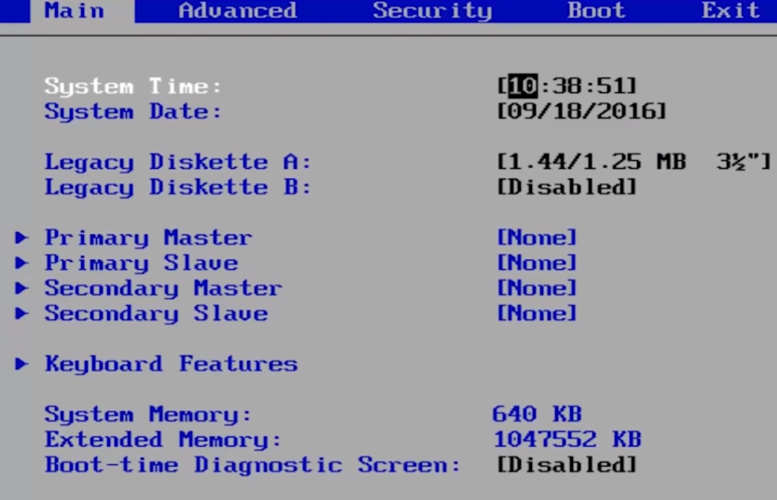
Решение 6. Сброс BIOS по умолчанию
Немногие пользователи сообщили, что им удалось исправить эту ошибку, сбросив BIOS по умолчанию, и это можно легко сделать. Чтобы узнать, как получить доступ и сбросить настройки BIOS, обязательно ознакомьтесь с руководством по материнской плате для получения подробных инструкций. Перед сбросом BIOS мы рекомендуем проверить контроллер SATA и посмотреть, какой режим вы используете в данный момент. Режим контроллера будет установлен на IDE, AHCI или RAID, поэтому обязательно установите для режима контроллера SATA то же значение после сброса BIOS.
- ЧИТАЙТЕ ТАКЖЕ: как исправить ошибки sysprep в Windows 10
Решение 7. Используйте восстановление системы или сброс Windows 10
Если ошибка ATTEMPTED_WRITE_TO_READONLY_MEMORY вызвана ошибкой программного обеспечения, вы сможете исправить ее, выполнив Восстановление системы. Для восстановления системы вам необходимо сделать следующее:
-
Удерживая клавишу Shift на клавиатуре, нажмите кнопку Перезагрузить .Кроме того, вы можете перезагрузить компьютер несколько раз во время загрузки, чтобы запустить автоматическое восстановление.
- Выберите Устранение неполадок> Дополнительные параметры> Восстановление системы .
- Выберите ваше имя пользователя и введите пароль, если он у вас есть.
- Выберите Выберите другую точку восстановления и нажмите Далее .
- Выберите точку восстановления, к которой вы хотите вернуться, и нажмите Далее . Подождите, пока процесс закончится.

Если восстановление системы не устранило проблему, вам придется выполнить сброс Windows 10. Для завершения сброса Windows 10 вам может потребоваться установочный носитель Windows 10, и вы можете легко создать его с помощью средства создания носителей и пустой флэш-накопителя USB. Мы должны предупредить вас, что процесс сброса аналогичен чистой установке, поэтому убедитесь, что вы создали резервные копии важных файлов из раздела C, прежде чем приступать к этой процедуре. Чтобы выполнить сброс Windows 10, выполните следующие действия.
- Запустите процесс автоматического восстановления и выберите Устранение неполадок> Сбросить этот компьютер> Удалить все . Будьте готовы вставить установочный носитель Windows 10, если вас попросят.
- Выберите Только диск, на котором установлена Windows> Просто удалите мои файлы и нажмите кнопку Сбросить .
- Следуйте инструкциям для завершения процесса сброса.
Если ошибка BSoD появляется даже после сброса Windows 10, скорее всего, ошибка вызвана неисправным оборудованием.
Решение 8. Проверьте свое оборудование
Ошибка ATTEMPTED_WRITE_TO_READONLY_MEMORY может быть вызвана вашим оборудованием, поэтому мы настоятельно рекомендуем вам проверить, правильно ли работает ваша RAM. Самый простой способ сделать это – проверить свои модули ОЗУ по одному, но вы также можете использовать такие инструменты, как MemTest86 +, чтобы выполнить детальное сканирование вашей ОЗУ. Если ваша оперативная память не является проблемой, вы должны проверить все другие основные компоненты оборудования.
Ошибки типа «синий экран смерти», такие как ATTEMPTED_WRITE_TO_READONLY_MEMORY, иногда трудно исправить, но мы надеемся, что вам удалось исправить эту ошибку с помощью одного из наших решений.
Примечание редактора . Этот пост был первоначально опубликован в июне 2016 года и с тех пор был полностью переработан и обновлен для обеспечения свежести, точности и полноты.
BSOD ATTEMPTED_TO_WRITE_TO_READONLY_MEMORY в Windows 11, 10
Снова разбираемся с очередной ошибкой, на этот раз затронем BSOD с кодом ATTEMPTED TO WRITE TO READONLY MEMORY. Неполадка затронула Windows 11, 10 и Server 2019, 2022. В самой проблеме уже зашита подсказка, что попытка записи или чтения памяти оказалась безуспешной. Конечно, это очень расплывчатое представление о проблеме, да и подобные сведения часто оказываются неприменимыми к реалиям. В этот раз сбой тоже может носить разные причины, да и проявляется различными способами.
Ошибка ATTEMPTED TO WRITE TO READONLY MEMORY может быть связана с различными кодами, а также ссылаться на некоторые файлы. Порой дополнительно могут фигурировать в сообщениях: 0x000000be, win32kbase.sys, ntfs.sys, ntoskrnl.exe. Если же заглянуть сейчас в системный отчет, то с большой долей вероятности можно найти следующее сообщение: «Операция ввода-вывода, инициированная реестром, завершилась неустранимым сбоем. Реестру не удалось очистить куст (файл)».
Почему появился BSOD:
- перегрев процессора и других комплектующих;
- повреждение оперативной памяти;
- неправильно настроенный XMP-профиль памяти;
- устаревшая версия BIOS;
- неисправность значений и ключей в реестре;
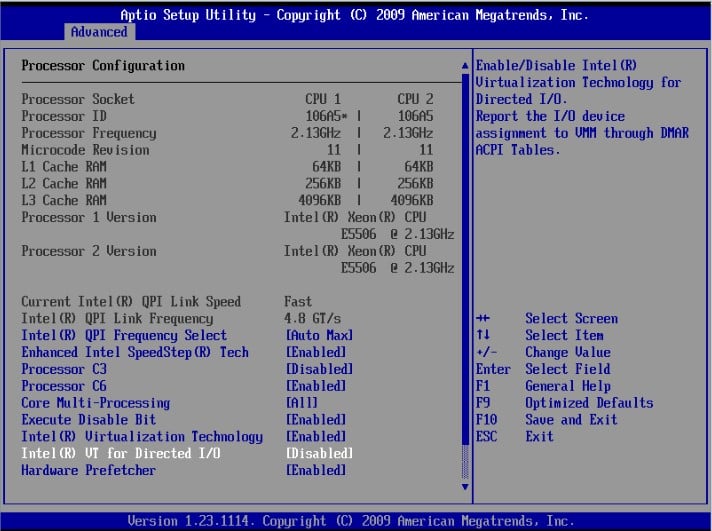
- проблема с виртуальным пространство и технологией Intel VT-d;
- несовместимость драйвера.
Как исправить ATTEMPTED TO WRITE TO READONLY MEMORY?
Исправлением для данного BSOD послужит устранение первопричины ошибки. Главная проблема в том, что мы не знаем, по какой именно причине произошел сбой в конкретном случае. Остается только пробовать решения в порядке от самых простых до более сложных. Что-то из перечисленного имеет хорошие шансы на успех.
Руководство по устранению BSOD:
- Проверить датчики. Следует провести стресс-тест через любую доступную утилиту, чтобы определить, не подвержена ли ваша система перегреву одной из комплектующих. Речь может идти о процессоре или видеокарте, как самых мощных источниках тепла. Важно обращать внимание на пиковую температуру. Если она достигает 80+ градусов, следует задуматься о дополнительном охлаждении.
- Восстановить реестр. С помощью специальных утилит можно в автоматическом режиме выполнить восстановление. Одна из самых популярных программ – CCleaner. На самом деле лучше было бы использовать резервный куст с этого же компьютера, но обычно его никто не создает заблаговременно.
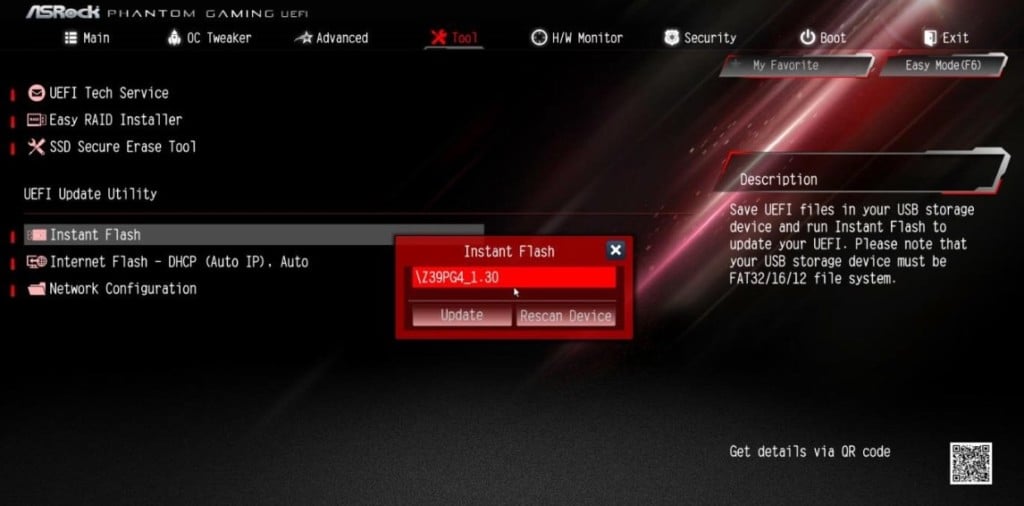
- Обновить BIOS. Особенно актуально для тех, у кого синий экран смерти появляется при попытке обновить Windows 11 или 10. Устаревшая версия BIOS является частым виновником. Процедура довольно простая: скачать прошивку с официального сайта разработчиков, загрузить на флешку, зайти в BIOS или UEFI и выбрать соответствующий пункт. Обычно он так и называется Update BIOS.
- Отключить Intel VT-d. По каким-то причинам, технология виртуального пространства порой выдает сбои и ее выключение помогло части пользователей. Предлагаем перейти в UEFI и выключить систему Intel VT-d, установив для нее значение Disable.
- Проверить оперативную память. С помощью Memtest86 следует просканировать ОЗУ. Еще более важный момент для тех, у кого в журнале событий числятся какие-то ошибки по видеокарте, так как ГПУ тянет часть ОЗУ, в последней может быть проблема.
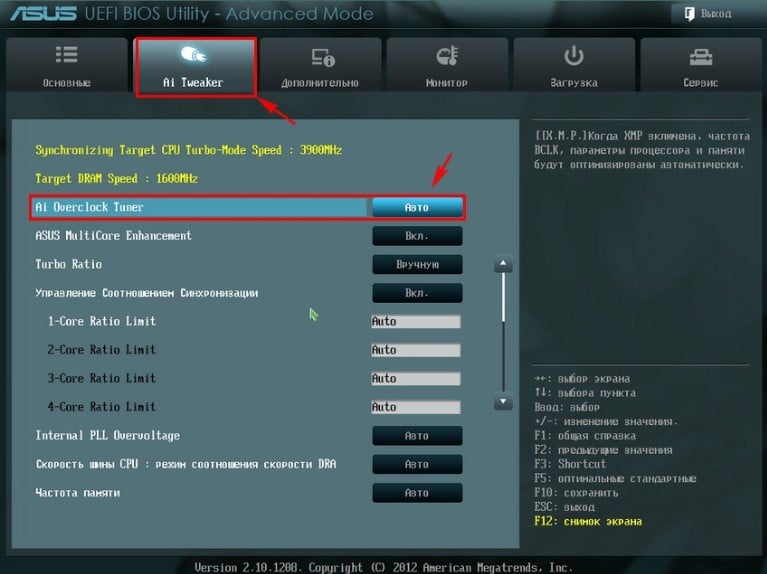
- Настроить профиль XMP. Очень часто неполадка заключается в неправильных таймингах, а также в завышенной тактовой частоте. Следует опытным путем снижать скорость работу ОЗУ в поисках более стабильного режима. Также следует подобрать оптимальные тайминги для всех планок оперативной памяти. Все перечисленное выполняется через интерфейс BIOS.
- Отключить посторонние драйвера. Известно, что некоторые версии драйверов Kaspersky мешают обновить Windows 10, а также перейти к Windows 11 и Server 2022. И это далеко не единственный драйвер, который был замечен в подобных неполадках. Разумно на время отключить дополнительное оборудование, а также выключить вспомогательное программное обеспечение.
Как показывает практика, указанные выше решения должны повергнуть BSOD ATTEMPTED TO WRITE TO READONLY MEMORY в Windows 11, 10. В большинстве случаев мы предполагаем появление положительного эффекта. Однако мы нуждаемся в ваших комментариях, которые подтверждают или опровергают эффективность методов.
Updated by
Sherly on Jul 20, 2023
Top 8 Ways to Fix Windows 11/10 Attempted Write to Readonly Memory BSOD Error
Windows 11/10 BSOD error is no longer new to many Windows users. The «Attempted Write to Readonly Memory» BSOD error is still a troublesome issue for most ordinary Windows users to fix. Right here below, you’ll find X reliable solutions, and you can follow anyone to resolve the Windows 11/10 Attempted_Write_to_Readonly_Memory BSOD error.
A quick overview of all four troubleshooting methods of attempted write to readonly memory BSOD error:
| Workable Solutions | Step-by-step Troubleshooting |
|---|---|
| Fix 1. Rebuild MBR | Download and launch EaseUS Partition Master on a new PC which runs the same system as yours…Full steps |
| Fix 2. Enter Safe Mode | Restart your PC by pressing the Power button. Once the related options show up, hold the «Shift» key…Full steps |
| Fix 3. Check RAM | Press Win + R to open the Run dialog box. Type mdsched.exe in the blank area…Full steps |
| Fix 4. Run CHKDSK | Press the Windows key and type cmd. Right-click «Command Prompt»…Full steps |
| Other Useful Fixes | Update Device Driver > Uninstall Recent Software > Check for Windows 10 Update > Restore System…Full steps |
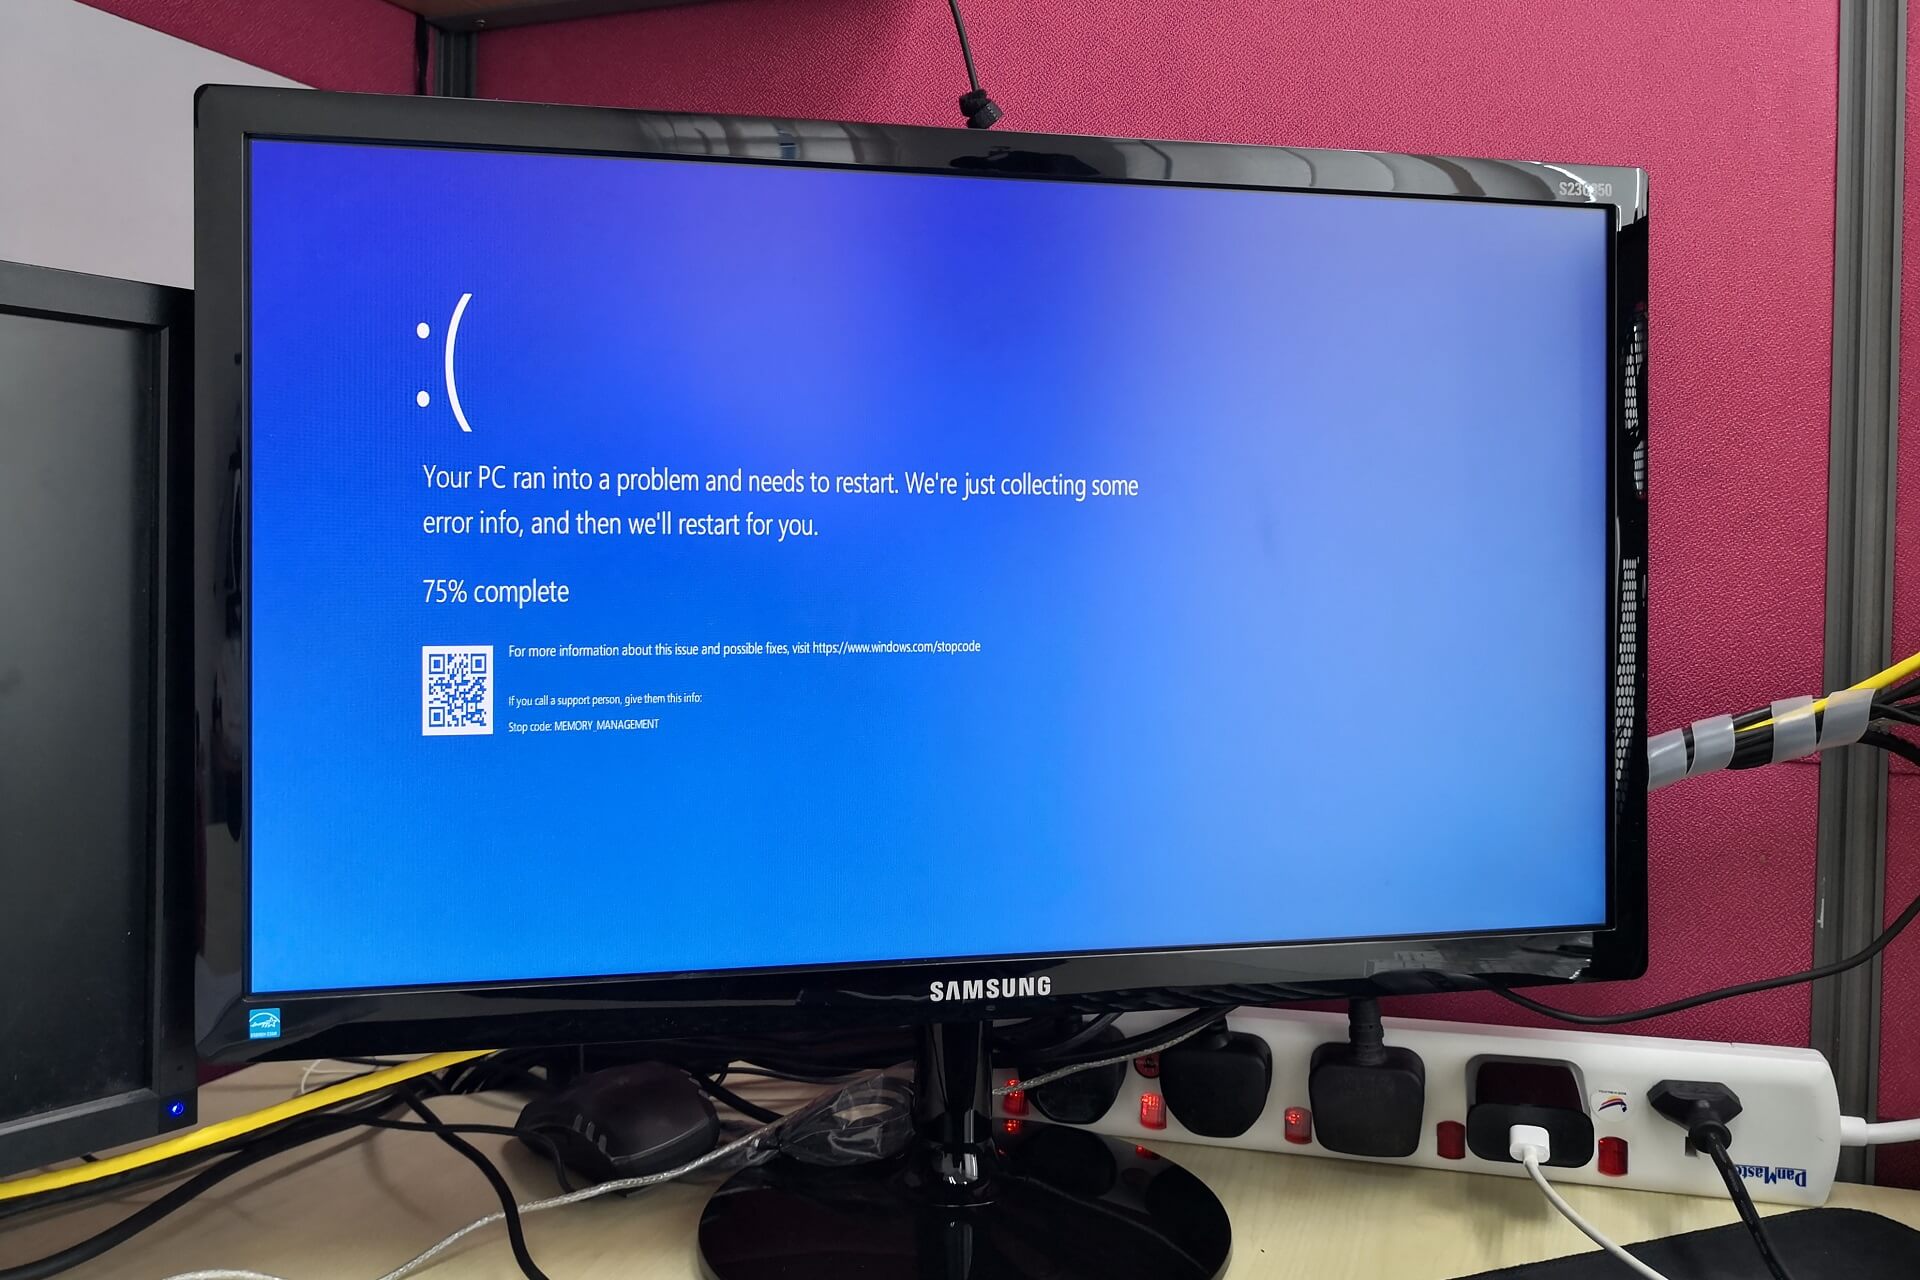
«Hi guys, do you know how to restore Windows 10 from BSOD issue with the error message ‘Your PC ran into a problem and needs to restart. We are just connecting some error info, and then we’ll restart for you. If you’d like to know more, you can search online for this error ATTEMPTED_WRITEN_TO_READONLY_MEMORY? I got this message this morning when I tried to open my PC. I waited for the PC to restart, but nothing changed. Then I reboot the PC, and this message popped up once again. Does anyone know how to fix the BSOD error with Attempted Write to Readonly Memory? I don’t even know what the error message means. Please do help me if you just know the solution. Thanks.»
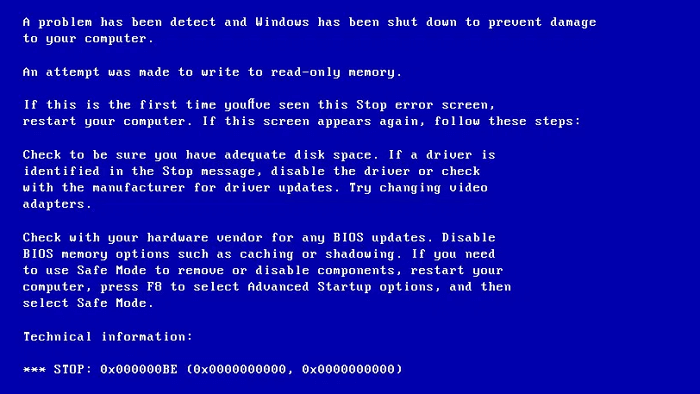
The error 0x000000BE (ATTEMPTED WRITE TO READONLY MEMORY) occurs when a driver tries to write on a read-only segment of your computer’s memory. If the system manages to identify the driver that caused the error, that driver is going to be mentioned near the STOP message on the Blue Screen of Death screen.
The following things could cause 0x000000BE error:
- Faulty or corrupt device driver
- Incompatible firmware software
- Corrupt system services
You can watch this video first to fix the BSOD error:
Let’s see how to fix this BSOD issue and make your Windows 10 Computer back to work normally again now.
Fix 1. Rebuild MBR to Fix Windows 11/10 Attempted Write to Readonly Memory BSOD
Let the best partition manager software — EaseUS Partition Master to help you boot PC and follow the below tips to solve this BSOD issue in Windows 11/10 now. This disk management tool enables you to create a WinPE bootable disk and enter your computer to make it bootable. Besides, it has many highlights:
- Combine partitions to enrich partition space
- Replace an old hard drive with a new one
- Convert basic disk to dynamic or dynamic to basic with ease
- Resize, format, create or delete a partition
Steps to rebuild MBR in Windows 11/10:
— EaseUS Partition Master —
Your Smart Windows 11 Update Disk Manager
- MBR to GPT Converter, Make Disk Ready for Windows 11.
- Migrate Windows 11 to New SSD in 1-Click.
- Handy to Extend or Combine Partitions in Windows 11.
- Clone and Upgrade Disks without Data Loss.
Step 1. Create a WinPE bootable disk
- Launch EaseUS Partition Master, and click «Bootable Media» on the toolbar. Select «Create bootable media».
- Click «Next» to finish the process.

Step 2. Boot EaseUS Partition Master Bootable USB
- Connect the bootable USB or CD/DVD to your PC.
- Press F2 or Del when you restart the computer to enter the BIOS screen. Set and boot your computer from «Removable Devices» or «CD-ROM Drive». And then EaseUS Partition Master will run automatically.
Step 3. Rebuild MBR
- Click «Toolkit» and choose «Rebuild MBR».

- Select the disk and the type of MBR. Then, click «Rebuild».

- After that, you can see «MBR has been successfully rebuilt on Disk X».

Fix 2. Enter Safe Mode to Fix Attempted Write to Readonly Memory error
Windows 11/10 receives «Attempted Write to Readonly Memory» BSOD error and needs to restart, how to fix? All you need to do is enter the safe mode to fix 0x000000BE if you are unable to enter Windows.
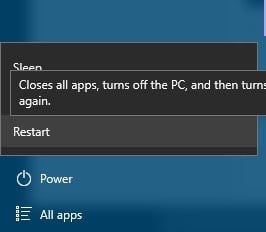
Step 1. Restart your PC by pressing the Power button.
Step 2. Once the related options show up, hold the «Shift» key and press «Restart» simultaneously.
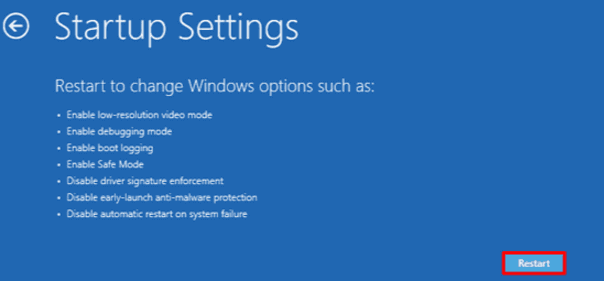
Step 3. Select «Troubleshoot > Advanced options > Startup Settings > Restart». After your computer restart, press 4 or F4 on the keyboard to start your PC in Safe Mode.
Fix 3. Check Computer’s Memory (RAM) to Fix Windows 11/10 BSOD Error
The error — attempted write to readonly memory is related to the computer’s memory. The lack of storage space on your computer leads to the BSOD. This solution is of vital importance. Follow the steps below to identify whether your PC’s memory is working properly or not.
Step 1. Press Win + R to open the Run dialog box.
Step 2. Type mdsched.exe in the blank area and click OK to proceed.
Step 3. Select the option «Restart now and check for problems» to detect the trouble in the memory immediately.
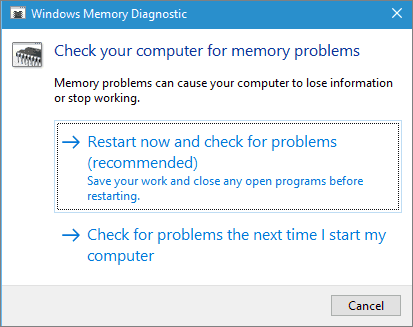
Then, the Memory Diagnostic Tool will automatically scan your PC. If errors are detected, change the current device with a new one to get rid of BSOD with ATTEMPTED_WRITE_TO_READONLY_MEMORY.
Do you know how to check RAM now? By clicking the buttons below, you can share this guide to let more users know about this method.
Fix 4. Remove Attempted Write to Readonly Memory BSOD with CHKDSK
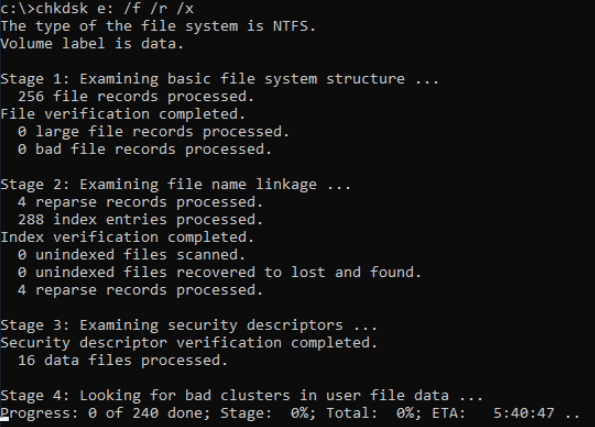
System file error and bad sector error could result in this ATTEMPTED_WRITE_TO_READONLY_MEMORY. If the above solutions do not bring any relief, then stay into Safe Mode and run SFC and CHKDSK to repair the bad sectors and faulty system files. You can enter safe mode in Fix 1.
Step 1. Press the Windows key and type cmd.
Step 2. Right-click «Command Prompt» and choose «Run as administrator».
Step 3. Enter the following command:
sfc /scannow
Step 4. Once the scan gets over, run this command
chkdsk E: /f /r /x
«E» means the drive letter of the partition you want to repair.
Also read: Fix SFC/SCANNOW Cannot Repair Error.
Use CHKDSK Alternative Tool
Download EaseUS CleanGenius and install it on your computer. Let’s start checking and refixing file system error on your device now.
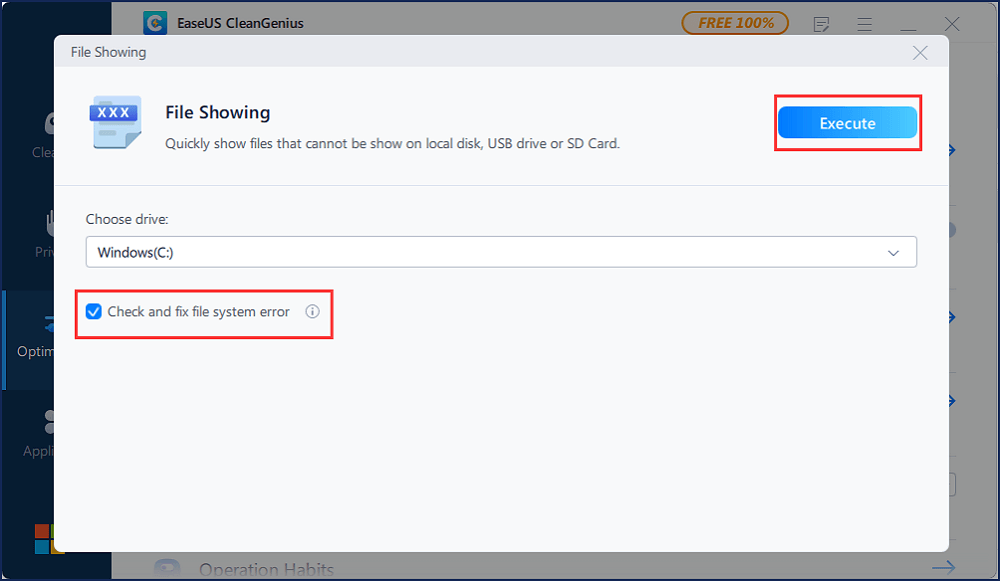
Step 1. Click «File Showing» to enter the next step.
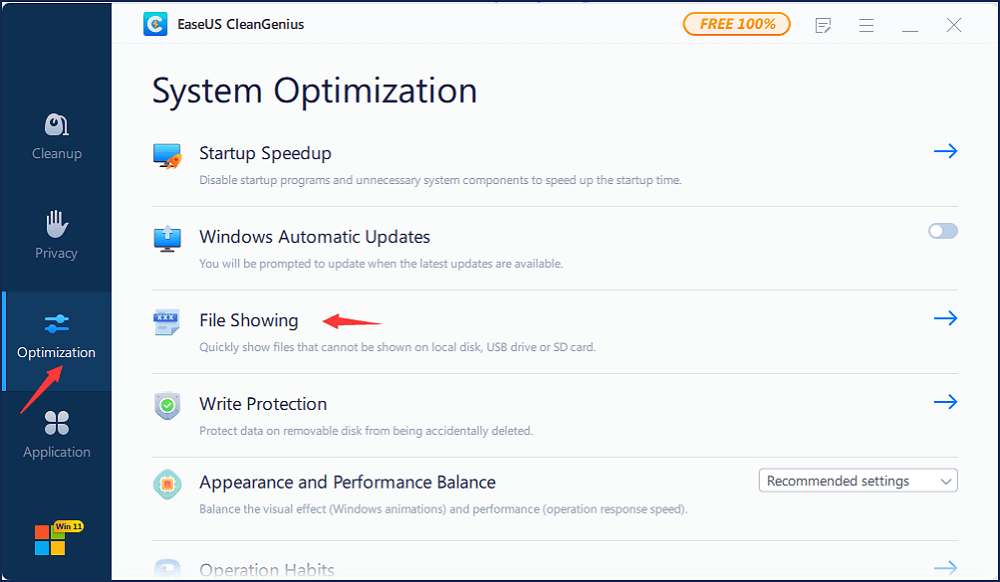
Step 2. Choose the target device and tick the box of «Check and fix file system error». Click «Execute» to start fixing the problematic device.
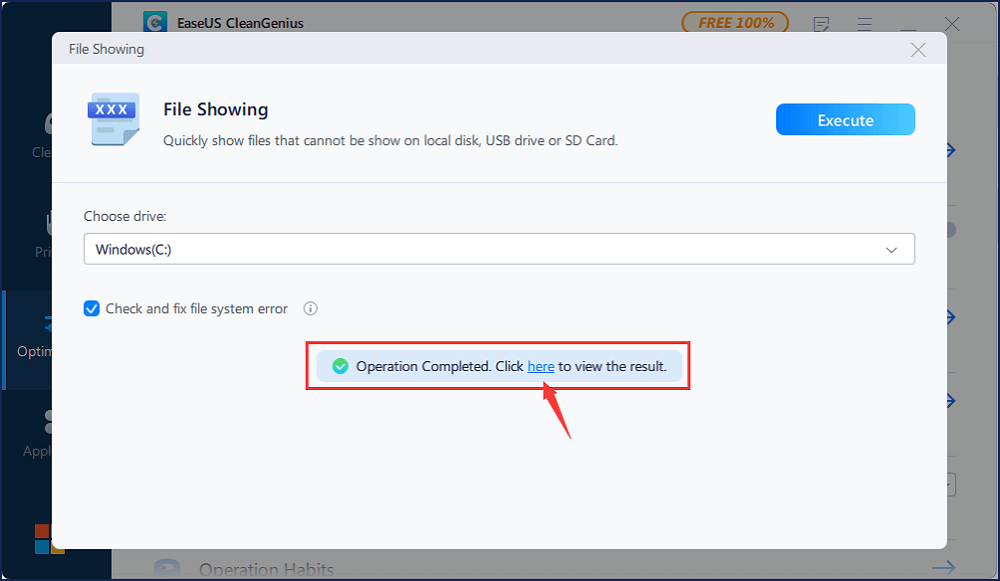
Step 3. When the fixing process completes, click «here» to open and use your device.
Fix 5. Update Device Driver to Fix Attempted Write to Readonly Memory
You need to update the driver after you have entered the safe mode in Fix 1. A faulty or corrupt device driver can cause ATTEMPTED_WRITE_TO_READONLY_MEMORY error. You need to update your device driver to get rid of attempted write to readonly memory in Windows 10.
Steps to update the device driver:
Step 1. Right-click on the Windows icon at the left corner and select «Device Manager».
Step 2. On the Device Manager, check for the problematic driver. Usually, the driver will display a yellow triangle next to the faulty driver.
Step 3. Right-click on the driver and click «update driver».
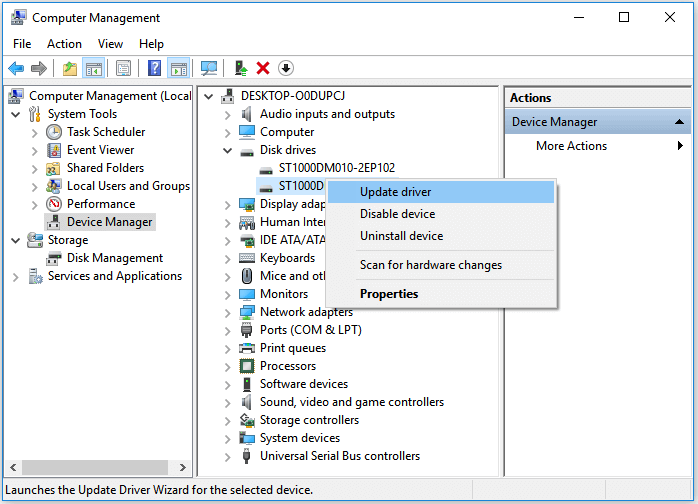
Step 4. Select «Search automatically for updated driver software».
- If Windows doesn’t find a new driver, try to download a new one from the device manufacturers’ website.
- If the update step doesn’t work, right-click each device driver and select «Uninstall».
After this, reboot the PC, and Windows 10 will update or reinstall the drive drivers for you.
Fix 6. Uninstall Recent Software to Resolve the BSOD Error
The installation of new software on the system may be the possible reason for attempted write to readonly memory. You can resolve Windows 10 attempted write to readonly memory by uninstalling recent software.
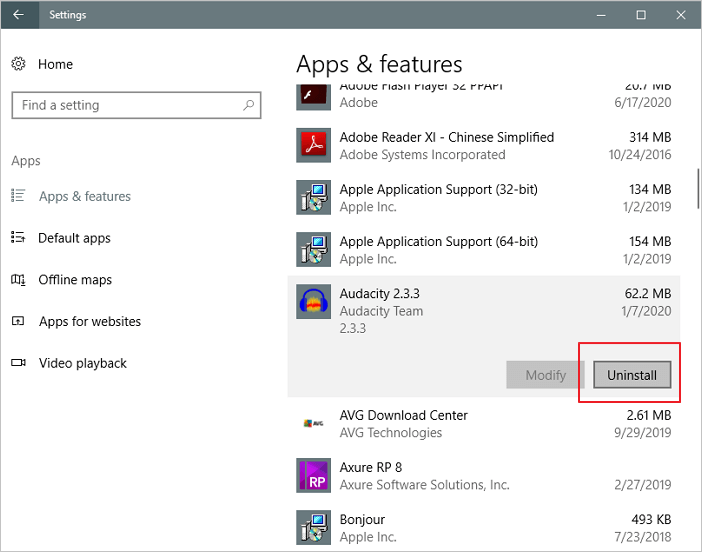
Step 1. Open «Settings > Apps > Apps & features».
Step 2. Select the app or game that you want to remove and click the «Uninstall» button.
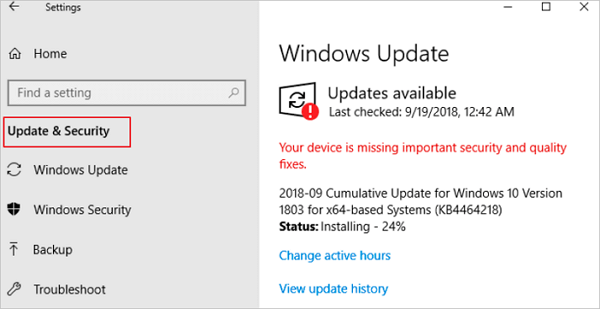
Fix 7. Check for Windows 11/10 Update to Fix 0x000000BE
Another way to fix Windows 10 attempted to write to readonly memory error is by updating Windows. Steps to get the latest Windows update.
Step 1. Click the «Start» icon.
Step 2. Go to «Settings > Update & Security settings > Windows Update».
Fix 8. Remove Attempted Write to Readonly Memory BSOD by System Restore
The last solution that can help you get rid of Attempted Write to Readonly Memory BSOD by System Restore is to perform System Restore.
Also read: How to back up system
Step 1. Turn on Windows and press F8/Shift and click «Repair Your Computer».
Step 2. When Windows repair mode is ready, click OK if it asks you to choose keyboard; Choose your account and click OK if it asks you to choose the account and enter a password if you have one.
Step 3. Choose «System Restore» under System Recovery Options, and you can see all Windows restore points.
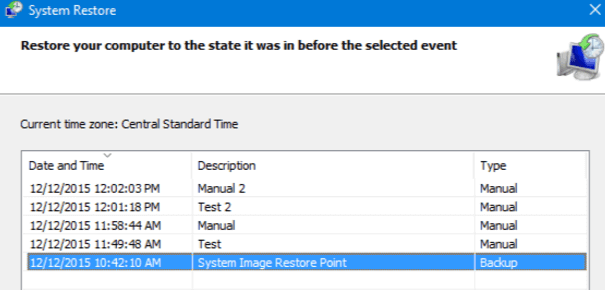
Step 4. Select the right restore point which was created when your computer is safe and sound, and check Show more restore points if you don’t see all restore points.
Step 5. Click «Next». Then all you need is to wait patiently to let it restore all your Windows to the point that you’ve selected.
Conclusion
These eight solutions above can fix the stop code attempted write to readonly memory error perfectly. You can try any one of these solutions to get help. If you still have a problem, you can contact us to get additional help.
by Milan Stanojevic
Milan has been enthusiastic about technology ever since his childhood days, and this led him to take interest in all PC-related technologies. He’s a PC enthusiast and he… read more
Updated on
- Corrupted drivers can cause an attempted_write_to_readonly_memory error or any other BSoD error to appear.
- Another cause for the error attempted_write_to_readonly_memory on Windows 10 is faulty hardware.
-
Running a Windows troubleshooter has been efficient in fixing stop code attempted_write_to_readonly_memory.
- Then, removing problematic apps is a sure way to fix attempted_write_to_readonly_memory overclock issues.
XINSTALL BY CLICKING THE DOWNLOAD
FILE
Blue Screen of Death errors such as ATTEMPTED_WRITE_TO_READONLY_MEMORY can cause you a lot of problems on Windows 10 since they will frequently restart your PC in order to prevent damage.
Occasionally, users have reported an error variations saying attempted_write_to_readonly_memory dxgmms2 sys or attempted_write_to_readonly_memory unisafe sys.
These errors can cause system instability and data loss, therefore today we’re going to show you how to fix this error.
What steps do I take to fix a 0x000000BE attempted_write_to_readonly_memory stop message?
- Update your drivers and Windows 10
- Run the Hardware Troubleshooter
- Run the SFC scan
- Run DISM
- Remove problematic applications
- Reset BIOS to default
- Use System Restore or Windows 10 reset
- Check your hardware
1. Update your drivers and Windows 10
Blue Screen of Death errors are often caused by outdated or incompatible drivers, therefore it’s important that you update them as often as you can.
Windows 10 relies heavily on drivers in order to recognize and use certain hardware.
And if your drivers are corrupted, or simply not compatible with Windows 10, that will cause an ATTEMPTED_WRITE_TO_READONLY_MEMORY or any other BSoD error to appear.
In order to fix this error it’s highly recommended that you update your drivers.
Updating drivers in Windows 10 is fairly simple, and you can do that right from the Device Manager by following these steps:
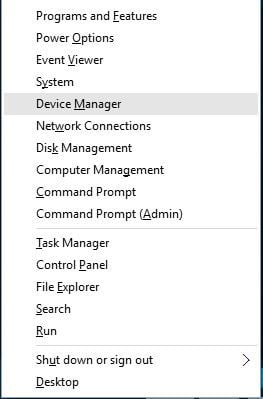
- Press Windows Key + X to open Power User Menu and select Device Manager.

- Once Device Manager opens, locate the device you want to update, right-click it and select Update Driver Software from the menu.

- Select Search automatically for updated driver software and wait for Windows 10 to install the appropriate driver for your device.

- Repeat the steps for all devices that you want to update.
Using Device Manager to update your drivers is pretty straightforward, but some users claim that Device Manager doesn’t always download the latest drivers for your device.
To download the latest drivers, it’s always better to visit your hardware manufacturer’s website and download the necessary drivers manually. Bear in mind that you’ll have to update as many drivers as you can in order to fix this issue.
How we test, review and rate?
We have worked for the past 6 months on building a new review system on how we produce content. Using it, we have subsequently redone most of our articles to provide actual hands-on expertise on the guides we made.
For more details you can read how we test, review, and rate at WindowsReport.
Updating your drivers with a professional solution is a realistic choice for resolving the BSoD problem ATTEMPTED WRITE TO READONLY MEMORY in Windows 10. Take advantage of the technology that is easy, quick, and safe, all wrapped up in one performant program that will also optimize your computer hardware.
This solution has a large daily-updated driver database, so it will propose the most recent drivers available after scanning your system. You will also receive a comprehensive report outlining the precise state of your Windows 10’s missing, damaged, or obsolete drivers.
Update drivers automatically
Searching for drivers on your own can be time-consuming. So, we advise you to use a tool that will do this for you automatically.
Using an automatic driver updater will certainly save you from the hassle of searching for drivers manually, and it will always keep your system up to date with the latest drivers.
Outbyte Driver Updater can assist you in automatically updating drivers and preventing PC harm caused by installing the incorrect driver version. It keeps up with the latest modifications, preventing the system from experiencing latency, system failures, and BSoD concerns.
⇒ Get Outbyte Driver Updater
2. Run the Hardware Troubleshooter
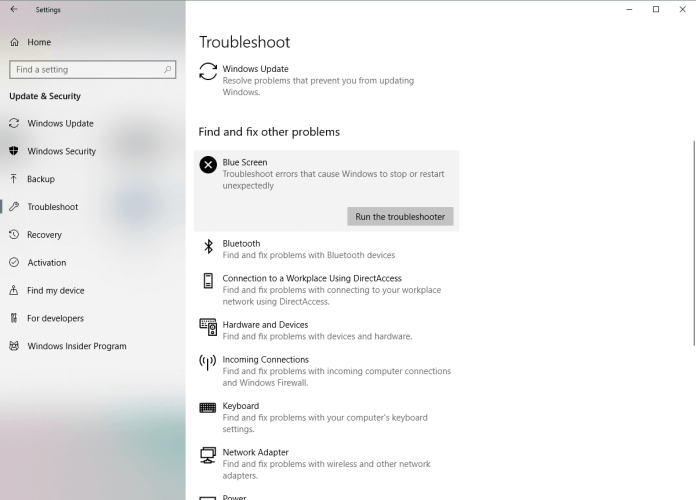
- Open the Settings app and go to Update & Security section.
- Select Troubleshoot from the menu on the left.
- Select BSOD from the right pane and click Run the troubleshooter.

- Follow the instructions on the screen to complete the troubleshooter.
3. Run the SFC scan
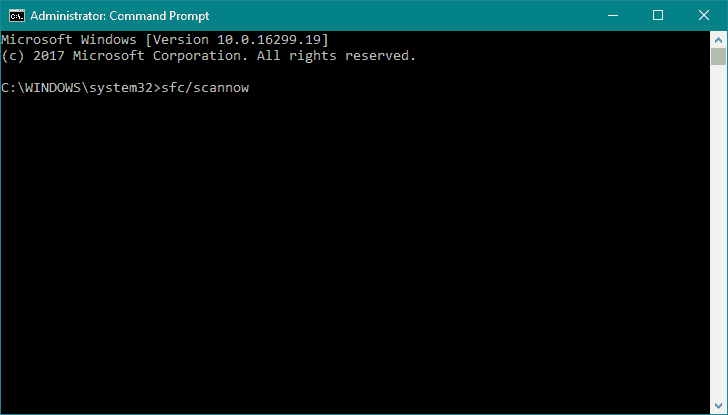
- Right-click on the Start Menu button, and open Command Prompt (Admin).
- Enter the following line and press Enter: sfc/scannow

- Wait until the process is done (it may take a while).
- If the solution is found, it will automatically be applied.
- Now, close the Command Prompt and restart your computer.
4. Run DISM
- The standard way
- Right-click Start and open Command Prompt (Admin).
- Paste the following command and press Enter:
DISM /Online /Cleanup-Image /RestoreHealth
- Wait until the scan is finished.
- Restart your computer and try updating again.

- With the Windows installation media
- Insert your Windows installation media.
- Right-click the Start menu and, from the menu, choose the Command Prompt (Admin).
- In the command line, type the following commands and press Enter after each:
dism /online /cleanup-image /scanhealthdism /online /cleanup-image /restorehealth
- Now, type the following command and press Enter:
DISM /Online /Cleanup-Image /RestoreHealth /source:WIM:X:SourcesInstall.wim:1 /LimitAccess
- Make sure to change an X value with the letter of the mounted drive with Windows 10 installation.
- After the procedure is finished, restart your computer.
5. Remove problematic applications
Errors such as ATTEMPTED_WRITE_TO_READONLY_MEMORY can be caused by certain applications, therefore it’s necessary that you find and remove them.
Users reported that Gigabyte On/Off software is the common cause for this error, so if you have this software installed, be sure that you remove it.
Another common cause of BSoD errors can be your antivirus software.
Users reported that tools such as NoVirusThanks can cause these types of errors, and according to them, the issue was fixed after removing this tool.
We have to mention that almost any antivirus program can cause this error, and if you want to fix this problem, you’ll have to remove all third-party antivirus programs from your PC.
To completely remove an antivirus program, we strongly suggest that you use a dedicated removal tool.
Many antivirus companies have dedicated removal tools available for their software, so be sure to download one for your antivirus program.
If uninstalling the antivirus fixes the issue, you might want to download the latest version of the same antivirus program that you were using before, or you can switch to any other antivirus software.
6. Reset BIOS to default
Few users reported that they managed to fix this error by resetting BIOS to default, and you can do that easily.
To see how to access and reset BIOS, be sure to check your motherboard manual for detailed instructions.
Before you reset BIOS, we advise you to check your SATA Controller and see what mode you are currently using.
Controller mode will be set to IDE, AHCI, or RAID, so be sure to set the SATA controller mode to the same value after you reset BIOS.
7. Use System Restore or Windows 10 reset
- Hold the Shift key on your keyboard and click the Restart button. Alternatively, you can restart your computer a few times during the boot sequence to start Automatic Repair.

- Select Troubleshoot > Advanced options > System Restore.
- Select your username and enter your password if you have one.
- Select Choose a different restore point and click Next.
- Choose the restore point you wish to return to and click Next. Wait for the process to finish.
If System Restore didn’t fix the issue, you’ll have to perform a Windows 10 reset.
To complete Windows 10 reset you might need Windows 10 installation media, and you can easily create one by using Media Creation Tool and an empty USB flash drive.
We have to warn you that the reset process is similar to clean install, so make sure that you back up important files from your C partition before you start this procedure. To perform Windows 10 reset, follow these steps:
- Start Automatic Repair process and choose Troubleshoot > Reset this PC > Remove everything. Be prepared to insert Windows 10 installation media if you’re asked to.
- Select Only the drive where Windows is installed > Just remove my files and click the Reset button.
- Follow the instructions to complete the reset process.
If the BSoD error appears even after Windows 10 reset, the error is most likely caused by faulty hardware.
- Fix: Exception Access Violation Error on Windows 10/11
- Security Settings Blocked Self-signed Application [Fix]
8. Check your hardware
ATTEMPTED_WRITE_TO_READONLY_MEMORY error can be caused by your hardware, so we urge you to check if your RAM is working properly.
The easiest way to do that is to test your RAM modules one by one, but you can also use tools such as MemTest86+ to perform a detailed scan of your RAM.
If your RAM is not the problem, you should check all other major hardware components.
Blue Screen of Death errors such as ATTEMPTED_WRITE_TO_READONLY_MEMORY can be sometimes hard to fix, but we hope that you managed to fix this error by using one of our solutions.
![]()
If you need the instructions on how to fix attempted write to readonly memory blue screen error, go through this article.
The most common nightmare for a Windows 10 user is the blue screen of death. There are many types of BSOD errors. The ATTEMPTED WRITE TO READONLY MEMORY is one of them.
If your PC shows you this BSOD, it also may show you a stop code like 0x000000BE. This blue screen of death may come suddenly while you are working or playing games. It also may appear before Windows starts up completely. Depending on the situation, you can take your troubleshooting steps. This article is all about how to fix attempted write to readonly memory BSOD on Windows.

What Causes Attempted Write to ReadOnly Memory Blue Screen?
Most blue screen error occurs due to any of the faulty drivers on your computer. This BSOD is not different. Sometimes, Windows may itself indicate the faulty driver’s name on the BSOD screen. Sometimes, you may not see it. But, In most cases, the ntkrnlpa.exe, vhdmp.sys, win32k.sys, tcpip.sys, iusb3hub.sys, ntoskrnl.exe, ntfs.sys, dxgkrnl.sys, or atikmdag.sys, etc. causes attempted write to readonly memory error.
There may be other drivers work behind this problem. But, these are the most common among them. However, this blue screen of death only occurs when a faulty driver tries to write on a memory segment, but that is read-only and not writeable.
There may be other reasons that make this conflict on your PC. But, In almost every case, you will be able to get rid of this blue screen of death.
Here are the best methods you can try to fix this problem.
1. Update/Roll Back Driver
To fix attempted write to readonly memory blue screen, you may need to update or roll back specific driver(s). It totally depends on the situation. If you have recently updated a driver and after that, the BSOD starts appearing, rollback is the option to go. If not, you can consider updating the driver.

To update drivers, you can use Driver Booster or Driver Easy, or Outbyte Driver Updater. These tools can easily update any drivers you want with just a single click. However, If you want to update manually, you can read this article: How to Update Drivers
Note: You should update all drivers especially NVIDIA/AMD/Intel graphics card as well as the network adapter.
To roll back a driver to its previous version, the tools I have mentioned above are sufficient. But, If you want to do it manually, follow these instructions.

- At first, Open the Windows Device Manager.
- Then, Right-click on a driver and go to its properties.
- Now, Go to the Driver tab and click on Roll Back Driver.
- Go ahead and finish the task.
I hope doing these things are sufficient to fix ATTEMPTED WRITE TO READONLY MEMORY.
2. System Restore
Performing system restoration can be a swift solution for this BSOD. If you are unsure about what mess you have made in your PC, a system restore can relieve you. If you are lucky, it may fix attempted_write_to_readonly_memory.
However, If you don’t know about system restore, read: How to perform System Restore on Windows.
3. Update BIOS
In your PC, BIOS firmware is the thing you don’t bother to update frequently. In fact, You don’t need to update it most of the time. Sometimes, Updating the BIOS/UEFI can help you resolve BSODs like attempted write to readonly memory and other security-related issues.
However, If you don’t know how to do it, read: How to Update BIOS/UEFI of Your Motherboard
4. Reset BIOS
Have you recently made some changes to your BIOS settings? It might be a reason why you are encountering attempted_write_to_readonly_memory.
In this case, You can undo the changes or reset the BIOS settings. You can find proper instructions for your PC/Motherboard manufacturer’s website.
5. Use CHKDSK
This blue screen of death may appear due to disk-related problems. So, It is better to run the chkdsk command to resolve common hard disk/SSD issues. It also may fix attempted write to readonly memory.
Read: How to Use CHKDSK Command
6. Run Memory Diagnostic Tool
Memory-related problems cause many BSODs. This ATTEMPTED WRITE TO READONLY MEMORY also can be a result of memory issues on your computer. So, I suggest you take care of a few things to ensure there are no memory problems. It also can fix this BSOD.
Read: How to Find and Troubleshoot Memory Problems
7. Analyze Dump File
I believe you won’t have to come to this method. But, If none other methods mentioned above help, this one is a great way to fix attempted write to readonly memory stope code.
If you configure, your computer can create a memory dump file where all information related to the BSODs can be found. By analyzing that information, you can easily find out the corrupted driver or service that is causing the problem. After that, you can update/rollback/reinstall/uninstall the driver and also take other necessary steps to fix blue screen of death.
To get all instructions, Read: How to Create and Analyze Small Memory Dump File
These are the best ways to fix attempted write to readonly memory blue screen error. I hope any of these methods will help you. But, If you know any other methods that may help others, you can mention it in the comment box.