This is an article detailing different methods of Arch/Windows coexistence.
Important information
Windows UEFI vs BIOS limitations
Microsoft imposes limitations on which firmware boot mode and partitioning style can be supported based on the version of Windows used:
Note: The following points only list configurations supported by the Windows Setup even though Windows itself may still work on these unsupported configurations. A good example of this is Windows 11 which still works on a BIOS/MBR configuration once the Windows Setup check is bypassed.
- Windows 8/8.1 and 10 x86 32-bit support booting in IA32 UEFI mode from GPT disk only, OR in BIOS mode from MBR disk only. They do not support x86_64 UEFI boot from GPT/MBR disk, x86_64 UEFI boot from MBR disk, or BIOS boot from GPT disk. On market, the only systems known to ship with IA32 (U)EFI are some old Intel Macs (pre-2010 models?) and Intel Atom System-on-Chip (Clover trail and Bay Trail) Windows Tablets, which boot ONLY in IA32 UEFI mode and ONLY from GPT disk.
- Windows 8/8.1 and 10 x86_64 versions support booting in x86_64 UEFI mode from GPT disk only, OR in BIOS mode from MBR disk only. They do not support IA32 UEFI boot, x86_64 UEFI boot from MBR disk, or BIOS boot from GPT disk.
- Windows 11 only supports x86_64 and a boot in UEFI mode from GPT disk.
In case of pre-installed Systems:
- All systems pre-installed with Windows XP, Vista or 7 32-bit, irrespective of Service Pack level, bitness, edition (SKU) or presence of UEFI support in firmware, boot in BIOS/MBR mode by default.
- MOST of the systems pre-installed with Windows 7 x86_64, irrespective of Service Pack level, bitness or edition (SKU), boot in BIOS/MBR mode by default. Very few late systems pre-installed with Windows 7 are known to boot in x86_64 UEFI/GPT mode by default.
- ALL systems pre-installed with Windows 8/8.1, 10 and 11 boot in UEFI/GPT mode. Up to Windows 10, the firmware bitness matches the bitness of Windows, ie. x86_64 Windows boot in x86_64 UEFI mode and 32-bit Windows boot in IA32 UEFI mode.
The best way to detect the boot mode of Windows is to do the following[1]:
- Boot into Windows
- Press
Win+Rkeys to start the Run dialog - In the Run dialog type
msinfo32.exeand press Enter - In the System Information windows, select System Summary on the left and check the value of BIOS mode item on the right
- If the value is
UEFI, Windows boots in UEFI/GPT mode. If the value isLegacy, Windows boots in BIOS/MBR mode.
In general, Windows forces type of partitioning depending on the firmware mode used, i.e. if Windows is booted in UEFI mode, it can be installed only to a GPT disk. If Windows is booted in Legacy BIOS mode, it can be installed only to an MBR disk. This is a limitation enforced by Windows Setup, and as of April 2014 there is no officially (Microsoft) supported way of installing Windows in UEFI/MBR or BIOS/GPT configuration. Thus Windows only supports either UEFI/GPT boot or BIOS/MBR configuration.
Tip: Windows 10 version 1703 and newer supports converting from BIOS/MBR to UEFI/GPT using MBR2GPT.EXE.
Such a limitation is not enforced by the Linux kernel, but can depend on which boot loader is used and/or how the boot loader is configured. The Windows limitation should be considered if the user wishes to boot Windows and Linux from the same disk, since installation procedure of boot loader depends on the firmware type and disk partitioning configuration. In case where Windows and Linux dual boot from the same disk, it is advisable to follow the method used by Windows, ie. either go for UEFI/GPT boot or BIOS/MBR boot. See https://support.microsoft.com/kb/2581408 for more information.
Install media limitations
Intel Atom System-on-Chip Tablets (Clover trail and Bay Trail) provide only IA32 UEFI firmware without Legacy BIOS (CSM) support (unlike most of the x86_64 UEFI systems), due to Microsoft Connected Standby Guidelines for OEMs. Due to lack of Legacy BIOS support in these systems, and the lack of 32-bit UEFI boot in Arch Official Install ISO (FS#53182), the official install media cannot boot on these systems. See Unified Extensible Firmware Interface#UEFI firmware bitness for more information and available workarounds.
Bootloader UEFI vs BIOS limitations
Most of the linux bootloaders installed for one firmware type cannot launch or chainload bootloaders of the other firmware type. That is, if Arch is installed in UEFI/GPT or UEFI/MBR mode in one disk and Windows is installed in BIOS/MBR mode in another disk, the UEFI bootloader used by Arch cannot chainload the BIOS installed Windows in the other disk. Similarly if Arch is installed in BIOS/MBR or BIOS/GPT mode in one disk and Windows is installed in UEFI/GPT in another disk , the BIOS bootloader used by Arch cannot chainload UEFI installed Windows in the other disk.
The only exceptions to this are GRUB in Apple Macs in which GRUB in UEFI mode can boot BIOS installed OS via appleloader command (does not work in non-Apple systems), and rEFInd which technically supports booting legacy BIOS OS from UEFI systems, but does not always work in non-Apple UEFI systems as per its author Rod Smith.
However if Arch is installed in BIOS/GPT in one disk and Windows is installed in BIOS/MBR mode in another disk, then the BIOS boot loader used by Arch CAN boot the Windows in the other disk, if the boot loader itself has the ability to chainload from another disk.
Note: To dual-boot with Windows on same disk, Arch should follow the same firmware boot mode and partitioning combination used by the Windows installation.
Windows Setup creates a 100 MiB EFI system partition (except for Advanced Format 4K native drives where it creates a 300 MiB ESP), so multiple kernel usage is limited. Workarounds include:
- Mount ESP to
/efiand use a boot loader that has file system drivers and is capable of launching kernels that reside on other partitions. - Expand the EFI system partition, typically either by decreasing the Recovery partition size or moving the Windows partition (UUIDs will change).
- Backup and delete unneeded fonts in
esp/EFI/Microsoft/Boot/Fonts/[2]. - Backup and delete unneeded language directories in
esp/EFI/Microsoft/Boot/(e.g. to only keepen-US). - Use a higher, but slower, compression for the initramfs images. E.g.
COMPRESSION="xz"withCOMPRESSION_OPTIONS=(-9e).
UEFI Secure Boot
All pre-installed Windows 8/8.1, 10 and 11 systems by default boot in UEFI/GPT mode and have UEFI Secure Boot enabled by default. This is mandated by Microsoft for all OEM pre-installed systems.
Arch Linux install media does not support Secure Boot yet. See Secure Boot#Booting an installation medium.
It is advisable to disable UEFI Secure Boot in the firmware setup manually before attempting to boot Arch Linux. Windows 8/8.1, 10 and 11 SHOULD continue to boot fine even if Secure boot is disabled. The only issue with regards to disabling UEFI Secure Boot support is that it requires physical access to the system to disable secure boot option in the firmware setup, as Microsoft has explicitly forbidden presence of any method to remotely or programmatically (from within OS) disable secure boot in all Windows 8/8.1 and above pre-installed systems
Note:
- If Windows used Bitlocker and stored the key in the TPM for automatic unlock on boot, it fails to boot when Secure Boot is disabled, instead showing a Bitlocker recovery screen. This is not permanent however, and you can easily boot Windows again by simply re-enabling Secure Boot.
- On Windows 11, disabling Secure Boot after install will not cause problems as long as TPM is working normally.
Fast Startup and hibernation
There are two OSs that can be hibernated, you can hibernate Windows and boot Linux (or another OS), or you can hibernate Linux and boot Windows, or hibernate both OSs.
Warning: Data loss can occur if Windows hibernates and you dual boot into another OS and make changes to files on a filesystem (such as NTFS) that can be read and written to by Windows and Linux, and that has been mounted by Windows [3]. Similarly, data loss can occur if Linux hibernates, and you dual boot into another OS etc. Windows may hibernate even when you press shutdown, see section #Windows settings.
For the same reason, if you share one EFI system partition between Windows and Linux, then the EFI system partition may be damaged if you hibernate (or shutdown with Fast Startup enabled) Windows and then start Linux, or hibernate Linux and then start Windows.
ntfs-3g added a safe-guard to prevent read-write mounting of hibernated NTFS filesystems, but the NTFS driver within the Linux kernel has no such safeguard.
Windows cannot read filesystems such as ext4 by default that are commonly used for Linux. These filesystems do not have to be considered, unless you install a Windows driver for them.
Windows settings
Fast Startup is a feature in Windows 8 and above that hibernates the computer rather than actually shutting it down to speed up boot times.
There are multiple options regarding the Windows settings for Fast Startup and hibernation that are covered in the next sections.
- disable Fast Startup and disable hibernation
- disable Fast Startup and enable hibernation
- enable Fast Startup and enable hibernation
The procedure of disabling Fast Startup is described in the tutorials for Windows 8, Windows 10 and Windows 11. In any case if you disable a setting, make sure to disable the setting and then shut down Windows, before installing Linux; note that rebooting is not sufficient.
Disable Fast Startup and disable hibernation
This is the safest option, and recommended if you are unsure about the issue, as it requires the least amount of user awareness when rebooting from one OS into the other. You may share the same EFI system partition between Windows and Linux.
Disable Fast Startup and enable hibernation
This option requires user awareness when rebooting from one OS into the other.
If you want to start Linux while Windows is hibernated, which is a common use case, then
- you must use a separate EFI system partition (ESP) for Windows and Linux, and ensure that Windows does not mount the ESP used for Linux. As there can only be one ESP per drive, the ESP used for Linux must be located on a separate drive than the ESP used for Windows. In this case Windows and Linux can still be installed on the same drive in different partitions, if you place the ESP used by linux on another drive than the Linux root partition.
- you can not read-write mount any filesystem in Linux, that is mounted by Windows while Windows is hibernated. You should be extremely careful about this, and also consider Automount behaviour.
- If you shut down Windows fully, rather than hibernating, then you can read-write mount the filesystem.
Note: You can avoid this issue for a drive by mounting a drive as an external drive in Windows and ejecting the drive in Windows before hibernating.
Enable Fast Startup and enable hibernation
The same considerations apply as in case «Disable Fast Startup and enable hibernation», but since Windows can not be shut down fully, only hibernated, you can never read-write mount any filesystem that was mounted by Windows while Windows is hibernated.
Note: Windows updates may re-enable Fast Startup, as reported in [4].
Windows filenames limitations
Windows is limited to filepaths being shorter than 260 characters.
Windows also puts certain characters off limits in filenames for reasons that run all the way back to DOS:
<(less than)>(greater than):(colon)"(double quote)/(forward slash)\(backslash)|(vertical bar or pipe)?(question mark)*(asterisk)
These are limitations of Windows and not NTFS: any other OS using the NTFS partition will be fine. Windows will fail to detect these files and running chkdsk will most likely cause them to be deleted. This can lead to potential data-loss.
NTFS-3G applies Windows restrictions to new file names through the windows_names option: ntfs-3g(8) § Windows_Filename_Compatibility (see fstab).
Installation
The recommended way to setup a Linux/Windows dual booting system is to first install Windows, only using part of the disk for its partitions. When you have finished the Windows setup, boot into the Linux install environment where you can create and resize partitions for Linux while leaving the existing Windows partitions untouched. The Windows installation will create the EFI system partition which can be used by your Linux boot loader.
Windows before Linux
BIOS systems
Using a Linux boot loader
You may use any multi-boot supporting BIOS boot loader.
Using the Windows Vista/7/8/8.1 boot loader
This section explains how to : install a linux bootloader on a partition instead of the MBR ; copy this bootloader to a partition readable by the windows bootloader ; use the windows bootloader to start said copy of the linux bootloader.
Note: Some documents state that the partition being loaded by the Windows boot loader must be a primary partition but usage of an extended partition has been documented as working.
- When installing the boot loader, install it on your
/bootpartition rather than the MBR. For details on doing this with GRUB, see GRUB/Tips and tricks#Install to partition or partitionless disk, for Syslinux, see the note at Syslinux#Manual install, for LILO see LILO#Install to partition or partitionless disk.
- Make a copy of the VBR:
dd if=/dev/disk of=/path/to/linux.bin bs=512 count=1
where
/dev/diskis the path of the partition on which your bootloader is installed and/path/to/is the mounted filesystem on which you want the copy to be readable by the Windows bootloader.
- On Windows, the linux.bin file should now be accessible. Run cmd with administrator privileges (navigate to Start > All Programs > Accessories, right-click on Command Prompt and select Run as administrator):
bcdedit /create /d "Linux" /application BOOTSECTOR
BCDEdit will return a UUID for this entry. This will be refered to as
UUIDin the remaining steps.bcdedit /set UUID device partition=c: (or the drive letter on which linux.bin is kept) bcdedit /set UUID path \path\to\linux.bin bcdedit /displayorder UUID /addlast bcdedit /timeout 30
On reboot, both Windows and Linux should now show up in the Windows bootloader.
Note: On some hardware, the Windows boot loader is used to start another OS with a second power button (e.g. Dell Precision M4500).
For more details, see https://www.iceflatline.com/2009/09/how-to-dual-boot-windows-7-and-linux-using-bcdedit/
UEFI systems
If you already have Windows installed, it will already have created some partitions on a GPT-formatted disk:
- a Windows Recovery Environment partition, generally of size 499 MiB, containing the files required to boot Windows (i.e. the equivalent of Linux’s
/boot), - an EFI system partition with a FAT32 filesystem,
- a Microsoft Reserved Partition, generally of size 128 MiB,
- a Microsoft basic data partition with a NTFS filesystem, which corresponds to
C:, - potentially system recovery and backup partitions and/or secondary data partitions (corresponding often to
D:and above).
Using the Disk Management utility in Windows, check how the partitions are labelled and which type gets reported. This will help you understand which partitions are essential to Windows, and which others you might repurpose. The Windows Disk Management utility can also be used to shrink Windows (NTFS) partitions to free up disk space for additional partitions for Linux.
Warning: The first 4 partitions in the above list are essential, do not delete them.
You can then proceed with partitioning, depending on your needs. The boot loader needs to support chainloading other EFI applications to dual boot Windows and Linux. An additional EFI system partition should not be created, as it may prevent Windows from booting.
Note: It only appears when Linux is installed on the second hard disk and a new EFI system partition is created on the second hard disk.
Simply mount the existing partition.
Tip:
- rEFInd and systemd-boot will autodetect Windows Boot Manager (
\EFI\Microsoft\Boot\bootmgfw.efi) and show it in their boot menu automatically. For GRUB follow either GRUB#Windows installed in UEFI/GPT mode to add boot menu entry manually or GRUB#Detecting other operating systems for a generated configuration file. - To save space on the EFI system partition, especially for multiple kernels, increase the initramfs compression.
Computers that come with newer versions of Windows often have Secure Boot enabled. You will need to take extra steps to either disable Secure Boot or to make your installation media compatible with secure boot (see above and in the linked page).
Linux before Windows
Even though the recommended way to setup a Linux/Windows dual booting system is to first install Windows, it can be done the other way around. In contrast to installing Windows before Linux, you will have to set aside a partition for Windows, say 40GB or larger, in advance. Or have some unpartitioned disk space, or create and resize partitions for Windows from within the Linux installation, before launching the Windows installation.
UEFI firmware
Windows will use the already existing EFI system partition. In contrast to what was stated earlier, it is unclear if a single partition for Windows, without the Windows Recovery Environment and without Microsoft Reserved Partition, will not do.
Follows an outline, assuming Secure Boot is disabled in the firmware.
- Boot into windows installation. Watch to let it use only the intended partition, but otherwise let it do its work as if there is no Linux installation.
- Follow the #Fast Startup and hibernation section.
- Fix the ability to load Linux at start up, perhaps by following #Cannot boot Linux after installing Windows. It was already mentioned in #UEFI systems that some Linux boot managers will autodetect Windows Boot Manager. Even though newer Windows installations have an advanced restart option, from which you can boot into Linux, it is advised to have other means to boot into Linux, such as an arch installation media or a live CD.
Windows 10 with GRUB
The following assumes GRUB is used as a boot loader (although the process is likely similar for other boot loaders) and that Windows 10 will be installed on a GPT block device with an existing EFI system partition (see the «System partition» section in the Microsoft documentation for more information).
Create with program gdisk on the block device the following three new partitions. See [5] for more precise partition sizes.
| Min size | Code | Name | File system |
|---|---|---|---|
| 16 MB | 0C01 | Microsoft reserved | N/A |
| ~40 GB | 0700 | Microsoft basic data | NTFS |
| 300 MB | 2700 | Windows RE | NTFS |
Create NTFS file systems on the new Microsoft basic data and Windows RE (recovery) partitions using the mkntfs program from package ntfs-3g.
Reboot the system into a Windows 10 installation media. When prompted to install select the custom install option and install Windows on the Microsoft basic data partition created earlier. This should also install Microsoft EFI files in the EFI system partition.
After installation (set up of and logging into Windows not required), reboot into Linux and generate a GRUB configuration for the Windows boot manager to be available in the GRUB menu on next boot.
Troubleshooting
Couldn’t create a new partition or locate an existing one
See #Windows UEFI vs BIOS limitations.
Cannot boot Linux after installing Windows
See Unified Extensible Firmware Interface#Windows changes boot order.
Restoring a Windows boot record
By convention (and for ease of installation), Windows is usually installed on the first partition and installs its partition table and reference to its bootloader to the first sector of that partition. If you accidentally install a bootloader like GRUB to the Windows partition or damage the boot record in some other way, you will need to use a utility to repair it. Microsoft includes a boot sector fix utility FIXBOOT and an MBR fix utility called FIXMBR on their recovery discs, or sometimes on their install discs. Using this method, you can fix the reference on the boot sector of the first partition to the bootloader file and fix the reference on the MBR to the first partition, respectively. After doing this you will have to reinstall GRUB to the MBR as was originally intended (that is, the GRUB bootloader can be assigned to chainload the Windows bootloader).
If you wish to revert back to using Windows, you can use the FIXBOOT command which chains from the MBR to the boot sector of the first partition to restore normal, automatic loading of the Windows operating system.
Of note, there is a Linux utility called ms-sys (package ms-sysAUR in AUR) that can install MBR’s. However, this utility is only currently capable of writing new MBRs (all OS’s and file systems supported) and boot sectors (a.k.a. boot record; equivalent to using FIXBOOT) for FAT file systems. Most LiveCDs do not have this utility by default, so it will need to be installed first, or you can look at a rescue CD that does have it, such as Parted Magic.
First, write the partition info (table) again by:
# ms-sys --partition /dev/sda1
Next, write a Windows 2000/XP/2003 MBR:
# ms-sys --mbr /dev/sda # Read options for different versions
Then, write the new boot sector (boot record):
# ms-sys -(1-6) # Read options to discover the correct FAT record type
ms-sys can also write Windows 98, ME, Vista, and 7 MBRs as well, see ms-sys -h.
Restoring an accidentally deleted EFI system partition
If you have a GPT-partitioned disk and erased (e.g. with mkfs.fat -F32 /dev/sdx) the EFI system partition, you will notice that Windows Boot Manager will either disappear from your boot options, or selecting it will send you back to the UEFI.
To remedy it, boot with a Windows installation media, press Shift+F10 to open the console (or click NEXT > Repair Computer > Troubleshoot… > Advanced > Command Prompt), then start the diskpart utility:
X:\Sources> diskpart
DISKPART> list disk
Select the appropriate hard drive by typing:
DISKPART> select disk number
Make sure that there is a partition of type system (the EFI system partition):
DISKPART> list partition
Select this partition:
DISKPART> select partition number
and assign a temporary drive letter to it:
DISKPART> assign letter=G:
DiskPart successfully assigned the drive letter or mount point.
To make sure that drive letter is correctly assigned:
DISKPART> list vol
 Volume ###  Ltr  Label        Fs     Type        Size     Status     Info
 ----------  ---  -----------  -----  ----------  -------  ---------  --------
 Volume 0     E                       DVD-ROM         0 B  No Media
 Volume 1     C                NTFS   Partition    195 GB  Healthy    Boot
 Volume 2         WINRE        NTFS   Partition    400 MB  Healthy    Hidden
 Volume 3     G                FAT32  Partition    499 MB  Healthy    System
Close diskpart:
DISKPART> exit
Navigate to C:\ (or what your system drive letter is):
X:\Sources> cd /d C:\
Next is the «magic» command, which recreate the BCD store (with /s for the mount point, /f for firmware type, optionally add /v for verbose):
C:\> bcdboot C:\Windows /s G: /f UEFI
Tip: If it hangs up after a minute, hit Ctrl+c. This happens sometimes, but you will get a message like boot files successfully created and it will have worked just fine.
You should now have Windows Boot Manager working as a boot option, and thus have access to Windows. Just make sure to never format your EFI system partition again!
Note: Remove the drive letter G assigned to the EFI system partition to keep it from showing up in My Computer.
See [6], [7] and [8].
The EFI system partition created by Windows Setup is too small
By default, Windows Setup creates a 100 MiB EFI system partition (except for Advanced Format 4K native drives where it creates a 300 MiB ESP). This is generally too small to fit everything you need. You can try different tools to resize this partition, but there are usually other partitions in the way, making it, at the very least, difficult.
If you are installing Windows from scratch, you can dictate the size of the EFI system partition during installation[9]:
- Select your installation target and make sure it has no partitions.
- Click New and then the Apply buttons. The Windows installer will then generate the expected partitions (allocating nearly everything to its primary partition) and just 100MB to the EFI.
- Use the UI to delete the
System,MSR, andPrimarypartitions. Leave theRecoverypartition (if present) alone. - Press
Shift+F10to open the Command Prompt. - Type
diskpart.exeand pressEnterto open the disk partitioning tool. - Type
list diskand pressEnterto list your disks. Find the one you intend to modify and note its disk number. - Type
select disk disk_numberwith the disk number to modify. - Type
create partition efi size=sizewith the desired size of the ESP in Mebibytes (MiB), and pressEnter. See the note at EFI system partition#Create the partition for the recommended sizes. - Type
format quick fs=fat32 label=Systemand pressEnterto format the ESP - Type
exitand pressEnterto exit the disk partitioning tool andexitfollowed byEnteragain.
Once Windows is installed, you can resize the primary partition down within Windows and then reboot and go about your usual Arch install, filling the space you just created.
Alternatively, you can use the Arch install media to create a single EFI system partition of your preferred size before you install Windows on the drive. Windows Setup will use the EFI system partition you made instead of creating its own.
Unable to install Windows Cumulative Update on BIOS system
On BIOS systems, Windows cumulative updates may fail with the error We couldn’t complete the updates. Undoing changes. Don’t turn off your computer. In such case, while in Windows, you need to set the Windows partition as active.
C:\> diskpart
DISKPART> list disk
DISKPART> select disk number
DISKPART> list partition
DISKPART> select partition number
DISKPART> active
DISKPART> exit
After successfully installing the Windows update, mark back your Linux partition as active, using commands above.
Time standard
- Recommended: Set both Arch Linux and Windows to use UTC, following System time#UTC in Microsoft Windows. Some versions of Windows revert the hardware clock back to localtime if they are set to synchronize the time online. This issue appears to be fixed in Windows 10.
- Not recommended: Set Arch Linux to localtime and disable all time synchronization daemons. This will let Windows take care of hardware clock corrections and you will need to remember to boot into Windows at least two times a year (in Spring and Autumn) when DST kicks in. So please do not ask on the forums why the clock is one hour behind or ahead if you usually go for days or weeks without booting into Windows.
Bluetooth pairing
When it comes to pairing Bluetooth devices with both the Linux and Windows installation, both systems have the same MAC address, but will use different link keys generated during the pairing process. This results in the device being unable to connect to one installation, after it has been paired with the other. To allow a device to connect to either installation without re-pairing, follow Bluetooth#Dual boot pairing.
See also
- Booting Windows from a desktop shortcut
- One-time boot into Windows partition from desktop shortcut
- Windows 7/8/8.1/10 ISO to Flash Drive burning utility for Linux (MBR/GPT, BIOS/UEFI, FAT32/NTFS)
In this guide, you will learn how to Dual boot Arch Linux with Windows 10 on UEFI system. This guide assumes that you already have Windows 10 installed on your system.
Prerequisites
Before you begin configuring the dual-boot setup, ensure that the following requirements are met:
- A bootable installation medium of Arch Linux (Either USB or DVD). To download the latest Arch Linux ISO, proceed to the official Arch Linux download page. Once you have downloaded the ISO image, grab an 8GB USB drive and make it bootable using Rufus tool or any other application that can create a bootable USB drive.
- A fast and stable internet connection for downloading and installing software packages.
Step 1) Create a separate partition for installation of Arch Linux
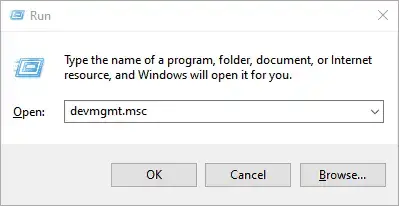
For the dual boot setup to work, we need to create a separate partition on the hard drive on which Arch Linux will be installed. To do so, head over to the disk management utility by pressing Windows Key + R. In the dialogue box, type diskmgmt.msc and hit ENTER.
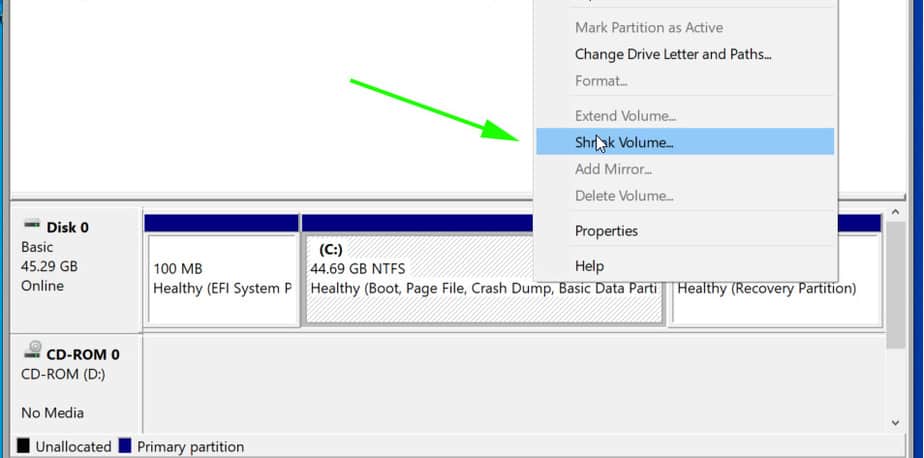
This launches the disk management utility displaying the various disk partitions on your hard drive. We are going to create an unallocated partition by shrinking the C drive. If you have a bigger partition than the C drive, feel free to use it for creating the separate partition,
So, we are going to right-click on drive C and select the ‘Shrink Volume’ option as shown
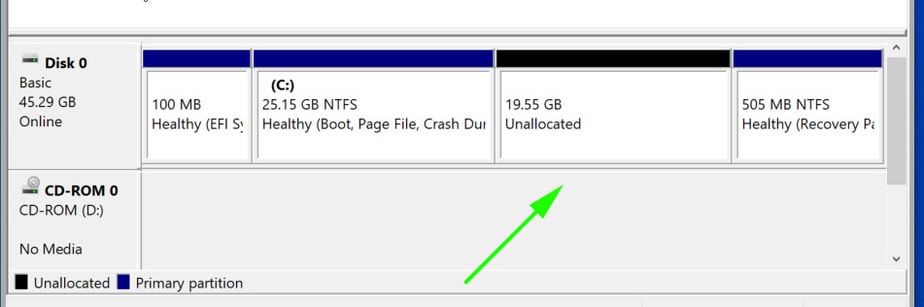
On the pop-up dialogue box that appears, we are going to specify the amount to shrink as shown. This is the amount that will be designated for the installation of Arch Linux. In our example, we have shrunk 20 GB of hard disk space will serve as the unallocated space.
Once you are satisfied, click on the ‘Shrink’ button.

Your unallocated space will be indicated as shown below. In our case, we have set aside approximately 20G for the installation of Arch Linux.
With the unallocated partition in place, plug in your bootable USB and reboot your PC.
Step 2) Configure BIOS to boot from bootable medium
Before you begin with the installation process, it’s prudent to set the boot priority in the BIOS to select your bootable medium as the most preferred option. Depending on your vendor, you can press the Esc, or F10 key to enter the BIOS and navigate to the boot priority Menu.
Also note that we are using the UEFI mode for installation.

Once you have selected your boot medium, press the ESC button to continue with the booting process.
Step 3) Begin the installation of Arch Linux
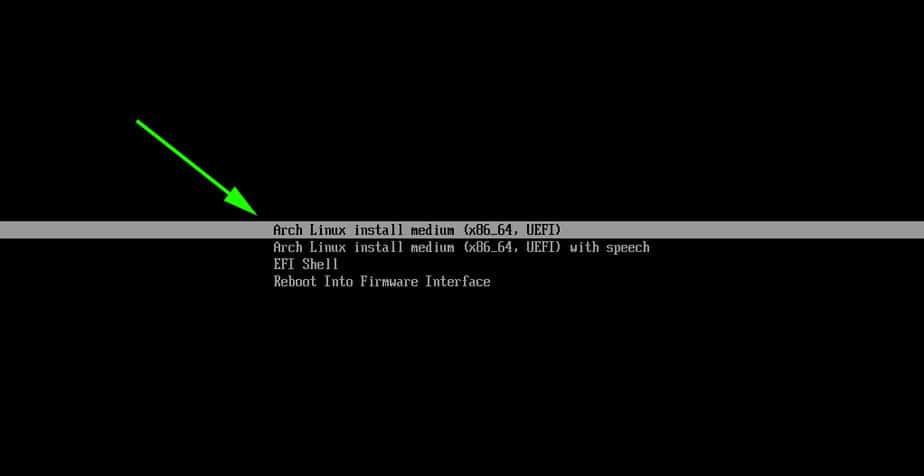
On the bootup screen, you will be presented with options as shown below. Select the first option – Arch Linux install medium (x86_64, UEFI) and hit ENTER.
This initialize Arch Linux as evidenced by the boot messages on the screen.
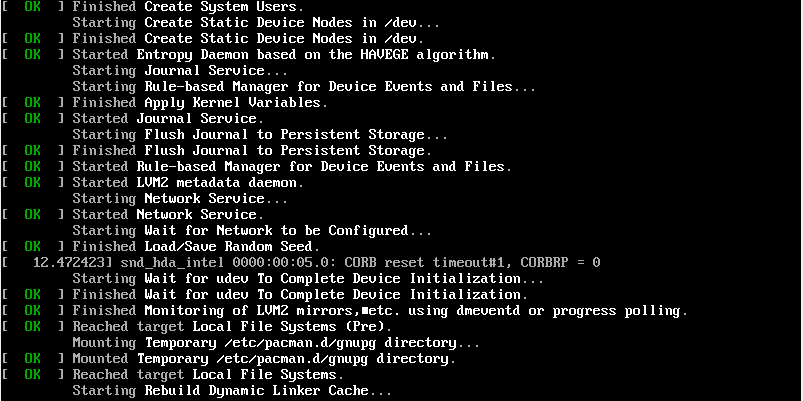
After a few seconds, this ushers you to the prompt as shown below.

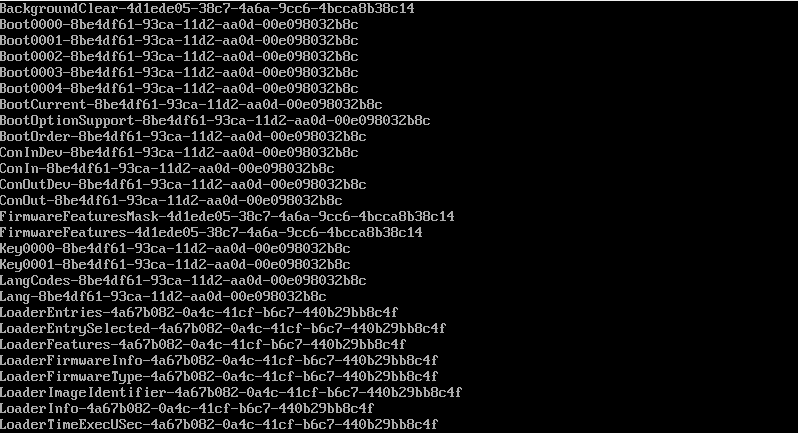
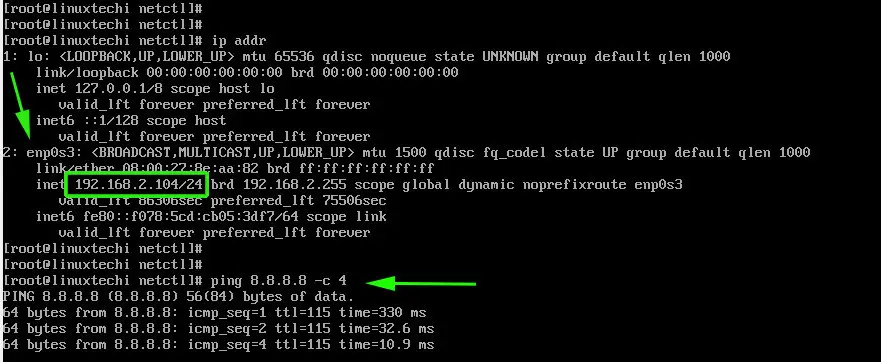
To confirm that you have EFI support, run the command:
# ls /sys/firmware/efi/efivars
You should get some entries on the screen as shown. If nothing is listed on your screen, then it means you are using MBR and this guide won’t work for you in configuring up a dual boot setup.
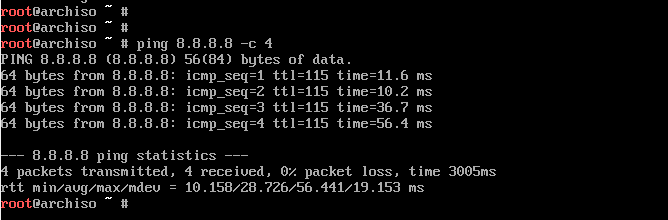
As you begin the installation, you might want to ensure that you have internet connectivity. Internet connectivity is crucial in setting time and date.
You can ping Google’s DNS as shown:
# ping 8.8.8.8 -c 4
You should get a positive reply as shown.
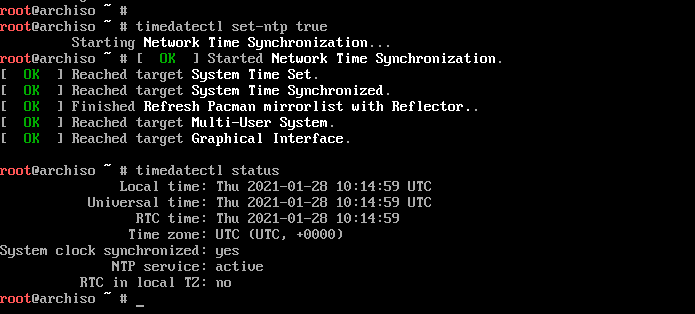
Step 4) Update time and date
Next, we are going to update the system time and date using the timedatectl command as shown.
# timedatectl set-ntp true
You can thereafter confirm the time and date using the command
# timedatectl status
Step 5) Create & format Linux partitions
Next, we are going to partition our hard drive and create some Linux partitions. An easy way of doing this is using the cfdisk utility. Run the command:
# cfdisk
This displays all the partitions available including Windows partitions.
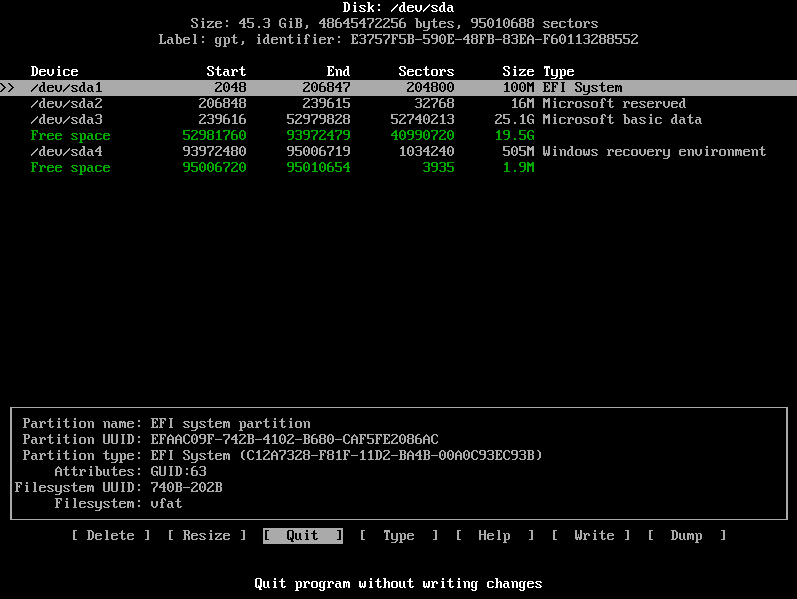
As you can see, we have some free space of 19.5G that we created earlier in step 1 from shrinking drive C on the Windows side. Using this partition, we shall create the following Linux partitions :
- Root partition / 12G
- swap partition 4G
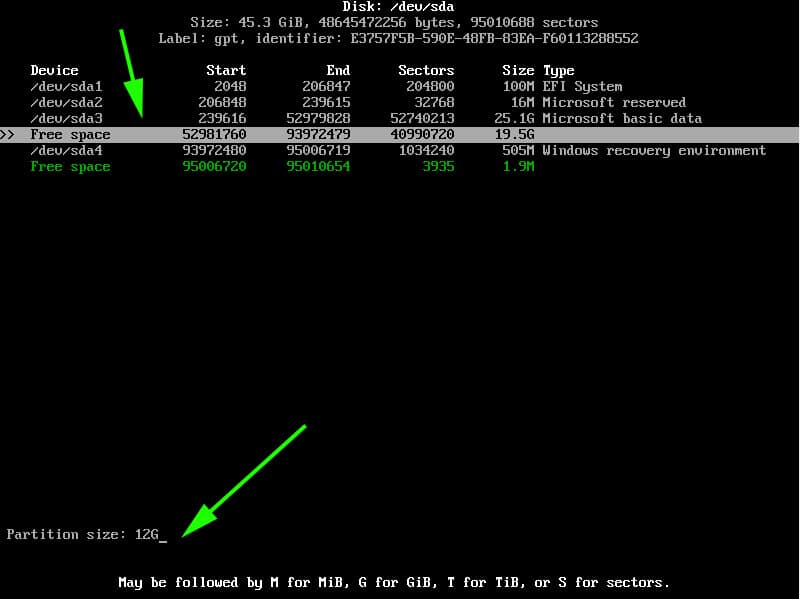
To achieve this, we will navigate to the free space with 19.5G just after /dev/sda3 volume and hit ENTER. We will then specify the volume as 12G for the root partition as shown below. Then hit ENTER.
The root partition will be created with the Linux filesystem type as shown.
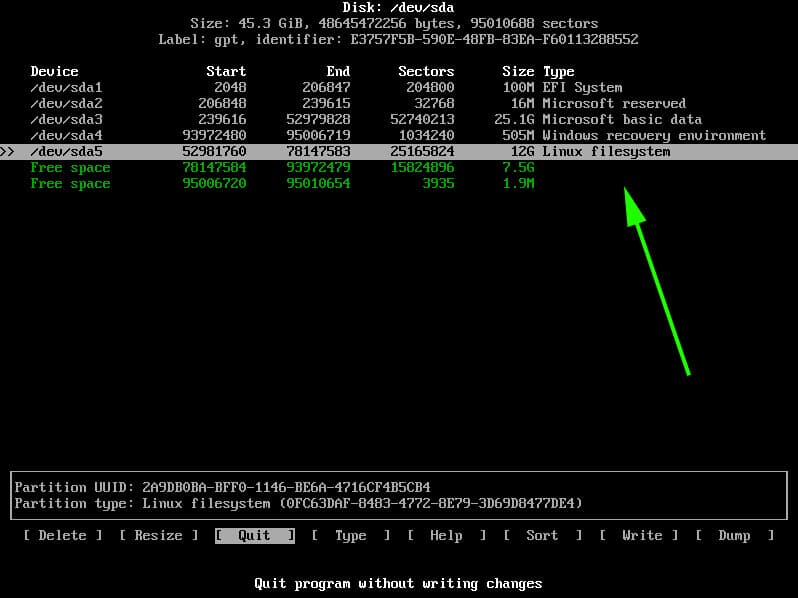
Next, we will create another partition for swap. Using the same method, we will proceed to the remaining free partition of 7G and select the ‘New’ option.
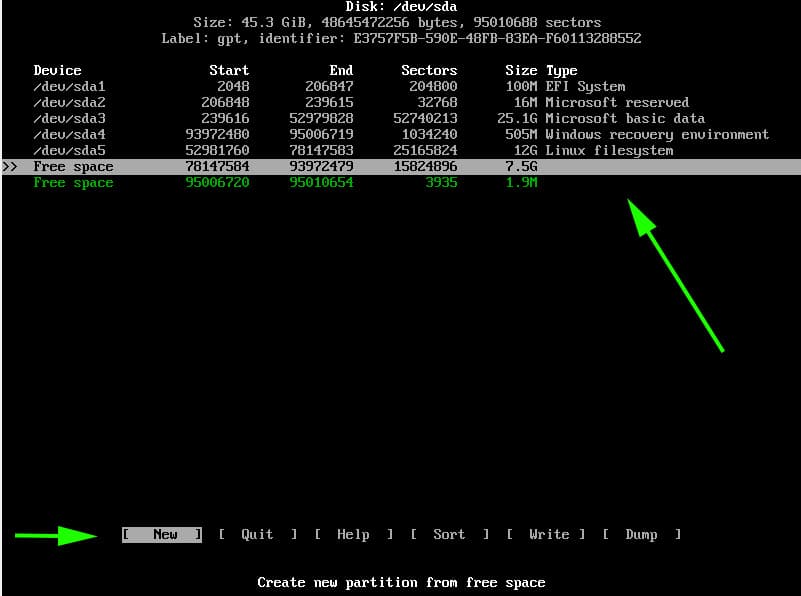
Specify the partition size as 4G
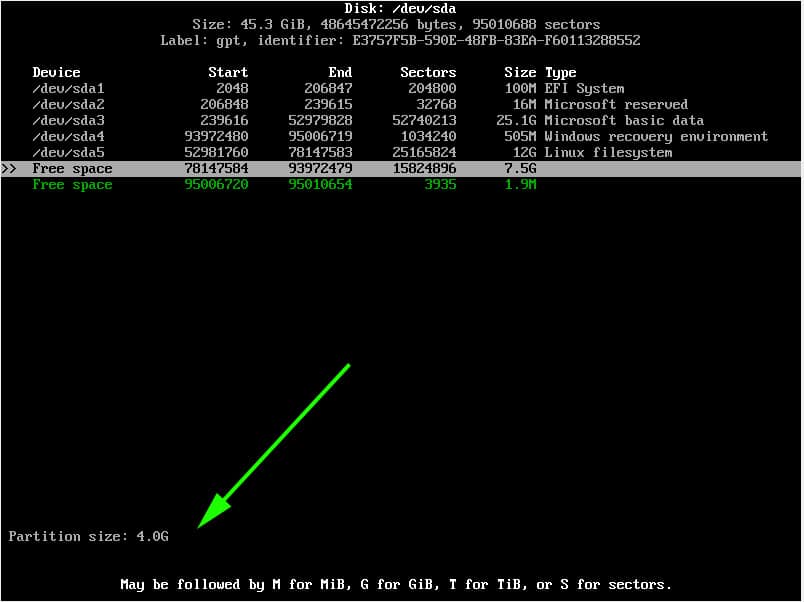
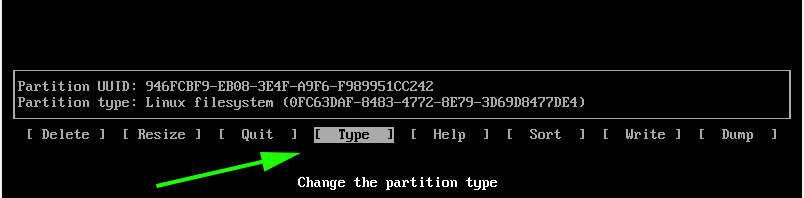
Since this will be our swap partition, we need to go the extra step and modify the partition type. Therefore, we will select the ‘type’ option and hit ENTER.
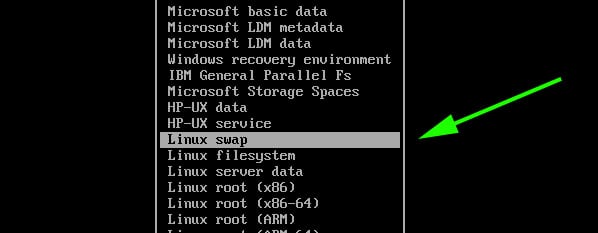
In the list that appears, select ‘Linux Swap’ and hit ENTER.
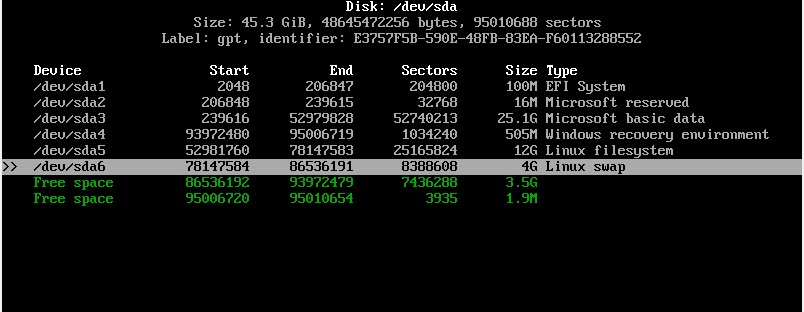
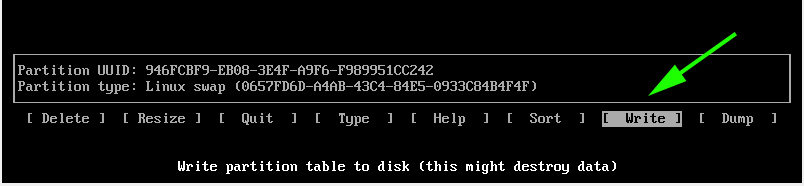
At this point, both the root and Linux swap partitions are created as seen from the partition table below.
To save the partitions, select the ‘Write’ option and hit ENTER.
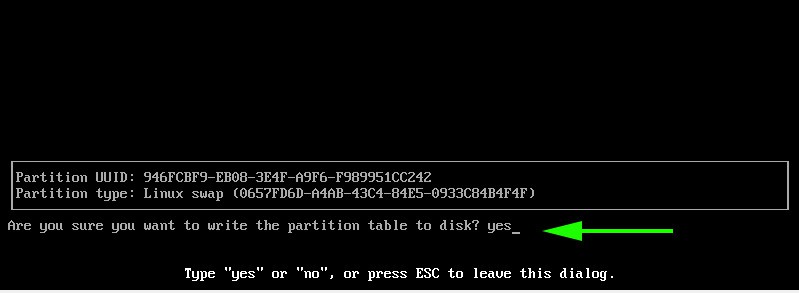
When prompted if you want to write the partition to disk, simply type ‘yes’ and hit ENTER.
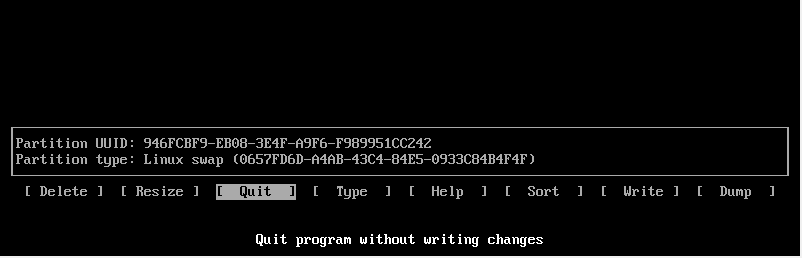
To exit cfdisk utility, select the ‘Quit’ option and hit ENTER.
Step 6) Format and mount the partitions
For the partitions to become usable and available for use, we need to format them and later mount them.
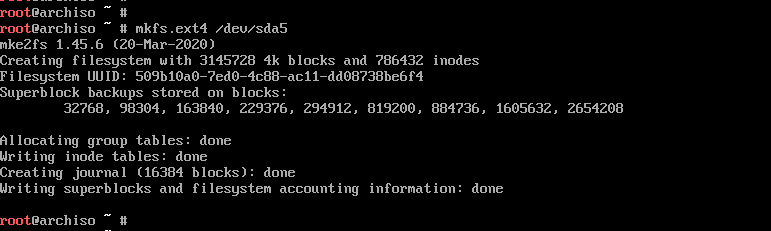
To format the root partition, run the command:
# mkfs.ext4 /dev/sda5
For swap partition, use the command:
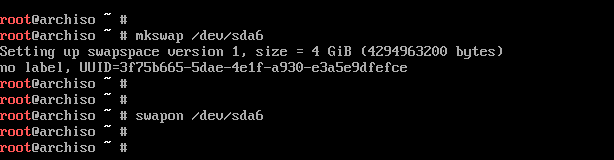
# mkswap /dev/sda6
Then enable swap using the swapon command shown:
# swapon /dev/sda6
Next, mount the root partition to the /mnt directory
# mount /dev/sda5 /mnt
Additionally, we are going to create a directory for the EFI partition on which we will mount the Windows EFI system which , in our case is located on the /dev/sda1 partition.
# mkdir /mnt/efi
Then mount the EFI partition on the EFI mount point.
# mount /dev/sda1 /mnt/efi

Step 7) Install base system and other required Linux firmware packages
Next, we are going to install the central packages for our Linux system including the base and Linux-firmware packages.
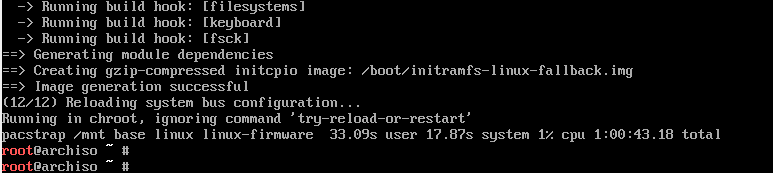
# pacstrap /mnt base linux linux-firmware

This is going to take quite some time. At this point, you can take a much-deserved break and head out for a stroll and grab some coffee. When the installation is successful, you should get the following output.
Step  Generate fstab file
 Generate fstab file
The next step will be to generate the fstab file on the /mnt directory as follows.
# genfstab -U /mnt >> /mnt/etc/fstab
Step 9) Setup timezone
After generating the ftab file, navigate to the newly created root filesystem
# arch-chroot /mnt
You can verify that you are in the root filesystem using the command as shown.
# ls
Time zone information is found in the /usr/share/zoneinfo/ directory. To set your timezone, create a symbolic link to the /etc/localtime
Path.
# ln -sf /usr/share/zoneinfo/US/Pacific /etc/localtime
Next, sync the hardware clock using the command:
# hwclock --systohc
Step 10) Set up locale
The locale determines the system language, currency format, numbering and date on your system. This information is contained in the /etc/locale.gen file. So, open the file using the vim editor.
# vim /etc/locale.gen
NOTE: To install the vim editor, use the pacman command as follows:
# pacman -Sy vim
Once you have accessed the file, scroll and uncomment your preferred locale. In this case, we have decided to go with en_US.UTF-8 UTF-8
Save and exit the file. Next generate the locale configuration using the command.
# locale-gen

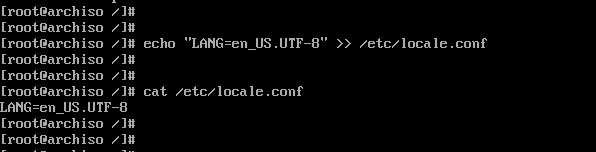
Next, create a new locale configuration file and save the locale as shown.
# echo "LANG=EN_US.UTF-8" > /etc/locale.conf
Step 11) Set up hostname
Next, we are going to configure the hostname of our Arch System. First, create a new file and specify the hostname as shown.
# echo linuxtechi > /etc/hostname

Afterwards, modify the /etc/hosts file as follows.
# echo "127.0.1.1 linuxtechi" >> /etc/hosts
Step 12) Install netctl Network Manager
To use the internet once the installation is complete and upon a reboot, we need to install a network manager. In this example we wil install the netctl network manager as follows
# pacman -Sy netctl
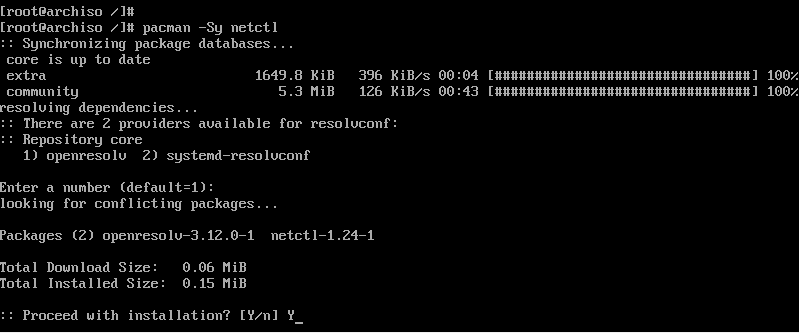
During the installation some optional dependencies for netctl are listed. We are going to install the following dependencies. These are:
- dhcpcd – For DHCP support
- wpa-supplicant – For wireless networking
- ifplugd – For wired connections networking
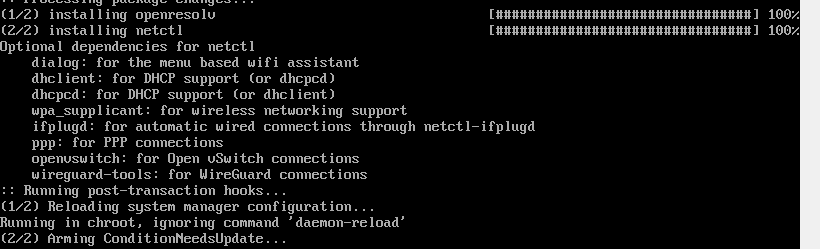
These dependencies will help you set up networking without a problem when you next boot in to Arch Linux.
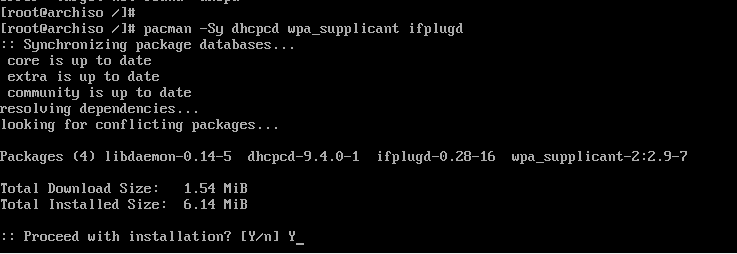
To install the optional dependencies, run the command below:
# pacman -Sy dhcpcd wpa-supplicant ifplugd
Step 13) Create a regular user
Next, we will create a regular user called linuxtechi and place him in the wheel group as follows.
# useradd -G wheel -m linuxtechi
The next step will be to assign a password to the user.
# passwd linuxtechi

Step 14) Install GRUB bootloader
We are getting close to the finish line. In this step, we will install the grub bootloader to enable us boot into our Arch Linux system upon a reboot.
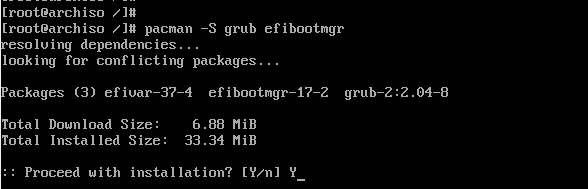
We will install the grub bootloader package alongside the efi boot manager package since we are using the UEFI mode.
# pacman -S grub efibootmgr
Next, install the os-prober package which will enable Arch Linux to detect the Windows operating system.
# pacman -S os-prober

Then install grub on the EFI directory as shown.
# grub-install --target=x86_64-efi --efi-directory=/efi --bootloader-id=GRUB

And install a grub configuration file as shown.
# grub-mkconfig -o /boot/grub/grub.cfg
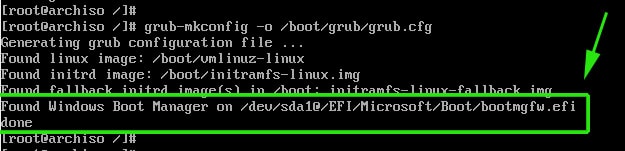
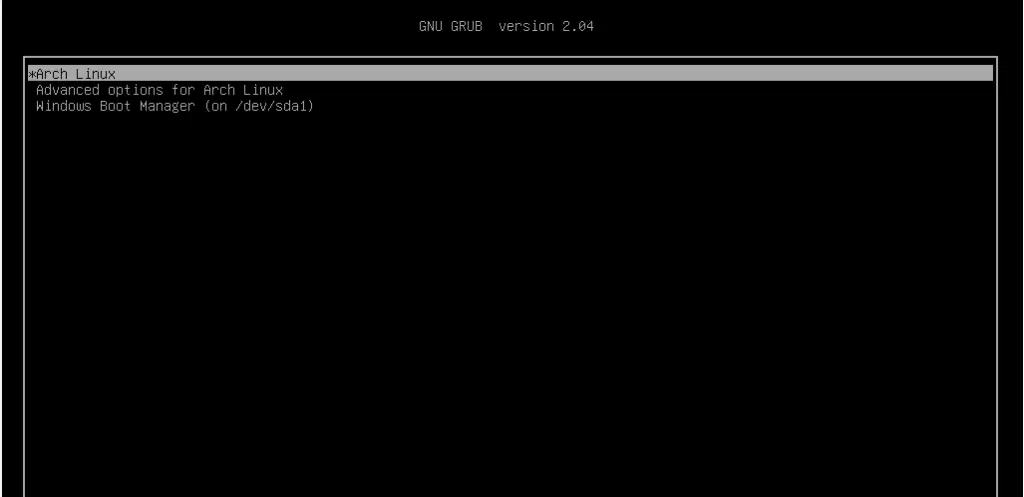
The last line is an indication that Arch has detected the presence of Windows Boot manager on /dev/sda1 partition. Perfect!
The finally, set a password for the root user as shown.
# passwd

Then exit and reboot your system.
# exit
# reboot
Step 15) Boot into Arch Linux
When booting, the GRUB bootloader will display various options including booting into Arch Linux, which is the first option, and also booting into Windows which is the last option in my case.
Log in as your regular user as shown

Step 16) Post Installation tasks
One of the things I noted when I logged in is that I do not have any internet connection. This is an issue caused by the default dhcp profile settings which need to be modified to accommodate the network interface attached to the Arch Linux system.
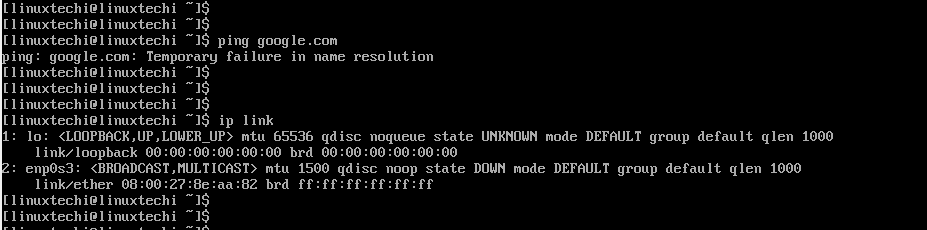
To find the interfaces attached run the command:
$ ip link
The output confirms that our network interface is enp0s3
We need to modify the ethernet-dhcp file in the /etc/netctl/examples/ path and edit out network interface.
But first, lets copy the file to the /etc/netctl directory.
Switch to the root user
# su
Copy the ethernet-dhcp file to the /etc/netctl directory.
# cp /etc/netctl/examples/ethernet-dhcp /etc/netctl/custom-dhcp-profile
Next, navigate to the /etc/netctl directory.
# cd /etc/netctl
Use the vim editor to edit the file.
# vim custom-dhcp-profile
The interface attribute is set to eth0.
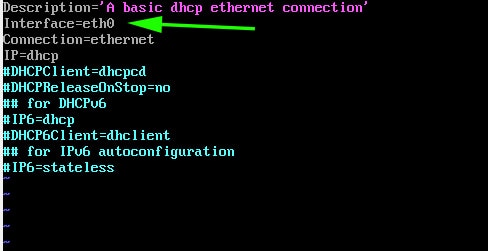
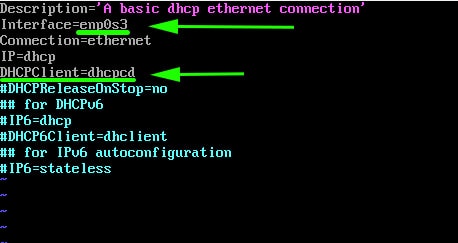
However, as we saw earlier, our network interface is enp0s3. Therefore, modify it to enp0s3. Additionally, uncomment the line starting with the DHCPClient parameter.
DHCPClient=dhcpcd
This enables the system to accept IP addresses using the dhcp service.
Save and exit the configuration file. Next, enable the custom dhcp profile.
# netctl enable custom-dhcp-profile

And finally enable the dhcp service.
# systemctl enable dhcpcd.service

Your interface should now pick an IP address from the router and you should have an internet connection.
You can install an X windows system as shown,
$ sudo pacman -S xorg xorg-server
Then install a display manager. For example, to install GNOME, run:
$ sudo pacman -S gnome
Then start and enable gdm service
$ sudo systemctl start gdm
$ sudo systemctl enable gdm
This brings us to the end of this lengthy topic. Hopefully, you are now in a position to Dual boot Arch Linux with Windows on UEFI system.
Read Also : How to Create and Configure Sudo User on Arch Linux
Dual boot with Windows (BIOS/MBR) — Archlinux
Simple instructions to install Arch Linux alongside Windows (Legacy-BIOS/MBR). Last update: 16/06/18.
Full documentation: Wiki
Windows UEFI vs BIOS
According to the ArchWiki:
The best way to detect the boot mode of Windows is to do the following:
- Boot into Windows
- Press Win key and ‘R’ to start the Run dialog
- In the Run dialog type «msinfo32» and press Enter
- In the System Information windows, select System Summary on the left and check the value of BIOS mode item on the right
- If the value is UEFI, Windows boots in UEFI/GPT mode. If the value is Legacy, Windows boots in BIOS/MBR mode.
Pre-installation
Windows setup
Partition
- Within the console (
Win + R) go toDisk Managementby typing: - Right click the partition you would like to expand and then choose
Extend Volume(e.g. D partition).
Fast-boot
-
Open
Power options. -
“Choose what the power buttons do”.
-
«Change settings that are currently unavailable.”
-
Under “Shutdown settings” make sure “Turn on fast startup” is disabled.
Boot usb
-
Enter
BIOS(F1, F2 or F10 during boot sequence). -
Give a USB device boot sequence priority over the hard drive
Linux setup
Network connection
-
If not using an ethernet conexion:
Pick network, enter password.
Verify it’s working by using [ping](https://en.wikipedia.org/wiki/Ping_(networking_utility):
-
Update the system clock
$ timedatectl set-ntp trueTo verify use
timedatectl status.
Installation
Partition the disks
-
Identify the disks (e.g.
/dev/sda) with fdisk:As you already have installed Windows, the output should look something like this:
Disk /dev/sda: 931.5 GiB, 1000204886016 bytes, 1953525168 sectors
Units: sectors of 1 * 512 = 512 bytes
Sector size (logical/physical): 512 bytes / 4096 bytes
I/O size (minimum/optimal): 4096 bytes / 4096 bytes
Disklabel type: dos
Disk identifier: 0xd275cc93

Device     Boot      Start        End   Sectors   Size Id Type
/dev/sda1  *          2048    1026047   1024000   500M  7 HPFS/NTFS/exFAT
/dev/sda2          1026048  437999615 436973568 208.4G  7 HPFS/NTFS/exFAT
/dev/sda3        437999616 1401948159 963948544 459.7G  7 HPFS/NTFS/exFAT
/dev/sda4       1401948160 1953525167 551577008   263G  5 Unallocated
We are going to unallocated partition (i.e.
/dev/sda4) to install Linux. -
Enter the disk
/dev/sda:With this we will enter
fdisk‘s command prompt.We will install Linux in 2 partitions (
rootandhome). To do so, we will make theTypeof the unallocated partitionExtended(source):$ Command (m for help): nSelect
Extendedpartition type. For the fist and last sector enter the default.Create the
rootpartition (ncommand). Partition type: Primary. First sector: default. Last sector: +XXXG (i.e. +63G).Create the
homepartition. Partition type: Primary. First sector: default. Last sector: default.To finalize, enter
wto write the changes.After
fdisk -l, the output should look something like this:Device Boot Start End Sectors Size Id Type /dev/sda1 * 2048 1026047 1024000 500M 7 HPFS/NTFS/exFAT /dev/sda2 1026048 437999615 436973568 208.4G 7 HPFS/NTFS/exFAT /dev/sda3 437999616 1401948159 963948544 459.7G 7 HPFS/NTFS/exFAT /dev/sda4 1401948160 1953525167 551577008 263G 5 Extended /dev/sda5 1401950208 1534070783 132120576 63G 83 Linux /dev/sda6 1534072832 1953525167 419452336 200G 83 Linux
Format the partitions
- Format both partitions to
ext4:
Mount the partitions
- We will mount
/dev/sda5to/mntand/dev/sda6to/mnt/home:We need to create the directory
/homefirst:$ mount /dev/sda6 /mnt/homeMount them all with
mount.
Install the base packages
- Use the pacstrap script to install the basic configuration:
Configure the system
- Generate the fstab. According to the wiki:
The fstab file can be used to define how disk partitions, various other block devices, or remote filesystems should be mounted into the filesystem.
```
$ genfstab -U /mnt >> /mnt/etc/fstab
```
Look at it:
```
$ cat /mnt/etc/fstab
```
-
Use
arch-chrootto enter/mntand change its privileges to root: -
Install packages using the pacman command.
$ pacman -S grub-bios linux-headers linux-lts linux-lts-headersThe
linux-lts(long term support) packages are optional. -
OPTIONAL Install these packages for wireless-card (source):
$ pacman -S dialog network-manager-applet networkmanager networkmanager-openvpn wireless_tools wpa_supplicant wpa_actiond -
Recreate the initramfs image (already done with
pacstrap):If you installed
linux-lts, run the previous command again now using the lts version. -
Uncomment localizations (i.e. en_US.UTF-8 UTF-8) in
/etc/locale.gen(usenano). Generate them with: -
Set the root password with paswd.
Grub configuration
-
Run the following command:
# grub-install --target=i386-pc --recheck /dev/sdXwhere
/dev/sdXis the partitioned disk where grub is to be installed (e.g./dev/sdaand not partition/dev/sda5). -
In the file
/etc/grub.d/40_custom(or/boot/grub/custom.cfg) copy the following (for Windows Vista/7/8/8.1/10):if [ "${grub_platform}" == "pc" ]; then menuentry "Microsoft Windows Vista/7/8/8.1/10 BIOS/MBR" { insmod part_msdos insmod ntfs insmod search_fs_uuid insmod ntldr search --fs-uuid --set=root --hint-bios=hd0,msdos1 --hint-efi=hd0,msdos1 --hint-baremetal=ahci0,msdos1 XXXXXXXXXXXXXXXX ntldr /bootmgr } fiwhere XXXXXXXXXXXXXXXX is the filesystem UUID which can be found with command
lsblk --fs(in most cases this corresponds to the first partition, i.e./dev/sda1). -
Copy the locale:
$ cp /usr/share/locale/en\@quot/LC_MESSAGES/grub.mo /boot/grub/locale/en.mo -
Generate the main configuration file:
$ grub-mkconfig -o /boot/grub/grub.cfg
Swap file
-
Create the swapfile:
$ fallocate -l XG /swapfilewhere X (e.g. 2G, 4G) is the size of the file in gigabytes.
-
Change file permissions so that only the owner has privileges (using chmod):
-
Swap format:
Add this file to
/etc/fstab:$ echo '/swapfile none swap sw 0 0' | tee -a /etc/fstab -
Exit arch-chroot with
exit. Unmount all devices withumount -a. Reboot (remove the USB).
Networking (wifi)
-
Check if you have an IP address with
ip:If not, check the status of
NetworkManagerusing systemctl:$ systemctl status NetworkManagerTo enable/start it use the following command:
$ systemctl XXXXX NetworkManagerWhere XXXXX can be start or enable.
-
Having installed
NetworkManagerwe can usenmcli, a command line interface which we will use to connect to wifi.To show a list of UUID’s:
Choose your corresponding wifi and connect using:
$ nmcli dev wifi connect <SSID> password <PASSWORD>Verify you have an IP address with
ip a.
Users
- Add an user with useradd:
Verify a user home directory has been created:
Add a password to the user with
passwd <USER>.
GUI
-
Install the display server Xorg:
-
Check which video driver you have with
lspci. For example:00:00.0 Host bridge: Intel Corporation Xeon E3-1200 v3/4th Gen Core Processor DRAM Controller (rev 06) 00:01.0 PCI bridge: Intel Corporation Xeon E3-1200 v3/4th Gen Core Processor PCI Express x16 Controller (rev 06) 00:02.0 VGA compatible controller: Intel Corporation 4th Gen Core Processor Integrated Graphics Controller (rev 06) 00:03.0 Audio device: Intel Corporation Xeon E3-1200 v3/4th Gen Core Processor HD Audio Controller (rev 06) 00:14.0 USB controller: Intel Corporation 8 Series/C220 Series Chipset Family USB xHCI (rev 04) 00:16.0 Communication controller: Intel Corporation 8 Series/C220 Series Chipset Family MEI Controller #1 (rev 04) 00:1a.0 USB controller: Intel Corporation 8 Series/C220 Series Chipset Family USB EHCI #2 (rev 04) 00:1b.0 Audio device: Intel Corporation 8 Series/C220 Series Chipset High Definition Audio Controller (rev 04) 00:1c.0 PCI bridge: Intel Corporation 8 Series/C220 Series Chipset Family PCI Express Root Port #1 (rev d4) 00:1c.2 PCI bridge: Intel Corporation 8 Series/C220 Series Chipset Family PCI Express Root Port #3 (rev d4) 00:1c.3 PCI bridge: Intel Corporation 8 Series/C220 Series Chipset Family PCI Express Root Port #4 (rev d4) 00:1d.0 USB controller: Intel Corporation 8 Series/C220 Series Chipset Family USB EHCI #1 (rev 04) 00:1f.0 ISA bridge: Intel Corporation HM86 Express LPC Controller (rev 04) 00:1f.2 SATA controller: Intel Corporation 8 Series/C220 Series Chipset Family 6-port SATA Controller 1 [AHCI mode] (rev 04) 00:1f.3 SMBus: Intel Corporation 8 Series/C220 Series Chipset Family SMBus Controller (rev 04) 01:00.0 3D controller: NVIDIA Corporation GK208M [GeForce GT 740M] (rev a1) 03:00.0 Network controller: Qualcomm Atheros QCA9565 / AR9565 Wireless Network Adapter (rev 01) 04:00.0 Ethernet controller: Qualcomm Atheros QCA8171 Gigabit Ethernet (rev 10)Check which video driver (
Inter,NVIDIA,VirtualBox, etc.) you have underVGA compatible controlleror3D controller. If you have both, I recommend installing the Intel driver.Intel:
$ pacman -S xf86-video-intel libgl mesaNVIDIA:
$ pacman -S nvidia nvidia-lts nvidia-libgl mesaVBOX:
$ pacman -S virtualbox-guest-utils virtualbox-guest-modules- arch mesa(Remember to enable the
vboxservice.serviceservice withsystemctl enable). -
Now its time to install a display manager. In this example we will install SDDM.
Enable the service (but not start it yet):
-
We will install the desktop environment. I prefer KDE:
If you want the most basic installation, install
plasmainstead (remember to install some terminal likekonsole). -
REBOOT!
Установка Arch Linux рядом с Windows 10. UEFI.systemd-boot (без GRUB)
Предлагаю посмотреть на базовую установку Arch Linux 64 рядом с Windows UEFI с использованием менеджера загрузки systemd-boot
Исходные данные
Комп ASUS K53BR x64 с UEFI
Графика AMD
Оператива 4 Gb
Винт 465,8 Gb с системой разделов GPT
Установлена Windows 10 64-бит
Сеть WIFI
Требуется
Установка базовой системы Arch Linux 64-bit рядом с Windows 10. UEFI.
Использование менеджера загрузки systemd-boot.
Запускаемся с USB в режиме EFI
Проверяем режим EFI
efivar -l
Должны вывестись список строк.

Подключаем интернет
wifi-menu
Выбираем сеть, вводим пароль.
Проверяем наличие интернет
ping ya.ru
Должны начать выводиться списки загружаемых пакетов
Прерываем и выходим из ping командой ctrl+c

Синхронизация системных часов
timedatectl set-ntp true
Посмотрим наши старые загрузочные записи (если есть)
efibootmgr

1. Видим, что загрузились через USB UEFI
2. Загрузчик Windows
3-5. Записи прочих загрузчиков. Если в свое время устанавливались другие дистрибутивы в раздел EFI, то таких записей может быть несколько. В любом случае визуально все можно понять.
Удаляем не нужные записи командой efibootmgr -b x -B, где x — номер записи в списке по последней цифре. В моем случае это записи 3,4,5.
efibootmgr -b 0 -B
efibootmgr -b 2 -B
efibootmgr -b 5 -B

Просмотрим разделы Windows
Видим, что раздел EFI находится на /dev/sda2. Сюда будем подключать наш загрузчик.
/dev/sda3 и /dev/sda4 — это, соответственно, диски C и D на Windows.

Разметка диска
cfdisk
На свободном месте добавляем разделы
Для root
new 20G type system linux подтверждаем write
Для swap
new 4.8G type linux swap подтверждаем write
Раздел /dev/sda2 с EFI не трогаем, раздел под /home я не создавал, так как пользоваться им практически не придется. Вся инфа лежит на windows разделе. Размер для root и swap, каждый выбирает на свое усмотрение.
Выходим из cfdisk через quit

Получaем разделы
root — sda5
boot — sda2
swap — sda6
Форматирование и подключение
#root
mkfs.ext4 /dev/sda5 -L «ARCH»
mount /dev/sda5 /mnt
#boot
mkdir -p /mnt/boot
mount /dev/sda2 /mnt/boot
#swap
mkswap /dev/sda6
swapon /dev/sda6
Просматриваем и проверяем разделы и подключение
cfdisk

Выходим из cfdisk
Обновляем пакеты
pacman -Syy
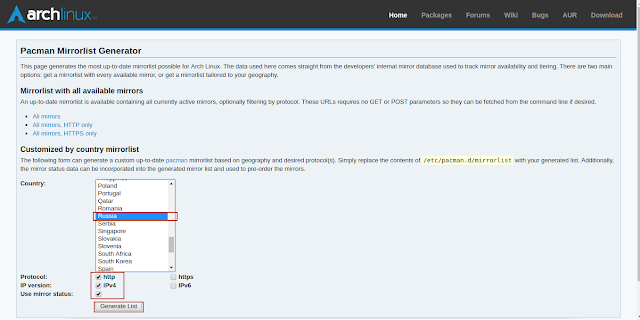
При обновлении пакетов видна скорость скачивания с сервера. Если устраивает,то следующий пункт можно пропустить.
![]()
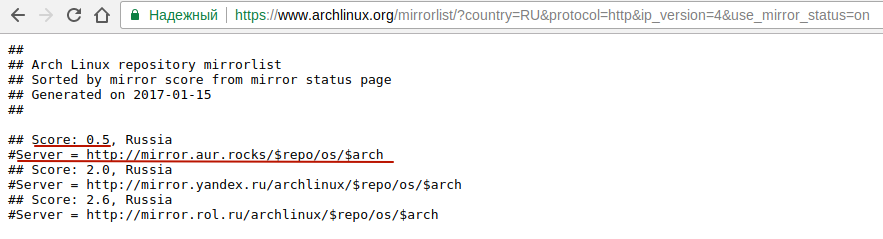
Настройка сервера загрузки, как пример, для российского сервера.
nano /etc/pacman.d/mirrorlist
Вверху прописываем
Записываем изменения командой ctrl+o
Подтверждаем enter Выходим из редактора ctrl+x
Устанавливаем базовую систему и пакет для будущего использования AUR.
pacstrap /mnt base linux linux-firmware base-devel
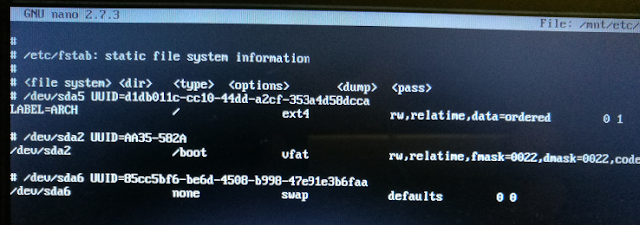
Генерируем fstab
genfstab -U /mnt >> /mnt/etc/fstab
Просмотрим созданный fstab
nano /mnt/etc/fstab
Переходим в систему
arch-chroot /mnt
Устанавливаем редактор nano
pacman -S nano
Настроим локаль, время, имя компьютера
loadkeys ru
setfont cyr-sun16
nano /etc/locale.gen
Здесь раскомментирум строки
en_US.UTF-8 UTF-8
ru_RU.UTF-8 UTF-8
Записываем изменения командой ctrl+o
Подтверждаем enter
Выходим из редактора ctrl+x
locale-gen
nano /etc/locale.conf
Прописываем строку
LANG=ru_RU.UTF-8
Записываем изменения командой ctrl+o
Подтверждаем enter
Выходим из редактора ctrl+x
export LANG=ru_RU.UTF-8
nano /etc/vconsole.conf
Прописываем строки
KEYMAP=ru
FONT=cyr-sun16
Записываем изменения командой ctrl+o
Подтверждаем enter
Выходим из редактора ctrl+x
Настраиваем зону и системное время, как пример, для Россия Москва
ln -sf /usr/share/zoneinfo/Europe/Moscow /etc/localtime
hwclock —systohc
Настраиваем имя компьютера
nano /etc/hostname
Прописываем
userhost — имя вашего компьютера
Записываем изменения командой ctrl+o
Подтверждаем enter
Выходим из редактора ctrl+x
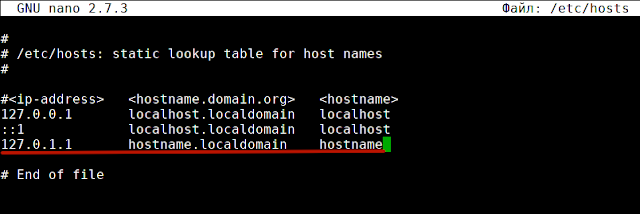
nano /etc/hosts
Прописываем строчку
127.0.1.1 userhost.localdomain userhost
Записываем изменения командой ctrl+o
Подтверждаем enter
Выходим из редактора ctrl+x
Устанавливаем пароль для root
passwd
Здесь же добавляю нового пользователя
useradd -G wheel -s /bin/bash -m username
где username — ваше имя пользователя
Открываем права для нового пользователя
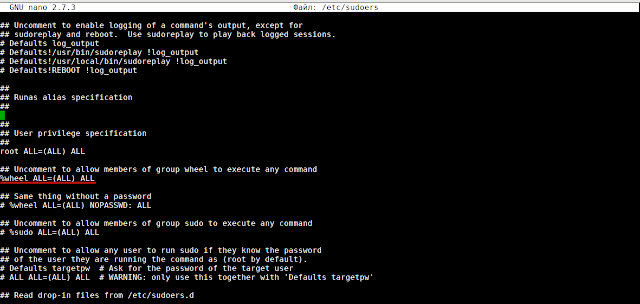
nano /etc/sudoers
Раскомментируем строку %wheel ALL=(ALL) ALL
Записываем изменения командой ctrl+o
Подтверждаем enter
Выходим из редактора ctrl+x
Устанавливаем пароль для нового пользователя
passwd username
Устанавливаем дополнительные пакеты (и пакеты, которые вы считаете нужными)
pacman -S efibootmgr iw wpa_supplicant dialog netctl dhcpcd
Для работы с дисками
pacman -S ntfs-3g mtools fuse2
Запускаем менеджер загрузки
bootctl install
Будут созданы необходимые директории и точка входа загрузчика

Настраиваем менеджер загрузки
nano /boot/loader/loader.conf
Закомментируем все строки, добавим свои
default arch
timeout 5
editor 1
Инфа из WIKI

Получаем

Создаем файлы конфигурации
Для пользователей процессоров Intel нужно установить дополнительный пакет
pacman -S intel-ucode
nano /boot/loader/entries/arch.conf
title Arch Linux
linux /vmlinuz-linux
# initrd /intel-ucode.img # раскомментировать для пользователей Intel
initrd /initramfs-linux.img
options root=/dev/sda5 rw
Здесь sda5 — это наш примонтированный root раздел
Просмотрим последовательность при запуске системы
efibootmgr
Установим выбранную последовательность загрузки
efibootmgr -o 0,3,4,1 # в моем случае Arch будет первым

Выходим
exit
Отмонтируем диски
umount -R /mnt
Перегружаемся
reboot

Базовая система установлена. Остальное устанавливаем на свой вкус и цвет.
…далее
Arch «будет тем, что вы из него сделаете»
Удачи!
Время на прочтение
3 мин
Количество просмотров 91K
Инструкция для новичков, о том, как сделать красивый dualboot windows и archlinux (и других ОС) через efi без grub и лишних заморочек.
Фото для привлечения внимания:
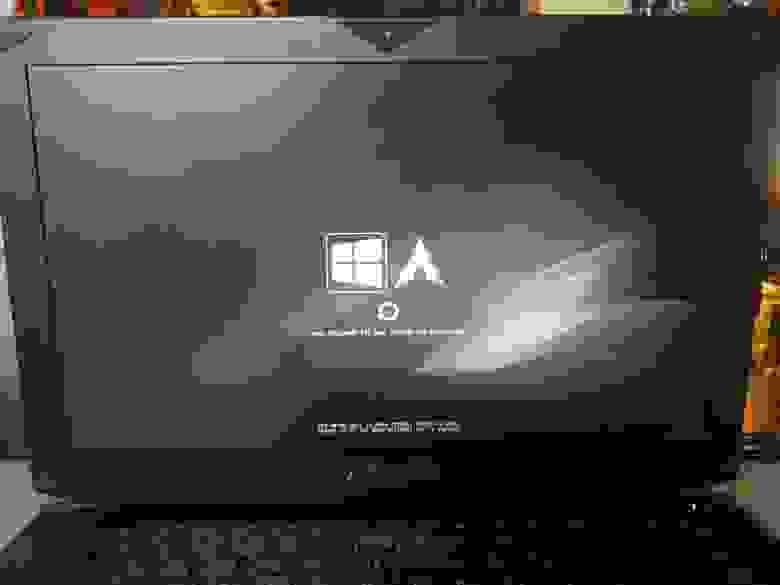
Можете посмотерть в google как это ещё может выглядеть.
Сразу оговорюсь.
Предполагается, что вы уже поставили windows и archlinux, понимаете как размечать диски и что куда монтировать и осталось вам только разобраться с загрузчиком. Если нет, то рекомендую посмотреть для начала вот это видео.
Я пробовал различные варианты, как описано тут, тут и тут и прочие выкрутасы с efibootmgr. Пытался добавлять опции прямо в «BIOSе» — ничего хорошего у меня не получилось, то рут раздел не находит то ещё что-то. Да и сам подход к переключению систем (жать Esc при включении ПК для выбора системы) меня не очень радовал.
Провозившись весь выходной, нашёл для себя простое и элегантное решение — пакет refind-efi (ArchWiki).
Если коротко, — достаточно установить этот пакет (pacman -S refind-efi) и выполнить refind-install, — всё.
В /boot/efi/EFI/ будет создан каталог refind и в опции загрузки добавлен новый пунк «rEFInd boot manager ».
Предупреждение
CodeRush в комментарии добавил важное замечание:
Добавлю к этой статье предупреждение: запись в NVRAM из ОС — достаточно опасная операция, которая может приводить к «кирпичу» на некоторых моделях ноутбуков с BIOSами на платформе Phoenix SCT. У автора BIOS на платформе AMI Aptio, с ним таких проблем нет.
Именно поэтому я настоятельно не рекомендую использовать на ноутбуках как саму efibootmgr, так и все, что ее вызывает, и устанавливать любые загрузчики вручную, либо заменяя имеющийся загрузчик по умолчанию (fs0:/EFI/BOOT/bootx64.efi), либо прописывая новый загрузчик из UEFI Shell командой bсfg boot add 0 fs0:/path/to/bootloader.efi «My Fancy Bootloader» — это намного безопаснее.
Всё что вы делаете, вы делаете на свой страх и риск!
Теперь подробнее об установке и конфигурировании
Для начала сверим конфигурации.
В моём случае это:
- Windows 8.1
- Arch Linux x86_64 Kernel Release: 3.14.4-1-ARCH
Вывод lsblk:
NAME   MAJ:MIN RM   SIZE RO TYPE MOUNTPOINT
sda      8:0    0 119.2G  0 disk
├─sda1   8:1    0   300M  0 part
├─sda2   8:2    0   100M  0 part /boot/efi
├─sda3   8:3    0   128M  0 part
├─sda4   8:4    0  59.1G  0 part
├─sda5   8:5    0     9G  0 part /
└─sda6   8:6    0    50G  0 part /home
fdisk /dev/sda
Device           Start          End   Size Type
/dev/sda1         2048       616447   300M Windows recovery environment
/dev/sda2       616448       821247   100M EFI System
/dev/sda3       821248      1083391   128M Microsoft reserved
/dev/sda4      1083392    125036543  59.1G Microsoft basic data
/dev/sda5    125036544    143910911     9G Linux filesystem
/dev/sda6    143910912    248768511    50G Linux filesystem
Раздел с типом «EFI System» созданный инсталятором windows, монтируем в /boot/efi/ ( /mnt/boot/efi/ ведь мы загрузились с liveiso верно?)
mkdir -p /mnt/boot/efi
mount /dev/sdaX /mnt/boot/efi
где X это номер вашего EFI раздела ( например mount /dev/sda2 /mnt/boot/efi ).
Далее перейдя в уже установленный arch ( arch-chroot /mnt/ ) устанавливаем сам refind:
pacman -S refind-efi
Если вдруг такой пакет не найден, поищите в yaourt:
yaourt refind
1 extra/refind-efi 0.7.9-1 [installed]
    Rod Smith's fork of rEFIt UEFI Boot Manager - built with Tianocore UDK libs
refind-install
и если не было ошибок
reboot
После перезагрузки можно поставить в «биосе» в настройках приоритета загрузки «rEFInd boot manager » на первое место.
И не забудьте отключить «Secure Boot».
Profit!
В каталоге /boot/efi/EFI создана дирректория refind. В ней есть refind.conf в котором можно установить время отображения списка ОС и настроить внешний вид.
Refind сам находит установленные ОС и определяет параметры их загрузки. Так же мне очень понравилось что если вставлена загрузочная флешка или диск они тоже появляются в списке.
Мне понравилась тема Next-Theme (вы можете подобрать что-то на свой вкус), положил её в /boot/efi/EFI/refind/next-theme и прописал в конфиге:
icons_dir next-theme/icons
banner next-theme/background_1200.png
Конфиг хорошо документирован и вопросов вызывать не должен.
Буду благодарен за замечания и дополнения.