Disclaimer: I am not a Windows or Microsoft fan, but I am a frequent Windows user and it’s the most common OS I found in the Enterprise everywhere. Therefore, I decided to try Apache Zeppelin on my Windows 10 laptop and share my experience with you. The behavior should be similar in other operating systems.
Introduction
It is not a secret that Apache Spark became a reference as a powerful cluster computing framework, especially useful for machine learning applications and big data processing. Applications could be written in several languages as Java, Scala, Python or R. Apache Zeppelin is a Web-based tool that tries to cover according to the official project Website all of our needs (Apache Zeppelin):
- Data ingestion
- Data discovery
- Data analytics
- Data visualization and collaboration
The interpreter concept is what makes Zeppelin powerful, because you can theoretically plug in any language/data-processing-backend. It provides built-in Spark integration, and that is what I have tested first.
Apache Zeppelin Download
You can download the latest release from this link: download
I downloaded the version 0.6.2 binary package with all interpreters.
Since this version, the Spark interpreter is compatible with Spark 2.0 and Scala 2.11
According to the documentation, it supports Oracle JDK 1.7 (I guess it should work with 1.8) and Mac OSX, Ubuntu 14.4, CentOS 6.X and Windows 7 pro SP1 (And according to my tests also with Windows 10 Home).
Too much bla bla bla, let’s get started.
Zeppelin Installation
After download open the file (I used 7 Zip) and extract it to a proper location (in my case just the c drive to avoid possible problems)
Set the JAVA_HOME system variable to your JDK bin folder.
Set the variable HADOOP_HOME to your Hadoop folder location. If you don’t have the HADOOP binaries you can download my binaries from here: Hadoop-2.7.1
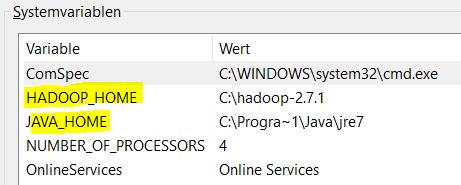
I am not really sure why Hadoop is needed if Zeppelin supposed to be autonomous but I guess Spark looks for the winutils.exe if you are using Windows. I posted about it in my previous post: Apache Spark Installation on Windows 10
This is the error I found in the Zeppelin logs (ZEPPELIN_DIR\logs –> there is a file for the server log and a separated file for each interpreter):

Zeppelin Configuration
There are several settings you can adjust. Basically, there are two main files in the ZEPPELIN_DIR\conf :
- zeppelin-env
- zeppelin-site.xml
In the first one you can configure some interpreter settings. In the second more aspects related to the Website, like for instance, the Zeppelin server port (I am using the 8080 but most probably yours is already used by another application)
If you don’t touch the zeppelin-env file, Zeppelin use the built-in Spark version, which it has been used for the results posted in this entry.
Start Zeppelin
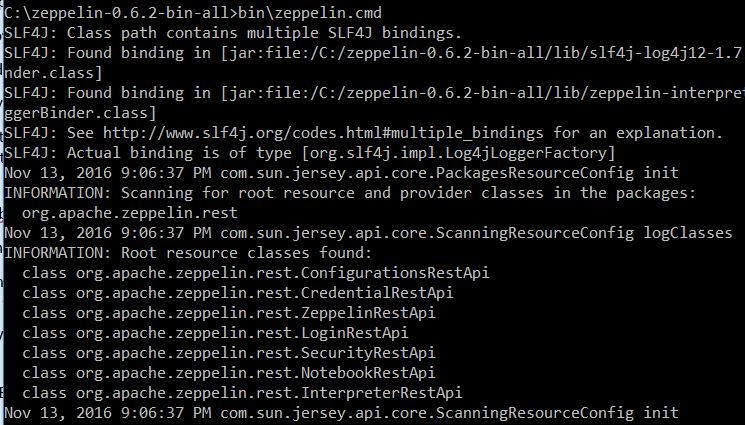
Open a command prompt and start Zeppelin executing the zeppelin.cmd in Drive:\ZEPELLIN_DIR\bin\zeppelin.cmd
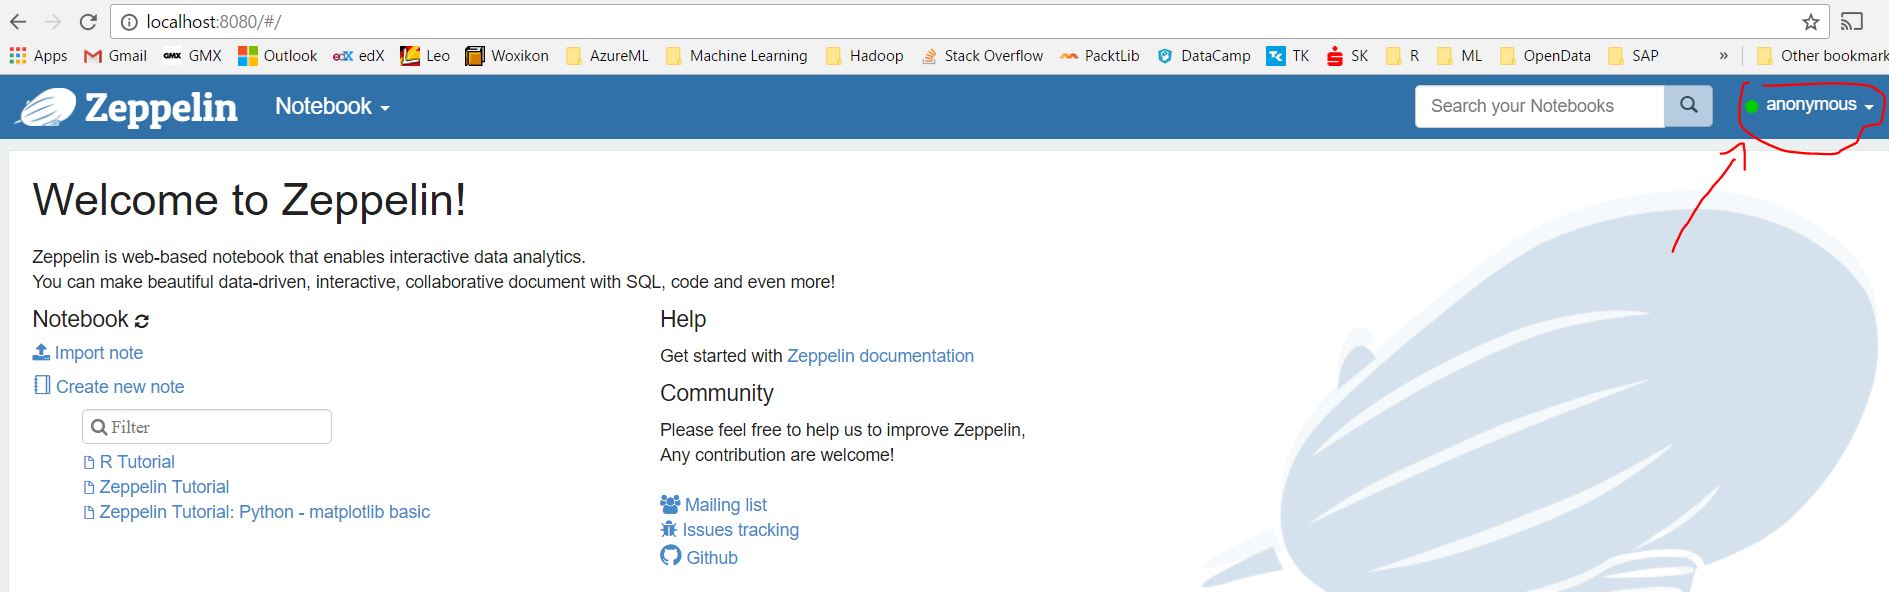
Then, open your favorite browser and navigate to localhost:8080 (or the one you set in the zeppelin-site.xml)
You should see the starting page. Verify that the indicator in the top-right-side of the windows is green, otherwise your server is down or is not running properly)
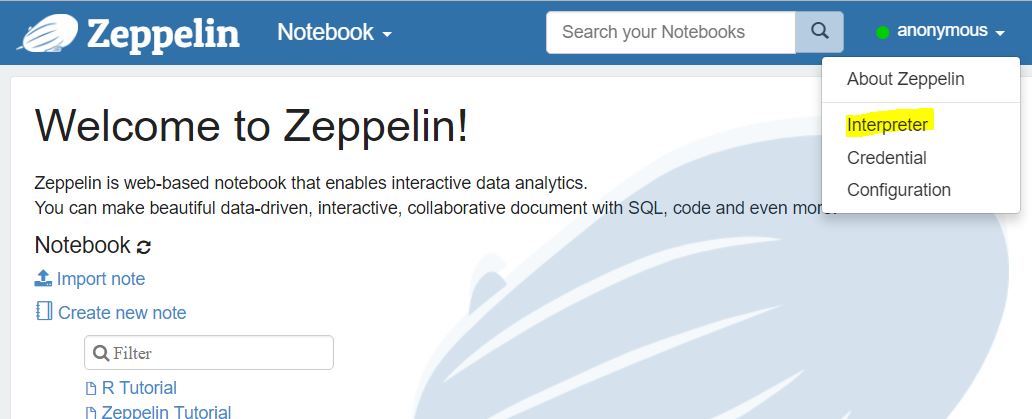
If you have not configured Hive, before start trying the tutorials included in the release, you should need to set the value of the zeppelin.spark.useHiveContext to false. Apart from the config files, Zeppelin has an interpreter configuration page. You can find it by clicking on your user “anonymous” –> Interpreter
Scroll-down to the bottom where you’ll find the Spark config values:
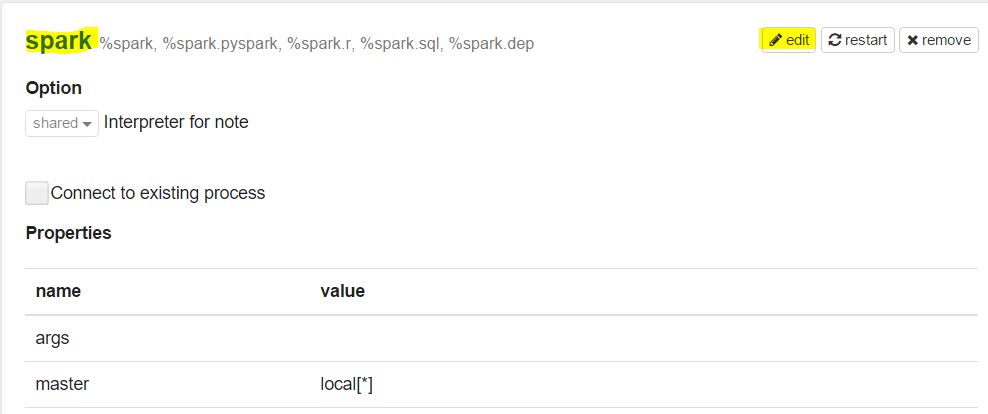
Press on the edit button and change the value to false in order to use the SQL context instead of Hive.
Press the Save button to persist the change:

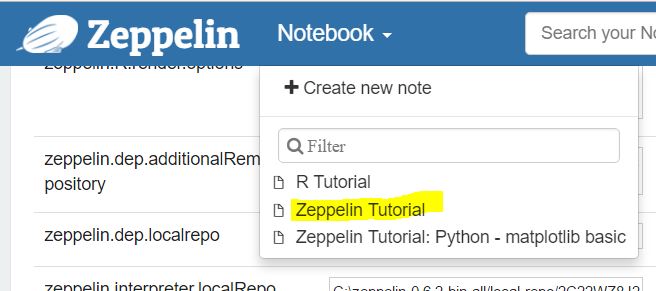
Now let’s try the Zeppelin Tutorial
From the Notebook menu click on the Zeppelin Tutorial link:
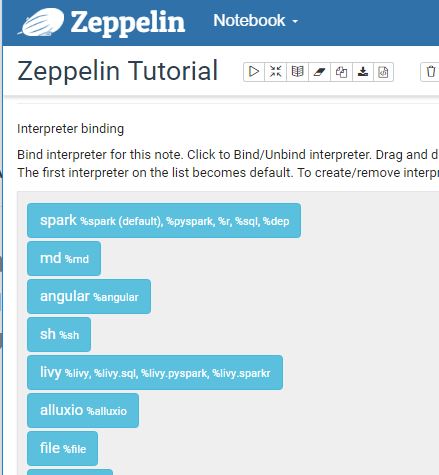
The first time you open it, Zeppelin ask you to set the Interpreter bindings:
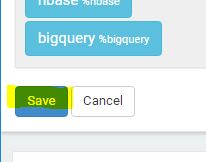
Just scroll-down and save them:
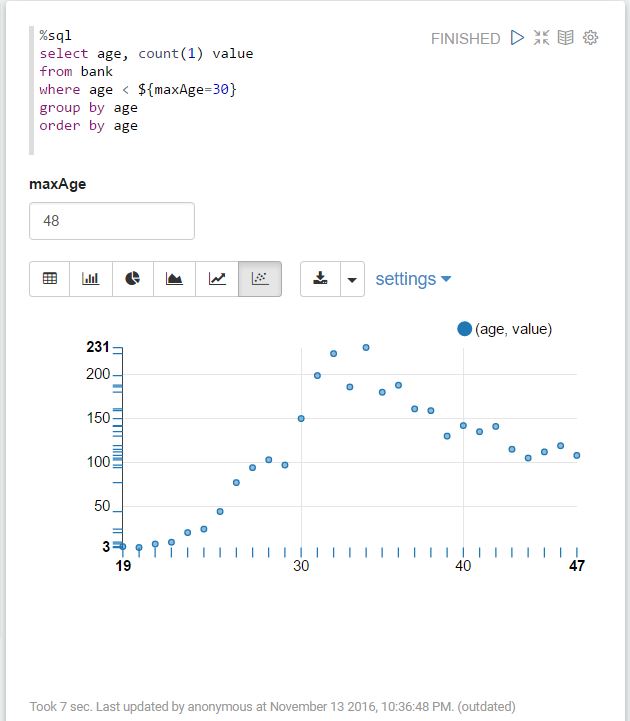
Some notes are presented with different layouts. For more about the display system visit the documentation online.
Other possible annoying error
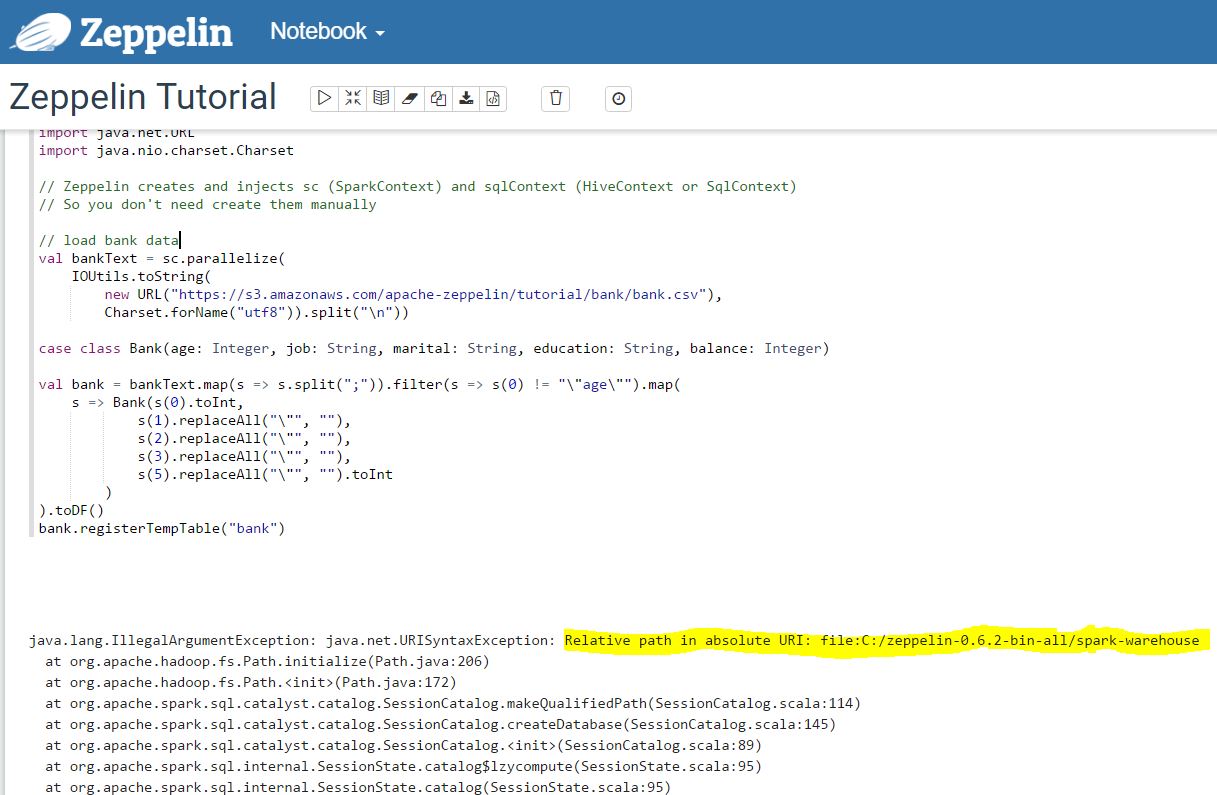
I was getting the following error when tried to run some notes in the Zeppelin Tutorial:
I found a suggested solution in the following stack overflow question: link
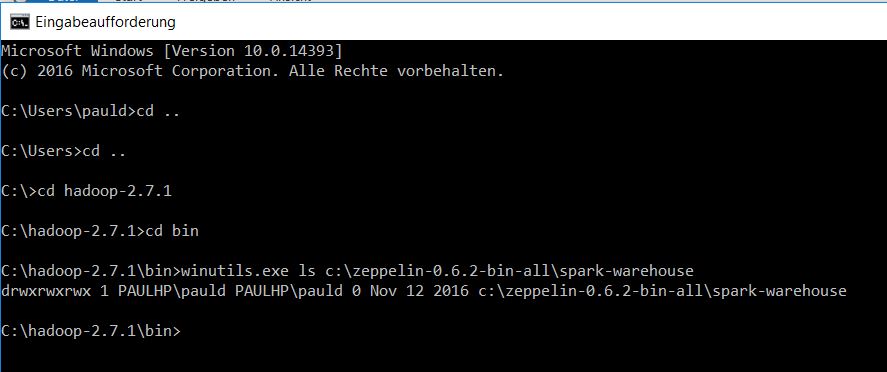
An URI syntax exception trying to find the folder spark-warehouse in the Zeppelin folder. I struggled a little bit with that. The folder was not created in my Zeppelin directory, I thought it was a permissions problem, so I created it manually and assigned 777 permissions.
It still failed. In the link above a forum user suggested to use triple slashes to define the proper path file:///C:/zeppelin-0.6.2-bin-all/spark-warehouse
But I still don’t know where to place this configuration. I couldn´t do it in the spark shell, also not while creating a spark session (zeppelin does it for me) and the conf/spark-defaults.conf doesn´t seem to be a good idea for Zeppelin because I was using the spark built-in version.
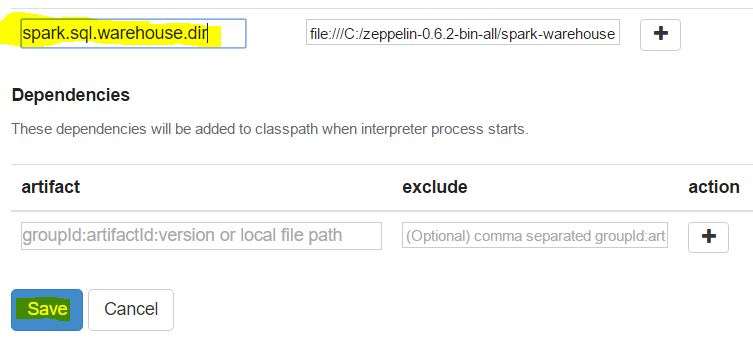
Finally, I remembered that is possible to add additional spark setting in the interpreter configuration page and I just navigated there and created it:
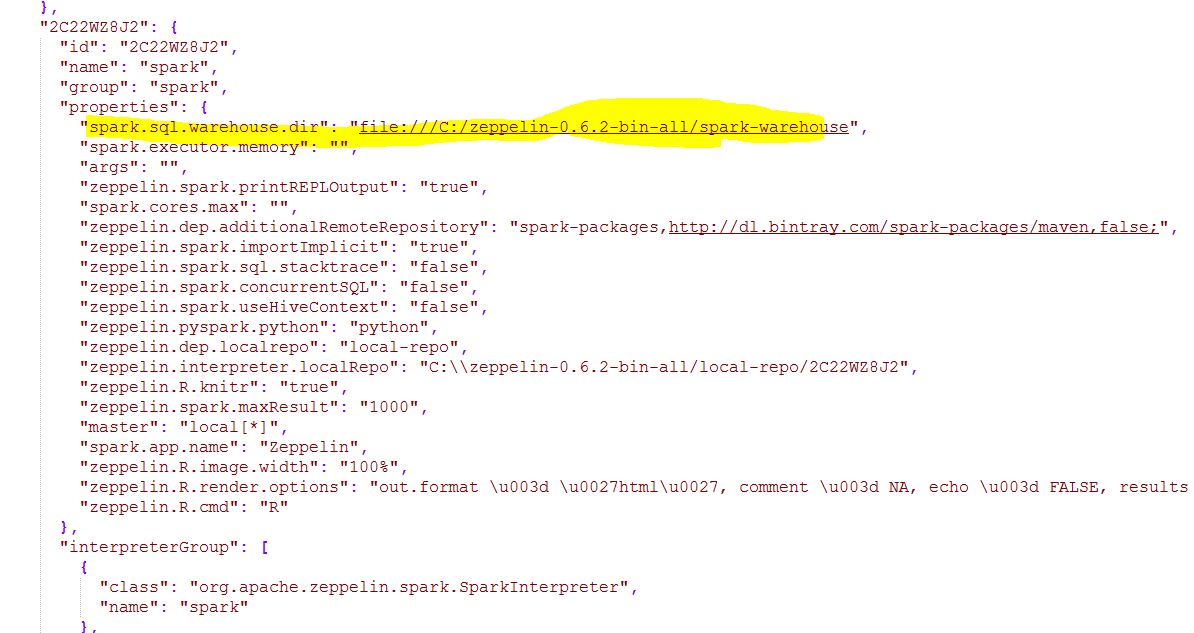
Just as additional info, you can verify the settings saved in this page in the file Drive:\ZEPELLIN_DIR\conf\interpreter.json
After these steps, I was able to run all of the notes from the Zeppelin tutorials.
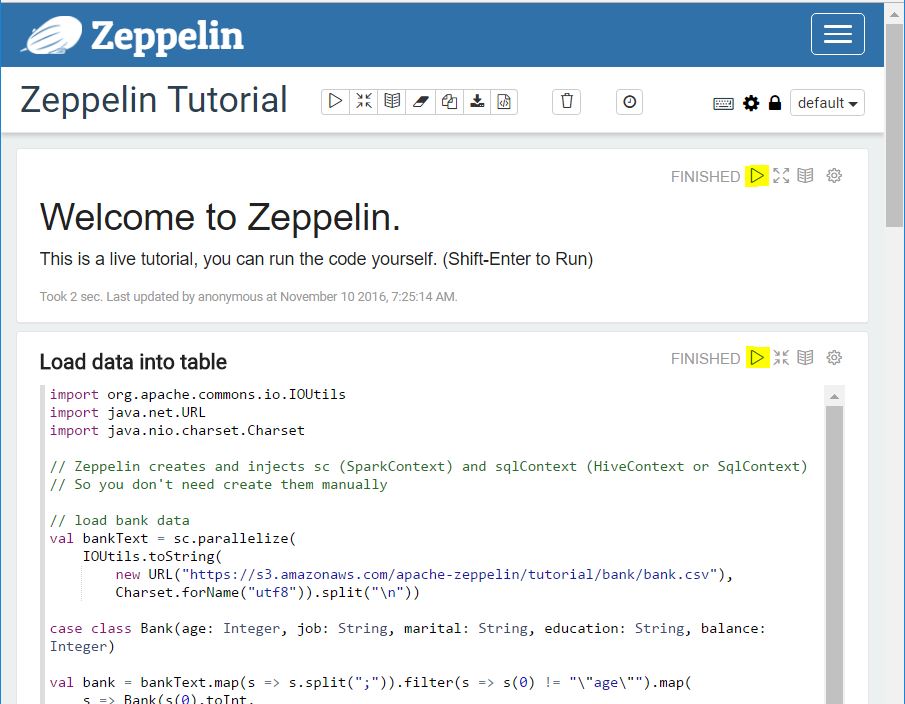
Note that the layout from the tutorial is telling you more or less the order in which you have to execute the notes. The note “Load data into table” must be executed before you play the notes below. I guess that is the reason it spans over the whole width of the page, because it must be executed before you visualize or analyze the data, while the notes below could be executed in parallel, or in any order. I mean, this layout is not a must but it helps to keep an execution order.
I hope this helps you on your way to learn Zeppelin!
This page summarizes the steps to install Zeppelin version 0.7.3 on Windows 10 via Windows Subsystem for Linux (WSL).
Version 0.8.1
When running Zeppelin in Ubuntu, the server may pick up one host address that is not accessible, for example 169.254.148.100, and the the remote interpreter connection cannot be established successfully. The logic has changed in this version and I cannot find a fix yet without change the source code.
https://github.com/apache/zeppelin/blob/733bed591bdb6a06864331540364254f1ea1ff20/zeppelin-interpreter/src/main/java/org/apache/zeppelin/interpreter/remote/RemoteInterpreterUtils.java
Thus, the page is still using version 0.7.3 to demo.
Prerequisites
Follow either of the following pages to install WSL in a system or non-system drive on your Windows 10.
- Install Windows Subsystem for Linux on a Non-System Drive
- Install Hadoop 3.2.0 on Windows 10 using Windows Subsystem for Linux (WSL)
I also recommend you to install Hadoop 3.2.0 on your WSL following the second page.
After the above exercises, you WSL should already have JDK 1.8 installed.
Now let’s start to install Apache Zeppelin 0.7.3 in WSL.
Download binary package
Find out the latest Zeppelin binary package from the Download page: http://zeppelin.apache.org/download.html.
For me the closest location is: http://archive.apache.org/dist/zeppelin/zeppelin-0.7.3/zeppelin-0.7.3-bin-all.tgz.
Run the following command to download the binary:
wget http://archive.apache.org/dist/zeppelin/zeppelin-0.7.3/zeppelin-0.7.3-bin-all.tgz
It may take a while to download.
Unzip the binary package
Unzip the binary package using the command below:
tar -xvzf zeppelin-0.7.3-bin-all.tgz -C ~/hadoop
Now Zeppelin is extracted to folder ~/hadoop/zeppelin-0.7.3-bin-all.
Start Zeppelin service
Start Zeppelin by running the following command:
cd ~/hadoop
cd zeppelin-0.7.3-bin-all/
bin/zeppelin-daemon.sh start
You can see a successful log message like the following in the zeppelin log file if the service is started:
({main} ZeppelinServer.java[main]:197) — Done, zeppelin server started
Open Zeppelin portal
In any browser, navigate to the following website: http://localhost:8080/.
8080 is the default port number. If you have changed it in Zeppelin configuration, remember to change the URL accordingly.
The UI looks like the following:
Stop Zeppelin service
Run the following command to stop the service:
bin/zeppelin-daemon.sh stop
Installing Zeppelin in Windows
We would need cygwin for this.
Install the basic Cygwin and specifically install wget,tar,qawk,bzip2,subversion,vim
Run the installer
After Cygwin gets installed, get the setup file and install the below:
> C:/Users/user/Downloads/setup-x86_64.exe -q -P wget,tar,qawk,bzip2,subversion,vim
Cygwin should give capabilities to install everything like ubuntu.We need to get the tar.gz file from the Apache Mirror installs for Zeppelin
(NOTE: Do make sure that your Spark, Hadoop and Scala installations are working properly)
-
Check the
java -version -
Create a folder
"zeppelin"in any path you want. -
In cygwin terminal type the below things:
$ wget http://www-eu.apache.org/dist/zeppelin/zeppelin-0.6.2/zeppelin-0.6.2-bin-all.tgz
$ gzip -d zeppelin-0.6.2-bin-all.tgz
$ tar -xvf zeppelin-0.6.2-bin-all.tar
export JAVA_HOME="/cygdrive/c/Program Files/Java/jdk1.8.0_91"
- Go to cmd prompt
D:\zeppelin\zeppelin-0.6.2-bin-all\bin>zeppelin.cmd
------------- verbose -----------------------------
- Open the link: http://127.0.0.1:8080/#
- Zeppelin notebook UI should be visible.
3 to demo.
How do you set up a Zeppelin?
You can either: Run the cmd window as administrator to start Zeppelin. Move the Zeppelin folder in the user directory.
Can we install Zeppelin in Windows?
Copy the download files for Apache Python interpreter from the downloaded install package to the notebook node directory /usr/hdp/current/zeppelin-server/interpreter/python and run the command:. Note: The group and user of the files must be zeppelin user. In the Ambari user interface, click Zeppelin Notebook x26gt; Start.
Jenkins admin password reset
How do I download Zeppelin notebook?
You can either: Run the cmd window as administrator to start Zeppelin. Move the Zeppelin folder in the user directory.
How do I install Zeppelin interpreter?
Download Apache Zeppelin
How do you set up a Zeppelin speaker?
Open the Bluetooth settings on the source device and ensure Bluetooth is switched on. Bowers Wilkins Zeppelin Wireless will appear as an available Bluetooth device. Select Zeppelin and close the Bluetooth settings. underway and illuminate fully when pairing is established.
How to start Jenkins on a different port
How do you set up Bowers and Wilkins speakers?
To pair a Bluetooth device to the Zeppelin using the Music app, go to Settings x26gt; Space. On the next page select ‘+ Pair a new device’, the Zeppelin (Space) will then be available in the Bluetooth pairing menu of your source device. The Zeppelin will be available in the Bluetooth menu under its given Space name.
How do I install Zeppelin on Windows?
3 to demo.
How do you set up a zeppelin?
Download Apache Zeppelin
How do I import a Zeppelin notebook?
3 to demo.
How install Zeppelin Linux?
Importing from a URL
How do I add an interpreter to Zeppelin?
Start Zeppelin by running ./bin/zeppelin-daemon.sh start . In the interpreter page, click the +Create button and configure your interpreter properties
What is Zeppelin interpreter?
3 to demo.
How do you use a Zeppelin speaker?
Open the Bluetooth settings on the source device and ensure Bluetooth is switched on. Bowers Wilkins Zeppelin Wireless will appear as an available Bluetooth device. Select Zeppelin and close the Bluetooth settings. underway and illuminate fully when pairing is established.
How do I setup my Zeppelin Wireless?
Open the Bluetooth settings on the audio source device and switch Bluetooth on. After a short delay, Zeppelin Wireless will be listed as an available Bluetooth device. Select Zeppelin Wireless and wait for visual confirmation in the Bluetooth settings that pairing is complete and that Zeppelin Wireless is connected.
How do I connect my Zeppelin Bluetooth?
To pair a Bluetooth device to the Zeppelin using the Music app, go to Settings x26gt; Space. On the next page select ‘+ Pair a new device’, the Zeppelin (Space) will then be available in the Bluetooth pairing menu of your source device. The Zeppelin will be available in the Bluetooth menu under its given Space name.
How do you hook up Bowers and Wilkins speakers?
Please ensure that Bluetooth is turned on (for Android devices please also enable location services). Plug the Zeppelin into a power outlet and wait for the speaker to power up. When the LED indicator on the top of your Zeppelin starts pulsing amber open the Bowers Wilkins Music app. Follow the on-screen prompts.
How do you set up Bowers and Wilkins formation?
The Bowers Wilkins Home app will first search for Formation products in setup mode and display a screen inviting the selection of one. Tap to select your Formation Audio. If you have already set up a Formation product and are adding an additional one, select ‘Add Formation product’ from the app Settings menu.
How do you hook up a bower speaker?
Open the Bluetooth settings on the source device and ensure Bluetooth is switched on. Once discovered, Bowers Wilkins T7 will appear as an available Bluetooth device. Select T7 and close the Bluetooth settings. T7 Bluetooth indicator will flash as pairing is underway and illuminate fully when pairing is established.
Why is my Bowers and Wilkins speaker not connecting?
Try turning your Bluetooth device completely off and then on again. Reboot your Bowers Wilkins product. Use a straightened paper-clip to press and hold the Reboot button for two seconds. The product will turn off, press Power On and reboot will be complete.
How do I connect my Zeppelin?
Open the Bluetooth settings on the source device and ensure Bluetooth is switched on. Bowers Wilkins Zeppelin Wireless will appear as an available Bluetooth device. Select Zeppelin and close the Bluetooth settings. underway and illuminate fully when pairing is established.
How do I save a zeppelin notebook as a PDF?
Download Apache Zeppelin
How do you use Zeppelin notebook?
If you would like to share your notebook in PDF form, you can easily export the notebook inside of Zepl.
How do I start Zeppelin in Ubuntu?
Downloading Binary Package If you have downloaded netinst binary, install additional interpreters before you start Zeppelin. Or simply run ./bin/install-interpreter.sh –all . After unpacking, jump to Starting Apache Zeppelin with Command Line section.
How do you set up a zeppelin notebook?
Open Zeppelin in your browser by navigating to http://localhost:8080 . In Zeppelin in the browser, open the drop-down menu at anonymous in the upper-right corner of the page, and choose Interpreter. On the interpreters page, search for spark , and choose edit on the right.
На чтение 3 мин Опубликовано Обновлено
Apache Zeppelin — это мощная среда разработки с открытым исходным кодом, которая позволяет работать с различными языками программирования и анализировать данные в реальном времени. В данной статье будет рассмотрен процесс установки Zeppelin на операционную систему Windows пошагово.
Перед установкой Zeppelin необходимо убедиться, что на компьютере уже установлены Java Development Kit (JDK) и Apache Maven. В случае их отсутствия, необходимо сначала выполнить их установку.
Шаг 1. Установка JDK
Для установки JDK необходимо скачать дистрибутив JDK с официального сайта Oracle и запустить установочный файл. Следуйте инструкциям установщика, выбрав желаемую версию JDK и установив ее в нужную директорию. После установки не забудьте добавить путь к JDK в переменную окружения PATH.
Шаг 2. Установка Apache Maven
Для установки Apache Maven сначала скачайте его дистрибутив с официального сайта Apache Maven и распакуйте его в желаемую директорию. Затем добавьте путь к Maven в переменную окружения PATH.
Содержание
- Установка Zeppelin на Windows: пошаговая инструкция
- Загрузите установочный файл
- Установите Java Development Kit
Установка Zeppelin на Windows: пошаговая инструкция
В данной статье будет показана пошаговая инструкция по установке Zeppelin на операционную систему Windows.
- Перейдите на официальный веб-сайт Zeppelin (https://zeppelin.apache.org).
- На главной странице найдите кнопку «Download», нажмите на неё.
- Далее появится список различных версий Zeppelin. Выберите нужную версию для Windows, например, «Zeppelin 0.9.0 for Windows».
- Скачайте архив с выбранной версией Zeppelin на свой компьютер.
- После скачивания архива, распакуйте его в любую удобную для вас директорию.
- Откройте командную строку (cmd) с административными правами и перейдите в директорию, где распакован архив с Zeppelin.
- В командной строке выполните команду «zeppelin-daemon.cmd start».
- После выполнения команды Zeppelin будет запущен и вы сможете открыть его веб-интерфейс в браузере, перейдя по адресу http://localhost:8080.
- Теперь вы можете начать использовать Zeppelin для разработки и выполнения вашего кода.
Установка Zeppelin на Windows теперь завершена. Вы можете начать настраивать и использовать Zeppelin для своих проектов и задач в области аналитики данных.
Загрузите установочный файл
Перед тем как установить Zeppelin на Windows, вам необходимо загрузить установочный файл. Вы можете скачать этот файл с официального сайта Zeppelin.
- Откройте ваш любимый браузер.
- Перейдите на официальный сайт Zeppelin.
- На странице загрузки выберите версию Zeppelin, совместимую с вашей операционной системой. Обычно для Windows рекомендуется скачивать версию tar-архива.
- Нажмите на ссылку для скачивания установочного файла. Вы будете перенаправлены на страницу загрузки.
- Дождитесь завершения загрузки.
Теперь у вас есть установочный файл Zeppelin, который вы можете использовать для установки на Windows.
Установите Java Development Kit
Для работы с Zeppelin необходимо установить Java Development Kit (JDK). JDK включает в себя все необходимые инструменты и библиотеки для разработки Java-приложений.
Шаги по установке JDK на Windows:
- Перейдите на официальный сайт Oracle (https://www.oracle.com/java/technologies/javase-jdk14-downloads.html).
- На странице загрузок найдите раздел «Java SE Development Kit».
- Согласитесь с лицензионным соглашением и выберите версию JDK, соответствующую вашей операционной системе (например, Windows x64 для 64-разрядной версии Windows).
- Скачайте установочный файл JDK для Windows.
- Запустите установочный файл и следуйте инструкциям по установке.
- После установки JDK убедитесь, что переменная среды JAVA_HOME указывает на каталог, где установлен JDK. Для этого можно воспользоваться командной строкой и выполнить команду echo %JAVA_HOME%. Если переменная не задана, то нужно будет настроить ее вручную.
Примечание: Вам может понадобиться перезагрузка компьютера после установки JDK для обновления переменных среды.