Время на прочтение
4 мин
Количество просмотров 24K
В данной статье будет представлена подробная инструкция по установке и настройке программ Apache, Python и PostgreSQL для обеспечения работы Django проекта в ОС MS Windows. Django уже включает в себя упрощенный сервер разработки для локального тестирования кода, но для задач, связанных с продакшен, требуется более безопасный и мощный веб-сервер. Мы настроим mod_wsgi для взаимодействия с нашим проектом и настроим Apache в качестве шлюза в внешний мир.
Стоит отметить, что установка и настройка будет производиться в ОС MS Windows 10 с 32 разрядностью. Также 32 битная реакция будет универсальна и будет работать на 64 битной архитектуре. Если вам нужна 64 битная установка повторите те же действия для 64 битных дистрибутивов программ, последовательность действий будет идентична.
В качестве Django проекта будем использовать программу Severcart. Она предназначена для управления перемещениями картриджей, учёта печатающего оборудования и договоров поставки и обслуживания. Установка всех программ и модулей будет производиться в каталог C:\severcart. Местоположение не принципиально.
Python
Первым шагом является загрузка и установка Python с веб-сайта Python. Выбираем Windows в качестве операционной системы и 32-битную версию. На момент написания статьи текущей версией является 3.9.0rc2.
Загрузив файл установки, щелкните правой кнопкой мыши файл установки и выберите «Запуск от имени администратора». Вы должны увидеть экран ниже
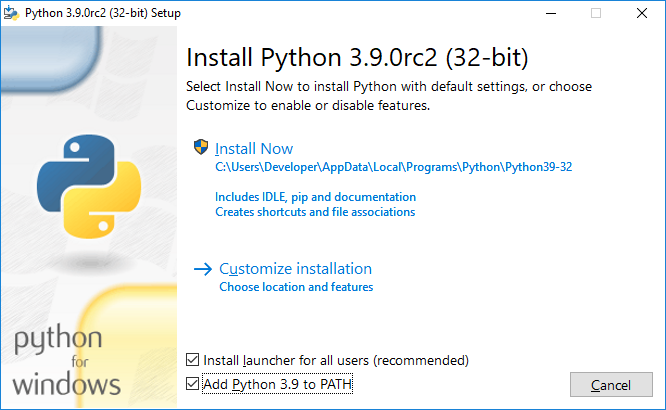
Устанавливаем галочки напротив чекбоксов «Install launcher for add user (recomended)» и «Add Python 3.9 to PATH» и нажимаем на «Customize installation».

Устанавливаем галочки на против «pip», «py launcher», «for all users (requires elevation)» и нажимаем «Next».
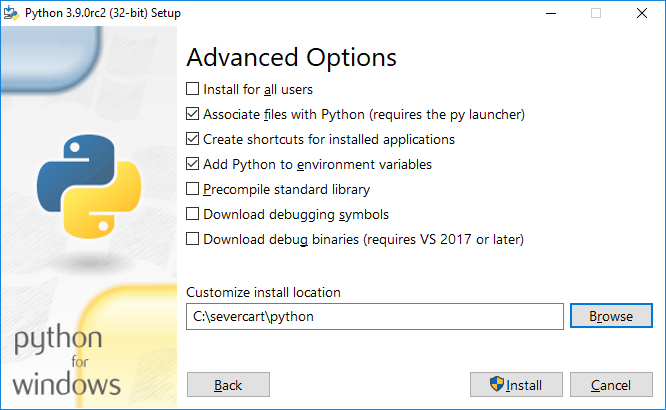
Выбираем все поля ввода как на картинке выше и нажимаем на «Install».
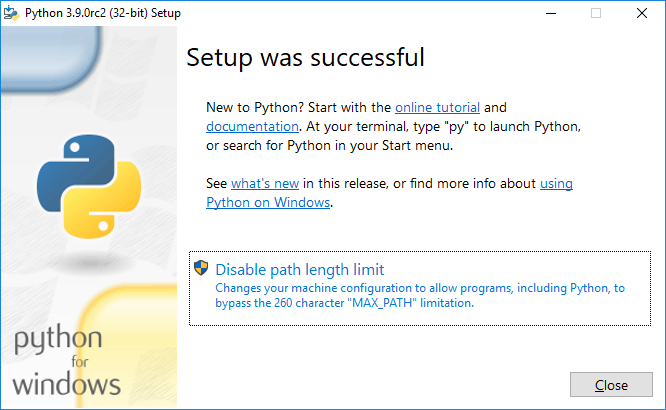
Чтобы убедиться, что установка прошла успешно, откройте cmd и введите python. Если установка прошла успешно, вы должны увидеть приглашение, подобный приведенному ниже

Устанавливаем mod_wsgi
Скачиваем скомпилированный пакет с mod_wsgi c сайта
www.lfd.uci.edu/~gohlke/pythonlibs. Модуль выполняет функции посредника межу сервером Apache и Django проектом. Самый свежий пакет будет с именем mod_wsgi-4.7.1-cp39-cp39-win32.whl. Обратите внимание, что пакет скомпилирован для 32 битной Windows CPython версии 3.9. Также стоит отметить, что очевидная установка модуля pip install mod_wsgi скорее всего завершится ошибкой, т.к. в процессе установки потребуется компилятор Visual Studio C++. Ставить компилятор целиком ради одного Python пакета в Windows считаем нецелесообразным.
Устанавливаем модуль с помощью стандартного пакетного менеджера pip в cmd или powershell:
pip install -U mod_wsgi-4.7.1-cp39-cp39-win32.whl

Apache
Скачиваем дистрибутив с сайта https://www.apachelounge.com/download/.
Самая свежая версия Web-сервера является Apache 2.4.46 win32 VS16. Также для работы программы понадобиться заранее установленный пакет «Visual C++ Redistributable for Visual Studio 2019 x86».
Распаковываем дистрибутив Apache в каталог C:\severcart\Apache24, далее меняем строку с номером 37 на свою
Define SRVROOT "C:/severcart/Apache24"
Проверяем работу Apache, выполнив в командной строке
C:/severcart/Apache24/bin> httpd.exe
В результате должны увидеть в браузере по адресу 127.0.0.1 строку «It works!».

Устанавливаем службу Apache, для этого выполним в командной строке от имени Администратора инструкцию:
C:\severcart\Apache24\bin>httpd.exe -k install -n "Apache24"
Далее подключим модуль mod_wsgi к Apache. Для этого выполним в командной строке инструкцию
C:\Windows\system32>mod_wsgi-express module-config
В результате в стандартный вывод будет распечатаны строки:
LoadFile "c:/severcart/python/python39.dll"
LoadModule wsgi_module "c:/severcart/python/lib/site-packages/mod_wsgi/server/mod_wsgi.cp39-win32.pyd"
WSGIPythonHome "c:/severcart/python"
Создаем файл C:\severcart\Apache24\conf\extra\httpd-wsgi.conf и копипастим туда распечатанные строки выше.
Подключаем новую конфигурацию к основному файлу httpd.conf
Include conf/extra/httpd-wsgi.conf
Сохраняем изменения, перезагружаем службы Apache
Net stop Apache24
Net start Apache24
PostgreSQL
Устанавливаем PostgreSQL взятый с сайта https://postgrespro.ru/windows. Текущая версия программного продукта – 12. Преимущества Российского дистрибутива от канонического представлены на том же сайте.


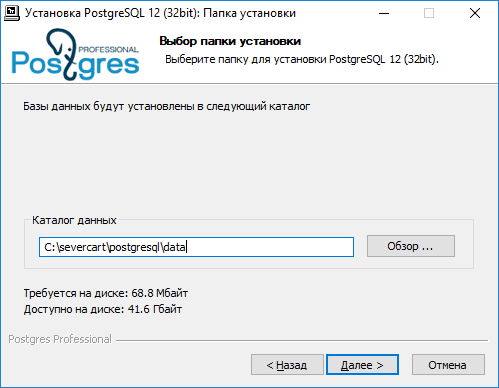

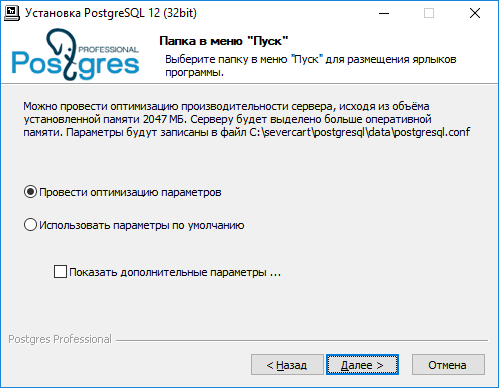
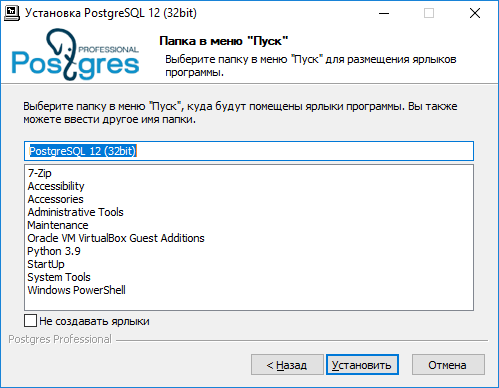
Действия по установке представлены выше и комментариях не нуждаются. Установка крайне проста.
Создаем БД в postgres, где потом будут храниться структуры данных Django проекта
C:\severcart\postgresql\bin>psql -h 127.0.0.1 -U postgres -W

CREATE DATABASE severcart WITH ENCODING='UTF8' OWNER=postgres CONNECTION LIMIT=-1 template=template0;

БД создана. Теперь разворачиваем Django проект.
Устанавливаем web приложение
Для этого скачиваем zip архив с сайта https://www.severcart.ru/downloads/ и распаковываем в каталог C:\severcart\app\

Вносим изменения в главный конфигурационный файл C:\severcart\app\conf\settings_prod.py для указания реквизитов подключения к БД
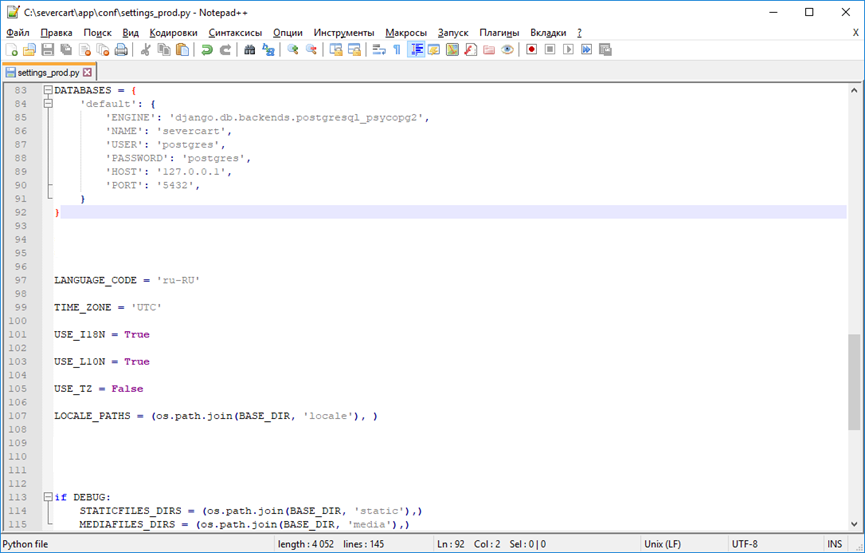
Python словарь DATABASES содержит в себе реквизиты подключения к БД. Подробности по настройке читайте здесь https://docs.djangoproject.com/en/3.1/ref/databases/#connecting-to-the-database
Устанавливаем Python пакеты значимостей для работы приложений внутри Django проекта
C:\severcart\app\tkinstaller>python install.py

В процессе работы скрипта будет произведена инициализация БД таблицами, констрейтами, индексами и прочим, а будет предложено создать пользователя, от имени которого будет производиться работа в программе.
Подключаем Django приложение к серверу Apache для этого дополняем конфигурационный файл
httpd-wsgi.conf следующим текстом
Alias /static "c:/severcart/app/static"

Alias /media "c:/severcart/app/media"

<Directory "c:/severcart/app/static">
    # for Apache 2.4
    Options Indexes FollowSymLinks
    AllowOverride None
    Require all granted
</Directory>

<Directory "c:/severcart/app/media">
    # for Apache 2.4
    Options Indexes FollowSymLinks
    AllowOverride None
    Require all granted
</Directory>


WSGIScriptAlias / "c:/severcart/app/conf/wsgi_prod.py"
WSGIPythonPath "c:/severcart/python/"

<Directory "c:/severcart/app/conf/">
<Files wsgi_prod.py>
    Require all granted
</Files>
</Directory>
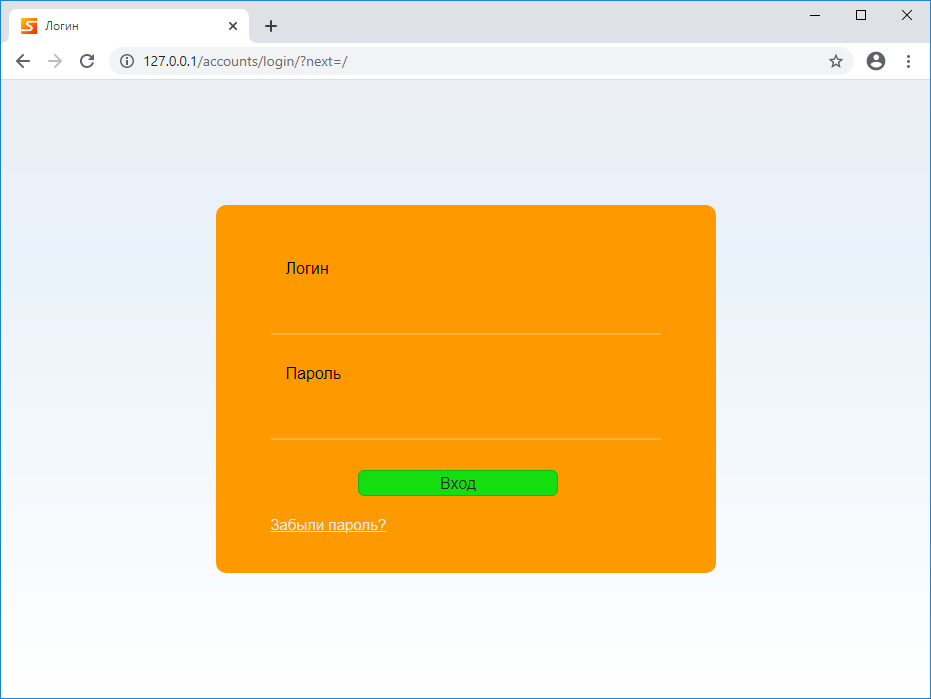
Перезагружаем службу Apache и проверяем работу приложения
На этом все. Спасибо что дочитали.
В следующей статье будем создавать установочный самораспаковывающийся архив в InnoSetup для быстрого развертывания Django проекта на компьютере заказчика. Для тех кто хочет повторить все действия на Яндекс.Диск загружены все используемые дистрибутивы.
Introduction
In this guide we will cover the deployment of a Django project in Apache using Windows 10 and the required compilation of the mod_wsgi module.
This article will take for granted:
- You have a Windows computer ready with administrator permissions.
- Basic knowledge of Python, pip package manager and virtualenv to create virtual environments.
- You already have a Django project, as this article is not intended to explain the configuration or creation of a Django application.
- You are familiar with the basic administration of Apache, as this tutorial will only cover the simple installation of the server itself and the configuration changes necessary to pair Django with Apache.
Prerequisites
Install Python
For this guide we will use Python version 3.8.3, which can be downloaded here.
Be sure to install the corresponding one for your system based on its bits 64 or 32 (x86), you can find out the bits of your system by right-clicking on start and clicking on System, and reading the information under the device specifications.
In installation options select add python to PATH and install launcher for all users.
Install Python Virtual Environment
Create a python virtual environment in the main root of the Django project.
virtualenv "D:\path\to\project-root\venv"Install Apache
We will use the Apache 2.4 version of the lounge page, downloadable from here.
Extract the ZIP file to the root of the C:/ drive, so that this result is obtained C:/Apache24.
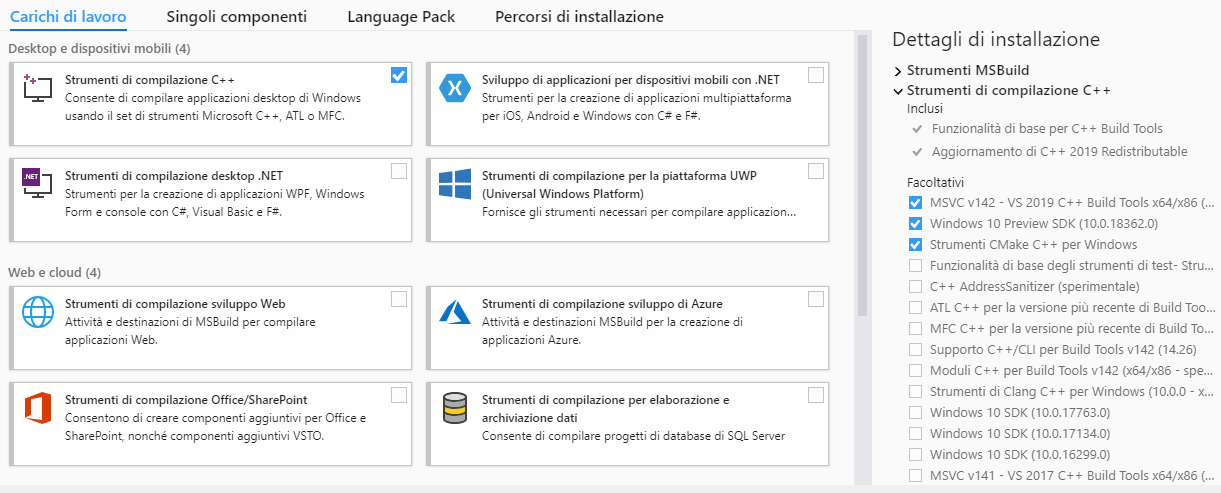
Install Microsoft Build Tools
In Windows it is necessary to compile the mod_wsgi module to be able to use it and for this it is necessary to have Microsoft Build Tools installed.
Installation requires about 4 gigabytes and you can download the installer here.
Install mod_wsgi
Installation of the mod_wsgi model and its configuration using Apache’s WSGIDaemonProcess method available on Linux is not compatible with Windows. Windows expects mod_wsgi to be compiled using Microsoft Build Tools.
Because of this it is necessary to follow these steps from a CMD:
-
Set MOD_WSGI_APACHE
_ROOTDIR as environment variableset "MOD_WSGI_APACHE_ROOTDIR=C:\Apache24" -
Activate python virtual environment
"D:path\to\project-root\venv\Scripts\activate" -
Install mod_wsgi module into the virtual environment
pip install mod_wsgi -
Copy the output to get the configuration required by Apache
mod_wsgi-express module-config -
Install all the library dependencies of the Django project
pip install module-nameOr get a requirements file with
pip freeze > requirements.txtand then install it withpip install -r requirements.txt -
Deactivate the virtual environment
deactivate
Configuration
-
Python virtual environments do not include dll files and at least one of these files is a dependency for the Apache configuration. It is possible to manually copy the required dll file into the
project-root\venv\Scriptsfolder from the Python installation folder which is usually located at%username%\AppData\Local\Programs\Python\Python38. The main file to copy is python39.dll and optionally all the other dll that are next to it and all the contents of thePrograms\Python\Python38\DLLsfolder. -
Edit the host file at
C:\Windows\System32\drivers\etcby adding this line to the bottom127.0.0.2 www.app-name.com app-name.com -
Update the list of allowed hosts for the application in settings.py.
ALLOWED_HOSTS = ['www.app-name.com', 'app-name.com'] -
Update the Django projects wsgi.py file to look like the following.
import os import sys from django.core.wsgi import get_wsgi_application from pathlib import Path # Add project directory to the sys.path path_home = str(Path(__file__).parents[1]) if path_home not in sys.path: sys.path.append(path_home) os.environ['DJANGO_SETTINGS_MODULE'] = 'main.settings' application = get_wsgi_application() -
Fix a Python bug that causes an error 500 every time a query is made to the database.
Edit the __init__.py file inproject-root\venv\Lib\site-packages\asgirefby adding the following.# PATCH that fix a Python Bug: import sys import asyncio if sys.platform == "win32" and sys.version_info >= (3, 8, 0): asyncio.set_event_loop_policy(asyncio.WindowsSelectorEventLoopPolicy()) -
Set up Apache by modifying the httpd.conf file at
C:\Apache24\conf, adding at the end everything that follows but replacing the directories with those on your system.LoadFile "S:/path/to/project-root/venv/Scripts/python38.dll" LoadModule wsgi_module "S:/path/to/project-root/venv/lib/site-packages/mod_wsgi/server/mod_wsgi.cp38-win_amd64.pyd" WSGIPythonHome "C:/Users/User-name/AppData/Local/Programs/Python/Python38" WSGIPythonPath "S:/path/to/project-root/venv/Lib/site-packages" <VirtualHost *:80> ServerAlias www.app-name.com ServerName app-name.com ServerAdmin info@admin.com WSGIScriptAlias / "S:/path/to/project-root/project-name/wsgi.py" <Directory "S:/path/to/project-root/project-name"> <Files wsgi.py> Require all granted </Files> </Directory> Alias /static/ "S:/path/to/project-root/static/" <Directory "S:/path/to/project-root/static"> Require all granted </Directory> ErrorLog "S:/path/to/project-root/logs/apache.error.log" CustomLog "S:/path/to/project-root/logs/apache.custom.log" common </VirtualHost> -
Check the syntax of the apache configuration files.
"C:\Apache24\bin\httpd.exe" -t -
Run the Apache server.
"C:\Apache24\bin\httpd.exe" -k start - Check the Django application from the browser by visiting app-name.com.
-
If any module is missing, it is recommended to use this command to make sure it is installed in the Python home given to Apache.
pip install --target="C:/Users/User-name/AppData/Local/Programs/Python/Python38" library-name
Congratulations, you have successfully deployed your application. In case you have had any problems, you can check the log files or leave a comment below and I will try to reply as soon as possible. Best regards.
How to use django with mod_wsgi
This is a very simple recipe to deploy a django application with mod_wsgi. This procedure has been tested on Windows but should work on any operating system supported by apache, mod_wsgi, and django.
Installation
The mod_wsgi package can be downloaded from http://code.google.com/p/modwsgi/. Ensure that you work through the mod_wsgi installation and configuration instructions before trying to setup Django. For links to Windows binaries and steps on setting up mod_wsgi Windows see its separate installation instructions but still refer to main installation instructions to work out if mod_wsgi was installed correctly.
If wanting to know about source code reloading issues when running Django under Apache and mod_wsgi then ensure you read document about reloading on mod_wsgi site. Do be aware that reloading your application by touching the WSGI script file only works for mod_wsgi daemon mode on UNIX/Apache 2.X systems. That specific reloading feature is not available on Windows, Apache 1.3 or if using embedded mode with Apache 2.X. If mod_wsgi daemon mode is available, you can also set it up to automatically restart on any code change. This is covered in mod_wsgi documentation on reloading, but is made clearer in this blog entry. This will give you same sort of automatic reloading capability as the Django development server.
Be aware that on UNIX systems you have the choice of using mod_wsgi in embedded mode or daemon mode. If you are not adept at configuring Apache and do not know how to tune Apache MPM settings to suit a specific type of application, then make sure you use mod_wsgi daemon mode. This is because the default Apache MPM settings are for static file serving and PHP, they are not suitable for large persistent Python web applications. If you use embedded mode and don’t change the settings you are likely to have problems with running out of memory on memory constrained systems and see load spikes which may cripple your system. These are the same problems that can arise as when using mod_python and you similarly haven’t tuned the Apache MPM settings. You will need to delve into the documentation on the mod_wsgi site for how to use daemon mode.
Note that the mod_wsgi site provides its own documentation for integrating Django with mod_wsgi. Those instructions go into areas this document does not and in some respect should be seen as being a more definitive source of information. It is also a good idea to read through other documentation on the mod_wsgi site as well, especially in respect to installation, configuration or application issues. Reading the other documentation on the mod_wsgi site will save you a lot of time if you do have any issues as it is quite comprehensive.
Configuration of Apache and mod_wsgi
In this section I will take you through an example, the django application is called dj_survey. This application is part of a project called «dj_project».
The urls.py I used to serve the application with the Django built-in development server:
from django.conf.urls.defaults import *
import registration


urlpatterns = patterns('',
    # Example:
    # (r'^dj_project/', include('dj_project.foo.urls')),

    # Uncomment this for admin:
    (r'^admin/', include('django.contrib.admin.urls')),
    (r'^dj_survey/', include('dj_project.dj_survey.urls')),
    (r'^accounts/', include('registration.urls')),
    (r'^yui/(?P<path>.*)$', 'django.views.static.serve', {'document_root': '../../svn_views/yui/build','show_indexes': True}),
    (r'^site_media/(?P<path>.*)$', 'django.views.static.serve',{'document_root': './media','show_indexes': True}),
)
In httpd.conf you should load the mod_wsgi and include the file containing the configuration of your django application. The trap there is all the path should use «/» and not «\».
httpd.conf
#This should be included somewhere at the top of this file
LoadModule wsgi_module modules/mod_wsgi.so

#somewhere at the bottom
Include "<PATH TO YOUR DJANGO PROJECT>/apache/apache_django_wsgi.conf"
NOTE: Putting settings file in the ‘apache’ subdirectory where the WSGI script file is located is technically a security risk. This is because in order for the WSGI script file to be served from there, you have had to configure Apache to tell it it can use that directory. In doing that, it can technically serve files from there as static files. Thus, if Apache was incorrectly configured and files in that directory made accessible via a URL as static files, it would be possible to download the settings file. Since the settings file can contain database passwords, that obviously isn’t going to be a good thing to happen. This example really should be modified, with settings files located one directory up from where they are, as would normally be the case.
This suppose that you have created a folder named apache in your django project in this folder your should add the following files:
08/16/2007  04:12 PM             1,082 apache_django_wsgi.conf
08/16/2007  04:31 PM               557 dj_survey.wsgi
08/16/2007  04:31 PM             4,362 settings_production.py
08/16/2007  04:09 PM               712 urls_production.py
08/16/2007  04:33 PM                 0 __init__.py
Note: There is a file called __init__.py in <PATH TO YOUR DJANGO PROJECT>/apache. In this case <PATH TO YOUR DJANGO PROJECT> is equal to c:\<LONG PATH>\workspace\dj_project
Like in the httpd.conf you should pay attention to the separator. You should use «/» and not «\»
apache_django_wsgi.conf
Alias /site_media/ "<PATH TO YOUR DJANGO PROJECT>/media/"
<Directory "<PATH TO YOUR DJANGO PROJECT>/media">
Order allow,deny
Options Indexes
Allow from all
IndexOptions FancyIndexing
</Directory>

Alias /yui/ "<PATH TO YOUR YUI>/build/"
<Directory "<PATH TO YOUR YUI>/build">
Order allow,deny
Options Indexes
Allow from all
IndexOptions FancyIndexing
</Directory>

Alias /media/ "<PATH TO YOUR DJANGO SRC>/trunk/django/contrib/admin/media/"
<Directory "<PATH TO YOUR DJANGO SRC>/trunk/django/contrib/admin/media">
Order allow,deny
Options Indexes
Allow from all
IndexOptions FancyIndexing
</Directory>


WSGIScriptAlias / "<PATH TO YOUR DJANGO PROJECT>/apache/dj_survey.wsgi"

<Directory "<PATH TO YOUR DJANGO PROJECT>/apache">
Allow from all
</Directory>
Now here it is the core of the wsgi application. The path there should use «
«as separator.
dj_survey.wsgi
import os, sys

#Calculate the path based on the location of the WSGI script.
apache_configuration= os.path.dirname(__file__)
project = os.path.dirname(apache_configuration)
workspace = os.path.dirname(project)
sys.path.append(workspace)

#Add the path to 3rd party django application and to django itself.
sys.path.append('C:\\yml\\_myScript_\\dj_things\\web_development\\svn_views\\django_src\\trunk')
sys.path.append('C:\\yml\\_myScript_\\dj_things\\web_development\\svn_views\\django-registration')

os.environ['DJANGO_SETTINGS_MODULE'] = 'dj_project.apache.settings_production'
import django.core.handlers.wsgi
application = django.core.handlers.wsgi.WSGIHandler()
Note: If you need to write something in error.log located in the following folder <Your Apache Installation>\Apache2.2\logs you can insert the line below in your WSGI file. In our example this file is called dj_survey.wsgi. This method is very convenient to get the PYTHONPATH correct:
print >> sys.stderr, sys.path
In this file you are defining the settings that will be used by your Django application, in our example this file is called: dj_project.apache.settings_production (Note: «.py» is implicit and should not be added).
There is nothing special in that file except that I am pointing to a special urls.py which reflect the configuration I am using in production.
ROOT_URLCONF = 'dj_project.apache.urls_production'
urls_production.py
from django.conf.urls.defaults import *
import registration


urlpatterns = patterns('',
    # Example:
    # (r'^dj_project/', include('dj_project.foo.urls')),

    # Uncomment this for admin:
    (r'^admin/', include('django.contrib.admin.urls')),
    (r'^dj_survey/', include('dj_project.dj_survey.urls')),
    (r'^accounts/', include('registration.urls')),
)
Test
Restart apache and now you should be able to enjoy your application served by Apache and mod_wsgi.
Additional Tweaking
If you’re taking advantage of the great Internationalization features of Django you may come across a curious problem. Namely, uploading of non-ascii filenames with the Django storage system with the default apache settings on most systems will trigger UnicodeEncodeError exceptions when calling functions like os.path(). To avoid these issues, ensure that the following lines are included in your apache envvars file (typically found in /etc/apache2/envvars).
export LANG='en_US.UTF-8'
export LC_ALL='en_US.UTF-8'
This error likely wont rear its head during development on the test server as, when run from the command line, the ./manage.py script inherits the users language and locale settings.
References
- http://code.google.com/p/modwsgi/
- http://code.google.com/p/modwsgi/wiki/IntegrationWithDjango
How to use Django with Apache and mod_wsgi
Deploying Django with Apache and mod_wsgi is a tried and tested way to get
Django into production.
mod_wsgi is an Apache module which can host any Python WSGI application,
including Django. Django will work with any version of Apache which supports
mod_wsgi.
The official mod_wsgi documentation is your source for all the details about
how to use mod_wsgi. You’ll probably want to start with the installation and
configuration documentation.
Basic configuration
Once you’ve got mod_wsgi installed and activated, edit your Apache server’s
httpd.conf file and add the following.
WSGIScriptAlias / /path/to/mysite.com/mysite/wsgi.py
WSGIPythonHome /path/to/venv
WSGIPythonPath /path/to/mysite.com

<Directory /path/to/mysite.com/mysite>
<Files wsgi.py>
Require all granted
</Files>
</Directory>
The first bit in the WSGIScriptAlias line is the base URL path you want to
serve your application at (/ indicates the root url), and the second is the
location of a “WSGI file” – see below – on your system, usually inside of
your project package (mysite in this example). This tells Apache to serve
any request below the given URL using the WSGI application defined in that
file.
If you install your project’s Python dependencies inside a virtual, add the path using
environmentWSGIPythonHome. See the mod_wsgi
virtual environment guide for more details.
The WSGIPythonPath line ensures that your project package is available for
import on the Python path; in other words, that import mysite works.
The <Directory> piece ensures that Apache can access your wsgi.py
file.
Next we’ll need to ensure this wsgi.py with a WSGI application object
exists. As of Django version 1.4, startproject will have created one
for you; otherwise, you’ll need to create it. See the WSGI overview
documentation for the default contents you
should put in this file, and what else you can add to it.
Warning
If multiple Django sites are run in a single mod_wsgi process, all of them
will use the settings of whichever one happens to run first. This can be
solved by changing:
os.environ.setdefault("DJANGO_SETTINGS_MODULE", "{{ project_name }}.settings")
in wsgi.py, to:
os.environ["DJANGO_SETTINGS_MODULE"] = "{{ project_name }}.settings"
or by using mod_wsgi daemon mode and ensuring that each
site runs in its own daemon process.
Fixing UnicodeEncodeError for file uploads
If you get a UnicodeEncodeError when uploading or writing files with
file names or content that contains non-ASCII characters, make sure Apache
is configured to support UTF-8 encoding:
export LANG='en_US.UTF-8'
export LC_ALL='en_US.UTF-8'
A common location to put this configuration is /etc/apache2/envvars.
Alternatively, if you are using mod_wsgi daemon mode
you can add lang and locale options to the WSGIDaemonProcess
directive:
WSGIDaemonProcess example.com lang='en_US.UTF-8' locale='en_US.UTF-8'
See the Files section of the Unicode reference guide for
details.
Using mod_wsgi daemon mode
“Daemon mode” is the recommended mode for running mod_wsgi (on non-Windows
platforms). To create the required daemon process group and delegate the
Django instance to run in it, you will need to add appropriate
WSGIDaemonProcess and WSGIProcessGroup directives. A further change
required to the above configuration if you use daemon mode is that you can’t
use WSGIPythonPath; instead you should use the python-path option to
WSGIDaemonProcess, for example:
WSGIDaemonProcess example.com python-home=/path/to/venv python-path=/path/to/mysite.com
WSGIProcessGroup example.com
If you want to serve your project in a subdirectory
(https://example.com/mysite in this example), you can add WSGIScriptAlias
to the configuration above:
WSGIScriptAlias /mysite /path/to/mysite.com/mysite/wsgi.py process-group=example.com
See the official mod_wsgi documentation for details on setting up daemon
mode.
Serving files
Django doesn’t serve files itself; it leaves that job to whichever web
server you choose.
We recommend using a separate web server – i.e., one that’s not also running
Django – for serving media. Here are some good choices:
-
Nginx
-
A stripped-down version of Apache
If, however, you have no option but to serve media files on the same Apache
VirtualHost as Django, you can set up Apache to serve some URLs as
static media, and others using the mod_wsgi interface to Django.
This example sets up Django at the site root, but serves robots.txt,
favicon.ico, and anything in the /static/ and /media/ URL space as
a static file. All other URLs will be served using mod_wsgi:
Alias /robots.txt /path/to/mysite.com/static/robots.txt
Alias /favicon.ico /path/to/mysite.com/static/favicon.ico

Alias /media/ /path/to/mysite.com/media/
Alias /static/ /path/to/mysite.com/static/

<Directory /path/to/mysite.com/static>
Require all granted
</Directory>

<Directory /path/to/mysite.com/media>
Require all granted
</Directory>

WSGIScriptAlias / /path/to/mysite.com/mysite/wsgi.py

<Directory /path/to/mysite.com/mysite>
<Files wsgi.py>
Require all granted
</Files>
</Directory>
Serving the admin files
When django.contrib.staticfiles is in INSTALLED_APPS, the
Django development server automatically serves the static files of the
admin app (and any other installed apps). This is however not the case when you
use any other server arrangement. You’re responsible for setting up Apache, or
whichever web server you’re using, to serve the admin files.
The admin files live in (django/contrib/admin/static/admin) of the
Django distribution.
We strongly recommend using django.contrib.staticfiles to handle the
admin files (along with a web server as outlined in the previous section; this
means using the collectstatic management command to collect the
static files in STATIC_ROOT, and then configuring your web server to
serve STATIC_ROOT at STATIC_URL), but here are three
other approaches:
-
Create a symbolic link to the admin static files from within your
document root (this may require+FollowSymLinksin your Apache
configuration). -
Use an
Aliasdirective, as demonstrated above, to alias the appropriate
URL (probablySTATIC_URL+admin/) to the actual location of
the admin files. -
Copy the admin static files so that they live within your Apache
document root.
Authenticating against Django’s user database from Apache
Django provides a handler to allow Apache to authenticate users directly
against Django’s authentication backends. See the mod_wsgi authentication
documentation.
Оригинальная статья:https://blog.csdn.net/weixin_40754816/article/details/80955817
Ранее я запускал проект django локально и недавно пытался развернуть проект на сервере. Он был успешно развернут и провел здесь много времени. Я поговорю с вами здесь и надеюсь, что он будет полезен для таких новичков, как я.
1. Конфигурация среды:
1.Python версия 3.6
2. Серверная платформа: Windows Server 2016
3.django версия 2.0.7
2. Apache скачать и настроить
1. Войдите на официальный сайт Apache,http://httpd.apache.org/Загрузите соответствующую версию и следуйте рисункам ниже, чтобы найти список загрузки версии:


Вы можете скачать соответствующую версию здесь, я выбрал Apache2.4 VC14 64 в качестве версии (выберите в соответствии с потребностями)


2. После загрузки сжатого файла, распакуйте его напрямую, найдите в папке папку Apache24, эта папка является файлом сервера apache, установка не требуется, переместите папку Apache24 в нужное место.

Я напрямую перемещаю apache24 в корневой каталог диска C здесь:

3. Настройте файл сервера Apache:
Войдите в каталог C: \ Apache24 \ conf и найдите файл httpd.conf. Это файл конфигурации сервера apache.
Я использую блокнот, чтобы открыть его (вы также можете использовать другие инструменты программирования), вы увидите много кода, не беспокойтесь, не удаляйте код, сразу найдите следующую строку кода для изменения
-
... -
Определите SRVROOT "C: \ Apache24" # путь к файлу Apache24, остальные не нужно менять. -
... -
Listen 192.168.31.227:8000 # Вот ip-адрес сайта, который вы хотите опубликовать, здесь я использую ip и порт моего компьютера, вы также можете использовать 127.0.0.1:8000 для локального тестирования; порт 80 устанавливается вами -
... -
ServerName 192.168.31.227:8000 -
...
Здесь вы можете найти crl + f.
4. Создайте сервис Apache
Откройте командную строку (администратор), перейдите в папку C: \ Apache24 \ bin (здесь это зависит от вашего фактического расположения в папке apache24), введите следующий код для создания службы:
httpd.exe -k install -n "apache2.4" # apache2.4 - это имя созданного сервера, которое можно изменить.Успешно установленный означает, что служба была успешно создана, в то же время может следовать некоторая другая информация, указывающая, правильна ли ваша конфигурация. Если есть ошибка, то проверьте шаг 3, чтобы увидеть, правильны ли путь и ip. Проблема, с которой я столкнулся, заключалась в том, что плагин c ++ сообщил об ошибке, просто скачайте и установите ее.
После успешного создания введите менеджер сервера, вы можете увидеть следующее
Щелкните правой кнопкой мыши, чтобы запустить, остановить и перезапустить службу. Здесь мы запускаем сервер, и статус меняется на работающий, затем он успешен (кроме того, командной строкой операции службы является sc delete «Apache2.4»)
5. Введите адрес 192.168.31.227:8000, настроенный в файле конфигурации в браузере, и следующая страница будет успешно отображена:

3. Настройте Джанго
1. Установите mod_wsgi, введитеhttp://www.lfd.uci.edu/~gohlke/pythonlibs/#mod_wsgi, Загрузите соответствующую версию плагина mod_wsgi Python. Я понимаю, что роль этого плагина — роль интерфейса Python и Apache, потому что сам проект django написан на python. В конце концов, после ввода URL-адреса загрузите соответствующую версию. Ap24cv24 относится к версии apache. Например, у меня apache24, cp36 относится к python3.6, а win_adm64 относится к 64-разрядной операционной системе. Вы должны загрузить правильную версию здесь, и тогда вы не сможете правильно выполнить развертывание.

Здесь также возникает ситуация, после загрузки найдите mod_wsgi-4.5.24 + ap24vc14-cp36-cp36m-win_amd64.whl, имя суффикса изменится на .zip для декомпрессии, но после декомпрессии файл mod_wsgi.so не будет найден (если ваша версия Есть файлы OS, введите этот учебник,http://www.cnblogs.com/fnng/p/4119712.htmlНайдите шаги для установки там mod_wsgi). Здесь мы непосредственно копируем whl-файл в папку сценария под путем к Python, у меня есть C: \ Users \ PengGangzhu \ AppData \ Local \ Programs \ Python \ Python36 \ Scripts. CD в путь, введите командную строку
pip3 install "mod_wsgi-4.5.24+ap24vc14-cp36-cp36m-win_amd64.whl"Имя файла в кавычках изменяется в соответствии с реальной ситуацией, а затем вводится после успешной установки
mod_wsgi-express module-configПоявятся следующие три строки подсказок, эти три строки должны быть записаны, самое важное в конфигурации:
-
LoadFile "c:/users/penggangzhu/appdata/local/programs/python/python36/python36.dll" -
LoadModule wsgi_module "c:/users/penggangzhu/appdata/local/programs/python/python36/lib/site-packages/mod_wsgi/server/mod_wsgi.cp36-win_amd64.pyd" -
WSGIPythonHome "c:/users/penggangzhu/appdata/local/programs/python/python36"
На этом этапе mod_wsgi успешно установлен.
2. Настроить проект Django
Снова откройте файл httpd.conf и в конце добавьте следующий код: конкретные пояснения см. В комментариях. Фактическая ситуация меняется в зависимости от местоположения вашего проекта. Здесь face_log2 — папка моего проекта.
-
# После установки модуля wsgi три строки символов, которые появляются, копируются напрямую -
LoadFile "c:/users/penggangzhu/appdata/local/programs/python/python36/python36.dll" -
LoadModule wsgi_module "c:/users/penggangzhu/appdata/local/programs/python/python36/lib/site-packages/mod_wsgi/server/mod_wsgi.cp36-win_amd64.pyd" -
WSGIPythonHome "c:/users/penggangzhu/appdata/local/programs/python/python36" -
# Установите путь wsgi в проекте -
WSGIScriptAlias / C:\Users\PengGangzhu\Desktop\face_log2\face_log2\wsgi.py -
# Установить путь к проекту -
WSGIPythonPath C:\Users\PengGangzhu\Desktop\face_log2 -
# Задайте путь wsgi -
<Directory C:\Users\PengGangzhu\Desktop\face_log2\face_log2> -
<Files wsgi.py> -
Require all granted -
</Files> -
</Directory> -
# Установить статический путь к файлу -
Alias /static C:\Users\PengGangzhu\Desktop\face_log2\static -
<Directory C:\Users\PengGangzhu\Desktop\face_log2\static> -
AllowOverride None -
Options None -
Require all granted -
</Directory>
Сохраните файл после записи, вернитесь к менеджеру сервера, найдите службу перезапуска apache2.4 (не забудьте перезапустить службу). Если с предыдущей конфигурацией все в порядке, введите http://192.168.31.227:8000 в браузере, и вы увидите знакомую страницу django.

Введите URL, http://192.168.31.227:8000/index1

Вы сделали!
Кроме того, если вы хотите получить доступ к сайту в локальной сети, вы можете перейти по ссылке ниже, про тестирование возможно.https://jingyan.baidu.com/article/b87fe19e639a8052183568be.htmlГлядя прямо на пятый шаг, рекомендуется не выключать брандмауэр.
Резюме: Подводя итог, можно сказать, что на первый взгляд простая проблема, на самом деле, я все еще оставляла в течение многих дней, и я чувствую, что она не идеальна. Короче говоря, она все же требует больше времени, больше операций и больше времени. В реальном развертывании вы можете столкнуться с проблемами, которые отличаются от моих. Не беспокойтесь. Решено пошагово, есть много интернет-ресурсов.Первый раз, когда я написал, он был основан главным образом на идее открытого исходного кода. Все поделились друг с другом, что может сэкономить много времени. Надеюсь, это будет полезно всем. Пожалуйста, исправьте меня, если это не так.
Во-вторых, вы думаете, что это конец. На самом деле нет. Когда я просматривал свой веб-сайт, на самом деле веб-сайт начал сообщать об ошибках. Большинство из них были сообщены с помощью синтаксиса Python, потому что мой django изначально был сделан под Mac, который Это связано с некоторыми небольшими различиями между Linux и Windows, в основном это проблема пути. Поэтому рекомендуется развертывание непосредственно на сервере Linux, который, как говорят, намного проще и снижает нагрузку на последующую отладку.