ANDROID_HOME
Installation directory of Android SDK package.
Example: C:\AndroidSDK or /usr/local/android-sdk/
ANDROID_USER_HOME
Location of SDK related data/user files.
Example: C:\Users\<USERNAME>\.android\ or ~/.android/
ANDROID_SDK_ROOT
Deprecated (in Android Studio), use ANDROID_HOME instead.
ANDROID_NDK_ROOT
Installation directory of Android NDK package. (WITHOUT ANY SPACE)
Example: C:\AndroidNDK or /usr/local/android-ndk/
ANDROID_SDK_HOME
Deprecated (in Android Studio 4.2), use ANDROID_PREFS_ROOT instead.
ANDROID_PREFS_ROOT
Deprecated (in Android Studio), use path to subdirectory .android via ANDROID_USER_HOME instead.
Example: C:\Users\<USERNAME>\ or ~/
ANDROID_EMULATOR_HOME
Location of emulator-specific data files.
Example: C:\Users\<USERNAME>\.android\ or ~/.android/
ANDROID_AVD_HOME
Location of AVD-specific data files.
Example: C:\Users\<USERNAME>\.android\avd\ or ~/.android/avd/
JDK_HOME and JAVA_HOME
Installation directory of JDK (aka Java SDK) package.
Note: This is used to run Android Studio(and other Java-based applications). Actually when you run Android Studio, it checks for JDK_HOME then JAVA_HOME environment variables to use.
After you are done with installation of Android SDK on Windows 10, you must set the ANDROID_HOME environment variable to point to the Android SDK installation directory.
To set up the Android Environment variable on Windows, you first required to have Android installation path with you.
By default it should be similar to this C:\Users\UserName\AppData\Local\Android\Sdk. If you are not able to find AppData folder you can follow this article.
Steps to set Android_Home Environment Variable path
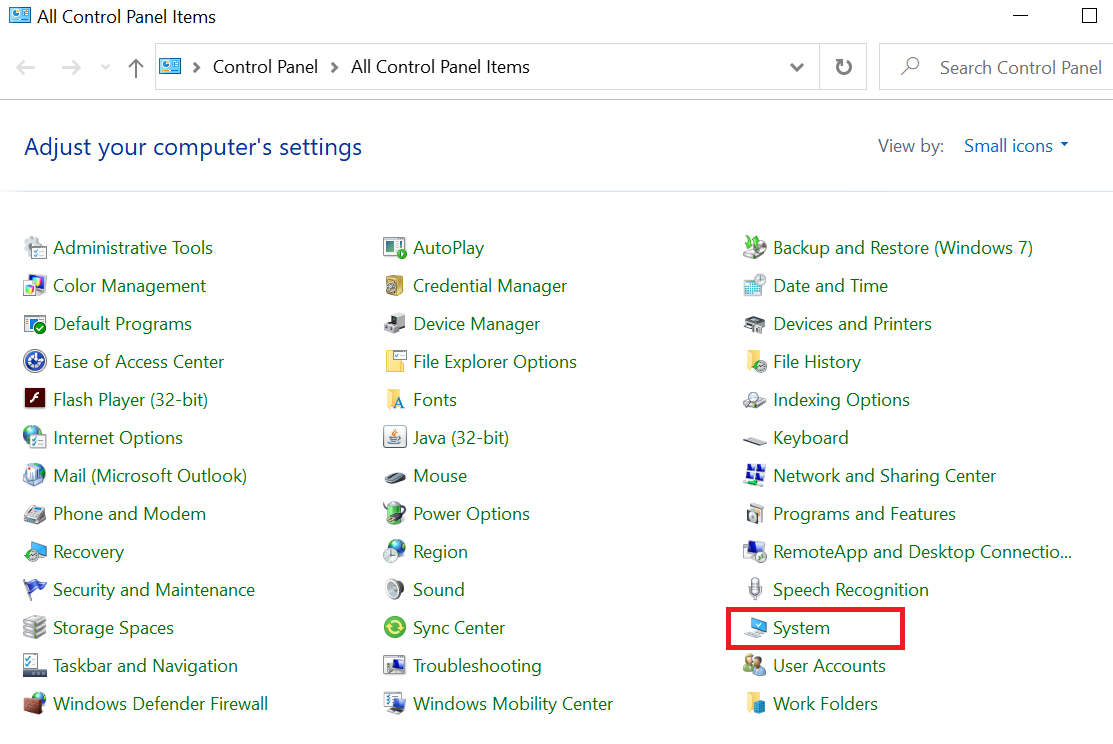
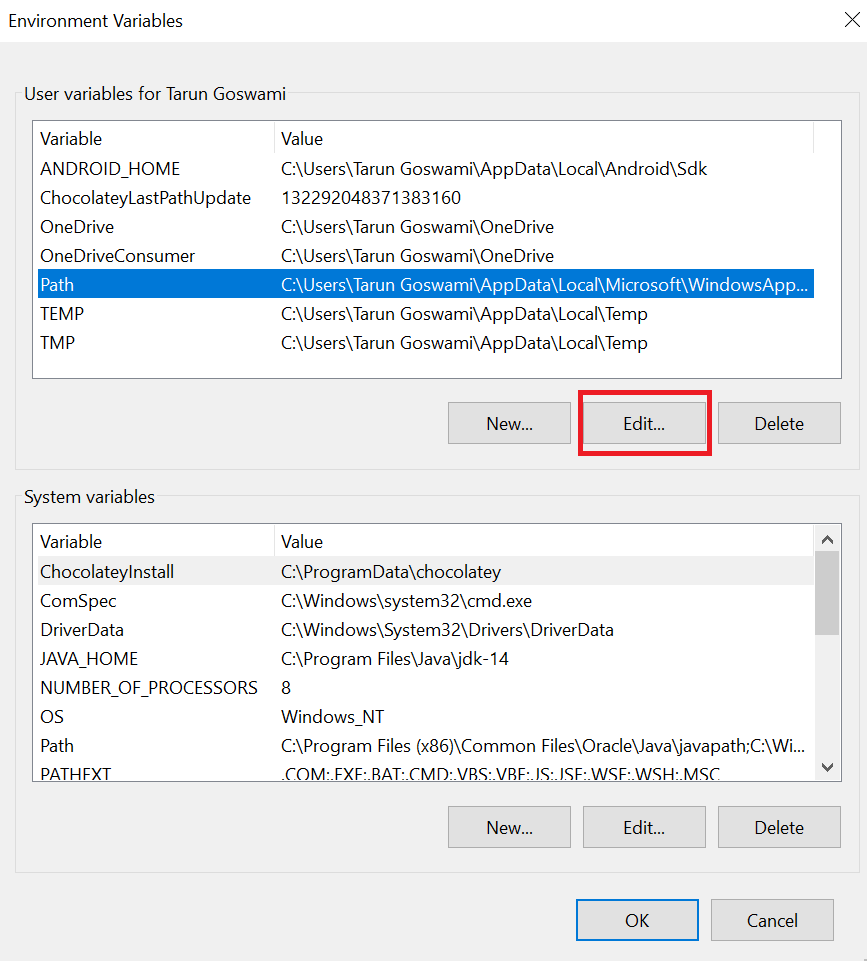
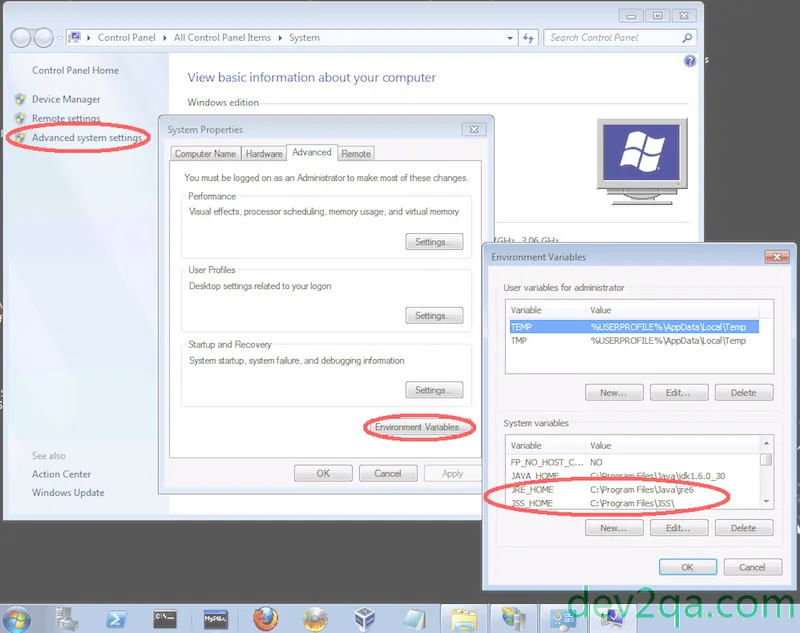
Step 1: Open Control Panel -> System
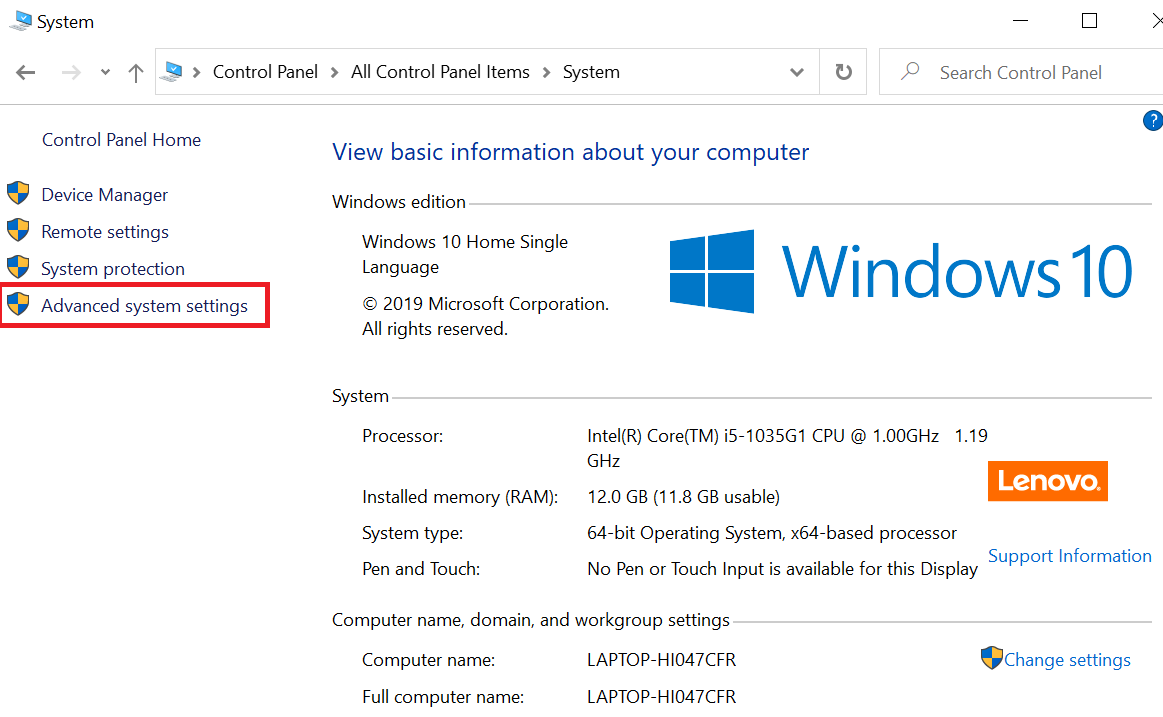
Step 2: Click on Advance System Settings
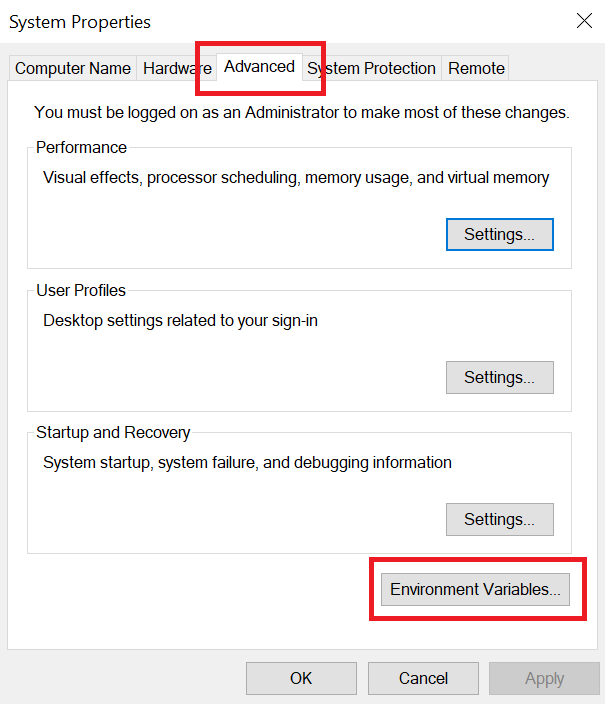
Step 3: Click Environment Variables on System Properties Dialogue
Step 4: In User variables or System Variable section, click on New button. [Note: System variables are shared for all users, but user variables are only for your account/profile.]
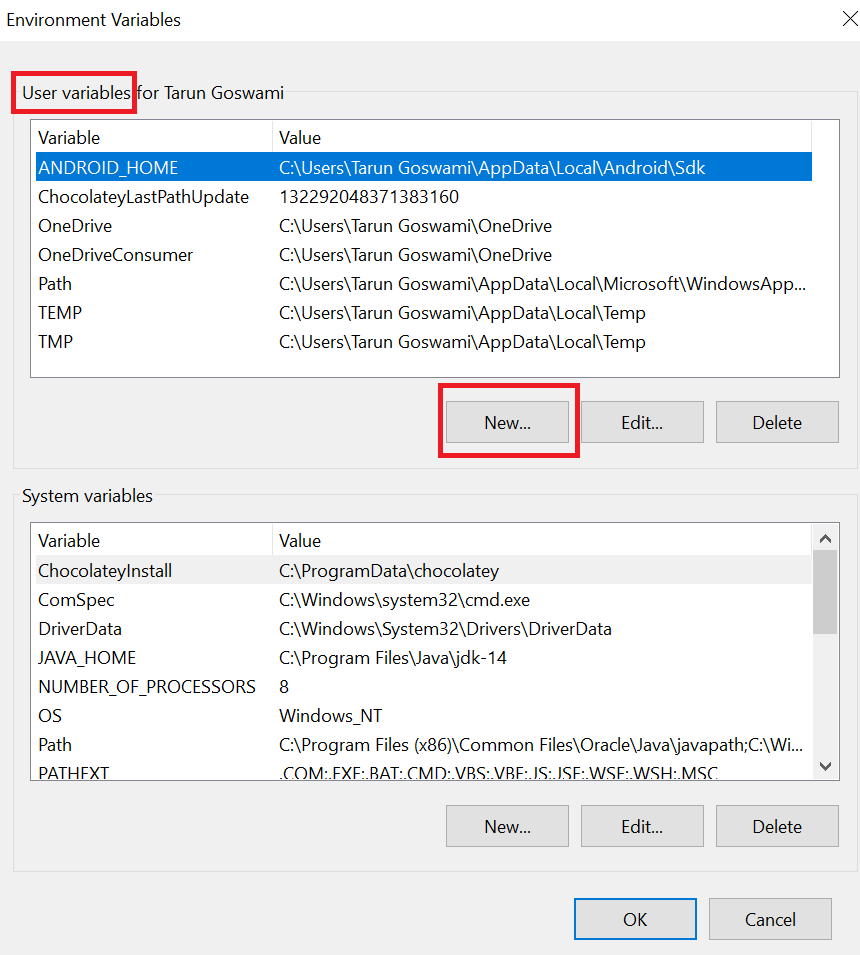
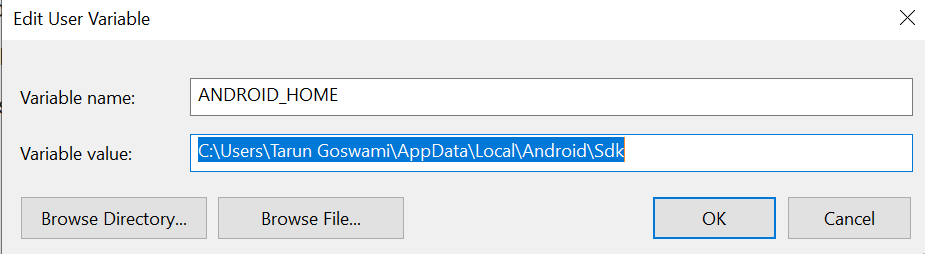
Step 5: In New User Variable dialogue, Enter Variable name as ANDROID_HOME and Variable value as C:\Users\goswa\AppData\Local\Android\Sdk [Use your path here] and Click on OK button
Step 6: Select on Path variable in User or System Variable section and click on Edit or you can double click on Path variable as well.
Step 7: From Edit environment variable dialogue box, Click on New and enter path for platform-tools and tools.

Step 8: Go to command prompt and type adb. If everything successful you will see below output.
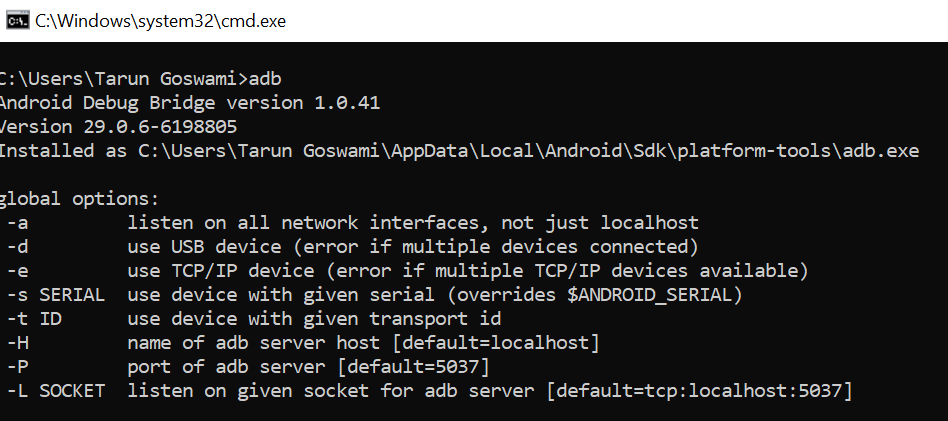
Note: You may need to open a new command prompt if you are getting command not found after setting environment variables.
ANDROID_HOME : You must need to set android_home environment variable in order to run appium test. In previous post, We learnt about how to download and install android SDK software and its different packages in windows. In order to use android environment to run appium software automation tests, You must need to set ANDROID_HOME and path environment variables for describing path of android SDK folders to your operating system. Bellow given steps will explain you how to set ANDROID_HOME and Path Environment Variables in windows for android SDK software.
PREREQUISITES : FIRST 3 STEPS of appium automation software tutorial should be completed.
Set ANDROID_HOME windows Variable
After installation of different packages, You need to set android_home environment variable and path environment variables. Follow the steps given bellow to set it.
- Open «Environment Variables» dialog from win start menu -> Right click on My Computer -> Select properties -> Advanced system settings -> Environment Variables button from Advanced tab. You can view detailed steps to open Environment Variables dialog in THIS POST.
- Click on New button under User Variable table. It will open New User Variable dialog.
- Set Variable Name = ANDROID_HOME and Variable value = E:\SDK (Path of SDK folder). Path can be different for you as per your SDK folder location as described in previous post.
- Click on OK button to close New User Variable dialog as shown in bellow image.

Set Path Variables
- Open SDK Folder from E: drive.
- You will find «tools» and «platform-tools» folders inside SDK folder.
- Copy path of both these folders. e.g. E:\SDK\tools and E:\SDK\platform-tools\
- Open «Environment Variables» dialog as described above.
- Locate Path variable line under System Variables table.
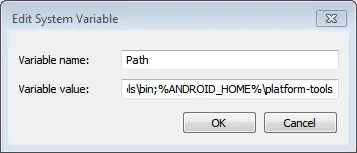
- Edit Path variable by clicking on Edit button. It will open Edit System Variables dialog.
- Append «tools» and «platform-tools» folder’s full path at the end of line as shown in bellow image. e.g. ;E:\SDK\tools;E:\SDK\platform-tools\;

- Now close all dialog by clicking on OK buttons of all opened dialog as shown in above image.
Verify Android Is Installed And Configured Properly
To check if android is configured properly or not,
- Open command prompt.
- Type command android as shown in bellow image.
- It will open Android SDK Manager dialog as shown in bellow image.

That means android is configured properly in your system.
Now android_home environment variable windows and Path Environment Variables are set for android SDK in windows environment. So android environment is configured and ready to use with appium to execute software automation tests. Next post will describe you how to integrate SDK with eclipse using Eclipse ADT Plugin to use android SDK with eclipse.
After you installed android studio, you still need to configure some android SDK environment variables then you can use them easily. This article will tell you how to correctly configure Android SDK environment variables such as ANDROID_HOME, PATH on both Windows and macOS.
1. Configure Android SDK Variable In Windows.
1.1 Get Android SDK Install Directory Path.
- Before you can configure it, you should first get the android SDK install directory following the steps below.
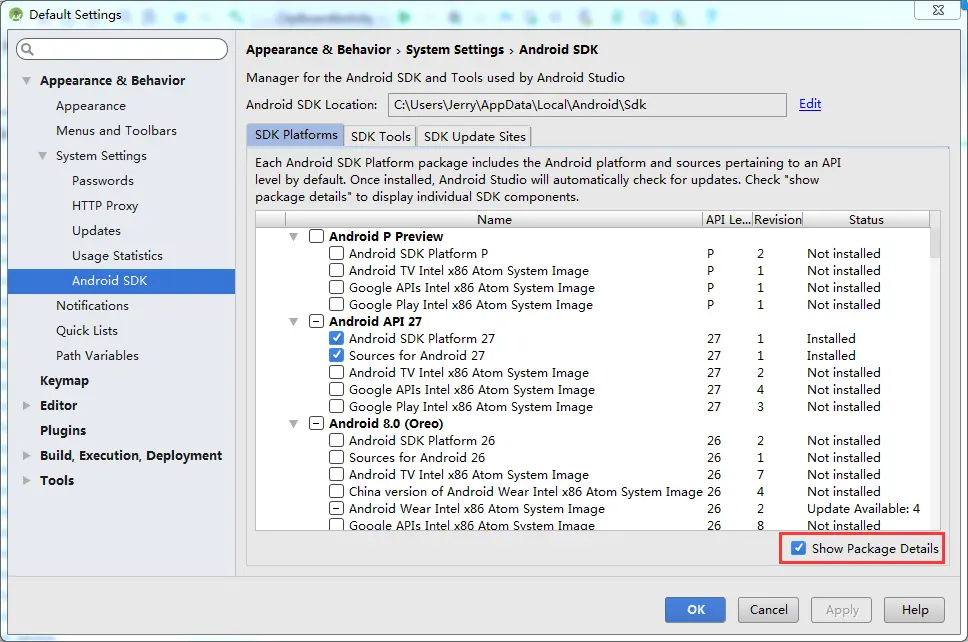
- Open android studio, click File —> Settings menu item in the top menu bar.
- Expand Appearance & Behavior —> System Settings —> Android SDK menu item on the left side of the popup window. Then you can find the Android SDK Location directory path on the right side ( in this example, the Android SDK location path is C:\Users\Jerry\AppData\Local\Android\Sdk ), remember it.

1.2 Set %ANDROID_HOME% and %Path% System Environment Variable.
- Right-click the computer icon in Windows file explorer left side, click Properties menu item in the popup menu list. This will open the windows system configuration window.
- Click the Advanced system settings link on the left panel, it will popup the System Properties window, click the Environment Variables button to open the Environment Variables window.

- Click the New… button to add a new system variable, input ANDROID_HOME as the variable name, and input the Android SDK location directory path ( such as C:\Users\Administrator\AppData\Local\Android\Sdk ) as the variable value.

- Select variable Path and click Edit button and add ;%ANDROID_HOME%\tools;%ANDROID_HOME%\tools\bin;%ANDROID_HOME%\platform-tools at the end of its value. Please note the ; must be English character otherwise, it will not take effect.

- Click OK to close the system environment variables settings window, open a dos window, type command adb in it. If you see output like below that means the android SDK path variable has been configured successfully.
C:\Users\Administrator>adb
Android Debug Bridge version 1.0.39
Version 0.0.1-4500957
Installed as C:\Users\Administrator\AppData\Local\Android\Sdk\platform-tools\adb
.exe

2. Configure Android SDK Variable In macOS.
- Open Android Studio on macOS, then click Android Studio —> Preferences menu item at the left top toolbar.
- Input search keyword sdk in the search box of the popup Preferences dialog window left side.
- It will focus on the Android SDK menu item on the left side, and you can get the Android SDK Location directory path value on the right side Android SDK Location text box.
- Generally, the Android SDK is installed in the /Users/user-name/Library/Android/sdk folder on macOS.
- If you can not find the above folder in macOS finder or terminal, this is because the Library folder is a hidden folder by default, you should make the hidden folder visible by executing the command
$ defaults write com.apple.finder AppleShowAllFiles TRUEin a macOS terminal window ( please read article How To Show Hidden Files In Mac OS Finder And Select Hidden Files In Html Upload File Form ). - You can also see the hidden Library folder by opening a macOS Finder window, then click Go —> Go to Folder… menu item, and input ~/Library in the popup dialog input text box, then click Go button.
- This is also another method to show the hidden Library folder, open a macOS Finder window, click Go —> Home menu item. Right-click the home folder, then click the Show View Options menu item in the popup menu list. Check the Show Library Folder checkbox.
- Use nano to create or edit user bash profile in user home directory.
$ nano .bash_profile.
- Add ANDROID_HOME and PATH environment variable in user bash profile.
export ANDROID_HOME=/Users/Jerry/Library/Android/sdk
export PATH=$PATH:$ANDROID_HOME/tools
export PATH=$PATH:$ANDROID_HOME/tools/bin
export PATH=$PATH/:$ANDROID_HOME/platform-tools
- Make the added system environment take effect.
$ source .bash_profile
- Now open a terminal and run adb, you should also see something output like in windows.
3. How To Download And Install Android SDK Command Line Tool Manually.
- If you do not need Android Studio, and you just want to use android SDK command-line tools only, it is very easy also.
- Go to the android SDK command-line tools download page and download the related zip files.
- Unzip the zip file to a local folder for example C:\android-sdk.
- Now when you start the Android Studio for the next time, it will let you select the android SDK location folder, just select the above folder.
- You can also change the android SDK location folder in the Android Studio Settings dialog.
- For Windows, start Android Studio, then click File —> Settings menu item.
- For macOS, start Android Studio, then click Android Studio —> Preferences menu item.
- Select Appearance & Behavior —> System Settings —> Android SDK menu item in the popup window left side.
- On the window right side, click the Edit link after the Android SDK Location text box, it will open the SDK Setup dialog.
- At the bottom of the SDK Setup dialog, there is an Android SDK Location text box, you can browse the new Android SDK folder to use it.
Этот урок описывает установку и настройку среды для разработки под Android.
Что вы создадите
Вы изучите, как установить инструменты для сборки Android приложений. При необходимости,
создадите виртуальное устройство Android (AVD).
Что вам потребуется
- Примерно 15 минут свободного времени
- Любимый текстовый редактор или IDE
- JDK 6 и выше
Настройка среды для разработки под Android
Перед тем, как вы сможете собрать Android приложение, вы должны установить Android SDK.
При установке Android SDK также устанавливается AVD Manager, графический пользовательский
интерфейс для создания и управления Android Virtual Devices (AVDs).
-
С сайта Android
скачайте актуальную версию Android SDK для вашей операционной системы. -
Распакуйте архив в выбранное вами место. К примеру, в Linux или Mac этим местом может быть
пользовательский каталог. Более подробную информацию по установке смотрите на сайте
Android Developers. -
Установите значение переменной окружения
ANDROID_HOMEв местоположение Android SDK.
Дополнительно, добавьте в переменную окруженияPATHзначенияANDROID_HOME/tools
иANDROID_HOME/platform-tools.
Mac OS X
export ANDROID_HOME=//android-sdk-macosx
export PATH=${PATH}:$ANDROID_HOME/tools:$ANDROID_HOME/platform-tools
Linux
export ANDROID_HOME=//android-sdk-linux
export PATH=${PATH}:$ANDROID_HOME/tools:$ANDROID_HOME/platform-tools
Windows
set ANDROID_HOME=C:\\android-sdk-windows
set PATH=%PATH%;%ANDROID_HOME%\tools;%ANDROID_HOME%\platform-tools
Загруженный Android SDK не содержит какую-то конкретную платформу. Для запуска кода этого урока
вам необходимо загрузить и установить последнюю версию SDK платформы. Для этого вы можете использовать
Android SDK и AVD Manager, которые вы установили в предыдущем разделе.
1. Откройте окно Android SDK Manager:
android
Если этой командой не открывается Android SDK Manager, значит вы
некорректно настроили переменные окружения.
2. Установите галочку для Tools.
3. Установите галочку для latest Android SDK.
4. В каталоге Extras установите галочку для Android Support Library.
5. Нажмите кнопку Install packages… для завершения загрузки и установки.
Если захотите загрузить и установить все доступные версии и обновления, то имейте ввиду, что
это займет много времени, т.к. каждая версия API занимает большой размер.
Если необходимо, создание виртуального устройства Android
Если у вас нет Android устройства для тестирования, то вы можете использовать виртуальное
устройство Android. Для этого у вас должны быть установлены Android SDK и соответствующая
версия SDK платформы и пакетов. См. Настройка среды для разработки под Android.
Эта команда создает новое AVD под названием «Default» на основе Android 4.2.2, API Level 19:
android create avd --name Default --target android-19 --abi armeabi-v7a
Как вариант, вы можете использовать android GUI инструмент для создания AVD.
Ниже приведена информация об использованных параметрах:
--nameНазвание нового AVD--targetНазначаемый ID нового AVD--abiCPU/ABI, которое будет эмулировано для AVD
Эта команда отображает список доступных заданий. Используйте их для создания различных AVD на основе
различных Android версий по необходимости.
android list target
Как вы можете увидеть, значение «29» ассоциировано с Android 4.2.2. Обратите внимание на
три доступных ABI(CPU) для данного ID. Команда, использованная ранее для создания AVD
указывала на ARM CPU.
id: 19 or "android-19"
     Name: Android 4.4.2
     Type: Platform
API level: 19
 Revision: 3
    Skins: HVGA, QVGA, WQVGA400, WQVGA432, WSVGA, WVGA800 (default), WVGA854, WXGA720, WXGA800, WXGA800-7in
Tag/ABIs : default/armeabi-v7a, default/x86
Просмотр списка доступных AVD производится командой:
android list avd
Ниже информация о только что созанном AVD:
Name: Default
   Path: /Users/{user}/.android/avd/Default.avd
 Target: Android 4.4.2 (API level 19)
Tag/ABI: default/armeabi-v7a
   Skin: WVGA800
Проверяем, что AVD работает:
emulator -avd Default
Итог
Поздравляем! Вы только что установили и настроили окружение для разработки под Android,
которое можно использовать с Spring.
С оригинальным текстом урока вы можете ознакомиться на
spring.io.
comments powered by