Search code, repositories, users, issues, pull requests…
Provide feedback
Saved searches
Use saved searches to filter your results more quickly
Sign up
This guide will show you how to successfully unpack and repack an Android system image
Requirements
- Download Auto Tool Unpack Repack .DAT & .IMG for Windows: V2.0 , V3.0 x86 , V3.0 X64
- Download Java SE Development Kit @ https://www.oracle.com/java/technologies…loads.html and install on the PC
- Download Python for Windows @ https://www.python.org/downloads/windows/ and install it
- Get file_contexts from the ramdisk in boot.img (see https://www.hovatek.com/forum/thread-15817.html )
- Get the system.img or system.new.dat & system.transfer.list you wish to unpack and repack
Follow the steps below to unpack and repack system.img or system.new.dat
How to unpack system.img
- Run Auto_Tool.exe as as Administrator
![[Image: Hovatek-how-to-unpack-and-repack-system.img-1.jpg]](data:image/svg+xml,%3Csvg%20xmlns='http://www.w3.org/2000/svg'%20viewBox='0%200%200%200'%3E%3C/svg%3E)
- You should now be in the tools Dashboard
Type 4 then press Enter
- Copy the file_contexts and system.img into the Input-IMG folder
- Go back to the tool and press Enter
- Wait while the system image gets unpacked
- Copy the size ***** bytes, you’ll need it for repacking . In this example, it is 2684190720
- Once unpacking is done, press Enter
- You should find the unpacked system image in the Unpack-IMG folder
![[Image: Hovatek-how-to-unpack-and-repack-system.img-1.jpg]](https://www.hovatek.com/blog/bpyeki/uploads/2016/11/Hovatek-how-to-unpack-and-repack-system.img-1.jpg)
![[Image: Hovatek-how-to-unpack-and-repack-system.img-2.jpg]](https://www.hovatek.com/blog/bpyeki/uploads/2016/11/Hovatek-how-to-unpack-and-repack-system.img-2.jpg)
![[Image: Hovatek-how-to-unpack-and-repack-system.img-3.jpg]](https://www.hovatek.com/blog/bpyeki/uploads/2016/11/Hovatek-how-to-unpack-and-repack-system.img-3.jpg)
![[Image: Hovatek-how-to-unpack-and-repack-system.img-4.jpg]](https://www.hovatek.com/blog/bpyeki/uploads/2016/11/Hovatek-how-to-unpack-and-repack-system.img-4.jpg)
![[Image: Hovatek-how-to-unpack-and-repack-system.img-5.jpg]](https://www.hovatek.com/blog/bpyeki/uploads/2016/11/Hovatek-how-to-unpack-and-repack-system.img-5.jpg)
![[Image: Hovatek-how-to-unpack-and-repack-system.img-7.jpg]](https://www.hovatek.com/blog/bpyeki/uploads/2016/11/Hovatek-how-to-unpack-and-repack-system.img-7.jpg)
![[Image: Hovatek-how-to-unpack-and-repack-system.img-8.jpg]](https://www.hovatek.com/blog/bpyeki/uploads/2016/11/Hovatek-how-to-unpack-and-repack-system.img-8.jpg)
![[Image: Hovatek-how-to-unpack-and-repack-system.img-9.jpg]](https://www.hovatek.com/blog/bpyeki/uploads/2016/11/Hovatek-how-to-unpack-and-repack-system.img-9.jpg)
![[Image: Hovatek-how-to-unpack-and-repack-system.img-10.jpg]](https://www.hovatek.com/blog/bpyeki/uploads/2016/11/Hovatek-how-to-unpack-and-repack-system.img-10.jpg)
How to repack system.img
- Go back to the tool, type 5 then press Enter
- Type y then press Enter
- Type the size in bytes you copied from above (in this example, it is 2684190720) then press Enter
- Wait while the image is repacked
- Once repacking is done, press Enter
- You should see the repacked system.img in the IMG-Repack folder
![[Image: Hovatek-how-to-unpack-and-repack-system.img-11.jpg]](https://www.hovatek.com/blog/bpyeki/uploads/2016/11/Hovatek-how-to-unpack-and-repack-system.img-11.jpg)
![[Image: Hovatek-how-to-unpack-and-repack-system.img-12.jpg]](https://www.hovatek.com/blog/bpyeki/uploads/2016/11/Hovatek-how-to-unpack-and-repack-system.img-12.jpg)
![[Image: Hovatek-how-to-unpack-and-repack-system.img-13.jpg]](https://www.hovatek.com/blog/bpyeki/uploads/2016/11/Hovatek-how-to-unpack-and-repack-system.img-13.jpg)
![[Image: Hovatek-how-to-unpack-and-repack-system.img-14.jpg]](https://www.hovatek.com/blog/bpyeki/uploads/2016/11/Hovatek-how-to-unpack-and-repack-system.img-14.jpg)
![[Image: Hovatek-how-to-unpack-and-repack-system.img-15.jpg]](https://www.hovatek.com/blog/bpyeki/uploads/2016/11/Hovatek-how-to-unpack-and-repack-system.img-15.jpg)
![[Image: Hovatek-how-to-unpack-and-repack-system.img-16.jpg]](https://www.hovatek.com/blog/bpyeki/uploads/2016/11/Hovatek-how-to-unpack-and-repack-system.img-16.jpg)
How to unpack system.new.dat
- Run Auto_Tool.exe as as Administrator
- Type 1 then press Enter
- Copy the file_contexts, system.new.dat and system.transfer.list into the Input-DAT folder
- Go back to the tool and press Enter
- Wait while the system.new.dat is unpacked
- Copy the size in bytes, you’ll need it for repacking. In this example, it is 2684354560
- Once unpacking is done, press Enter
- You should see the unpacked system.new.dat in the Unpack-DAT folder
![[Image: Hovatek-how-to-unpack-and-repack-system.new_.dat-1.jpg]](https://www.hovatek.com/blog/bpyeki/uploads/2016/11/Hovatek-how-to-unpack-and-repack-system.new_.dat-1.jpg)
![[Image: Hovatek-how-to-unpack-and-repack-system.new_.dat-2.jpg]](https://www.hovatek.com/blog/bpyeki/uploads/2016/11/Hovatek-how-to-unpack-and-repack-system.new_.dat-2.jpg)
![[Image: Hovatek-how-to-unpack-and-repack-system.new_.dat-3.jpg]](https://www.hovatek.com/blog/bpyeki/uploads/2016/11/Hovatek-how-to-unpack-and-repack-system.new_.dat-3.jpg)
![[Image: Hovatek-how-to-unpack-and-repack-system.new_.dat-4.jpg]](https://www.hovatek.com/blog/bpyeki/uploads/2016/11/Hovatek-how-to-unpack-and-repack-system.new_.dat-4.jpg)
![[Image: Hovatek-how-to-unpack-and-repack-system.new_.dat-5.jpg]](https://www.hovatek.com/blog/bpyeki/uploads/2016/11/Hovatek-how-to-unpack-and-repack-system.new_.dat-5.jpg)
![[Image: Hovatek-how-to-unpack-and-repack-system.new_.dat-6.jpg]](https://www.hovatek.com/blog/bpyeki/uploads/2016/11/Hovatek-how-to-unpack-and-repack-system.new_.dat-6.jpg)
![[Image: Hovatek-how-to-unpack-and-repack-system.new_.dat-7.jpg]](https://www.hovatek.com/blog/bpyeki/uploads/2016/11/Hovatek-how-to-unpack-and-repack-system.new_.dat-7.jpg)
How to repack system.new.dat
- Return to the tool, type 2 and press Enter
- Type y then press Enter
- Type the size in bytes you copied from above (in this example, it is 2684354560) then press Enter
- Wait while system.new.dat is repacked
- Once repacking is done, press Enter
- You should now see the repacked system.new.dat and system.transfer.list in the DAT-Repack folder
![[Image: Hovatek-how-to-unpack-and-repack-system.new_.dat-8.jpg]](https://www.hovatek.com/blog/bpyeki/uploads/2016/11/Hovatek-how-to-unpack-and-repack-system.new_.dat-8.jpg)
![[Image: Hovatek-how-to-unpack-and-repack-system.new_.dat-9.jpg]](https://www.hovatek.com/blog/bpyeki/uploads/2016/11/Hovatek-how-to-unpack-and-repack-system.new_.dat-9.jpg)
![[Image: Hovatek-how-to-unpack-and-repack-system.new_.dat-10.jpg]](https://www.hovatek.com/blog/bpyeki/uploads/2016/11/Hovatek-how-to-unpack-and-repack-system.new_.dat-10.jpg)
![[Image: Hovatek-how-to-unpack-and-repack-system.new_.dat-11.jpg]](https://www.hovatek.com/blog/bpyeki/uploads/2016/11/Hovatek-how-to-unpack-and-repack-system.new_.dat-11.jpg)
![[Image: Hovatek-how-to-unpack-and-repack-system.new_.dat-12.jpg]](https://www.hovatek.com/blog/bpyeki/uploads/2016/11/Hovatek-how-to-unpack-and-repack-system.new_.dat-12.jpg)
![[Image: Hovatek-how-to-unpack-and-repack-system.new_.dat-13.jpg]](https://www.hovatek.com/blog/bpyeki/uploads/2016/11/Hovatek-how-to-unpack-and-repack-system.new_.dat-13.jpg)
Important Notice
- If you’re using signed images then you might get an error unpacking with this tool. In such a case, you need to first unsign the images
- Ensure you have sufficient space on your PC because the unpacked images will be much larger than when in zipped / compressed format
- The Java and python installers are system architecture specific so ensure to download the right installer for yours (32 or 64 bit)
- You can also use Assayyed kitchen
Note!
We have a reply schedule for Free Support. Please upgrade to Private Support if you can’t wait.
(This post was last modified: 01-09-2020, 01:11 PM by hovatek.)
![]()
Posts: 31
Threads: 8
Joined: Mar 2017
Reputation:
0
thanks bro I will try , thanks for your quick response, great salute
![]()
Posts: 216
Threads: 63
Joined: Mar 2016
Reputation:
-1
![]()
Posts: 49,514
Threads: 1,465
Joined: Oct 2013
Reputation:
432
(12-12-2017, 01:38 PM)chikaubah Wrote: cant find file context
Look properly
Note!
We have a reply schedule for Free Support. Please upgrade to Private Support if you can’t wait.
![]()
Posts: 138
Threads: 1
Joined: Aug 2015
Reputation:
2
I tried using the tool and it was successful but upon trying to repack, i saw the message that says i should enter the size in MB
![]()
Posts: 138
Threads: 1
Joined: Aug 2015
Reputation:
2
I have successfully unpack my system new dat file but get the getting error while trying to repack it.
![[Image: Untitled.png]](https://preview.ibb.co/e47i8x/Untitled.png)
![]()
X3non
Recognized Contributor
![]()
![]()
![]()
![]()
![]()
Posts: 22,062
Threads: 571
Joined: Jul 2014
Reputation:
332
(08-02-2018, 10:13 AM)paeffiong Wrote: I tried using the tool and it was successful but upon trying to repack, i saw the message that says i should enter the size in MB
check step 6 when unpacking. you’re to take note of the size.
that’s what you’ll use for repacking
![]()
Posts: 138
Threads: 1
Joined: Aug 2015
Reputation:
2
(08-02-2018, 06:56 PM)X3non Wrote:
(08-02-2018, 10:13 AM)paeffiong Wrote: I tried using the tool and it was successful but upon trying to repack, i saw the message that says i should enter the size in MB
check step 6 when unpacking. you’re to take note of the size.
that’s what you’ll use for repacking
My issue as screen shot has nothing absolutely to do with the size.
Look critically at the pic and you will understand what I’m facing.
![]()
Posts: 49,514
Threads: 1,465
Joined: Oct 2013
Reputation:
432
(08-02-2018, 07:30 PM)paeffiong Wrote: My issue as screen shot has nothing absolutely to do with the size.
Look critically at the pic and you will understand what I’m facing.
Restart the unpack-repack process running the tool as Admin.
Also try unpack and repack as RAW (system.img) using the guide at https://www.hovatek.com/forum/thread-20497.html
Note!
We have a reply schedule for Free Support. Please upgrade to Private Support if you can’t wait.
![]()
Posts: 138
Threads: 1
Joined: Aug 2015
Reputation:
2
I need something that will help me out on repacking the image to its original format.
Though the ROM has already been ported to my device by me, i need to work on repacking it to its original format.
ANDROID IMG REPACK TOOLS | Android Image Editing Utilities for WINDOWS and LINUX
ANDROID_IMG_REPACK_TOOLS
Device or OS, firmware: Android Image Editing Utilities for WINDOWS and LINUX
ANDROID_IMG_REPACK_TOOLS is a set of utilities for editing Android ext4 and boot images for WINDOWS and LINUX
Developer: A.S._id
Special thanks for the help in the implementation of the project= S =
Tools included:
mkbootfs
mkbootimg
unpackbootimg
img2simg
simg2img
simg2simg
make_ext4fs
make_ext4fs_def
ext2simg
sgs4ext4fs — Chainfire’s tool
sources used:
https://android.googlesource.com
https://github.com/Cya…ndroid_system_core.git
https://github.com/Chainfire/sgs4ext4fs
Get the source code and compilation of binaries for Linux:
git clone https://github.com/ASdev/android_img_repack_tools
Select branch, for example:
cd android_img_repack_tools
git checkout android-4.4.4_r2.0.1
Preparation and compilation:
Download source from android git repositories
Compilation of executable files
Delete executable files
Delete source
Examples of using:
## Converting sparse flashing system.img from flashing android sparse img to ext4 img
$ simg2img system.img system.raw.img
## or all parts of sparse img
$ simg2img system.img * system.raw.img
## Mounting ext4 img for edit
$ mkdir system_mnt
$ mount -t ext4 -o loop system.raw.img system_mnt
## Creating new android sparse img for flashing (android 2.3.6-4.2)
$ mkuserimg.sh -s system_mnt system_new.img ext4 ./temp [size partition MB for example 1024M]
## or
$ make_ext4fs -s -l 1024M system_new.img system_mnt
## Create new FS or converting ext4 img to sparse img for flashing (android 4.3-etc)
$ ./mkuserimg.sh -s system system.img ext4 / system 2324M file_contexts
or
$ ext2simg -v system.raw.img system_new.img
## Changing sparse img header size from 28bit to 32bit (for Samsung Exynos Octa)
$ sgs4ext4fs —bloat system_new.img system_32bit.img
## Remove Moto extra header … (for Motorola G-series, making after unsparse img)
$ mv system.raw.img system.moto.img
$ dd if = system.moto.img of = system.raw.img ibs = 131072 skip = 1
Android_ROM_IMG_Repacker
Automation based on Android_img_repack_tools
XDA thread
 Android_ROM_IMG_Repacker_v22.zip(234.25 KB)
For help in creating thanksmaster_lee
Behind ImgExtractorAnd_pda
Installation Manual fromShipiloff69 Video
BINARY
ANDROID IMG REPACK TOOLS
Post has been editedA.S._id — 21.08.17, 09:14
Reason for editing: some fixes for Android_ROM_IMG_Repacker_v2
Only cygwin1.dll you have is strange. Specifically, make_ext4fs.exe does not start with it on 32 bits.
 S5610_best,
There is such a thing — added, what was required, although make_ext4fs, for the five — well, unless you create a new fs, but for editing it is much better:
ext2simg -v raw.img sparse.img
no mess with size, attributes and contexts — everything is saved
Post has been editedA.S._id — 26.04.15, 01:27
A.S._id,
Yes, the convert is great.
But the assembly from the folder …
r: \ make_ext4fs_new>make_ext4fs -l 1610612736 -a system -s -S file_contexts system.img system_
Creating filesystem with parameters:
Size: 1610612736
Block size: 4096
Blocks per group: 32768
Inodes per group: 8192
Inode size: 256
Journal blocks: 6144
Label:
Blocks: 393216
Block groups: 12
Reserved block group size: 95
error: xattr_assert_sane: BUG: extended attributes are not sorted
S5610_best @ 04/26/2015, 05:40
A.S._id,
Yes, the convert is great.
But the assembly from the folder …
Well, to be honest, I don’t quite understand how to describe the addition of Selinux contexts, here for comparison try the same thing on the phone how it will work …
Or better, I think it’s necessary to watch the Android assembly Makefile from the source, as described there …
In general, I figured out what was the matter and fixed it …
In short, I redid the source code and rebuilt the tools — I first made make_ext4fs in the same way as for Linux i.e. during assembly, attributes must be preserved, but because this is not suitable for Windows (UNIX attributes do not exist for files), so I had to add attributes during the default build of 644 root: root. This means that after the assembly, the file attributes must be edited in accordance with the OS parameters, although in theory the operand
mount point in theory should set the correct attributes myself, but I did not check -will have to try
Tried — attributes are set correct
$ ./mkuserimg.sh -s system system.img ext4 / system 2324M file_contexts
./make_ext4fs -s -T -1 -S file_contexts -l 2324M -a / system system.img system
Creating filesystem with parameters:
Size: 2436890624
Block size: 4096
Blocks per group: 32768
Inodes per group: 7840
Inode size: 256
Journal blocks: 9296
Label:
Blocks: 594944
Block groups: 19
Reserved block group size: 151
Created filesystem with 3980/148960 inodes and 550588/594944 blocks
Post has been editedA.S._id — 28.04.15, 01:24
Added by:
ANDROID_IMG_REPACK_TOOLS_CYGWIN_SRC_5.1.1_r1
ANDROID_IMG_REPACK_TOOLS_CYGWIN_x32_5.1.1_r1
ANDROID_IMG_REPACK_TOOLS_CYGWIN_x64-86_5.1.1_r1
I’ll grind in the evening. What, only I have a five on the whole forum …)
Hmm, something strange is happening … Until I figured it out
Post has been editedS5610_best — 01.05.15, 06:05
I wanted to edit the firmware file in .img format, I registered the command
ext2simg -v system.img sparse.img
And in response received
Help solve the problem 
Mumtaz
Little info — for the one that is, the tool does not see the fs header
A.S._id,
He only gives such an answer :(, what other methods are there?
Mumtaz @ 05/07/2015, 23:05
A.S._id,
He only gives such an answer :(, what other methods are there?
You need to at least know what kind of device …
A.S._id,
Teclast x80h, based on Intel x86
Mumtaz @ 05/08/2015, 18:04
A.S._id,
Teclast x80h, based on Intel x86
So it’s like a dual file system on it, I haven’t met such devices yet and don’t know how so far …
A.S._id,
Poking around is there an opportunity? )
file_contexts is a very correct thing.
The question arose of filling this file. Is it possible to create such a file based on the existing ext4 image of the SYSTEM partition? If not, is it possible to make such a program under win32?
Post has been editedastinus — 09.05.15, 14:38
Astinus @ 05/09/2015, 14:36
The question arose of filling this file. Is it possible to create such a file based on the existing ext4 image of the SYSTEM partition? If not, is it possible to make such a program under win32?
Why create it if it is?
I disassembled the firmware and reassembled it again. After downloading to the phone, the firmware does not start, because there are not enough rights that were assigned during the assembly. You have to manually register a fairly large list in this file.
Astinus @ 05/09/2015, 19:42
I disassembled the firmware and reassembled it again. After downloading to the phone, the firmware does not start, because there are not enough rights that were assigned during the assembly. You have to manually register a fairly large list in this file.
As far as I know, the contexts in this file are registered in groups, according to a specific mount point and list of exceptions for specific files. If the contexts of your files should differ from the contexts of the groups, then you should either add them to the exceptions, or register new groups for them, but in this case you will have to replace the fie_contexts on the building with your own, as when mounting it will need to coordinate your contexts. To do this, you will need to rebuild boot.img and replace file_contexts in it.
In my opinion, something like this …
Again he took up the old, a little understanding of what was happening. I collect the 5.1 image with the command:
make_ext4fs -s -T -1 -l 1610612736 -a / system -s -S file_contexts_lp system.img system_
If you collect from a folder unpacked through ImgExtractor — symlinks appear in the assembled image (as if implanted in an NTFS system — noticed through File Properties). If you collect a folder from, let’s say, anonymized files and folders unpacked somewhere on a lifeless file system such as FAT32 on a USB flash drive -beneficial bacteriathere are no symlinks in the final image. I check this by re-unpacking in ImgExtractor.
Those. how would make_ext4fs work, but not really. For example, I would like to collect firmware sparse images from TWRP tarballs (Nandroid). Torment did not lead to anything. An image cannot be extracted without distorting the structure and contents of files (7zip / WinRAR). This is already a question of N2, but it is connected with the first.
Help than you can))
S5610_best,
Now, let’s start sorting it out together:
1. I did not understand what kind of symlink we are talking about? As far as I know, make_ext4fs does not know how to create symlinks (I suspect it’s about unix permissions (rights and owners)?)
2. I did this: I took the finished firmware image from note3, converted it through simg2img, opened it with paragon disk manager, exported all the contents to the temp folder, and then assembled the sparse image with the command
$ ./mkuserimg.sh -s temp system.img ext4 / system 2324M file_contexts
rebooted into linux again converted the received image via simg2img, mounted, mounted the original image next to it, opened both images through krusader in neighboring windows, compared and made sure that all attributes are identical
3. in a team
make_ext4fs -s -T -1 -l 1610612736 -a / system -s -S file_contexts_lp system.img system_
I do not understand why you write the -s operand twice?
4. yes 7zip / winrar for some reason break the contents of the .tar archive, so for this it is better to use the total commander or in the tar.exe idial from cygwin it is there in the / bin folder
Post has been editedA.S._id — 14.05.15, 13:20
Владелец скрыт
9 июн. 2015 г.
—
Владелец скрыт
9 июн. 2015 г.
—
Владелец скрыт
9 июн. 2015 г.
—
Владелец скрыт
8 мар. 2016 г.
—
Владелец скрыт
8 мар. 2016 г.
—
В этой папке нет файлов.Чтобы добавить файлы, войдите в аккаунт
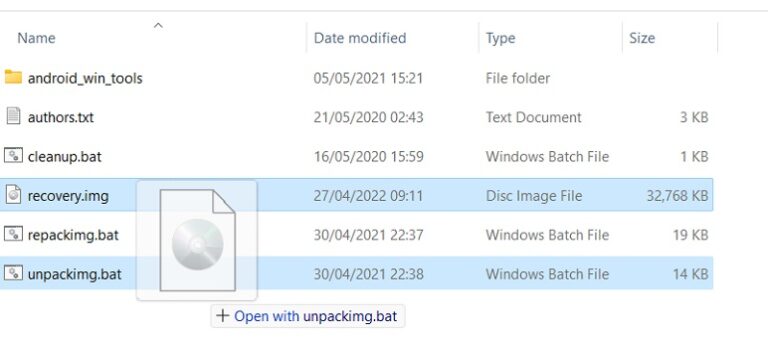
Android Image Kitchen is a program that lets you edit, unpack, and repack boot and recovery images. It allows you to edit the files using your favorite text editor and other tools. It also replaces the original files with the appropriate file permissions. The program is ideal for testing boot and recovery images.
This app is compatible with Android mobile devices, as well as PCs, Macs, and Windows computers. It also runs on various Android emulators. In addition to the mobile platform, Image Kitchen for PC is available for Windows, Mac, and Linux computers. To install Image Kitchen for PC, you can use any Android emulator.
What is IMG Kitchen?
Android Image Kitchen is a free tool for Windows, Mac, Linux, and Android that allows you to Android Image Kitchen [IMG Kitchen] Unpack/Repack Kernel+Recovery Images, and Edit the ramdisk.
Android Image Kitchen Instructions
- Unzip.
- Either use the command line “unpacking “, or simply drag and drop the image. This will split the image and unpack the ramdisk to a subdirectory.
- After the ramdisk as you like.
- The repacking script requires no input and simply recombines the previously split kernel with the newly packed modified ramdisk using all the original image information (which was also split and saved).
- The cleanup script resets the folder to its initial state, removing the split_img+ramdisk directories and any newly packed ramdisk or image files.
There are a few optional, advanced command-line arguments for repacking: “–original”, which will cause it to repack using the original split ramdisk instead of repacking, this is useful for testing or trimming dumps; “–organize”, which will cause it to repack then pad it to the size of the original image, this is useful for repacking dumps to then be fastboot flashed; “–level” with 1-9 and possibly 0 allows changing the compression level used to repack to more closely match the original; “–avbkey” with (optionally path and) a keyname allows changing from the default AOSP verity key; “–forceelf” to attempt to make an older unpacked Sony ELF file repack as an ELF.
All scripts also allow unpacking/repacking with the current directory instead of the AIK directory if “–local” is the first command-line argument.
Supported ramdisk compression formats in the *-ramdiskcomp file are gzip, lzop, lzma, xz, bzip2, lz4, lz4-l (for lz4 legacy), cpio (for uncompressed), and empty (for no ramdisk).
Usage is similar for the Android and Linux versions, again, just review the release notes for them.
Hopefully, this is some help to someone. It’s been extremely useful for me in my messing around with kernel ramdisks, which is why I created it in the first place.
Enjoy!
Also Check: Aroma File Manager Tool
Download IMG Kitchen [All Versions]
| Name | OS | Link |
|---|---|---|
| IMG_Kitchen_win v3.8 | Windows | Download AIK Win32 |
| IMG_Kitchen_Mobile v3.8 | Linux | Download AIK Linux |
| IMG_Kitchen_linux v3.8 | Android | Download AIK Android |