Powershell может использовать классы .NET. Один из таких классов, NotifyIcon, может выводить привычный баннер в нижней части экрана. В этой статье будет рассмотрен способ создания такого баннера с вашим текстом, а так же разные варианты его использования.
В итоге этой статьи можно будет создать баннер с похожим уведомлением:

Оно так же будет оставаться в панели уведомлений.
Где можно использовать
Обычно такие баннеры можно видеть при обновлении, освобождении места, почтовые уведомления и т.д. Учитывая, что Powershell хорошо интегрирован с серверными ролями — такой баннер может отлично подойти под разные мониторинги сервисов. Например вы можете проверять заблокированных пользователей и выводить их если это произошло.
Сложность, с которой я столкнулся, связана с удаленным выполнением такого скрипта средствами Powershell (WinRM). Вывод каких либо окон у удаленного пользователя, используя Powershell и .NET, задача не такая простая.
Самый простой и интересный способ выводить такие окна массово — использование REST. В предыдущих статьях был пример создания такого сервиса на Pode.
Если баннер у вас не выводится — возможно у вас отключены уведомления. В моем случае причиной оказалось следующая настройка, но она не единственная которая может повлиять на вывод:

Создание баннера
Первым делом мы должны импортировать класс «System.Windows.Forms» через Add-Type. Без этой команды у вас может появиться ошибка. Далее мы создаем объект (копию/инстанс) из класса ‘NotifyIcon’:
Add-Type -AssemblyName System.Windows.Forms

$banner = New-Object System.Windows.Forms.NotifyIcon
После создания объекта баннера — нам нужно указать у него 4 свойства:
- Icon — иконка, которая будет отображаться вместе с баннером;
- BalloonTipIcon — уровень уведомлений: ошибка (Error), предупреждение (Warning), уведомление (Info) или None;
- BalloonTipText — текст, который будет выводиться в баннере;
- BalloonTipTitle — заголовок в баннере;
- Visible — отображение;
Иконку можно указать 2-мя способами: указав прямой путь до файла с расширением ‘*.ico’ или скопировать ее у одного из приложений:
# импортируем класс для иконки
Add-Type -AssemblyName System.Drawing

# 1) Указываем путь до существующей картинки формата '.ico'
$ico = 'G:\banner.ico'
$banner.Icon = New-Object System.Drawing.Icon($ico)

# 2) или вытаскиваем иконку с существующего приложения
# (в данном примере Powershell)
$ico = "$env:WINDIR\system32\WindowsPowerShell\v1.0\powershell.exe"
$banner.Icon = [System.Drawing.Icon]::ExtractAssociatedIcon($ico)
Так же объявим остальные свойства описанные выше:
# Уровень сообщения
$banner.BalloonTipIcon  = [System.Windows.Forms.ToolTipIcon]'Info'
$banner.BalloonTipTitle = 'Заголовок'
$banner.BalloonTipText  = 'Наше сообщение'
# будет ли выводится баннер
$banner.Visible = $true
Для вызова баннера используется метод «ShowBalloonTip», в котором нужно указать длительность отображения баннера. В примере ниже стоит 200 миллисекунд. По истечении этого времени баннер исчезнет:
$banner.ShowBalloonTip(200)
Скрытие иконки
Одна из проблем кода выше заключается в иконке, которая выводятся вместе с баннером. Она не исчезает после вывода баннера. Ее так же нельзя скрыть по нажатию. Единственный способ закрыть их — завершить сессию Powershell в которой она была создана (закрыв окно).
Правильным способом скрытием иконки будет вызов метода ‘dispose’, который предназначен именно для этого. Этот метод будет вызываться при событии (тригере) в виде двойного нажатия на иконку в трейе.
Событие создается с помощью ‘Register-ObjectEvent’. В нем мы должны указать объект (NotifyIcon), событие на которое необходима реакция (двойное нажатие мышки) и название. При нажатии мы выполняем блок прописанный в ‘Action’:
Add-Type -AssemblyName System.Windows.Forms

if (-NOT $banner) {
    $banner = New-Object System.Windows.Forms.NotifyIcon
    [void](Register-ObjectEvent -InputObject $banner -EventName MouseDoubleClick -SourceIdentifier BannerClick -Action {
        # При двойном клике удаляем все созданные объекты
        $banner.dispose()
        Unregister-Event -SourceIdentifier BannerClick
        Remove-Job -Name BannerClick
        Remove-Variable -Name banner
    })
}

# ...
# Остальной код
# ...
Альтернативно можно закрыть баннер вызвав метод «$banner.dispose()» в конце скрипта, но в этом случае иконка вместе с сообщением пропадет полностью после указанного времени.
Готовая команда
Целый скрипт находится на GitHub. Его можно использовать разными способами. Вы можете поместить его в папку с модулями или импортировать:
Import-Module "F:\powershell\banner\Invoke-Banner.ps1"Варианты использования:
# информационное сообщение
Invoke-Banner -Title 'Заголовок' -Text 'Простое информационное сообщение'

# вывод ошибки
Invoke-Banner -Title 'Заголовок' -Text 'Ошибка' -Type Error

# указываем длительность работы баннера и свою иконку
Invoke-Banner -Title 'Заголовок' -Text 'Простое информационное сообщение' -Type Error -Duration 700 -Icon "G:\banner.ico"
Дополнительные возможности
Сам класс ‘NotifyIcon’ предназначен не только для вывода баннера. Основная работа класса связана с взаимодействием с иконкой. К этой иконке можно привязать контекстное меню и вызвать какие-то другие функции. Для примера возьмем команды, которые выведут список процессов в GUI:
Get-Process | Out-GridView
Мы можем создать контекстное меню с вызовом этой команды. Для этого добавим следующий код к предыдущему скрипту:
    $banner.BalloonTipText  = $Text
    # --- предыдущий код ---
    # создаем объект с меню
    $menu = New-Object System.Windows.Forms.ContextMenuStrip
    # создаем кнопку с названием
    $exit = $menu.Items.Add('Вывод процессов')
    # привязываем событие, которое сработает при нажатии на кнопку
    $exit.add_Click({
        Get-Process | Out-GridView
        # Закрытие работы приложения
        $appContext.ExitThread()
    })
    # привязываем меню к кнопке
    $banner.ContextMenuStrip = $menu
    $banner.Visible = $true
    $banner.ShowBalloonTip($Duration)
    # запускаем как приложение
    $appContext = New-Object System.Windows.Forms.ApplicationContext
    [void][System.Windows.Forms.Application]::Run($appContext)

}
Можно установить другие события скрывающие иконку или выполняющие определенные действия. Все из них можно увидеть следующим образом:
Add-Type -AssemblyName System.Windows.Forms
$banner = New-Object System.Windows.Forms.NotifyIcon
$banner | Get-Member
NotifyAction это класс .NET и вы можете почитать документацию для поиска других применений.
Использование удаленно
Вызывать подобный скрипт удаленно, используя WinRM (PSRemoting), не получится. Это связано с разными сеансами, в которых работает сам пользователи и Powershell. Если вы ищете простой вариант вывода сообщений удаленно — вам может больше подойти статься по программе msg и ее использование в Powershell, которая работает в этом случае исправно.
Можно использовать программу ‘psexec’ от SysInternals, но это так же достаточно сложный процесс. В первую очередь мы должны узнать номер сессии в которой работает пользователь. Самый простой способ сделать это — использовать ‘quser’:
# локально
quser

# удалено
quser /server:localhost
О quser и другие способах подключения описывалось в предыдущих статьях. Удаленный вариант, с quser, сработает только в том случае, если вы являетесь привилегированным пользователем для подключения к удаленному компьютеру. Использовать эту команду с WinRM, скорее всего, приведет к проблемам с кодировками. Из результата работы команды вам нужно значение с ID.
Имея этот идентификатор и скаченную утилиту ‘psexec’, вы сможете запустить командлет следующим образом:
$module_path = "C:\banner.ps1"
$command = "Invoke-Banner -Title Hello -Text World"
$session_id = 2

.\PsExec64.exe -s -i $session_id \\192.168.2.111 -u domain\администратор -p пароль /accepteula cmd /c "powershell -command Import-Module $module_path; $command"
Пример, который я сделал для видео:
…
Теги:
#powershell
Несмотря на то, что PowerShell консольный язык, иногда необходимо из скрипта PowerShell оповестить пользователя об определенном событии или необходимости выполнить определенное действие. Например, вывести уведомление о завершении какого-либо длительного PoSh скрипта, или об наступлении какого-то важного события.
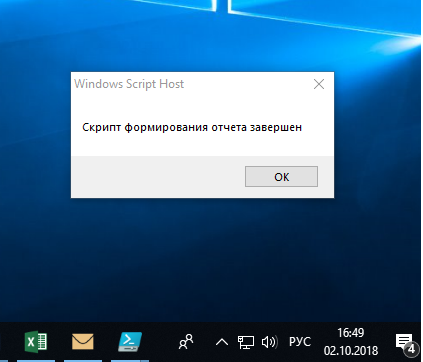
Самый простой способ вывести окошко с произвольным тестом через подсистему сценариев Windows – Wscript.
Следующий код выведет обычное текстовое окно с необходимым текстом и кнопкой OK.
$wshell = New-Object -ComObject Wscript.Shell
$Output = $wshell.Popup("Скрипт формирования отчета выполнен")
С помощью различных свойств метода Popup вы можете настроить вид модального окна сообщения. В том числе можно вернуть в скрипт результаты ответа пользователя на вопрос (Да / Нет).
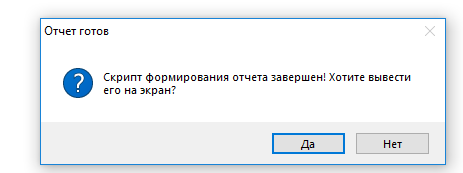
$Output = $wshell.Popup("Скрипт формирования отчета завершен! Хотите вывести его на экран?",0,"Отчет готов",4+32)
Общий синтаксис и параметры метода Popup:
Popup(<Text>,<SecondsToWait>,<Title>,<Type>)
Параметры:
- <Text> — строка, текст сообщения.
- <SecondsToWait> — необязательный, число. Количество секунд, по истечении которого окно будет автоматически закрыто.
- <Title> — необязательный, строка. Текст заголовка окна сообщения.
- <Type> — необязательный, число. Комбинация флагов, определяет тип кнопок и значка. Возможные значения флагов:
- 0 — кнопка ОК.
- 1 — кнопки ОК и Отмена.
- 2 — кнопки Стоп, Повтор, Пропустить.
- 3 — кнопки Да, Нет, Отмена.
- 4 — кнопки Да и Нет.
- 5 — кнопки Повтор и Отмена.
- 16 — значок Stop.
- 32 — значок Question.
- 48 — значок Exclamation.
- 64 — значок Information.
Описание: возвращает целое значение, с помощью которого можно узнать, какая кнопка была нажата пользователем. Возможные значения:
- -1 — таймаут.
- 1 — кнопка ОК.
- 2 — кнопка Отмена.
- 3 — кнопка Стоп.
- 4 — кнопка Повтор.
- 5 — кнопка Пропустить.
- 6 — кнопка Да.
- 7 — кнопка Нет.
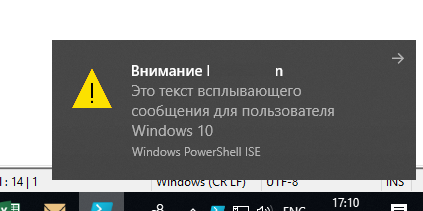
Более привлекательные и приятные взгляду всплывающие сообщения (ballons) можно вывести в Windows 7, 8.1 и 10 через API Windows Forms. Следующий PowerShell код выведет всплывающее сообщение рядом с панелью уведомлений Windows 10, которое автоматически исчезнет через 10 секунд.
Add-Type -AssemblyName System.Windows.Forms
$global:balmsg = New-Object System.Windows.Forms.NotifyIcon
$path = (Get-Process -id $pid).Path
$balmsg.Icon = [System.Drawing.Icon]::ExtractAssociatedIcon($path)
$balmsg.BalloonTipIcon = [System.Windows.Forms.ToolTipIcon]::Warning
$balmsg.BalloonTipText = 'Это текст всплывающего сообщения для пользователя Windows 10'
$balmsg.BalloonTipTitle = "Внимание $Env:USERNAME"
$balmsg.Visible = $true
$balmsg.ShowBalloonTip(10000)
Кроме того для создания красочных всплывающих сообщений в Windows 10 (PowerShell 5.0+)можно использовать отдельный PowerShell модуль BurntToast из галереи PowerShell.
Модуль устанавливается из онлайн репозитория с помощью менеджера пакетов Windows 10:
Install-Module -Name BurntToast
Теперь, например, в ранее рассматриваемый скрипт автоматического отключение от Wi-FI сети при подключении к Ethernet можно добавить красочное уведомление:
New-BurntToastNotification -Text "Отключение от Wi-Fi сети", "Вы были отключены от Wi-Fi сети, т.к. Вше устройство было подключено к скоростному Ethernet подключению." -AppLogo C:\PS\changenetwork.png
Итак, теперь вы знаете как вывести уведомление пользователя через PowerShell. Если у пользователя есть динамики, можно даже сыграть ему мелодию:
[console]::beep(440,500)
[console]::beep(440,500)
[console]::beep(440,500)
[console]::beep(349,350)
[console]::beep(523,150)
[console]::beep(440,500)
[console]::beep(349,350)
[console]::beep(523,150)
[console]::beep(440,1000)
[console]::beep(659,500)
[console]::beep(659,500)
[console]::beep(659,500)
[console]::beep(698,350)
[console]::beep(523,150)
[console]::beep(415,500)
[console]::beep(349,350)
[console]::beep(523,150)
[console]::beep(440,1000)
[console]::beep(880,500)
[console]::beep(440,350)
[console]::beep(440,150)
[console]::beep(880,500)
[console]::beep(830,250)
[console]::beep(784,250)
[console]::beep(740,125)
[console]::beep(698,125)
[console]::beep(740,250)
[console]::beep(455,250)
[console]::beep(622,500)
[console]::beep(587,250)
[console]::beep(554,250)
[console]::beep(523,125)
[console]::beep(466,125)
[console]::beep(523,250)
[console]::beep(349,125)
[console]::beep(415,500)
[console]::beep(349,375)
[console]::beep(440,125)
[console]::beep(523,500)
[console]::beep(440,375)
[console]::beep(523,125)
[console]::beep(659,1000)
[console]::beep(880,500)
[console]::beep(440,350)
[console]::beep(440,150)
[console]::beep(880,500)
[console]::beep(830,250)
[console]::beep(784,250)
[console]::beep(740,125)
[console]::beep(698,125)
[console]::beep(740,250)
[console]::beep(455,250)
[console]::beep(622,500)
[console]::beep(587,250)
[console]::beep(554,250)
[console]::beep(523,125)
[console]::beep(466,125)
[console]::beep(523,250)
[console]::beep(349,250)
[console]::beep(415,500)
[console]::beep(349,375)
[console]::beep(523,125)
[console]::beep(440,500)
[console]::beep(349,375)
[console]::beep(261,125)
[console]::beep(440,1000)
PowerShell is an advanced shell with integration of .NET objects. It’s more than just a replacement for the older cmd.exe. It can work with .NET assemblies, process large datasets and even interact with web services.
Because of the .NET assemblies support, it can work with WinForms (or even WPF), making it possible to create scripts with GUIs.
Requirements
This has been tested to work with Windows PowerShell verion 5.1. It’s likely going to work with older versions as well, but it’s not going to work with the new cross-platform PowerShell (there are no WinForms on Linux/macOS). You can check the version with
Get-Host | Select-Object version
Setting up the environment
Before we can start, let’s check a few things.
The first one is the script execution policy. It controls which scripts can be run. By default, Windows blocks execution of all scripts (more on that here). We have to allow it to run local scripts that are not digitally signed. It’s possible to do this this either by going through Windows Settings > Updates & Security > For developers, checking the Change execution policy… checkbox and clicking Apply, or just executing
Set-ExecutionPolicy RemoteSigned
from administrator PowerShell.
Another (less important) thing is the code editor. Even though we could just write the entire script directly in PowerShell, it’s easier to use a full-featured editor with error checking and syntax highlighting. Windows already comes with PowerShell ISE (Integrated Scripting Environment), but you can use Visual Studio Code with the PowerShell extension.
Writing our script
Let’s start!
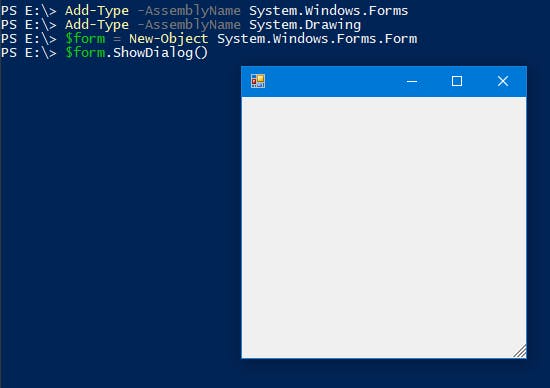
Importing the assemblies
We have to import both System.Windows.Forms and System.Drawing assemblies. It’s possible to only include the first one but we also need the 2nd to specify control sizes.
Add-Type -AssemblyName System.Windows.Forms
Add-Type -AssemblyName System.Drawing
You can test it by creating a blank form:
$form = New-Object System.Windows.Forms.Form
$form.ShowDialog()
Adding controls
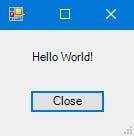
Let’s make a «Hello World» form. First, we create a top-level Form object:
$form = New-Object System.Windows.Forms.Form
$form.Text = "Some form"
$form.Size = New-Object System.Drawing.Size(150, 145)
$form.AutoSize = $true
In PowerShell, objects are created using New-Object. You can also pass parameters to constructors, similar to the new keyword in C#. Values are assigned to properties directly. Another difference is using $true instead of just true.
Let’s add a label and a button:
$lbl1 = New-Object System.Windows.Forms.Label
$lbl1.Text = "Hello World!"
$lbl1.Location = New-Object System.Drawing.Point(30, 20);

$btn = New-Object System.Windows.Forms.Button
$btn.Text = "Close"
$btn.location = New-Object System.Drawing.Point(30, 60);
$btn.DialogResult = [System.Windows.Forms.DialogResult]::OK
The $btn.DialogResult line tells the form what to return when the button is clicked. You can use this to figure out whether the user clicked OK or Cancel. We also make $btn the default button and lay controls onto the form:
$form.AcceptButton = $btn
$form.controls.Add($lbl1)
$form.controls.Add($btn)
All that’s left is showing the form itself:
$form.ShowDialog()
Event handlers
In our form, $btn is the default OK button which just terminates the form. But we can use non-terminating event handlers as well. For example, let’s make it possible to click on the label:
$lbl1.Add_Click({
    [System.Windows.Forms.MessageBox]::Show("Hey!")
})
You can call functions from event handlers as you normally would.
Visual Styles
Something I’ve noticed with these GUI scripts is that different control styles are used when the script is run from the PowerShell console instead of VSCode. The console uses legacy rendering which falls back to using Windows 95-style controls. We need to enable Visual Styles to fix that:
[System.Windows.Forms.Application]::EnableVisualStyles()
From here on, you can add more controls and event handlers. If you’ve used C#/VB.NET before you can reuse large parts of that knowledge to create nicer and more powerful scripts.
That’s it for now 😉
The full script:
Add-Type -AssemblyName System.Windows.Forms
Add-Type -AssemblyName System.Drawing

[System.Windows.Forms.Application]::EnableVisualStyles()

$form = New-Object System.Windows.Forms.Form
$form.Text = "Some form"
$form.Size = New-Object System.Drawing.Size(150, 145)
$form.AutoSize = $true

$lbl1 = New-Object System.Windows.Forms.Label
$lbl1.Text = "Hello World!"
$lbl1.Location = New-Object System.Drawing.Point(30, 20);

$lbl1.Add_Click({
    [System.Windows.Forms.MessageBox]::Show("Hey!")
})

$btn = New-Object System.Windows.Forms.Button
$btn.Text = "Close"
$btn.location = New-Object System.Drawing.Point(30, 60);
$btn.DialogResult = [System.Windows.Forms.DialogResult]::OK

$form.AcceptButton = $btn
$form.controls.Add($lbl1)
$form.controls.Add($btn)

$Null = $form.ShowDialog()
I saw a question with an answer a while back showing how to work around an issue that had previously worked up until PowerShell V3 involving variables and how they work in an event handler in a WinForm or WPF UI. The suggested answer was to create the variable with the Script variable scope so that way the data in the variable would be available in the event handler and its scope.
An example of this can be shown below, first with the code that the variable would not work with because it is out of the scope of the event handler.
Add-Type -AssemblyName System.Windows.Forms
Add-Type -AssemblyName System.Drawing
$window = New-Object System.Windows.Forms.Form
$window.Width = 1000
$window.Height = 1000

$windowTextBox = New-Object System.Windows.Forms.TextBox
$windowTextBox.Location = New-Object System.Drawing.Size(10,10)
$windowTextBox.Size = New-Object System.Drawing.Size(500,500)

$windowButtonOK = New-Object System.Windows.Forms.Button
$windowButtonOK.Location = New-Object System.Drawing.Size(10,510)
$windowButtonOK.Size = New-Object System.Drawing.Size(50,50)
$windowButtonOK.Text = "OK"
$windowButtonOK.Add_Click({
    $text  = $windowTextBox.Text
    $window.Dispose()
})

$window.Controls.Add($windowTextBox)
$window.Controls.Add($windowButtonOK)

[void]$window.ShowDialog()

Write-Host -ForegroundColor Yellow "Test: $($Text)"
What happens here is that even though we set the variable ($Text) in the event handler, we cannot access it outside of the event handler at all.

As you can see below, the actual text inputted doesn’t make it outside of the event handler.

The solution to was to change the scope of the variable to Script: (not Global which would be beyond what is needed) to allow for the variable to be accessible to commands run in the script. As shown with the code below, we need to ensure that each time the variable is used, that we specify it as Script: to ensure it is read properly, otherwise the variable will just be treated like it was in the previous example.
Add-Type -AssemblyName System.Windows.Forms
Add-Type -AssemblyName System.Drawing
$window = New-Object System.Windows.Forms.Form
$window.Width = 1000
$window.Height = 1000
$ThreadID = [System.Threading.Thread]::CurrentThread.ManagedThreadId
Write-Host -ForegroundColor Green "ThreadID: $($ThreadID) - ProcessID: $PID)"
$windowTextBox = New-Object System.Windows.Forms.TextBox
$windowTextBox.Location = New-Object System.Drawing.Size(10,10)
$windowTextBox.Size = New-Object System.Drawing.Size(500,500)

$windowButtonOK = New-Object System.Windows.Forms.Button
$windowButtonOK.Location = New-Object System.Drawing.Size(10,510)
$windowButtonOK.Size = New-Object System.Drawing.Size(50,50)
$windowButtonOK.Text = "OK"
$windowButtonOK.Add_Click({
    $ThreadID = [System.Threading.Thread]::CurrentThread.ManagedThreadId
    Write-Host -ForegroundColor Green "[EventHandler] ThreadID: $($ThreadID) - ProcessID: $PID)"
    $Script:text  = $windowTextBox.Text
    $window.Dispose()
})

$window.Controls.Add($windowTextBox)
$window.Controls.Add($windowButtonOK)

[void]$window.ShowDialog()

Write-Host -ForegroundColor Yellow "Test: $($Script:text)"


This time we have our variable available outside of the event handler scope and now shows up when we display the information. Definitely something to remember when you are working with UIs in PowerShell V3 and above so you are not left wondering why specific events are not working properly.
In case you are wondering if the event handler occurs in a different process id and/or thread, it doesn’t.
![]()
I started with this because it works. But it isn’t the only approach to dealing with this issue by adjusting the variable scope. My approach to this is done using synchronized collections, or what I commonly use with runspaces, the synchronized hash table.
Add-Type -AssemblyName System.Windows.Forms
Add-Type -AssemblyName System.Drawing
$hash = [hashtable]::Synchronized(@{})
$hash.text = ""
$window = New-Object System.Windows.Forms.Form
$window.Width = 1000
$window.Height = 1000

$windowTextBox = New-Object System.Windows.Forms.TextBox
$windowTextBox.Location = New-Object System.Drawing.Size(10,10)
$windowTextBox.Size = New-Object System.Drawing.Size(500,500)

$windowButtonOK = New-Object System.Windows.Forms.Button
$windowButtonOK.Location = New-Object System.Drawing.Size(10,510)
$windowButtonOK.Size = New-Object System.Drawing.Size(50,50)
$windowButtonOK.Text = "OK"
$windowButtonOK.Add_Click({
    $hash.text = $windowTextBox.Text
    $window.Dispose()
})

$window.Controls.Add($windowTextBox)
$window.Controls.Add($windowButtonOK)

[void]$window.ShowDialog()

Write-Host -ForegroundColor Yellow "Test: $($hash.text)"

Works like a charm without having to mess with variable scopes. But it does require that you initialize the hash table and make sure it is synchronized. This is a nice approach also if you have multiple variables that you may need to track across other event handlers rather than dealing with the variable scope.
Now, this doesn’t actually just apply to working with the UIs in PowerShell. This can also be applied to other event handlers such as those that have action script blocks using the Register-*Event cmdlets as well as shown in the demo below.
$synchash = [hashtable]::Synchronized(@{})
$synchash.test = 'test1'
$ThreadID = [System.Threading.Thread]::CurrentThread.ManagedThreadId
Write-Host -ForegroundColor Green "ThreadID: $($ThreadID) - ProcessID: $PID)"
$Job = start-job -ScriptBlock {start-sleep -seconds 2}
Register-ObjectEvent -InputObject $Job -EventName StateChanged -Action {
    $ThreadID = [System.Threading.Thread]::CurrentThread.ManagedThreadId
    Write-Host -ForegroundColor Green "[EventHandler] ThreadID: $($ThreadID) - ProcessID: $PID)"
    Write-Host "Data: $($synchash.test)" -ForegroundColor Yellow -BackgroundColor Black
}

Using the same approach worked again to display the data from within the Event handler script block. And as you can see again, the process id and thread id is the same as what is outside of the handler. We could also write to the hash table as well from within the handler and the data would be available for us to use in the current script.
So with that, we have an alternative to messing with the scope of variables if needed if you would rather not have to deal with it. This doesn’t mean that you have to stop using scopes such as Script, it just means that like most things in PowerShell, there are always alternatives to performing a single action. It does have a little bit more work in creating and initializing the synchronized collection, but it gives you something that will work perfectly within the scope of event handlers as well as offering a way to transport multiple variables within a single collection.
When it comes to working with the assembly System.Windows.Form there really is a lot of Classes available to you which allows you to add elements to your GUI Form to make it more user friendly and functional; afterall the entire purpose of creating a GUI Form is to remove the users need to type in all those commands you have coded into your Script.
Given the number of Classes is quite large I will not be covering every option in this tutorial, and instead will focus on a handful, which I hope will illustrate to you the basic principals of using these classes to create a functional GUI Form.
We’ll start with a very simple Form, and slowly build on it as I did in Part 1 to help you come to grips with the way to create your GUI Form, and make you realize that while there is a certain amount of finger exercise to come, that it is not as difficult to do as one might imagine.
So let’s get started!
Open Windows PowerShell ISE and enter the following code into the Script pane:
Code:
# Load required assemblies
Add-Type -AssemblyName System.Windows.Forms
Add-Type -AssemblyName System.Drawing

# Create Form to contain elements
$Form = New-Object System.Windows.Forms.Form

# Set Form Titlebar text
$Form.Text = "Console to list Directories of chosen path"

# Set size of form
# Size(<length>,<height>) in pixels
$Form.Size = New-Object System.Drawing.Size(600,400)

# Initialize form and show it
# [void] used to suppress other messages generated by Form actions
[void] $Form.ShowDialog()
After typing or copy & pasting the above code into the script pane click File > Run

- As you can see we now have a Blank Form which we’ll be able to build on.
- At this build we’ve set the Forms title bar text using $Form.Text
- Unlike in Part 1, this time we used a new assembly class to control the size of our Form (System.Drawing.Size).
- The Size() takes integer values to determine the size of the object being drawn in the format: Size(<length>,<height>) e.g. Size(600,400)
- Note: We’ve initialized our Form slightly differently that in Part 1
- [void] $Form.ShowDialog()
- [void] suppresses other messages generated by the Form. If we do not use [void], then, for example, if the user closes the Form the word «Cancel» appears in the console. We do not need that information, nor do they.
Add some elements to make the GUI Form functional
A User Input Textbox
We can add textbox to our GUI Form which takes input from the User. by adding the following code block to our Script:
Code:
# Create an Input textbox
$inputBox = New-Object System.Windows.Forms.TextBox

# Size(<length>,<height) in pixels
# .Location will position the textbox in a position relative to the
# base Form based on the Forms size(600,400)
# In this case location is 20 pixels in from Form boundary, and 50 pixels down from Form boundary
$inputBox.Location = New-Object System.Drawing.Size(20,50)

# Size(<length>,<height) in pixels
# .Size determines the actual size of the textbox
$inputBox.Size = New-Object System.Drawing.Size(150,20)

# Initialize the textbox inside the Form
$Form.Controls.Add($inputBox)
I’ve added comments to the code block to help explain each snippet, but here is a break down of what it does:
- First we create a variable $inputBox to assign our new object to. You can name your variable whatever you wish, but it helps when later analyzing your scripts to use a descriptive name.
- Next we assign a new object using the cmdlet New-Object and passing it our assembly Class System.Windows.Forms.TextBox
- Now using our $inputBox variable we append the .Location method in order to assign a new Drawing object by making using of the assembly class System.Drawing.Size(<length>,<height>)
- The System.Drawing.Size class takes two integer arguments: <length> and <height> which represent the number of pixels to draw the new textbox in from a specific location which is relative to the boundary walls of the GUI Form
- In the code above we are instructing the textbox be drawn 20 pixels in from the left boundary wall of GUI Form and 50 pixels down from the top boundary wall of our GUI Form
- Next we set the size of the textbox using the .Size method and assigning the System.Drawing.Size(<length>,<height>) class which takes integer values to represent the length and height (in pixels) of the object being drawn. In our case that will be 150 pixels wide by 20 pixels high)
- Finally, we need to initialize the textbox so it can be seen on the GUI Form. We do this by the snippet: $Form.Controls.Add($inputBox) which adds the Control element we pass to it (in this case our $inputBox variable which is storing our object.)
So now we need to add this to our current Script in the Windows PowerShell ISE Script Pane:

If we click File > Save, then File > Run we get:
It would be great to add a label to help the User understand what to do with that input field. To do that we simply add, the following code block before we initialize the $inputBox
Code:
# Create Instruction Label for inputBox
$Label = New-Object System.Windows.Forms.Label
$Label.Text = "Type Path here: e.g C:\Users"
$Label.Location = New-Object System.Drawing.Size(20,30)
$Label.BackColor = "Transparent"
$Label.AutoSize = $true

# Initialize Label
$Form.Controls.Add($Label)

When we run our updated script we get:
The label helps user understand the purpose of the input field
- The message for the user was placed onto the Label using $Label.Text
- We positioned the Label using $Label.Location = New Object System.Drawing.Size(20,30) i.e. 20 pixels in from left boundary wall of the GUI Form and 30 pixels down from top boundary wall of the GUI Form
- Just as in Part 1 of this tutorial we made the Label itself transparent, using $Label.BackColor = «Transparent» so as not to distract the eye from the input field.
- We initialized the $Label so it can be seen on the GUI Form using $Form.Controls.Add($Label) to pass our $Label variable storing the object via Controls.Add(<variable) to our $Form.
Supply feedback using an Output Textbox
Now we want to add an Output Textbox which will provide information to the User.
As the information may contain more than a single line of information we will make our new Textbox a multi-line field. This will be done by using the following code block:
Code:
# Create an Output textbox, 10 pixels in from Form Boundary and 150 pixels down
# As we want a multiline output set textbox size to 565 px x 200 px
# .Multiline declares the textbox is multi-line
$outputBox = New-Object System.Windows.Forms.TextBox
$outputBox.Location = New-Object System.Drawing.Size(10,150)
$outputBox.Size = New-Object System.Drawing.Size(565,200)
$outputBox.MultiLine = $True

# Initialize the textbox inside the Form
$Form.Controls.Add($OutputBox)- So we start by creating a variable $outputBox which we can name whatever we like as before. We will assign this variable a new Textbox object by using the cmdlet New-Object and passing the assembly class System.Windows.Forms.Textbox to it.
- Next we position the textbox as we did before with our input textbox.
- Next, also as before with the input textbox, we set its size. In this example, it will be 565 pixels wide by 200 pixels high.
- Now we declare that our textbox will be Multi-lined. To do this we use the boolean .MultiLine and as it is a boolean we assign $true to confirm its to be a multi-lined textbox who’s information is stored inside the variable $outputBox
- Finally, we need to initialize the textbox so it can be seen on the GUI Form
Now we add this to our current Script:

Then we save the changes, and click File > Run to get:
So now out GUI Form has a Textbox for the User to input data, and an Output Textbox that is multi-lined to report back data to the User. But how do we get the User input results to the Output Textbox?
Add an Action Button to GUI Form
To get the User input activated we can use a Button element which the User can click to start processing what they typed into the Input field, so a result can be displayed into the Output field.
To add this button we will use the following code block:
Code:
# Add a Button which can be used to generate an action from our textboxes
$Button = New-Object System.Windows.Forms.Button
$Button.Location = New-Object System.Drawing.Size(400,30)

# Button size(length>,<height>) in pixels
$Button.Size = New-Object System.Drawing.Size(110,80)

# Label the button
$Button.Text = "Click to view Directories"

# Declare the action to occur when button clicked
$Button.Add_Click( { GetDirectories } )

# Initialize the button inside the Form
$Form.Controls.Add($Button)- So as before we start by creating a variable to assign our new button object to, and as before we can name that variable whatever we like. In this example I used $Button for the variable and then used the cmdlet New-Object and then the assembly Class System.Windows.Forms.Button
- Then we position the button on the GUI Form using the .Location method appended to our variable. So the button will be 400 pixels from the left boundary wall of our GUI Form and 30 pixels down from the top boundary wall of our GUI Form.
- Now we set the size of the button by appending the .Size method to our variable then assigning the new object obtained by using the assembly Class System.Drawing.Size(<length>,height>)
- We add some text on our Button using $Button.Text = <String> which in this example is an instruction to tell User to click the button to view the Directories in the Path they just typed into their Input field.
- Next we need to code what action to take when the button is clicked. To do this we append the .Add_Click to our $Button variable so it knows the action to detect is the button being clicked, then we provide an Function to go seek, which contains the instructions on what action to take when button is clicked.
- Note: This function does not exist yet.
- Finally, we need to initialize our Button so it can be seen on the GUI Form
Now we add this code block to our Script, then save the changes:

After saving the changes we click File > Run to get:
Our GUI Form now has an Input & Output textbox, and a Button
Add a Function to process input, and show output by using Button Click action
The Form is almost ready now, but without a Function nothing will happen if the User typed a path into the Input Field, then clicked the button.
Functions are a code block normally placed at the top of a Script, or at least before the elements they are designed to provide actions to, in this case, our input, output and button.
Take a look at the code block for a Function that will bring our GUI Form to life:
Code:
# Create a Function to make use of textboxes
function GetDirectories {

  # Variable to store what user types into Input textbox
  $Input = $inputBox.Text

  # Set path to user's input
  Set-Location $Input

  # Variable to store results of actioning the Input
  $Result = $Input | Get-ChildItem -Directory  | Out-String

  # Assign Result to OutputBox
  $outputBox.Text = $Result
}- Our Function is named GetDirectories { }
- The parameters we will assign this function are the variables we created for our GUI Form, and some cmdlets we will use to generate an action.
- So we start by declaring a function: function GetDirectories {
- Now we create a new variable $Input that will have the User’s input assigned to it. To get the User’s input we call the .Text method by appending it to the $inputBox variable which is where the User is typing their data.
- Now we use the cmdlet Set-Location <variable> which in this example is our new $Input variable that stores the path the User typed into the $inputBox. This instruction changes the current directory to the directory the User chose to type into their textbox.
- Now we create another new variable $Result which will ultimately store the data gathered by processing the $Input we piped to the Get-ChildItem cmdlet then filter result using parameter -Directory which only supplies directories and not all other files, then piped to the cmdlet Out-String
- To get the information stored in our $Result variable to the $outputBox we append the method .Text to our $outputBox and then assign the $Result to that.
- Then we close our function with }
Let’s add this code block to our Script:

After saving the change and then clicking File > Run, our GUI Form now has life.
Example: User types C:\Windows\System32 into the Input field & clicks button
Have you spotted the problem yet?
No, its not that ugly formatting on the Sub-directory names (although we could tidy that up too.) Click inside the Output textbox then use your down arrow. As you get to last entry viewable more content will begin to appear. Our Textbox for the output is not big enough.
Now we could increase the size, but how can we possibly guess what is the correct size for a user; after all, we do not know if they’ve added their own custom sub-folders or not. What about using formatting to create two columns or more. Well that could work, but our textbox is not wide enough to avoid truncation of the result (you know, those …‘s).
What about adding a scrollbar? That does two things for us:
- It makes it very clear to the user they may need to scroll down to view all content, and
- It makes it a lot easier to actually scroll as now they can use their mouse.
Add a scrollbar to textbox
We know its our $outputBox than needs the ability to scroll, so that means we’ll need to edit the block of code relating to this textbox.
We know when we want to add to an object (in this case $outputBox) we need to append what we create to that object.
So this is how easy it is to fix our problem:
Code:
$outputBox.Scrollbars = "Vertical"
Add that to our Script:

Save the edit, then click File > Run and we get this if we enter C:\Windows and click the button:
So at this point you have created your own filtered version of File Explorer. Filtered, because you are only displaying sub-folders of a path you enter.
If you wanted to filter it to show files and not sub-folders, then you’d change this code snippet: $Result = $Input | Get-ChildItem -Directory | Out-String
- To view files only, and not sub-folders:
Code:
$Result = $Input | Get-ChildItem -File | Out-String- To view files and sub-folders:
Code:
$Result = $Input | Get-ChildItem | Out-StringDrag & Drop Feature
Something a lot of users love in Windows is the ability to drag and drop files.
For example, people drag an executable to their Command Prompt to quickly run it.
You can offer this feature in your GUI Form in PowerShell too.
To illustrate this I’m going to redesign our GUI Form, and create a left and right pane. The left pane will contain our File Explorer, and the right pane will contain a Listbox. You’ll be able to drag en element from the left pane to the Listbox in the right pane which will record the elements full path into a variable which will also be piped to a text file that will be saved to the Desktop.
So let’s get to the coding!
Code:
# Load required assemblies
Add-Type -AssemblyName System.Windows.Forms
Add-Type -AssemblyName System.Drawing

# Create a Function to make use of textboxes
function GetDirectories {

  # Variable to store what user types into Input textbox
  $Input = $inputBox.Text

  # Set path to user's input
  Set-Location $Input

  # Variable to store results of actioning the Input
  $Result = $Input | Get-ChildItem | Out-String

  # Assign Result to OutputBox
  $outputBox.Text = $Result
}

# Create Form to contain elements
$Form = New-Object System.Windows.Forms.Form

# Set Form Titlebar text
$Form.Text = "Console to list Files & Directories of chosen path and Drag & Drop to Listbox"

# Set size of form
# Size(<length>,<height>) in pixels
$Form.Size = New-Object System.Drawing.Size(800,600)

# Create an Input textbox
$inputBox = New-Object System.Windows.Forms.TextBox

# Size(<length>,<height) in pixels
# .Location will position the textbox in a position relative to the
# base Form based on the Forms size(800,600)
# In this case location is 20 pixels in from Form boundary, and 50 pixels down from Form boundary
$inputBox.Location = New-Object System.Drawing.Size(20,50)

# Size(<length>,<height) in pixels
# .Size determines the actual size of the textbox
$inputBox.Size = New-Object System.Drawing.Size(300,20)

# Create Instruction Label for inputBox
$Label = New-Object System.Windows.Forms.Label
$Label.Text = "Type Path here: e.g C:\Users"
$Label.Location = New-Object System.Drawing.Size(20,30)
$Label.BackColor = "Transparent"
$Label.AutoSize = $true

# Initialize Label
$Form.Controls.Add($Label)

# Initialize the textbox inside the Form
$Form.Controls.Add($inputBox)

# Create an Output textbox, 10 pixels in from Form Boundary and 150 pixels down
# As we want a multiline output set textbox size to 440 px x 400 px
# .Multiline declares the textbox is multi-line
# Declare vertical scrollbars
$outputBox = New-Object System.Windows.Forms.TextBox
$outputBox.Location = New-Object System.Drawing.Size(10,150)
$outputBox.Size = New-Object System.Drawing.Size(440,400)
$outputBox.MultiLine = $True
$outputBox.ScrollBars = "Vertical"

# Initialize the textbox inside the Form
$Form.Controls.Add($OutputBox)

# Add a Button which can be used to generate an action from our textboxes
$Button = New-Object System.Windows.Forms.Button
$Button.Location = New-Object System.Drawing.Size(20,90)

# Button size(length>,<height>) in pixels
$Button.Size = New-Object System.Drawing.Size(200,20)

# Label the button
$Button.Text = "Click to view Files `&& Directories"

# Declare the action to occur when button clicked
$Button.Add_Click( { GetDirectories } )

# Initialize the button inside the Form
$Form.Controls.Add($Button)

# Initialize form and show it
# [void] used to suppress other messages generated by Form actions
[void] $Form.ShowDialog()
Our edited Form now lists Files and Directories of the Path entered by user.
Note: I’ve left room on the right side for the Listbox yet to be created, which is what we’ll drag and drop to.
If above code and enter C:\Windows\System32 then click the button we get:

I will not explain the above again, as apart from some minor manipulation of the original Script to relocate, resize and re-label items, everything ought to be self-explanatory.
Add the listbox
Adding a listbot is no different to adding a textbox. Take a look at the code:
Code:
# Create a Listbox to drag items to
$listBox = New-Object Windows.Forms.ListBox
$listBox.Location = '480,100'
$listBox.Size = New-Object System.Drawing.Size(295,450)
$listBox.Anchor = (
  [System.Windows.Forms.AnchorStyles]::Bottom -bor
  [System.Windows.Forms.AnchorStyles]::Left -bor
  [System.Windows.Forms.AnchorStyles]::Right -bor
  [System.Windows.Forms.AnchorStyles]::Top
)
$listBox.IntegralHeight = $False
$listBox.AllowDrop = $True

# Initialize Listbox
$form.Controls.Add($listBox)- Most of this will be familiar to you.
- We’ve used the assembly Class Windows.Forms.ListBox
- The only subtle difference here is the use of the parameter -bor which stands for Bitwise OR (inclusive) in conjunction with specific borders which are piped via the assembly Class [System.Windows.Forms.AnchorStyles].
There are five choices for this class. Top, Bottom, Left, Right & None.
The control (e.g. Listbox) is anchored to the Bottom, left, right and top.
If I instead chose None then the control would not be anchored to any border.
While this was not truly needed in this code, I’ve shown it as an alternate way to position a control on your GUI Form.
- $listBox.IntegralHeight = $False
$True indicates that the text box resizes itself to display only complete items (default). $False indicates that the text box does not resize itself even if the item is too tall to display completely.
The IntegralHeight property relates to the height of the text box, just as the AutoSize property relates to the width of the text box.
If IntegralHeight is $True, the text box automatically resizes when necessary to show full rows. If False, the text box remains a fixed size; if items are taller than the available space in the text box, the entire item is not shown.
- $listBox.AllowDrop = $True — This boolean allows us to drop a dragged item into the ListBox
So let’s add our Listbox code block to the Script:

Now save the changes, then click File > Run and we get:
Label the listbox
We can add a descriptive label to our Listbox to help the User understand its purpose, by using the code block:
Code:
# Create Instruction Label for Listbox
$Label2 = New-Object System.Windows.Forms.Label
$Label2.Text = "Drag files or directories from Output field and drop here"
$Label2.Location = New-Object System.Drawing.Size(480,80)
$Label2.BackColor = "Transparent"
$Label2.AutoSize = $true

# Initialize Label2
$Form.Controls.Add($Label2)
Add this code to our Script:

Save the changes, then click File > Run to get:
Add a Button & Checkbox for our Listbox
Now we want to add a Button that when clicked will produce a text file saved to the Desktop of the contents of the ListBox.
We will also offer a checkBox that if checked will clear the ListBox once the button has been activated.
Take a look at the following code blocks to achieve this:
Code:
# Add a button for the Listbox
$Button2 = New-Object System.Windows.Forms.Button
$Button2.Location = '480,30'
$Button2.Size = New-Object System.Drawing.Size(180,20)
$Button2.Text = "Save as Listbox.txt on Desktop"

# Initialize Button2
$Form.Controls.Add($Button2)

# Add a checkbox to allow User to clear listbox if desired
# Will clear if checked and button is clicked
$Checkbox = New-Object Windows.Forms.Checkbox
$Checkbox.Location = '680,30'
$Checkbox.AutoSize = $True
$Checkbox.Text = "Clear Listbox"

# Initialize checkbox
$Form.Controls.Add($Checkbox)
Now add this code to our Script:

Save the changes, then click File > Run to get:
The easy bit is over — Let’s add a little colour to our Form to help highlight buttons, and differentiate from the OutputBox and ListBox fields (both of which are a TextBox). While we are at it let’s give the user some filter options to select all files, or a particular file type to view from the folder path they select.
To do all this we will make use of the BackColor and ForeColor methods with the listBox and outputBox and button variables. For example:
Code:
$listBox.BackColor = "#9a94be"
$listBox.ForeColor = "#000000"
This sets the BackColor of our listBox to #9a94be (a lilac shade) and the ForeColor to #000000 which is ‘black‘ — So the field is lilac and the font that appears in the listBox will be black.
We can set the font face, size and style too. For example:
Code:
$listBox.Font = "Microsoft Sans Serif,10"
This sets the font face for our listBox to Microsoft Sans Serif. The size is 10 pt.
I did not do it here, but if you wanted to, after the size you could add ,style=bold:
Code:
$listBox.Font = "Microsoft Sans Serif,10,style=bold"
This would make the 10 pt Microsoft Sans Serif font appear in bold within the listBox.
We can add buttons for file types to our Form using code blocks like:
Code:
$button2 = New-Object system.windows.Forms.Button
$button2.BackColor = "#000000"
$button2.Text = "EXE"
$button2.ForeColor = "#ffffff"
$button2.Width = 60
$button2.Height = 30
$button2.location = new-object system.drawing.point(90,100)
$button2.Font = "Microsoft Sans Serif,12"
This creates a black button, with EXE on the button in a white font color, located 90 pixels in from the left and 100 pixels down from the top of form. The button itself is 60 pixels wide x 30 pixels high.
Each of these file type buttons needs its own function to allow it to instruct the computer what to do when clicked. For example:
Code:
# All Executable files in selected path explored
Function ExeFileExplorer {

  # Variable to store what user types into Input textbox
  $Input = $inputBox.Text

  # Set path to user's input
  Set-Location $Input

  # Create Temporary File
  foreach ($item in $outputBox) {
    # Set filepaths
    $str = Get-ChildItem -Filter *.exe
  }
  $outputBox.Text = $str.FullName
  # Save Temporary file to Desktop
  $outputBox.Text.Split() | Out-File $env:USERPROFILE\Desktop\FilePath.txt -Append
  $outputBox.Clear()

  # Variable to store results of actioning the Input
  $Result = Get-ChildItem -Name $Input -Filter *.exe | Out-String

  # Assign Result to OutputBox
  $outputBox.Text = $Result
}
We need to call our Function for the buttons. This is easy; for example:
Code:
$button2.Add_Click({ ExeFileExplorer })When $button2 is clicked it calls the Function ExeFileExplorer which controls the actions to take place when button is clicked. In this case it will filter the results to display any executable file in the filepath supplied by the User into out $outputBox
So after these modifications and other similar modifications for other control items in the form we end up with a form looking like the following:
Event Handlers
So we have a few bells now, but still no whistles. We need to add some event handlers in order to make it possible to drag items from $outputBox (the left pane) to our $listBox (the right pane).
There are three ways to approach this, but for this we’ll use a relatively pain free method. I’ll go into more advanced details in a later tutorial.
For our basic form simple is best to achieve the goal of Drag & Drop capabilities.
I’ll make use of three events — MouseDown, DragEnter, DragDrop — and some Functions to inject some life into our Form. We also need to declare a new boolean to be true, to be able to make this work.
Boolean
To be able to drag and drop anything into your ListBox, we first need to declare true a boolean to allow DragDrop to even work. To do this we simply need to add one more line to our $listBox properties:
Code:
$listBox.AllowDrop = $trueThis makes use of the boolean AllowDrop to declare that any item dragged can be dropped into the ListBox.
MouseEventHandler MouseDown coupled with DragDropEffects
In order to be able to drag the text contents of our $outputBox we make use of the [System.Windows.Forms.MouseEventHandler] coupled with [System.Windows.Forms.DragDropEffects]. Again this is a nice tidy code block to add to our code:
Code:
<#
   ------------------------------------------------------------
   OutputBox Event Handler
   Allows 1 or more items to be selected and dragged to listBox
   ------------------------------------------------------------ #>
$outputBox_MouseDown = [System.Windows.Forms.MouseEventHandler] {
  $outputBox.DoDragDrop($outputBox.Text,[System.Windows.Forms.DragDropEffects]::Copy)
}- We declare our MouseDown event by appending _MouseDown to the $outputBox variable.
- This is event is assigned as a MouseEventHandler by adding = [System.Windows.Forms.MouseEventHandler] { }
- The action to take place on MouseDown [ i.e. left mouse button pressed and held as you drag ] is placed inside the { } braces.
- We append the method: DoDragDrop() to our $outputBox then pass two arguments through this method.
(1) SoutputBox.Text instructs that the text inside the TextBox $outputBox is the focus of the action to be taken.
(2) The second argument is the action to take. In this case we parse the Text contents of the TextBox $outputBox through the [System.Windows.Forms.DragDropEffects] class and instruct that it is to be copied :: Copy. Ultimately it will be copied to our ListBox, but first we need to provide Event Handlers for our ListBox and some functions to deal with the copied text data.
Drag & Drop requires two event handlers: The first deals with the Effect — DragEventHandler DragEnter for the ListBox
We made it possible to drop a dragged item into our ListBox using the boolean AllowDrop = $true.
If we left that as is, and provided no Event Handler to deal with our MouseDown then you could drag items from anywhere on your computer to the ListBox, however, that is not the plan with this project. We already have a TextBox that stored the data we want to drag to our ListBox.
Thus we need to create some Event Handlers for the ListBox to reflect this.
First, we want to handle what happens after we press and hold our left mouse button down and drag the cursor from the TextBox to our ListBox [i.e. what happens when we enter the ListBox with our mouse cursor ].
Code:
<#
   ----------------------------------------------------------------------------------
   ListBox Event Handlers
   Sets the only location a dragged item can enter.  In this case that is the ListBox
   ----------------------------------------------------------------------------------  #>
$listBox_DragEnter = [System.Windows.Forms.DragEventHandler] {
  $_.Effect = $_.AllowedEffect
}- As explained in the comments within this code block, when we append _DragEnter to out ListBox $listBox and assign [System.Windows.Forms.DragEventHandler] class to it, then declare that this.Effect = this.AllowedEffect (remember in PowerShell this is represented by $_) we are instructing the computer to only allow a dragged item from our TextBox $outputBox to be dropped into the ListBox $listBox.
When you run this program you’ll see as you drag from the TextBox the mouse cursor will remain a Circle with a diagonal line, until it Enters inside the ListBox then the cursor will change and the user will know they can release their mouse button to drop the dragged content into the ListBox.
- The AllowedEffect in this case is to Copy the Text from our $outputBox into our $listBox which as you will recall you set with the previous MouseEventHandler MouseDown coupled with DoDragDrop and [System.Windows.Forms.DragEventHandler]::Copy.
Drag & Drop requires two event handlers: The second deals with the Drop itself — DragEventHandler DragEnter for the ListBox
Code:
<#
   ------------------------------------------------------------------------
   > Set how to drop selected item(s) into ListBox
   > Makes use of [System.IO.File] to read each line
     of a file, then add each line to the ListBox.

     Required to prevent multiple items from a multiline TextBox
     appearing as one long line inside ListBox, rather than a list of items
     ---------------------------------------------------------------------- #>
$listBox_DragDrop = [System.Windows.Forms.DragEventHandler] {

  # Read Temorary File back into ListBox
  [string[]] $lines =  [System.IO.File]::ReadAllLines("$env:USERPROFILE\Desktop\FilePath.txt")
  [string] $line

  foreach ($line in $lines) {
    $listBox.Text = $listBox.Items.Add($line)
  }
  # Clear OutputBox
  $outputBox.Clear()

  # Delete Temporary File
  Remove-Item "C:\Users\Regedit32\Desktop\FilePath.txt"
}- We declare _DragDrop and assign it as a [System.Windows.Form.DragEventHandler]
- Now we pass our instructions between the { } braces. In this case we’ll be making use of Functions we have called on. I’ll show these next.
- [String[]] $lines creates a String array called $lines
- = [System.IO.File] assigns an assembly class System Input/Output File
- ::ReadAllLines instructs that the file being passed as the ReadAllLines() method will have all lines of text in it read
- («$env:USERPROFILE\Desktop\FilePath.txt») is the argument being passed through the ReadAllLines() method which in this case is pointing a temporary file created on the Users Desktop named FilePath.txt
- [string] $line declares a new String variable $line
- foreach ($line in $lines) { $listBox.Text = $listBox.Items.Add($line) } is a conditional loop which continues until there are no more new lines of text in our file $FilePath.txt. For each new line in FilePath.txt assign that line of text to our [String] $line. Now add this $line to our ListBox.
Without this snippet of code when we copy the data from $outputBox to $listBox, all lines would appear as a single long line in our ListBox. Using this Array conditional loop approach allows us to take one line at a time and add it to the ListBox.
- $outputBox.Clear() instructs in this case to clear the TextBox $outputBox of its contents once the conditional loop has completed.
- Remove-Item «C:\Users\Regedit32\Desktop\FilePath.txt» will delete the temporary file on User’s Desktop named FilePath.txt when the actions of the conditional loop have completed and thus populated our dragged text from the TextBox to our ListBox.
Note: You’ll notice if you run this Script the TextBox $outputBox contains a list of names of a particular file extension the User chose, for example regedit.exe
However, after we drag this list to our ListBox that Text data miraculously changes to a full file path to the file, e.g. C:\Windows\regedit.exe
This occurs because of another conditional loop coded earlier that is contained in each of the supporting Functions for the file type the User chooses to explore.
I will not re-explain this here as (1) it is very similar to the conditional loop already explained above, and (2) the Function its included in while supporting the clicking of the EXE button in our Form, is simply using standard snippets of code explained in previous Tutorials. If you need help understanding the support functions in this Script ask and I’ll go through it step by step.
Remove and/or Initialize these control event handlers
As one last piece of house maintenance, we need to add our event handlers to the Form, and also remove them as the Form is closed ( Disposed() ).
Code:
$form_FormClosed = {
  try {
    $Form.remove_FormClosed($Form_Cleanup_FormClosed)
    $outputBox.remove_MouseDown($outputBox_MouseDown)
    $listBox.remove_DragEnter($listBox_DragEnter)
    $listBox.remove_DragDrop($listBox_DragDrop)
  }
  catch [Exception] {}
}
#Initialize Events
$Form.Add_Click($button6_Click)
$button1.Add_Click($button1_Click)
$button2.Add_Click($button2_Click)
$button3.Add_Click($button3_Click)
$button4.Add_Click($button4_Click)
$button5.Add_Click($button5_Click)
$button6.Add_Click($button6_Click)
$outputBox.Add_MouseDown($outputBox_MouseDown)
$listBox.Add_DragEnter($listBox_DragEnter)
$listBox.Add_DragDrop($listBox_DragDrop)

$Form.Add_FormClosed($Form_FormClosed)
Again, I’ve explained these techniques in previous tutorials, so I will not repeat myself, but as you can see in the code block above, you do need to add each event handler and remove them too for Form Opening and Closure.
If you need help understanding this code block, just ask and I’ll give a detailed break down of what its doing.
The Full Script Code is below:
Code:
<#
__          ___           _                  __  ___  ______
\ \        / (_)         | |                /_ |/ _ \|  ____|
\ \  /\  / / _ _ __   __| | _____      _____| | | | | |__ ___  _ __ _   _ _ __ ___  ___   ___ ___  _ __ ___
  \ \/  \/ / | | '_ \ / _` |/ _ \ \ /\ / / __| | | | |  __/ _ \| '__| | | | '_ ` _ \/ __| / __/ _ \| '_ ` _ \
   \  /\  /  | | | | | (_| | (_) \ V  V /\__ \ | |_| | | | (_) | |  | |_| | | | | | \__ \| (_| (_) | | | | | |
    \/  \/   |_|_| |_|\__,_|\___/ \_/\_/ |___/_|\___/|_|  \___/|_|   \__,_|_| |_| |_|___(_)___\___/|_| |_| |_|


PowerShell Script Repository: https://www.windows10forums.com/articles/categories/powershell-scripts.8/
Author: Regedit32
#>

Add-Type -AssemblyName System.Windows.Forms

# All file types explored
Function AllFileExplorer {

  # Variable to store what user types into Input textbox
  $Input = $inputBox.Text

  # Set path to user's input
  Set-Location $Input

  # Create Temporary File
  foreach ($item in $outputBox) {
    # Set filepaths
    $str = Get-ChildItem -Filter *.*
  }
  $outputBox.Text = $str.FullName
  # Save Temporary file to Desktop
  $outputBox.Text.Split() | Out-File $env:USERPROFILE\Desktop\FilePath.txt -Append
  $outputBox.Clear()

  # Variable to store results of actioning the Input
  $Result = Get-ChildItem -Name $Input -Filter *.* | Out-String


  # Assign Result to OutputBox
  $outputBox.Text = $Result
}

# All Executable files in selected path explored
Function ExeFileExplorer {

  # Variable to store what user types into Input textbox
  $Input = $inputBox.Text

  # Set path to user's input
  Set-Location $Input

  # Create Temporary File
  foreach ($item in $outputBox) {
    # Set filepaths
    $str = Get-ChildItem -Filter *.exe
  }
  $outputBox.Text = $str.FullName
  # Save Temporary file to Desktop
  $outputBox.Text.Split() | Out-File $env:USERPROFILE\Desktop\FilePath.txt -Append
  $outputBox.Clear()

  # Variable to store results of actioning the Input
  $Result = Get-ChildItem -Name $Input -Filter *.exe | Out-String

  # Assign Result to OutputBox
  $outputBox.Text = $Result
}

# All DLL files in seleced path explored
Function DllFileExplorer {

  # Variable to store what user types into Input textbox
  $Input = $inputBox.Text

  # Set path to user's input
  Set-Location $Input

  # Create Temporary File
  foreach ($item in $outputBox) {
    # Set filepaths
    $str = Get-ChildItem -Filter *.dll
  }
  $outputBox.Text = $str.FullName
  # Save Temporary file to Desktop
  $outputBox.Text.Split() | Out-File $env:USERPROFILE\Desktop\FilePath.txt -Append
  $outputBox.Clear()

  # Variable to store results of actioning the Input
  $Result = Get-ChildItem -Name $Input -Filter *.dll | Out-String

  # Assign Result to OutputBox
  $outputBox.Text = $Result
}


# All SYS files of selected path explorered
Function SysFileExplorer {

  # Variable to store what user types into Input textbox
  $Input = $inputBox.Text

  # Set path to user's input
  Set-Location $Input

  # Create Temporary File
  foreach ($item in $outputBox) {
    # Set filepaths
    $str = Get-ChildItem -Filter *.sys
  }
  $outputBox.Text = $str.FullName
  # Save Temporary file to Desktop
  $outputBox.Text.Split() | Out-File $env:USERPROFILE\Desktop\FilePath.txt -Append
  $outputBox.Clear()

  # Variable to store results of actioning the Input
  $Result = Get-ChildItem -Name $Input -Filter *.sys | Out-String
  $str = Get-ChildItem -Filter *.sys

  # Assign Result to OutputBox
  $outputBox.Text = $Result

  Return $str
}

# All TXT files of selected path explored
Function TxtFileExplorer {

  # Variable to store what user types into Input textbox
  $Input = $inputBox.Text

  # Set path to user's input
  Set-Location $Input

  # Create Temporary File
  foreach ($item in $outputBox) {
    # Set filepaths
    $str = Get-ChildItem -Filter *.txt
  }
  $outputBox.Text = $str.FullName
  # Save Temporary file to Desktop
  $outputBox.Text.Split() | Out-File $env:USERPROFILE\Desktop\FilePath.txt -Append
  $outputBox.Clear()

  # Variable to store results of actioning the Input
  $Result = Get-ChildItem -Name $Input -Filter *.txt | Out-String

  # Assign Result to OutputBox
  $outputBox.Text = $Result
}

$Form = New-Object system.Windows.Forms.Form
$Form.Text = "Drag & Drop Files to listBox"
$Form.TopMost = $true
$Form.Width = 800
$Form.Height = 600

$listBox = New-Object system.windows.Forms.ListBox
$listBox.BackColor = "#9a94be"
$listBox.ForeColor = "#000000"
$listBox.Size = New-Object System.Drawing.Size(360,404)
$listBox.location = new-object system.drawing.point(400,137)
$listBox.Font = "Microsoft Sans Serif,10"
$listBox.AllowDrop = $true

$label2 = New-Object system.windows.Forms.Label
$label2.Text = "Drag `&& Drop Files or Directories Here"
$label2.AutoSize = $true
$label2.Width = 360
$label2.Height = 20
$label2.location = new-object system.drawing.point(400,100)
$label2.Font = "Microsoft Sans Serif,14"

$checkBox = New-Object system.windows.Forms.CheckBox
$checkBox.Text = "Clear "
$checkBox.AutoSize = $true
$checkBox.Width = 95
$checkBox.Height = 30
$checkBox.location = new-object system.drawing.point(710,60)
$checkBox.Font = "Microsoft Sans Serif,12,style=Bold"

# Create an Output textbox, 10 pixels in from Form Boundary and 150 pixels down
# As we want a multiline output set textbox size to 360 px x 400 px
# .Multiline declares the textbox is multi-line
# Declare vertical scrollbars
$outputBox = New-Object System.Windows.Forms.TextBox
$outputBox.Location = New-Object System.Drawing.Size(20,140)
$outputBox.Size = New-Object System.Drawing.Size(360,400)
$outputBox.MultiLine = $true
$outputBox.ScrollBars = "Vertical"
$outputBox.Font = "Microsoft Sans Serif,10"

# Buttons
$button1 = New-Object system.windows.Forms.Button
$button1.BackColor = "#000000"
$button1.Text = "*.*"
$button1.ForeColor = "#ffffff"
$button1.Width = 60
$button1.Height = 30
$button1.location = new-object system.drawing.point(20,100)
$button1.Font = "Microsoft Sans Serif,12"

$button2 = New-Object system.windows.Forms.Button
$button2.BackColor = "#000000"
$button2.Text = "EXE"
$button2.ForeColor = "#ffffff"
$button2.Width = 60
$button2.Height = 30
$button2.location = new-object system.drawing.point(90,100)
$button2.Font = "Microsoft Sans Serif,12"

$button3 = New-Object system.windows.Forms.Button
$button3.BackColor = "#000000"
$button3.Text = "DLL"
$button3.ForeColor = "#ffffff"
$button3.Width = 60
$button3.Height = 30
$button3.location = new-object system.drawing.point(160,100)
$button3.Font = "Microsoft Sans Serif,12"

$button4 = New-Object system.windows.Forms.Button
$button4.BackColor = "#000000"
$button4.Text = "SYS"
$button4.ForeColor = "#ffffff"
$button4.Width = 60
$button4.Height = 30
$button4.location = new-object system.drawing.point(230,100)
$button4.Font = "Microsoft Sans Serif,12"

$button5 = New-Object system.windows.Forms.Button
$button5.BackColor = "#000000"
$button5.Text = "TXT"
$button5.ForeColor = "#ffffff"
$button5.Width = 60
$button5.Height = 30
$button5.location = new-object system.drawing.point(300,100)
$button5.Font = "Microsoft Sans Serif,12"

$button6 = New-Object system.windows.Forms.Button
$button6.BackColor = "#4d194b"
$button6.Text = "Click to save as listBox.txt to Desktop"
$button6.ForeColor = "#ffffff"
$button6.Width = 300
$button6.Height = 30
$button6.location = new-object system.drawing.point(400,60)
$button6.Font = "Microsoft Sans Serif,12"

# Declare the action to occur when buttons clicked
$button1.Add_Click({ AllFileExplorer })
$button2.Add_Click({ ExeFileExplorer })
$button3.Add_Click({ DllFileExplorer })
$button4.Add_Click({ SysFileExplorer })
$button5.Add_Click({ TxtFileExplorer })
$button6.Add_Click($button6_Click)

# Input Box
$inputBox = New-Object system.windows.Forms.TextBox
$inputBox.Width = 360
$inputBox.Height = 20
$inputBox.location = new-object system.drawing.point(20,40)
$inputBox.Font = "Microsoft Sans Serif,10"

# Labels
$label1 = New-Object system.windows.Forms.Label
$label1.Text = "  Type Directory View (e.g. C:\Windows)  "
$label1.BackColor = "#b41c1f"
$label1.AutoSize = $true
$label1.ForeColor = "#ffffff"
$label1.Width = 360
$label1.Height = 30
$label1.location = new-object system.drawing.point(20,10)
$label1.Font = "Microsoft Sans Serif,14"

$label3 = New-Object system.windows.Forms.Label
$label3.Text = "Select File Extension to view"
$label3.AutoSize = $true
$label3.Width = 360
$label3.Height = 30
$label3.location = new-object system.drawing.point(20,70)
$label3.Font = "Microsoft Sans Serif,14"

# Add controls to form
$Form.SuspendLayout()
$Form.Controls.Add($button1)
$Form.Controls.Add($button2)
$Form.Controls.Add($button3)
$Form.Controls.Add($button4)
$Form.Controls.Add($button5)
$Form.Controls.Add($button6)
$Form.Controls.Add($checkBox)
$Form.Controls.Add($label1)
$Form.Controls.Add($label2)
$Form.Controls.Add($label3)
$Form.Controls.Add($inputBox)
$Form.Controls.Add($outputBox)
$Form.Controls.Add($listBox)
$Form.ResumeLayout()
# Event handlers
$button6_Click = {
  foreach ($item in $listBox) {
    # Save listBox to Desktop
    $listBox.Items | Out-File $env:USERPROFILE\Desktop\ListBox.txt -Append
  }
  if ($checkBox = 'Checked') {
    $listBox.Items.Clear()
  }
}

<#
   ------------------------------------------------------------
   OutputBox Event Handler
   Allows 1 or more items to be selected and dragged to listBox
   ------------------------------------------------------------ #>
$outputBox_MouseDown = [System.Windows.Forms.MouseEventHandler] {
  $outputBox.DoDragDrop($outputBox.Text,[System.Windows.Forms.DragDropEffects]::Copy)
}

<#
   ----------------------------------------------------------------------------------
   ListBox Event Handlers
   Sets the only location a dragged item can enter.  In this case that is the ListBox
   ----------------------------------------------------------------------------------  #>
$listBox_DragEnter = [System.Windows.Forms.DragEventHandler] {
  $_.Effect = $_.AllowedEffect
}

<#
   ------------------------------------------------------------------------
   > Set how to drop selected item(s) into ListBox
   > Makes use of [System.IO.File] to read each line
     of a file, then add each line to the ListBox.

     Required to prevent multiple items from a multiline TextBox
     appearing as one long line inside ListBox, rather than a list of items
     ---------------------------------------------------------------------- #>
$listBox_DragDrop = [System.Windows.Forms.DragEventHandler] {

  # Read Temorary File back into ListBox
  [string[]] $lines =  [System.IO.File]::ReadAllLines("$env:USERPROFILE\Desktop\FilePath.txt")
  [string] $line

  foreach ($line in $lines) {
    $listBox.Text = $listBox.Items.Add($line)
  }
  # Clear OutputBox
  $outputBox.Clear()

  # Delete Temporary File
  Remove-Item "$env:USERPROFILE\Desktop\FilePath.txt"
}

$form_FormClosed = {
  try {
    $Form.remove_FormClosed($Form_Cleanup_FormClosed)
    $outputBox.remove_MouseDown($outputBox_MouseDown)
    $listBox.remove_DragEnter($listBox_DragEnter)
    $listBox.remove_DragDrop($listBox_DragDrop)
  }
  catch [Exception] {}
}
#Initialize Events
$Form.Add_Click($button6_Click)
$button1.Add_Click($button1_Click)
$button2.Add_Click($button2_Click)
$button3.Add_Click($button3_Click)
$button4.Add_Click($button4_Click)
$button5.Add_Click($button5_Click)
$button6.Add_Click($button6_Click)
$outputBox.Add_MouseDown($outputBox_MouseDown)
$listBox.Add_DragEnter($listBox_DragEnter)
$listBox.Add_DragDrop($listBox_DragDrop)

$Form.Add_FormClosed($Form_FormClosed)

# Initialize Form
[void]$Form.ShowDialog()
$Form.Dispose()
Well that is it for now. In Part 3 of this tutorial, I’ll be showing you are much more User Friendly GUI for the Drag&DropGUI we’ve just been looking at.
I’ll be also going into more examples of Drag & Drop to illustrate the various ways to acheive this in PowerShell, including the use of custom templates.
Got a Question? Ask away? Got a request for things to add or a new tutorial topic, let us know in the Discussion section. Want to contribute your own tutorials on PowerShell? Please do!
Regards,
Regedit32