Практически всегда ошибка 0x800f0905 в Windows 10 связана с повреждением файлов. Речь идет либо о неисправности самого файла обновления, либо системных файлов. После появления кода сбоя апдейт обрывается или загрузка зависает. Такое поведение часто наблюдается при каждой попытке обновления. Хорошо то, что исправить проблему можно. Чаще всего нужно только найти обходной путь для установки свежего патча Windows 10. Сейчас мы покажем все возможные способы исправления ошибки 0x800f0905, которая может появляться при обновлении и при удалении обновления в Windows 10, Windows 11.
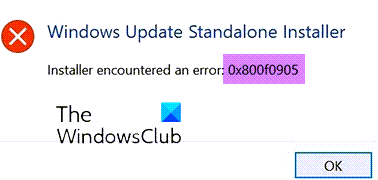
Установщик обнаружил ошибку 0x800f0905
Причины ошибки
Благо, что причин данной проблемы не так уж много:
- неполадки сети при загрузке файла;
- повреждение файла обновления;
- неисправность системных файлов Windows.
Действуя в указанных направлениях, нам удалось найти 4 глобальных решения проблемы.
Как исправить 0x800f0905?
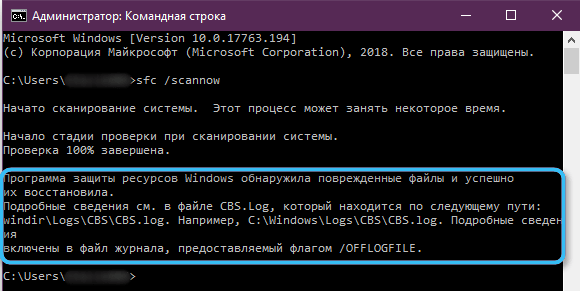
Мы не хотим на долго останавливаться на банальных способах исправления. Поэтому сразу укажем, что вам нужно проверить подключение к интернету. Возможно, оно нестабильное, имеются проблемы с DNS, проблемы кэша DNS. Удостоверившись в том, что сеть есть и она стабильная, нужно проанализировать системные файлы. Для этого есть быстрый, эффективный и автоматический способ – утилита sfc. Нужно всего лишь ввести в командную строку с привилегиями администратора строчку sfc /scannow.
Теперь время перейти в более целевым методам решения, которые сработали у других пользователей. Об этом неоднократно высказывались на технических форумах.
1) Позволить компьютеру обновиться самостоятельно
Первый способ тоже предельно прост в реализации. Он подразумевает то, что ваше «железо», особенно жесткий диск, очень медленное. В этом случае загрузка и установка обновления может сильно затянуться. Периодически такое положение дел приводит к тайм-ауту подключения и ошибке. Стоит просто попробовать еще несколько раз и подольше подождать завершение процедуры. Только важно при этом выключить автоматический переход в спящий режим. В идеале нужно оставить компьютер на ночь и посмотреть результат уже утром.
2) Использовать автоапдейтер от Microsoft
Есть у компании специальный инструмент Media Creation Tool, который позволяет загрузить ISO-образ системы, выполнить чистую установку, создать загрузочную флешку и, что сейчас самое важное – обновить Windows до новой версии. В результате используются немного другие алгоритмы, поэтому ошибки 0x800f0905 при апдейте Windows 10, 11 может и не появиться.
Что нужно сделать:
- Переходим на эту страницу Microsoft и жмем на кнопку «Download tool now».
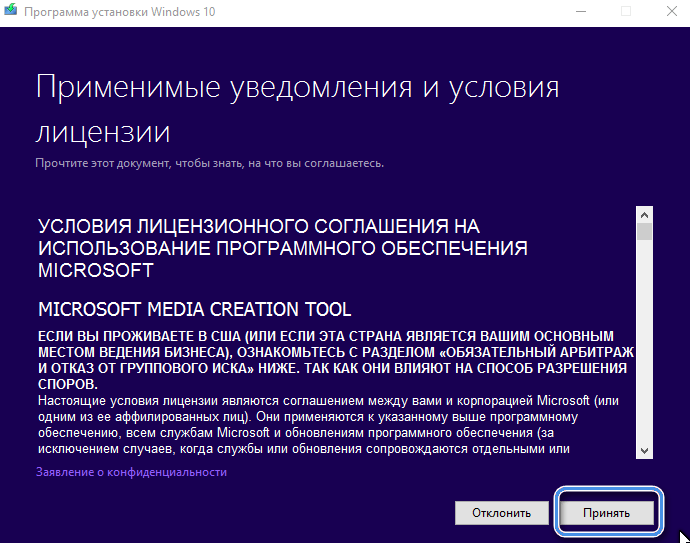
- Получив файл, открываем его с правами администратора и соглашаемся с условиями использования.
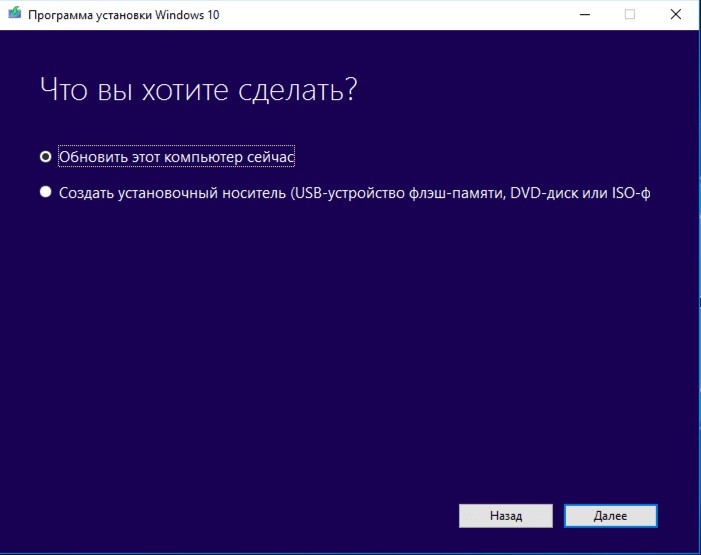
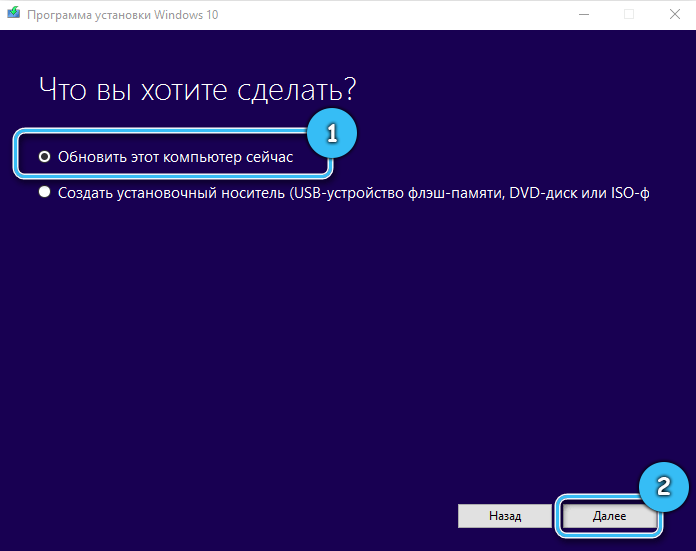
- На начальной странице с вопросом: «Что вы хотите сделать?», выбираем «Обновить этот компьютер сейчас».
- Ждем, пока процедура завершится.
3) Запустить обновление вручную через Powershell
Первым делом стоит попробовать выполнить простое обновление. Возможно, такой метод не сработает и придется дополнительно перезагрузить «Центр управления Windows». Второй вариант более предпочтителен в силу своей эффективности, но и более трудоемок.
Как обновить Windows 10, 11 через командную строку или Powershell:
- Вводим в консоль wuauclt /detectnow и жмем на Enter. Должен запустить поиск обновлений.
- Как только апдейт будет найден, вводим wuauclt /UpdateNow и нажимаем на клавишу Ввод. Сейчас должна начаться процедура скачивания и установки всех найденных обновлений.
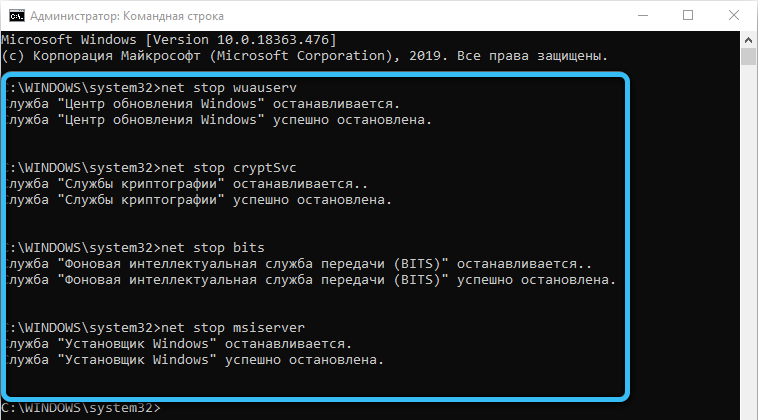
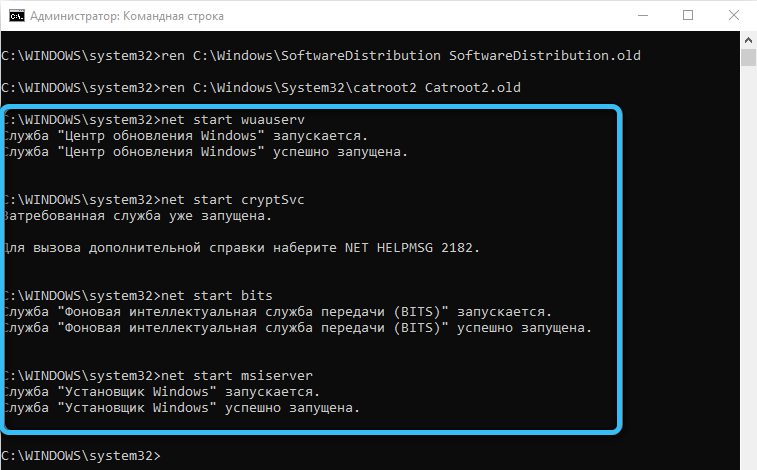
Чтобы сбросить состояние служб «Центра обновлений Windows 10», нужно последовательно ввести такой список команд:
net stop bits
net stop wuauserv
net stop appidsvc
net stop cryptsvc
Del «%ALLUSERSPROFILE%\Application Data\Microsoft\Network\Downloader\*.*»
rmdir %systemroot%\SoftwareDistribution /S /Q
rmdir %systemroot%\system32\catroot2 /S /Q
regsvr32.exe /s atl.dll
regsvr32.exe /s urlmon.dll
regsvr32.exe /s mshtml.dll
netsh winsock reset
netsh winsock reset proxy
net start bits
net start wuauserv
net start appidsvc
net start cryptsvc
4) Использовать средство устранения неполадок при обновлении
Есть в Windows 10 и 11 масса инструментов исправления распространенных проблем, в том числе и при обновлении операционной системы. Он исправляет много различных проблем при апдейте ОС, поэтому его нет смысла игнорировать.
Как его запустить:
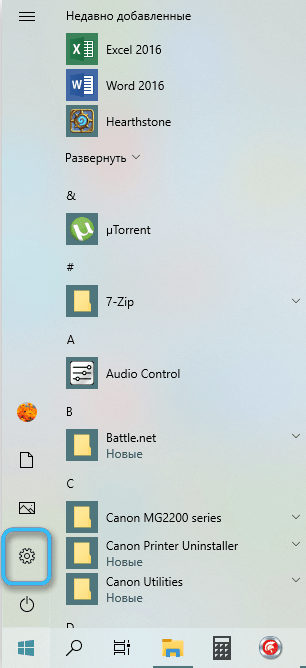
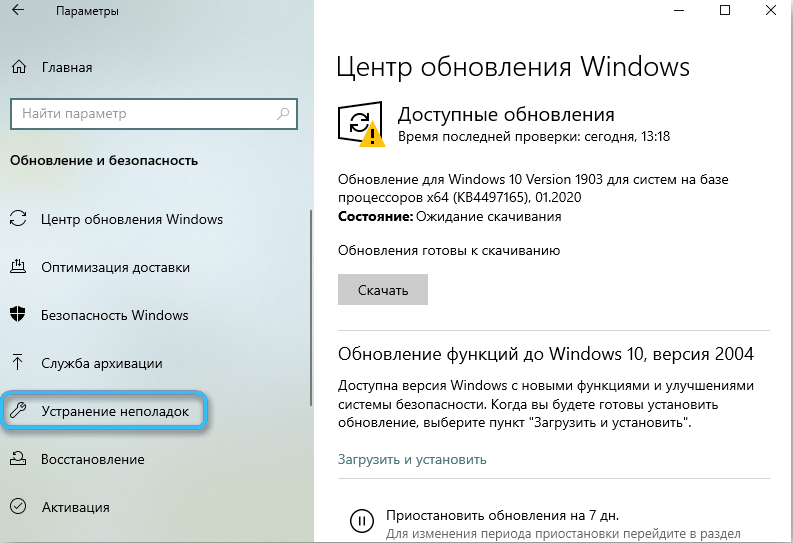
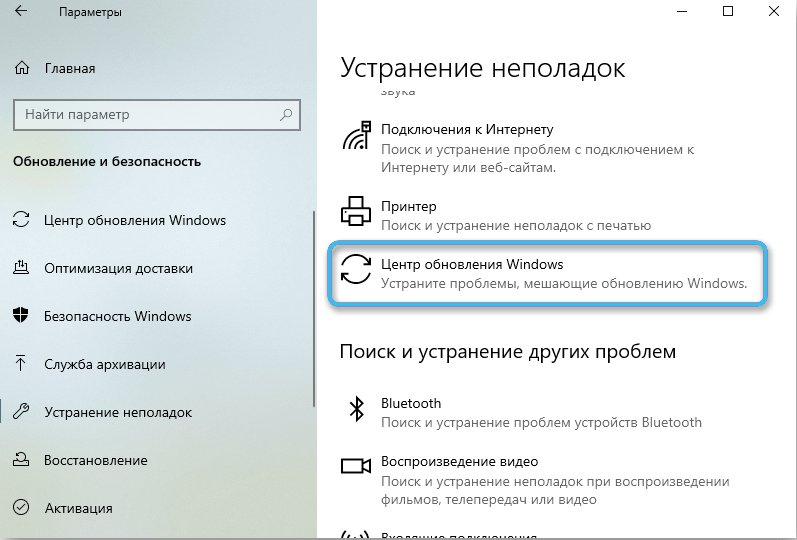
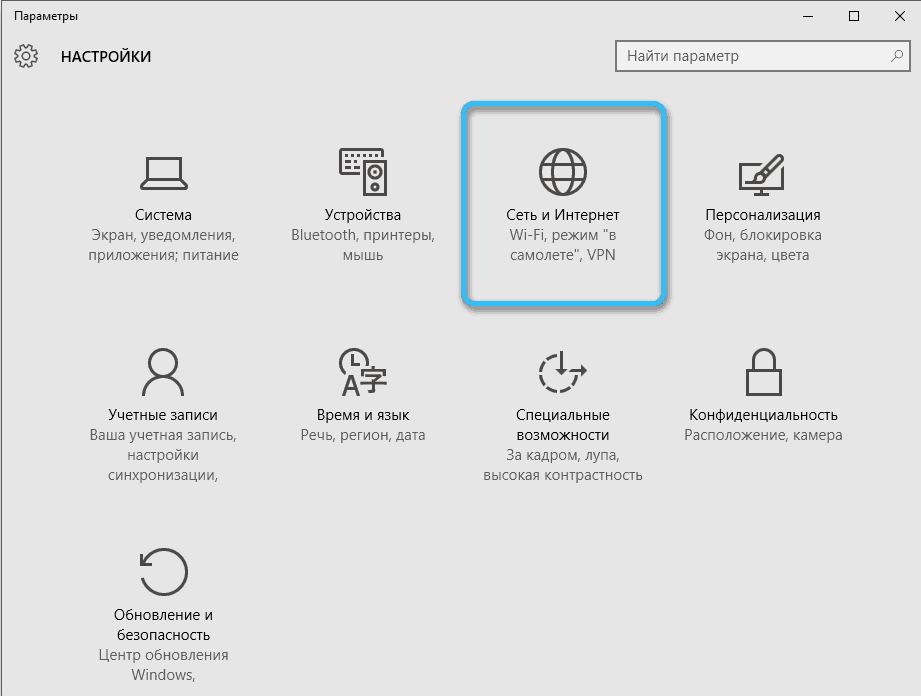
- Переходим в «Параметры» системы клавишами Win + I.
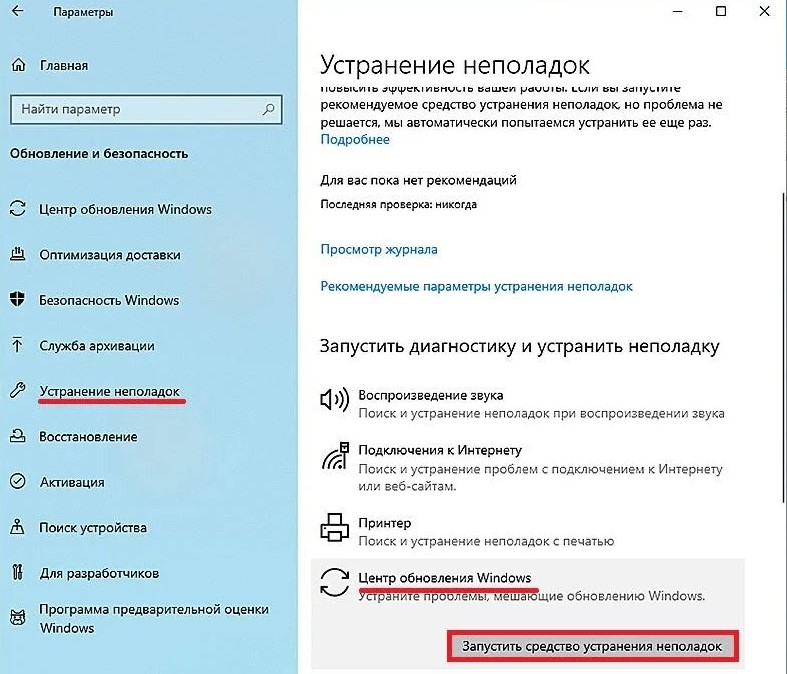
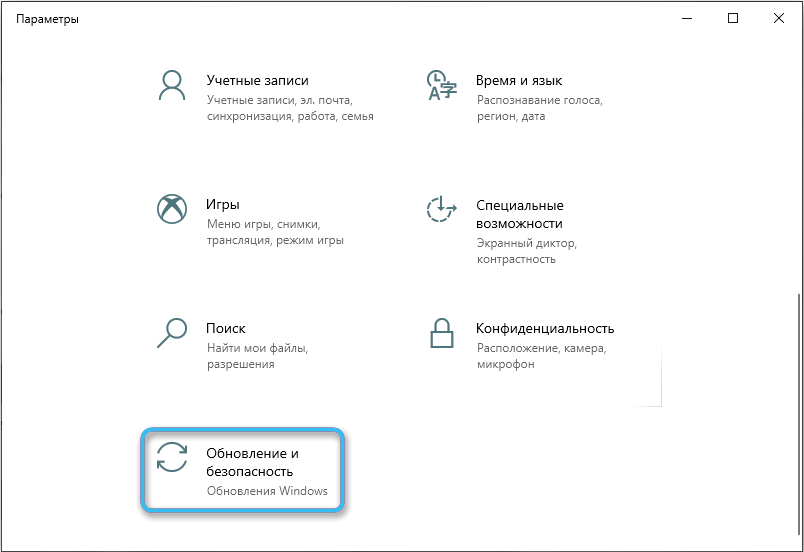
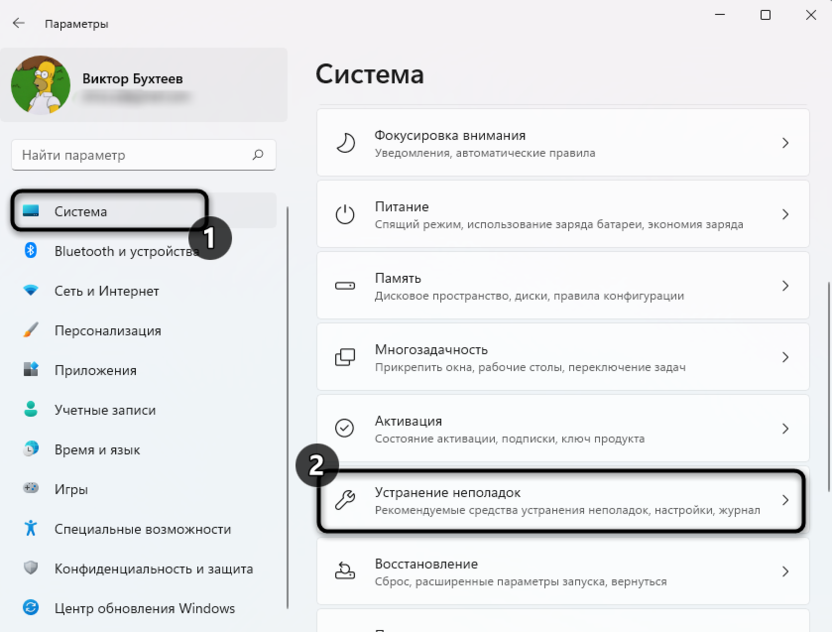
- Выбираем вкладку «Система» и идем на страницу «Устранение неполадок».
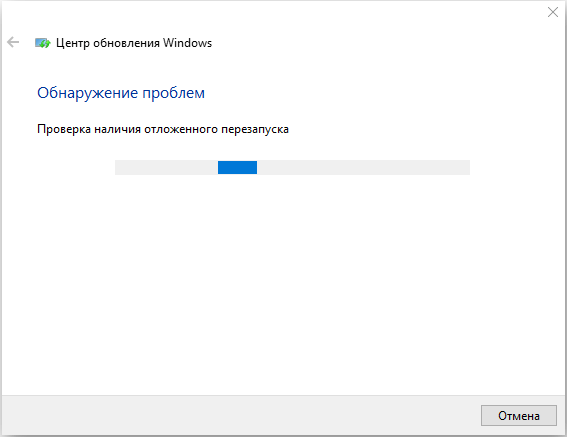
- Жмем на «Центр обновления Windows» и разворачивается кнопка «Запустить средство устранения неполадок».
Мы очень надеемся, что какой-то из способов позволит устранить ошибку обновления с кодом 0x800f0905 в Windows 10, 11. В противном случае придется сбрасывать ОС к заводскому состоянию и пытаться обновиться уже из него.
Check out tried and tested fixes that worked for most!
by Kazim Ali Alvi
Kazim has always been fond of technology, be it scrolling through the settings on his iPhone, Android device, or Windows. And at times, unscrewing the device to take… read more
Updated on
- The installer encountered an error 0x800f0905 issue could appear due to corrupt system files, misconfigured settings, or a slow PC, amongst other issues.
- To start the fixing process, run the dedicated troubleshooter, restore the system, or perform an in-place upgrade.
- Read on to find out all the possible solutions for the Windows Update standalone installer error 0x800f0905.
XINSTALL BY CLICKING THE DOWNLOAD
FILE
Anyone somewhat acquainted with Windows’s functioning knows how important it is to keep it up-to-date. But, several users have reported that the installer encountered an error 0x800f0905 while updating Windows.
When unable to update to the latest version, you don’t just lose out on several new features; it also affects the system’s performance and leaves it open to all sorts of security threats. So, let’s find out how to fix the 0x800f0905 Windows Update error on Windows 10 and Windows 11.
What does 0x800f0905 mean?
The Installer encountered an error 0x800f0905 message indicating the operating system’s inability to install the requested updates. Unfortunately, the error is quite persistent and not easily fixable.
There are a bunch of reasons behind the 0x800f0905 error encountered by the installer, and we have listed the most prominent ones below:
- Corrupt system files – If your computer has corrupt system files, it’s likely to lead to several issues, including Windows Update errors.
- Problems with Windows Update components – In some cases, users reported issues with the WU components, and resetting the Windows Update components did the trick.
- Misconfigured settings – You may receive the error message if the update or network settings are misconfigured.
- Third-party applications – Several third-party applications are known to conflict with the update process and throw errors. The simplest solution, in case of the Installer encountered an error 0x800f0905 message, is to uninstall the problematic app.
How can I fix Installer encountered an error 0x800f0905?
- What does 0x800f0905 mean?
- How can I fix Installer encountered an error 0x800f0905?
- 1. Run the Windows Update troubleshooter
- 2. Reset Windows update components
- 3. Perform a system restore
- 4. Manually install the updates
- 5. Perform an in-place upgrade
Before we walk you through the slightly complex solutions, here are a few simple ones:
- Disable any third-party antivirus, security software, or firewall installed on the computer.
- If you have a VPN connection set up, disable it and use the regular connection to install the Windows update.
If that’s the case with you, the following solutions should get things up and running.
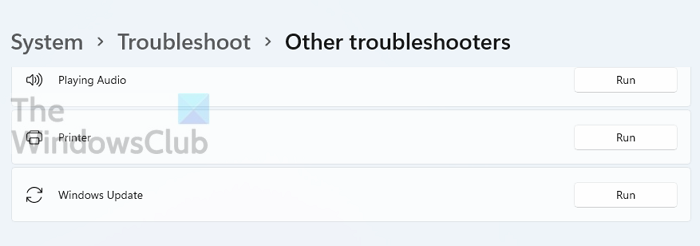
1. Run the Windows Update troubleshooter
- Press Windows + I to launch the Settings app.
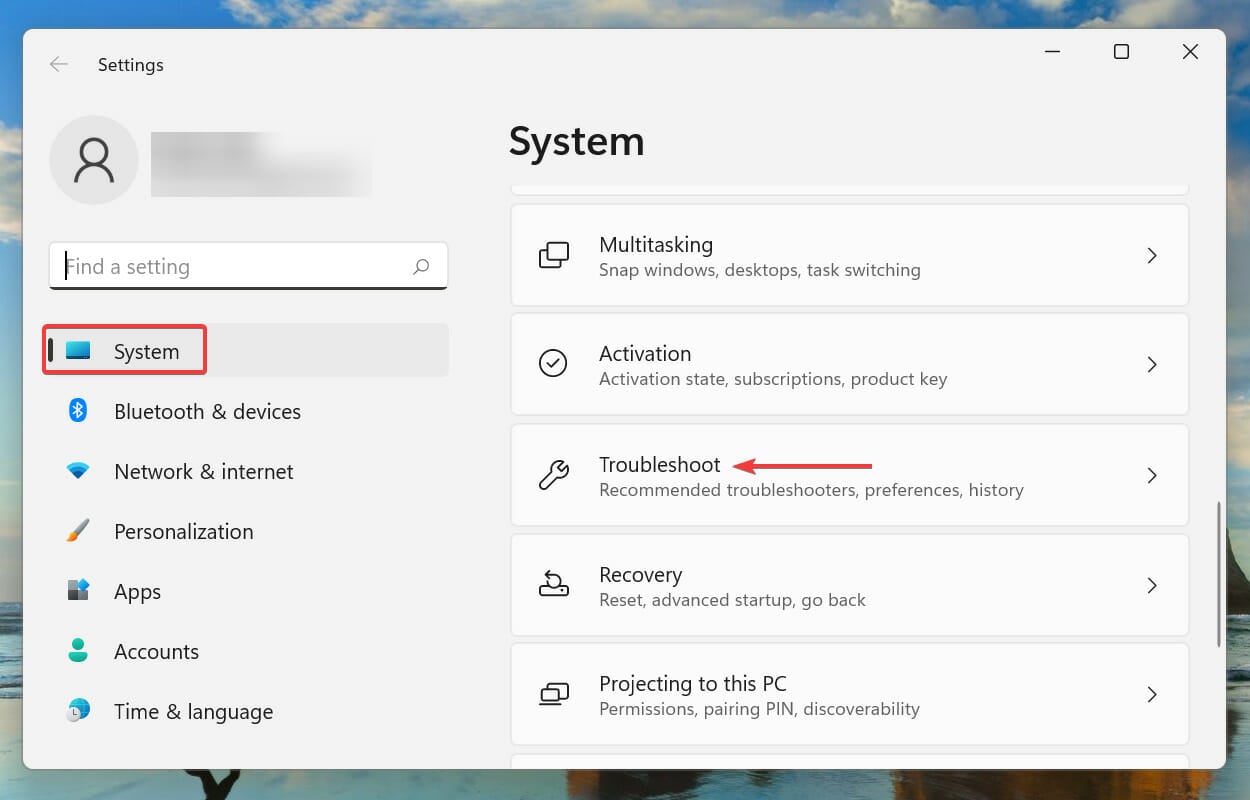
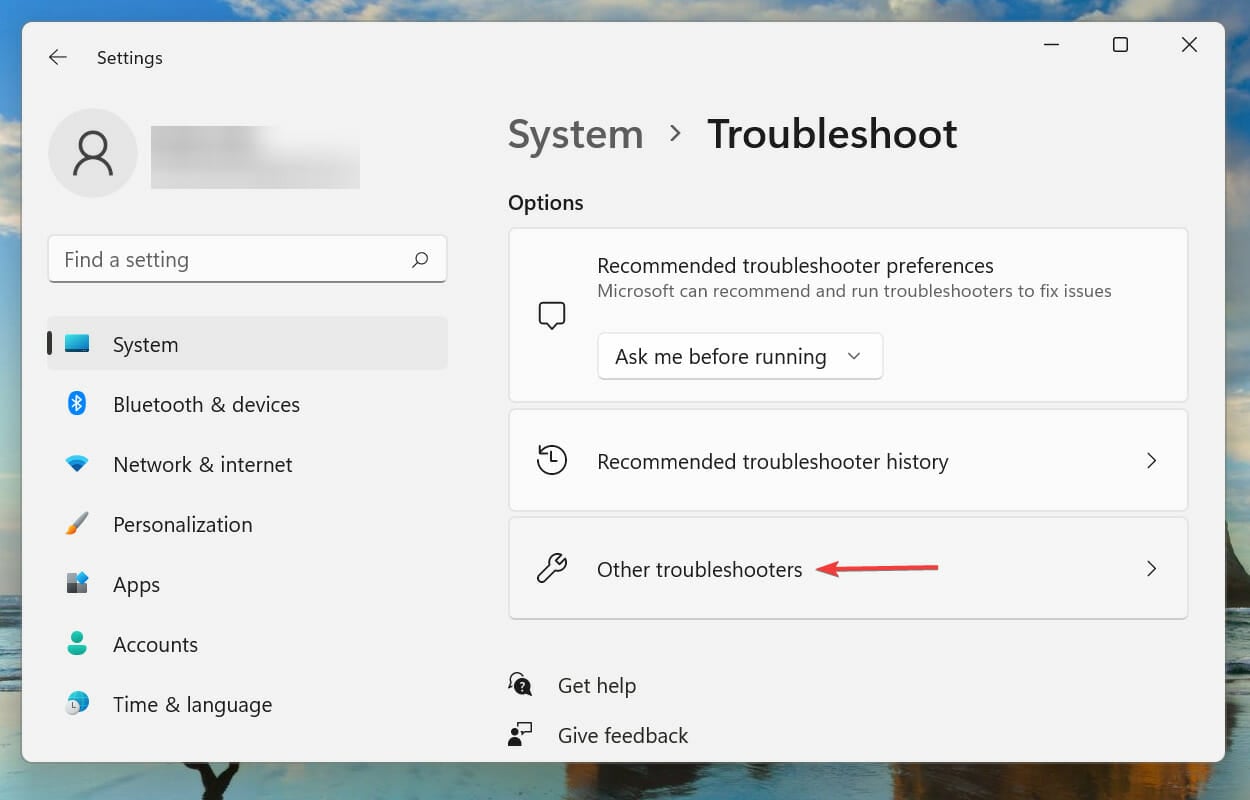
- Click on Troubleshoot on the right in the System tab.
- Next, click on Other troubleshooters.
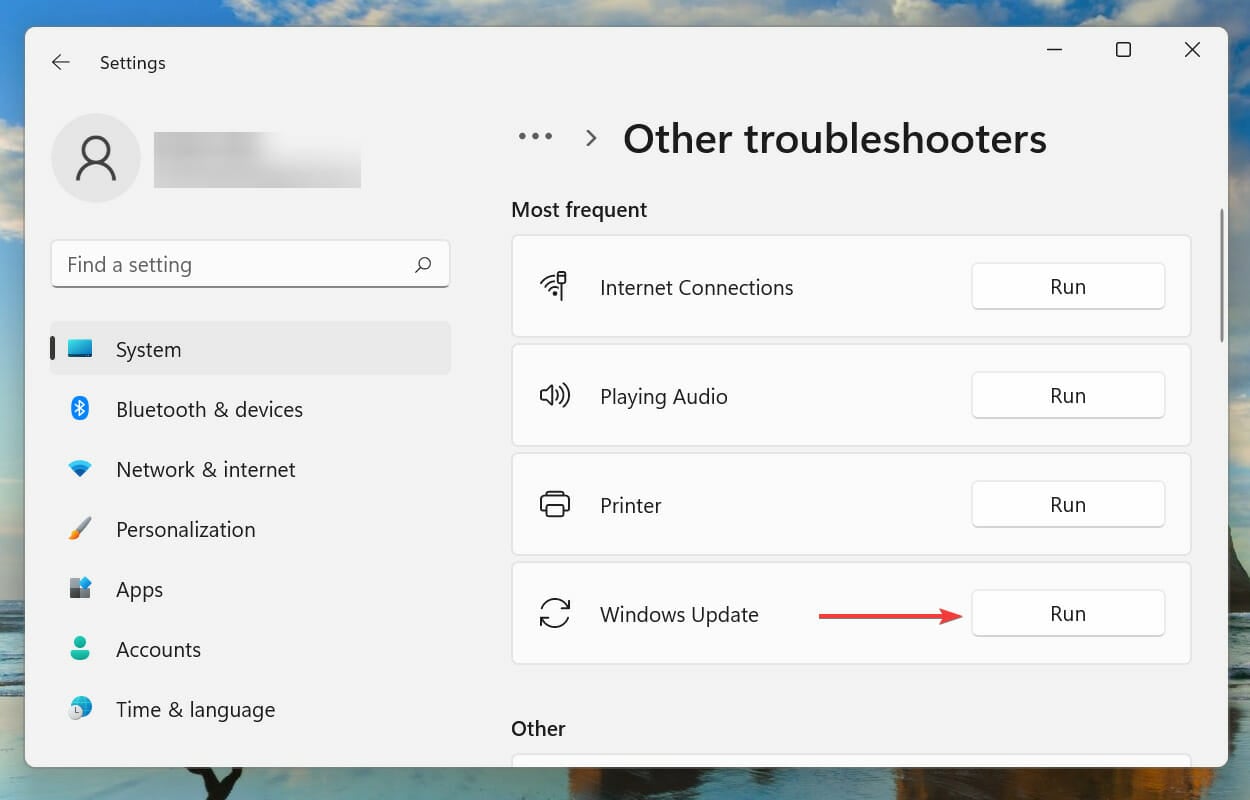
- Locate the Windows Update troubleshooter and click on the Run button next to it.
- Windows will now detect and fix problems that might be leading to the 0x800f0905 error encountered by the installer.
Alternatively, you can try dedicated third-party repair software to automatically fix Windows Update-related errors.
2. Reset Windows update components
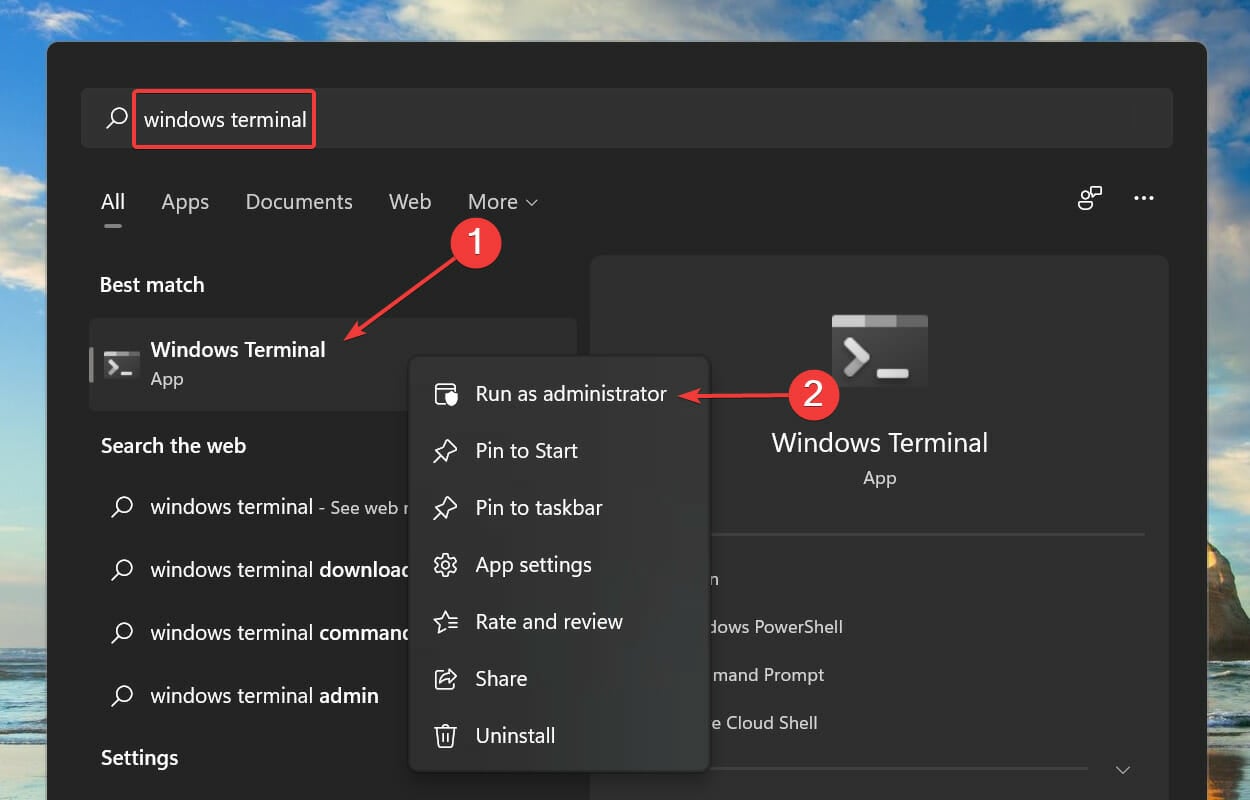
1. Press Windows + S to launch the Search menu, enter Windows Terminal in the text field at the top, right-click on the relevant search result, and then select Run as administrator from the context menu.
2. Click Yes on the UAC (User Account Control) prompt that pops up.
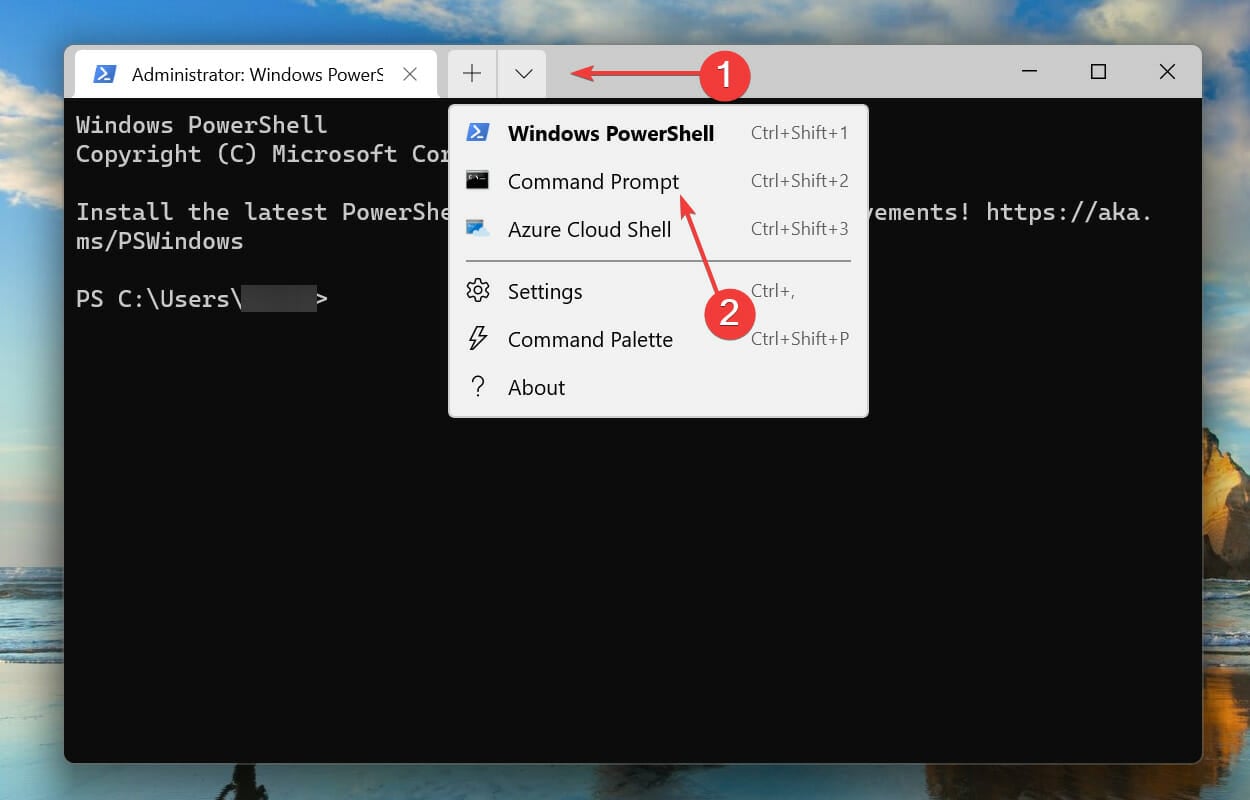
3. Up next, click on the downward arrow at the top, and select Command Prompt from the list of options. Alternatively, you can press Ctrl + Shift + 2 to launch the Command Prompt tab.
4. Now, type/paste the following commands to stop the BITS and Windows update service, and hit Enter after each to execute them:
net stop bits
net stop wuauserv
5. Next, enter the following command to delete the qmgr*.dat files:Del “%ALLUSERSPROFILE%Application DataMicrosoftNetworkDownloaderqmgr*.dat”
6. Now, enter the following commands to rename some critical folders:
Ren %Systemroot%\SoftwareDistribution\DataStore DataStore.bak
Ren %Systemroot%\SoftwareDistribution\Download Download.bak
Ren %Systemroot%\System32\catroot2 catroot2.bak
How we test, review and rate?
We have worked for the past 6 months on building a new review system on how we produce content. Using it, we have subsequently redone most of our articles to provide actual hands-on expertise on the guides we made.
For more details you can read how we test, review, and rate at WindowsReport.
If this is your first attempt at resetting Windows Update components, skip this step.
7. Paste the following commands and hit Enter to reset the BITS and Windows Update services:
sc.exe sdset bits D:(A;;CCLCSWRPWPDTLOCRRC;;;SY)(A;;CCDCLCSWRPWPDTLOCRSDRCWDWO;;;BA)(A;;CCLCSWLOCRRC;;;AU)(A;;CCLCSWRPWPDTLOCRRC;;;PU)
sc.exe sdset wuauserv D:(A;;CCLCSWRPWPDTLOCRRC;;;SY)(A;;CCDCLCSWRPWPDTLOCRSDRCWDWO;;;BA)(A;;CCLCSWLOCRRC;;;AU)(A;;CCLCSWRPWPDTLOCRRC;;;PU)
8. Next, paste the following command and hit Enter:cd /d %windir%\system32
9. You will now have to execute each of the following commands to reregister the BITS and Windows Update files to fix the 0x800f0905 error encountered by the installer:
regsvr32.exe atl.dll
regsvr32.exe urlmon.dll
regsvr32.exe mshtml.dll
regsvr32.exe shdocvw.dll
regsvr32.exe browseui.dll
regsvr32.exe jscript.dll
regsvr32.exe vbscript.dll
regsvr32.exe scrrun.dll
regsvr32.exe msxml.dll
regsvr32.exe msxml3.dll
regsvr32.exe msxml6.dll
regsvr32.exe actxprxy.dll
regsvr32.exe softpub.dll
regsvr32.exe wintrust.dll
regsvr32.exe dssenh.dll
regsvr32.exe rsaenh.dll
regsvr32.exe gpkcsp.dll
regsvr32.exe sccbase.dll
regsvr32.exe slbcsp.dll
regsvr32.exe cryptdlg.dll
regsvr32.exe oleaut32.dll
regsvr32.exe ole32.dll
regsvr32.exe shell32.dll
regsvr32.exe initpki.dll
regsvr32.exe wuapi.dll
regsvr32.exe wuaueng.dll
regsvr32.exe wuaueng1.dll
regsvr32.exe wucltui.dll
regsvr32.exe wups.dll
regsvr32.exe wups2.dll
regsvr32.exe wuweb.dll
regsvr32.exe qmgr.dll
regsvr32.exe qmgrprxy.dll
regsvr32.exe wucltux.dllregsvr32.exe muweb.dll
regsvr32.exe wuwebv.dll
10. Execute the following command to reset Winsock: netsh winsock reset
11. Finally, execute these commands to restart the BITS and Windows Update service:
net start bits
net start wuauserv
Resetting the Windows Update components is one of the best fixes for any issues related to updating the OS.
Though the process is slightly longer, it’s known to eliminate the install error – 0x800f0905 encountered by installer in Windows for a lot of users.
3. Perform a system restore
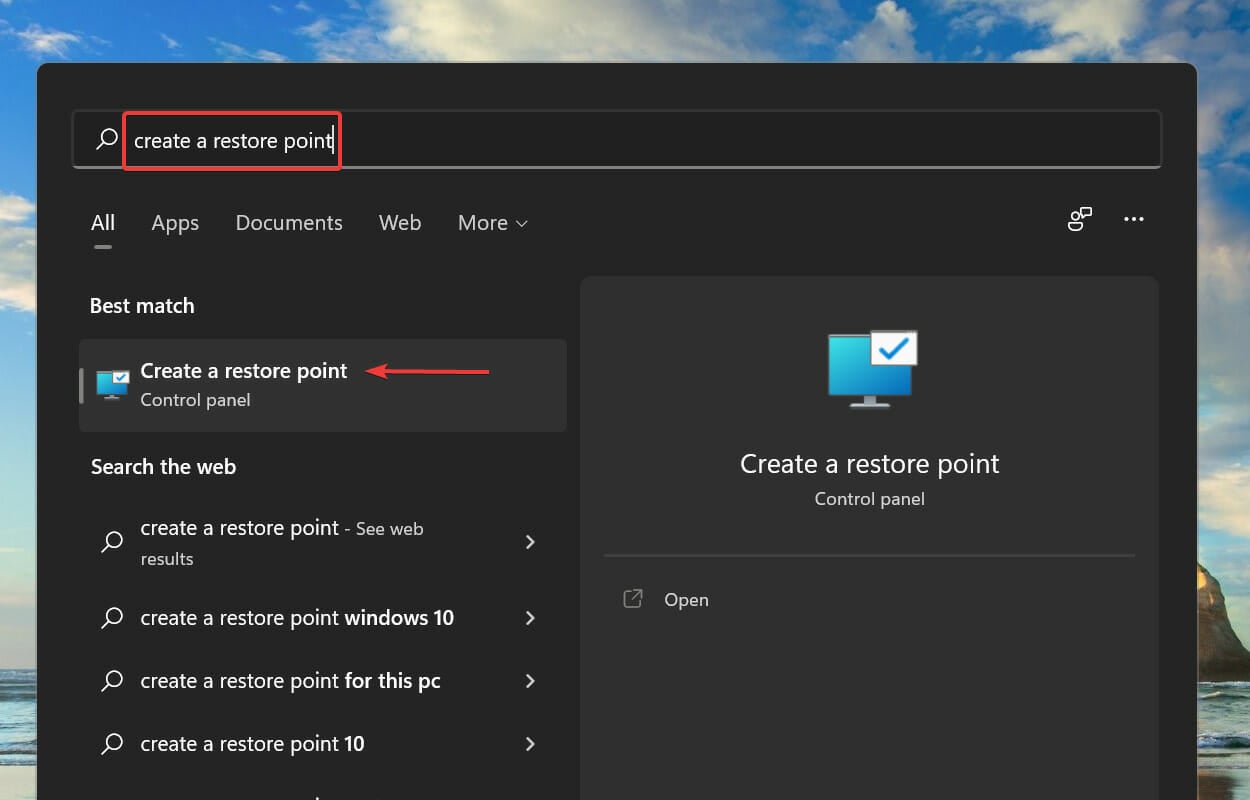
- Press Windows + S to launch the Search menu, enter Create a restore point in the text field at the top, and click on the relevant search result.
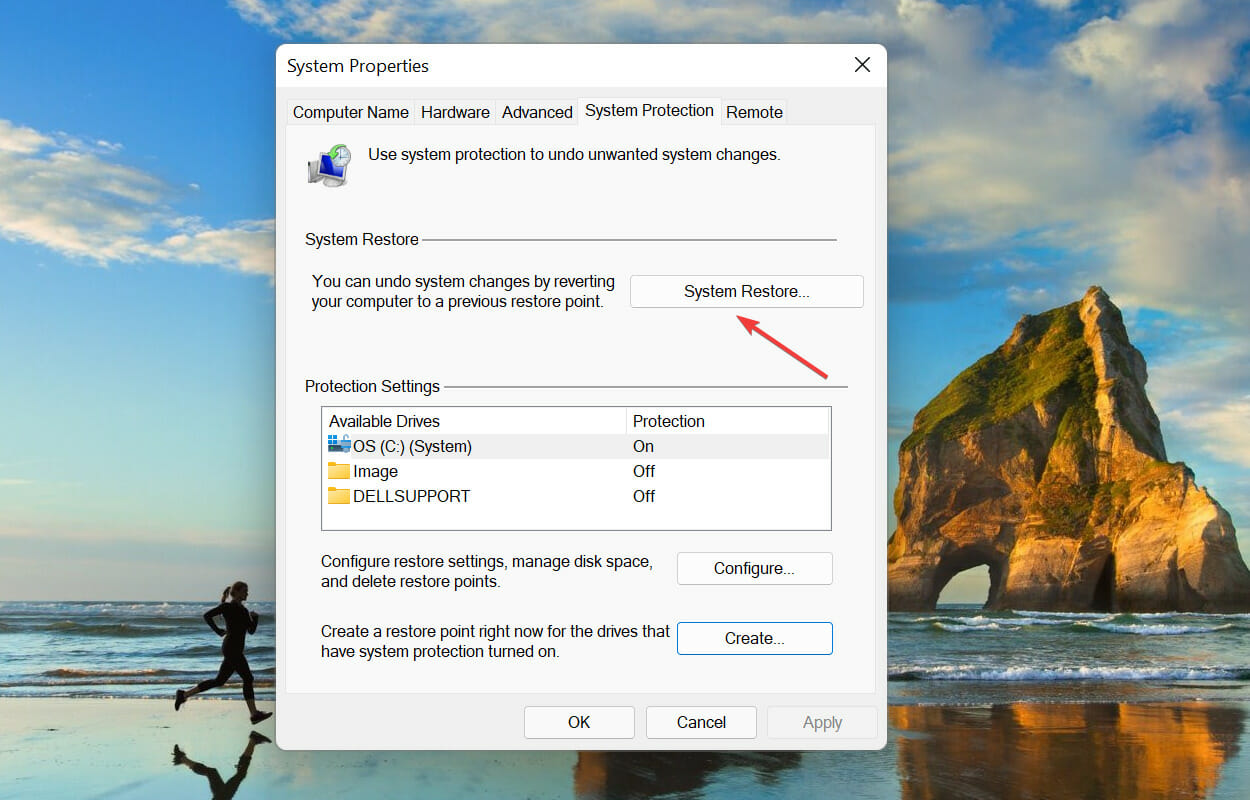
- Next, click on System Restore.
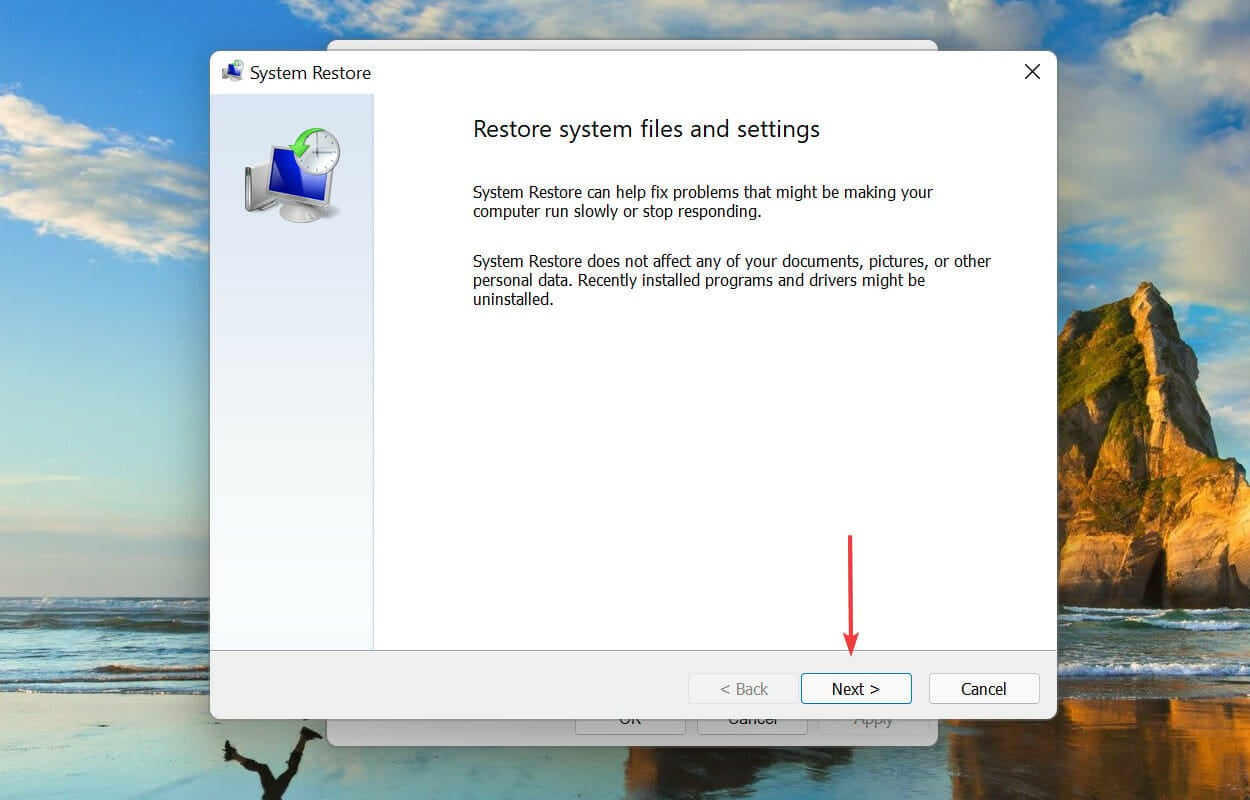
- If no recommended restore points are listed, click on Next.
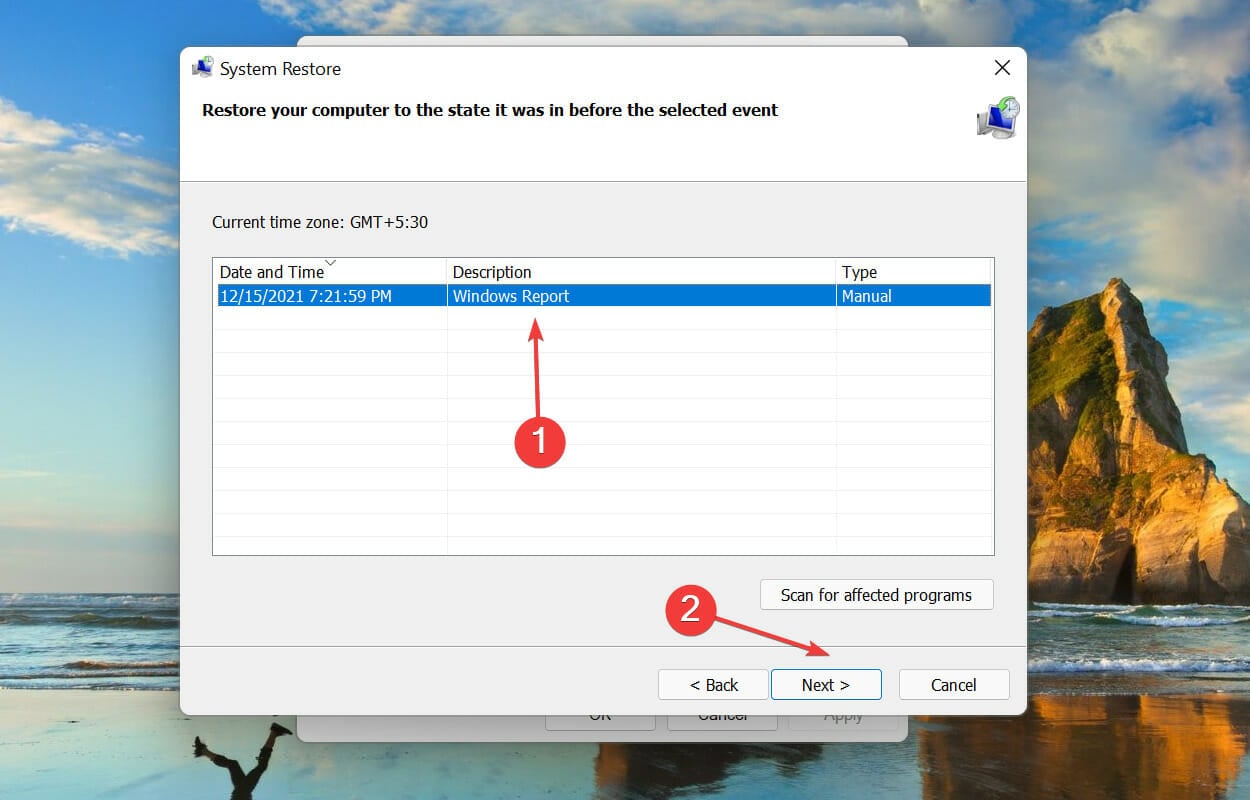
- Choose a restore point from the ones listed here and click on Next.
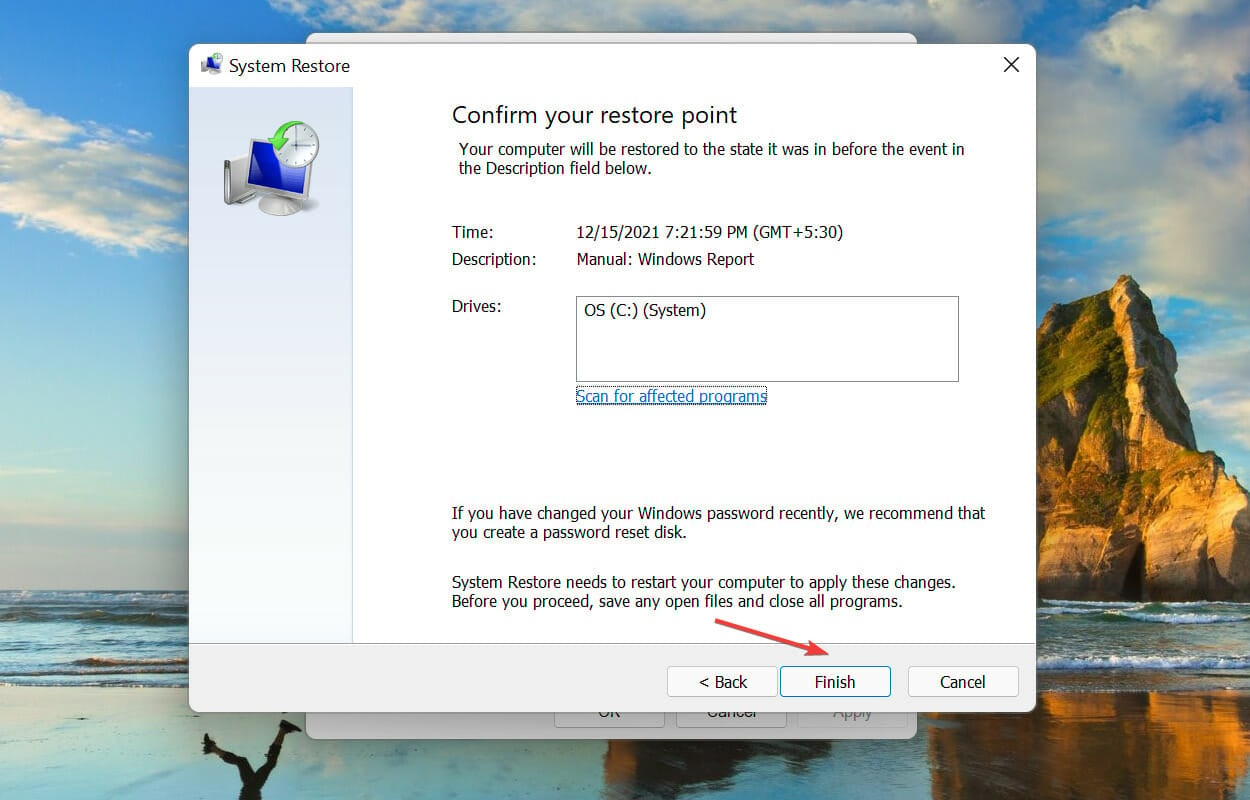
- Finally, review the restore settings and click on Finish to start the process.
- Your computer will restart during the process, so save any open files.
- After the computer restarts, check if the 0x800f0905 Windows Update error encountered by the installer is fixed.
System restore takes your computer back to a state where the error didn’t exist altogether. For example, say it’s misconfigured settings or a conflicting application causing the error, and restoring the system works perfectly here.
- Fix: Fatal Error 1603 during installation in Windows 10
- Fix: This Alias Cannot be Added to Your Account Error on Windows 11
4. Manually install the updates
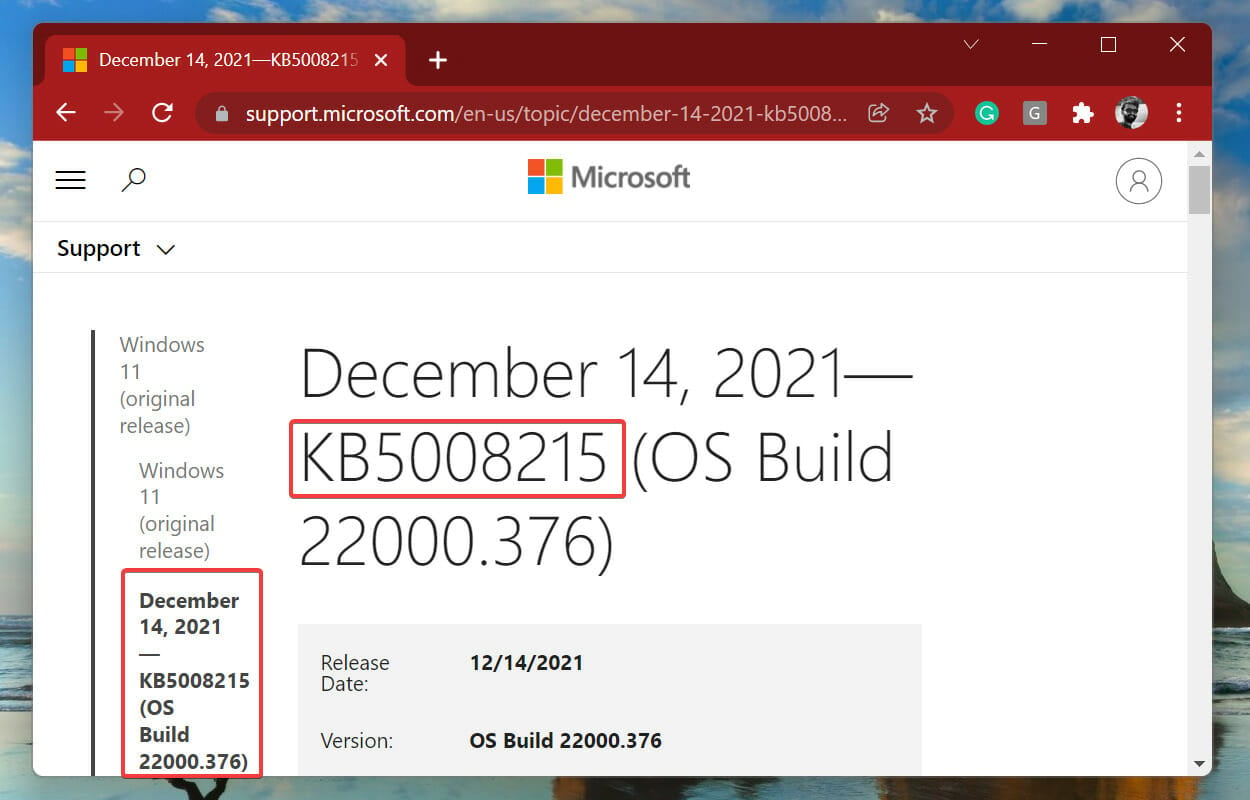
- Go to Windows 11 update history and identify the latest version’s KB (Knowledge Base) number. The KB number below is for the last update when writing this article; it could be different for the update you install in the future.
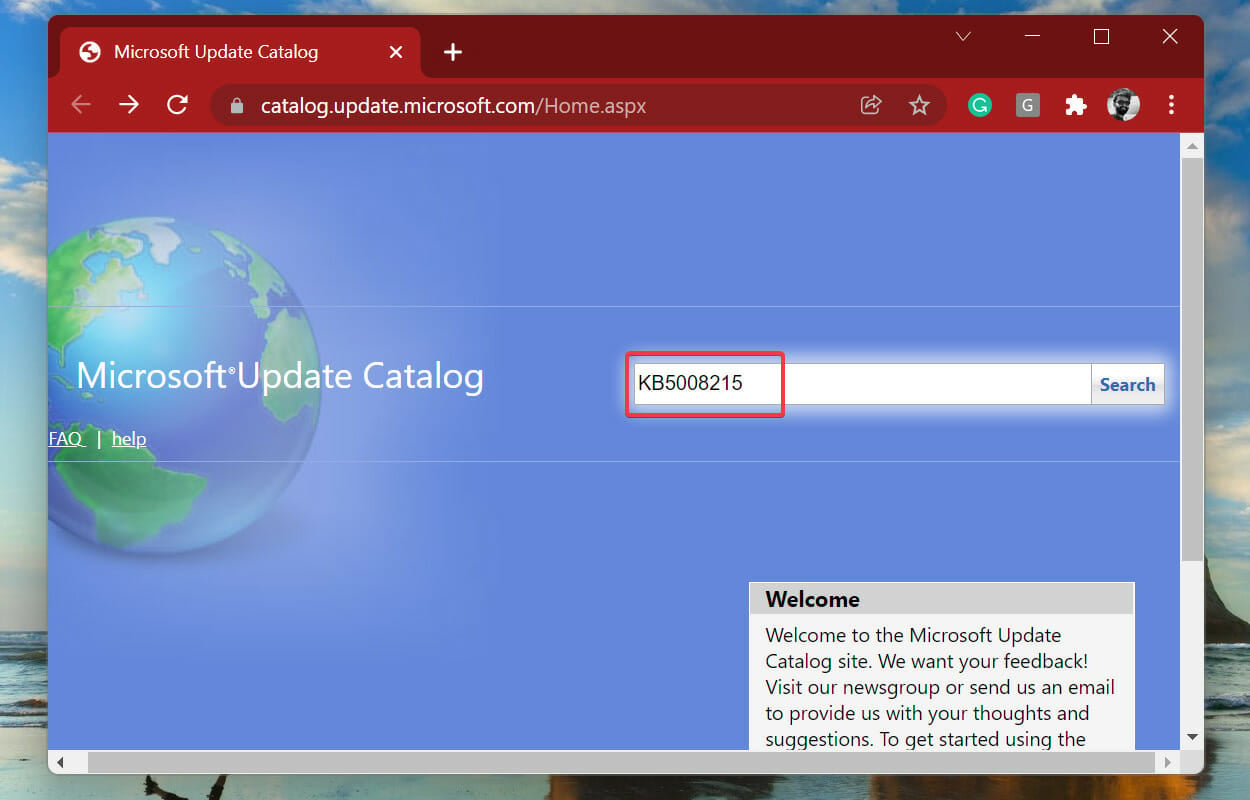
- Now, go to the official Microsoft Update Catalog, paste the KB number in the search box, and then hit Enter.
- Click on the Download button next to the update that matches your system.
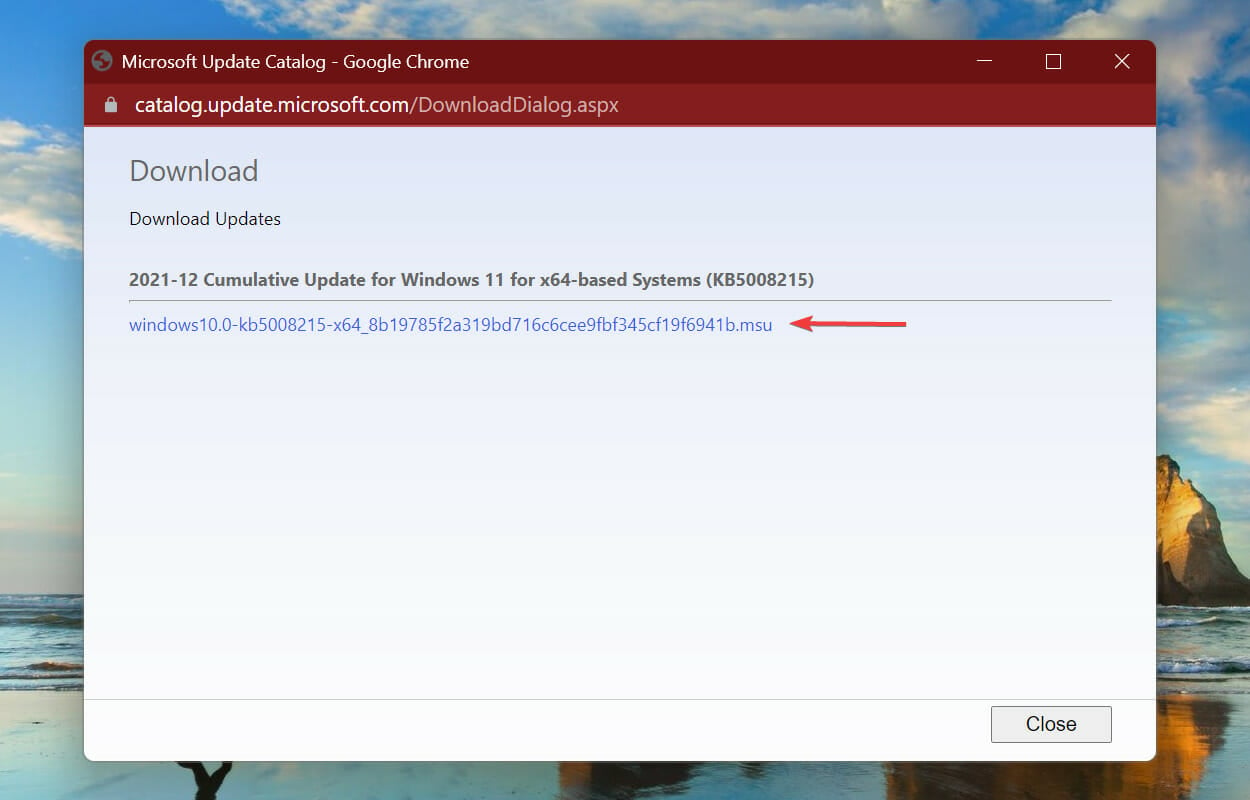
- Next, click on the link to download the file.
- Double-click on the downloaded file to launch the installer setup, and follow the on-screen instructions to complete the process.
After manually downloading and installing the Windows update, the 0x800f0905 error encountered by the installer should be eliminated.
5. Perform an in-place upgrade
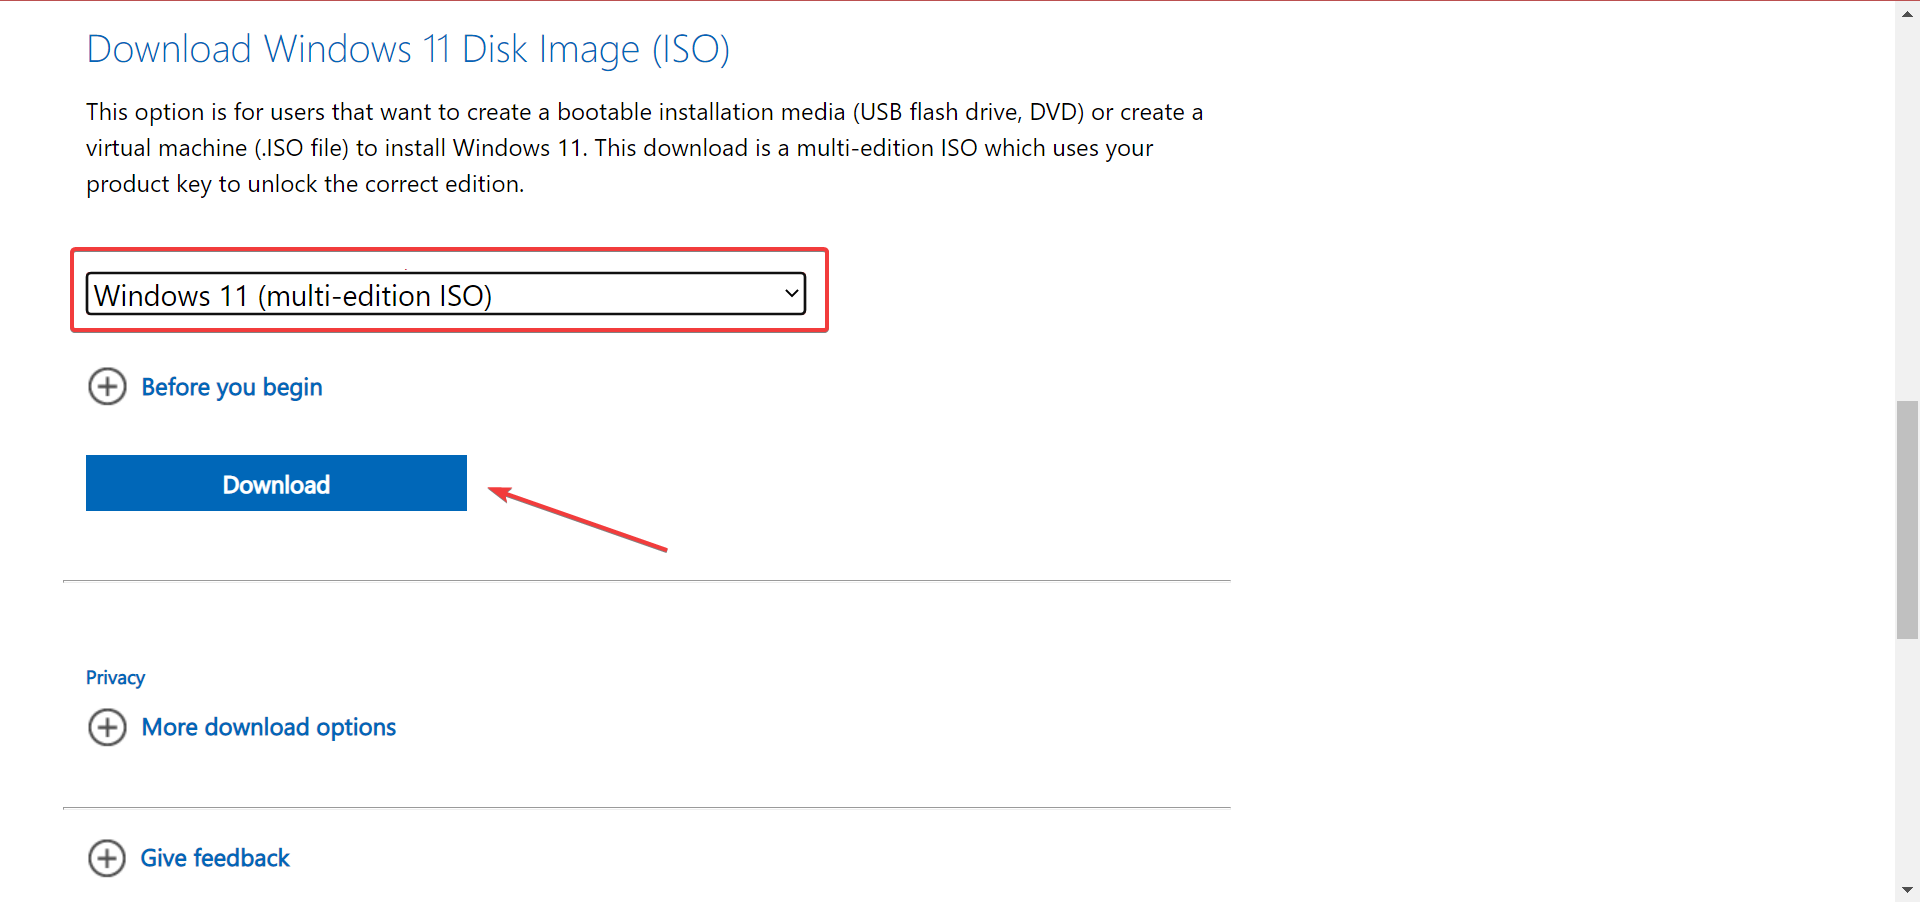
- Go to Microsoft’s official website, scroll to the Download Windows 11 Disk Image (ISO) section, select Windows 11 (multi-edition ISO) from the dropdown menu, and click Download.
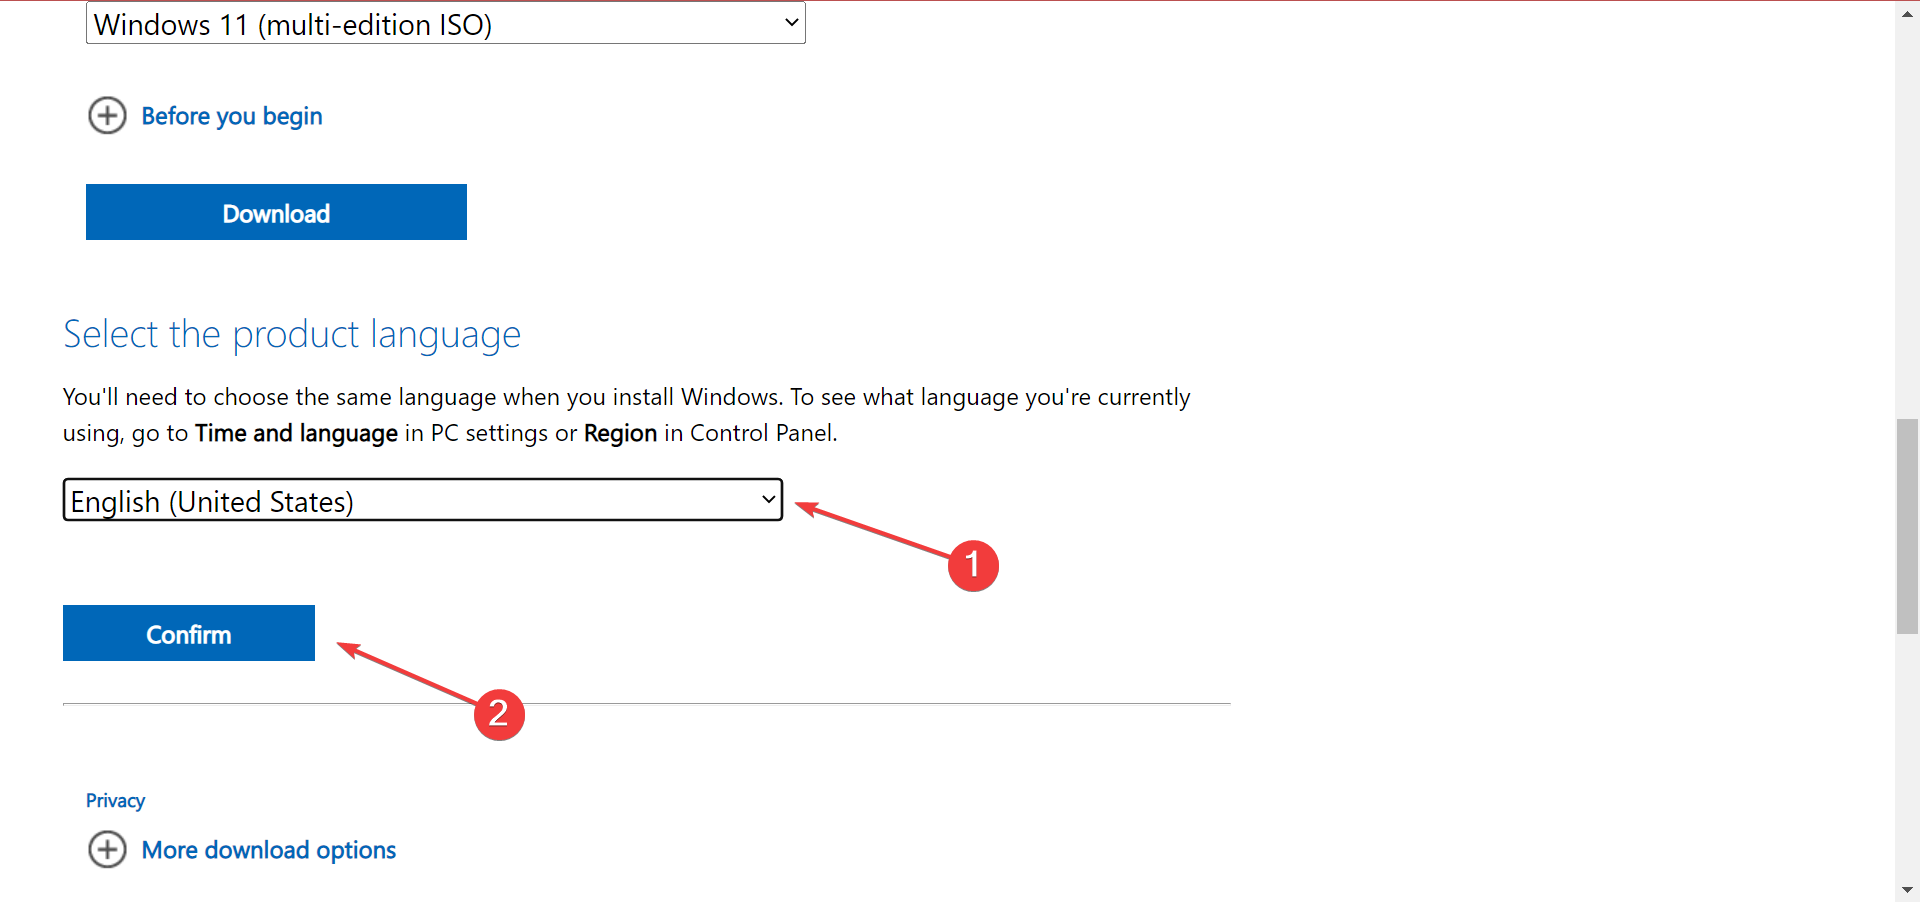
- Choose a language, preferably English (United States), and then click Confirm.
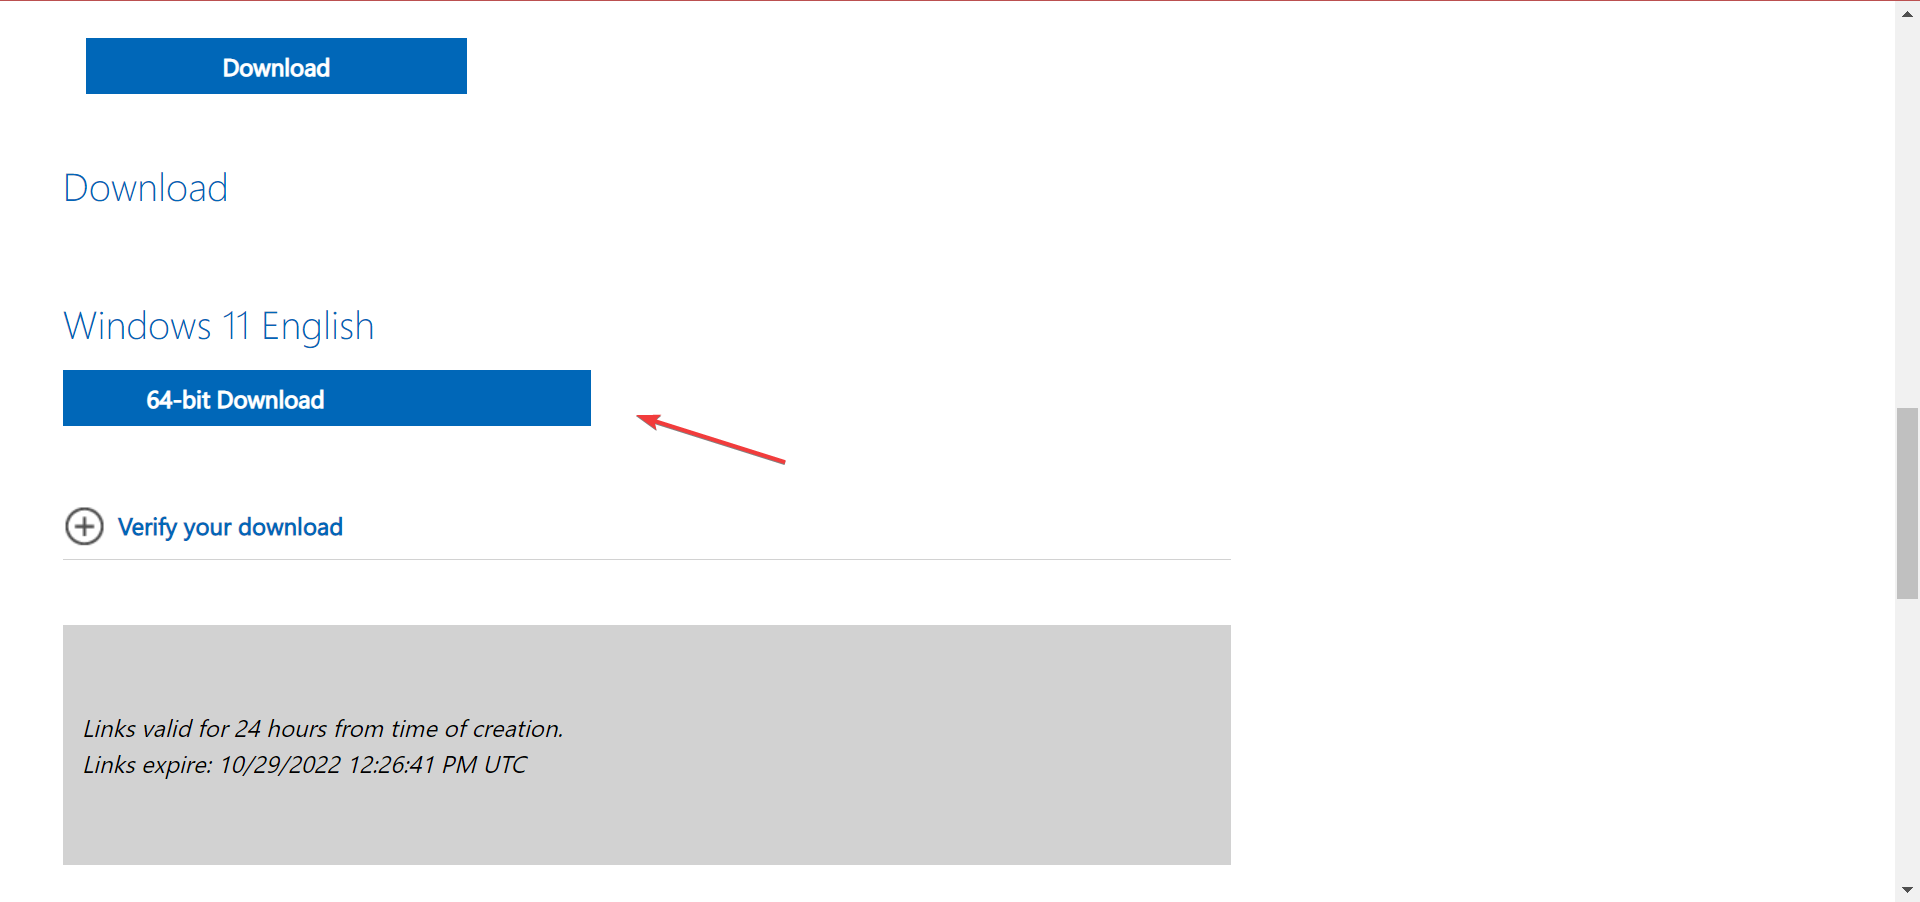
- Now, click on the 64-bit Download button.
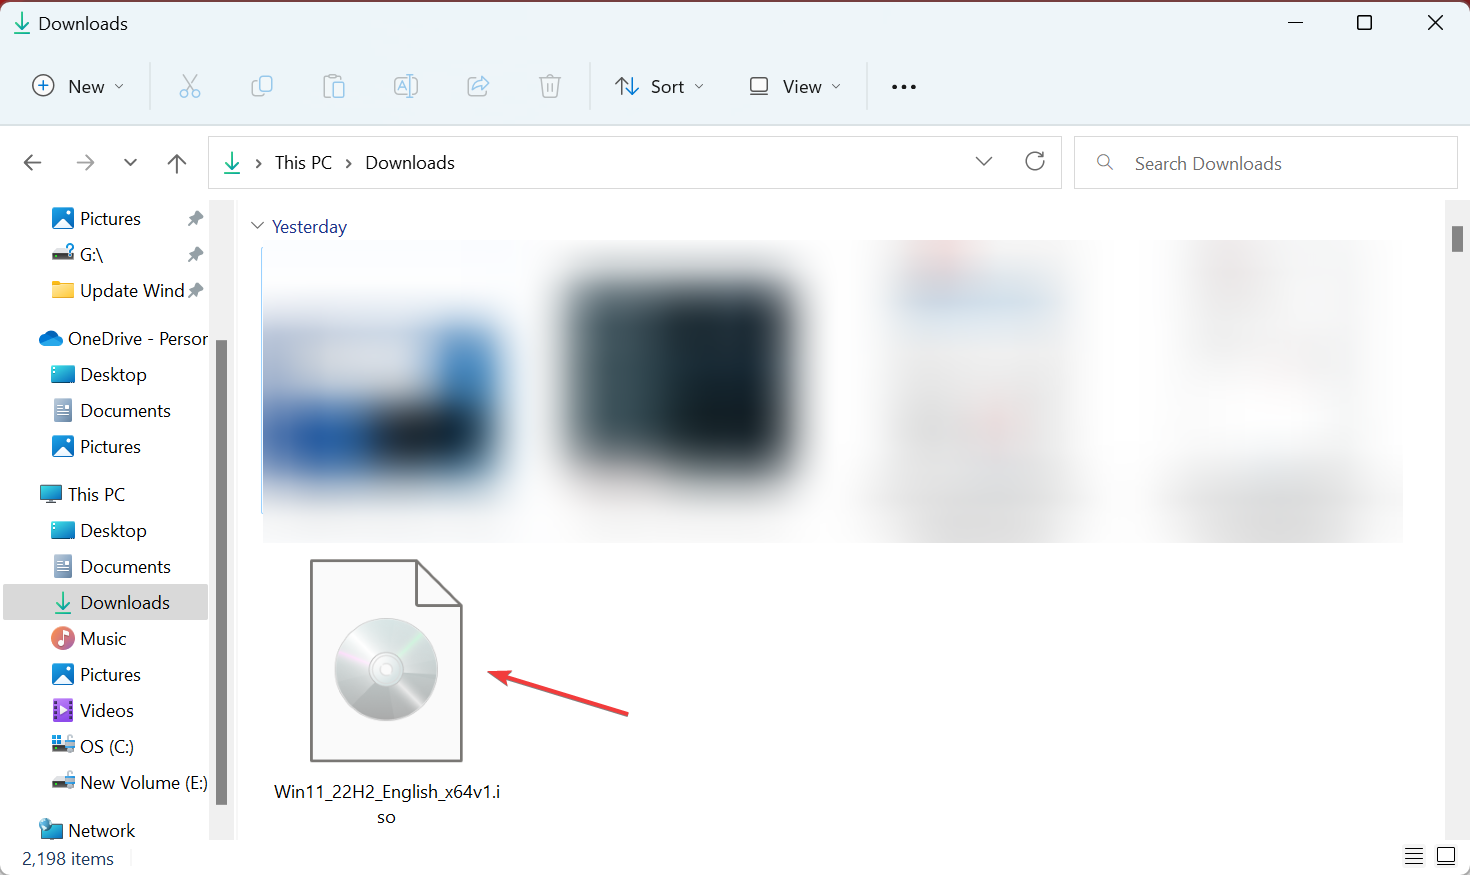
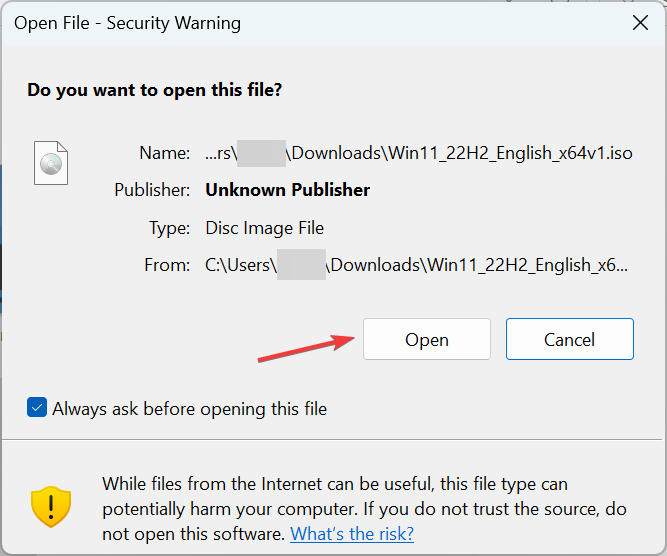
- After it’s downloaded, double-click on the file.
- Click Open in the confirmation prompt.
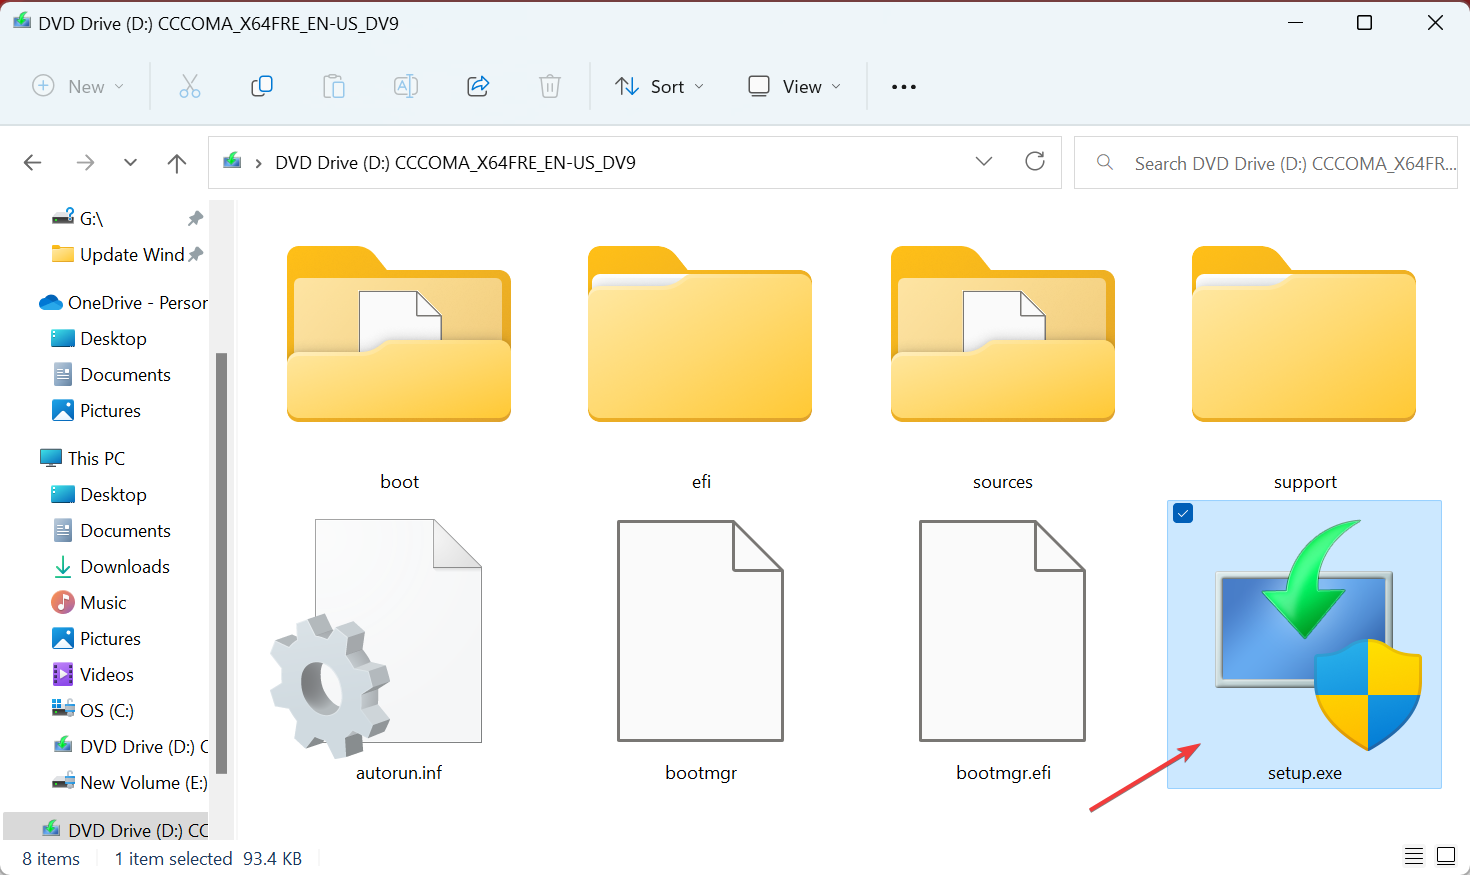
- Now, run the setup.exe file.
- Click Yes in the UAC prompt.
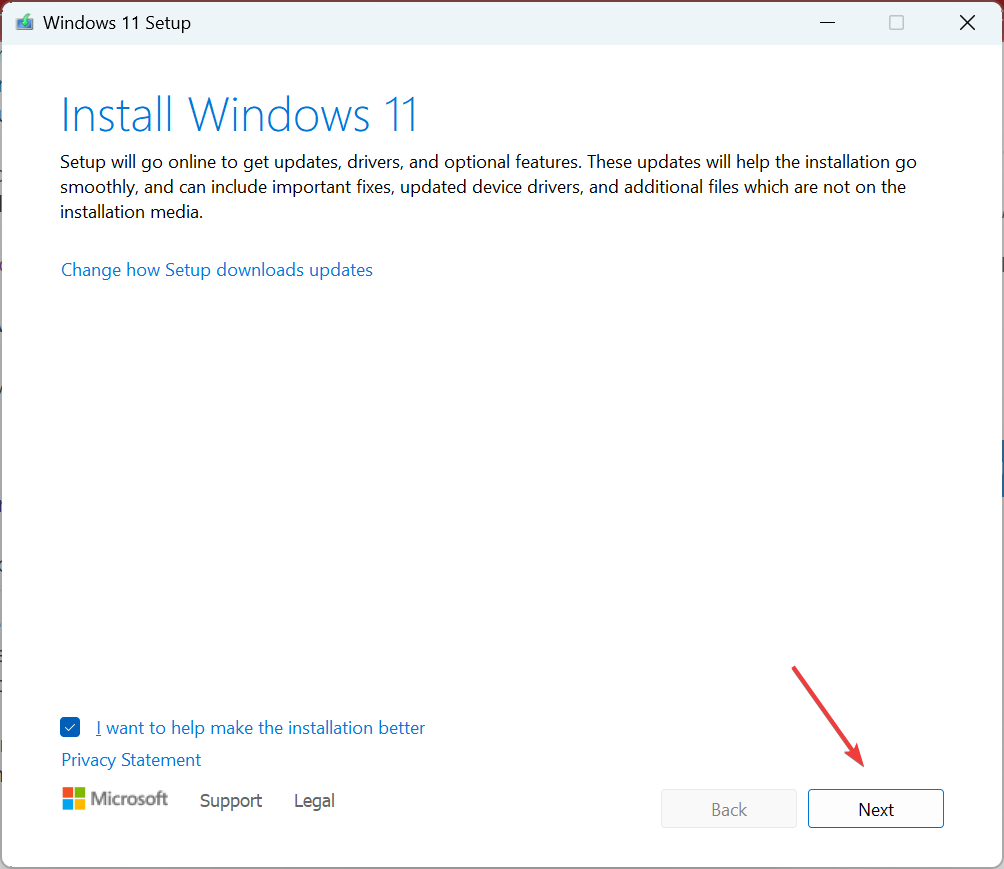
- Now, click Next.
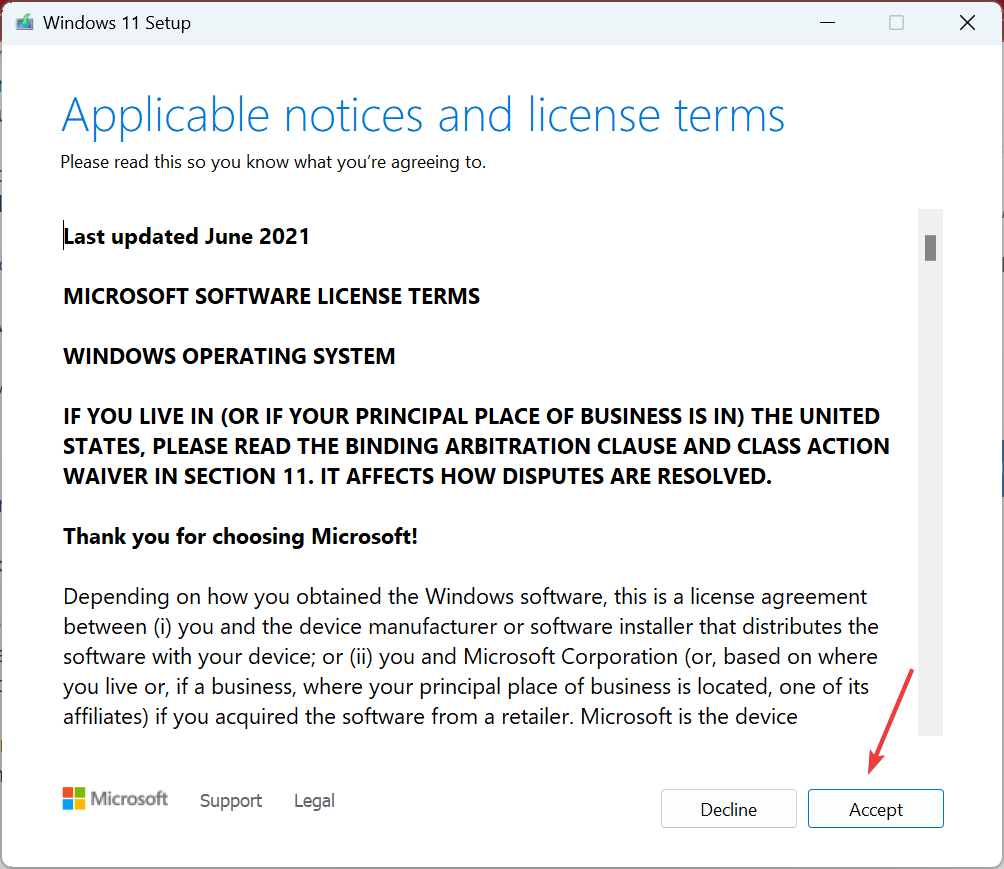
- Click Accept in the Applicable notices and license terms window.
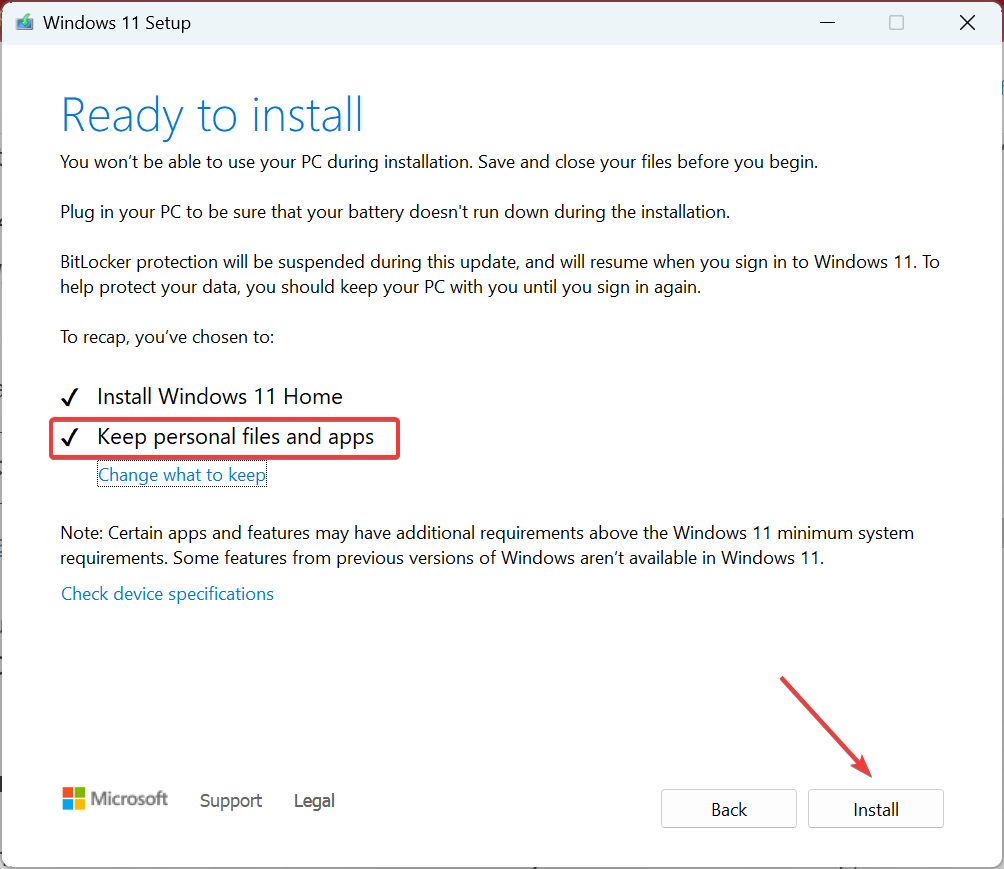
- Finally, verify that it lists Keep personal files and apps, then click on Install.
- Now, wait for the installation to complete. It may take some time and should let the process run uninterrupted.
That’s it! If none of the previous methods worked, performing an in-place upgrade should most certainly get things up and running when receiving the Installer encountered an error 0x800f0905 message.
If it still doesn’t work, you can factory reset Windows 11 or even roll back to Windows 10.
Tell us which fix worked or whether you had to reset Windows 11 in the comments section below.
In this post, we will show how you can fix Installer encountered an error 0x800f0905 on Windows 11 or Windows 10. This error can occur when running Windows Update or using its Windows Update Standalone Installer.
When updating Windows, if you receive error 0x800f0905, it’s because of misconfigured or corrupt Windows files. It can be the update file or any of the system files. When files are corrupt, installations can fail, downloads can get stuck, and sometimes the process needs a restart. It takes a while for Windows to achieve this, but it can be done manually by the end user.
Follow these suggestions to fix Installer encountered an error 0x800f0905, while running the Windows Update Standalone Installer on your Windows 11/10 computer:
- Let Windows Update Itself
- Run Windows Update Troubleshooter
- Refresh Windows Update Services
- Repair Corrupt System Files
- Peform an InPlace Upgrade
You will need admin permission to resolve this.
1] Let Windows Update Itself
If you have slow hardware, especially an HDD, then downloading and installing Windows Update may take longer than itself. In fact, at times, it results in timeout, and Windows itself throws an error. The point is that you may have to wait for this and try a couple of times. Windows Updates work better compared to previous, but they still share their own set of problems.
Make sure to disable all sleep mode; in fact, Power Toys offer this feature without changing the core settings. Let it run overnight, and see if it gets resolved.
2] Run Windows Update Troubleshooter
Windows offers a built-in troubleshooter that can help you resolve Windows Update. It’s an automated solution where a lot of services are restarted, the Update cache is cleared, and so on.
Go to Windows Settings > System > Troubleshoot > Other troubleshooter. If you are using Windows 10, then it is available under Update and Security instead of System.
3] Refresh Windows Update Services
The best way to reset Windows Update Service is to restart them, delete any downloaded files, and reset WINSOCK for network issues.
Open PowerShell or Windows Terminal or Command Prompt with admin permission, and execute the commands one after another:
net stop bits
net stop wuauserv
net stop appidsvc
net stop cryptsvc
Del "%ALLUSERSPROFILE%\Application Data\Microsoft\Network\Downloader\*.*"
rmdir %systemroot%\SoftwareDistribution /S /Q
rmdir %systemroot%\system32\catroot2 /S /Q
regsvr32.exe /s atl.dll
regsvr32.exe /s urlmon.dll
regsvr32.exe /s mshtml.dll
netsh winsock reset
netsh winsock reset proxy
net start bits
net start wuauserv
net start appidsvc
net start cryptsvc
Once done, you can restart Windows PC and then manually initiate the download once you log in again. This will remove any chance of errors caused by any of these services and files.
4] Repair Corrupt System Files
System File Checker (SFC) and DISM are built-in tools that can fix any corrupt system file by replacing them with a new copy.
Open an elevated PowerShell or Command Prompt or Windows Terminal, and execute the following commands. First run the SFC command, and second DISM.
sfc /scannow
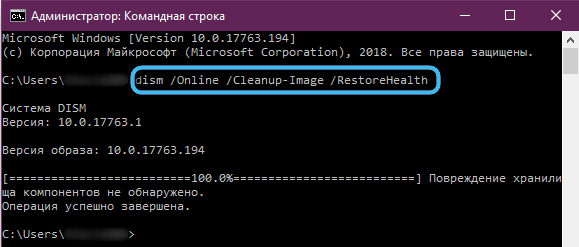
DISM /Online /Cleanup-Image /RestoreHealth
If any of these find a corrupted file system, they will be replaced. Once done, restart the PC, and then check for updates again or try installing it.
5] Peform an InPlace Upgrade
This method is a bit of overkill but if you cannot update, and it’s a major one, then you can choose to perform an in-place upgrade that will not remove anything from the system. The method is also called Refresh your PC. It can fix a lot of software, and system file issues by reinstalling the OS still preserving user data.
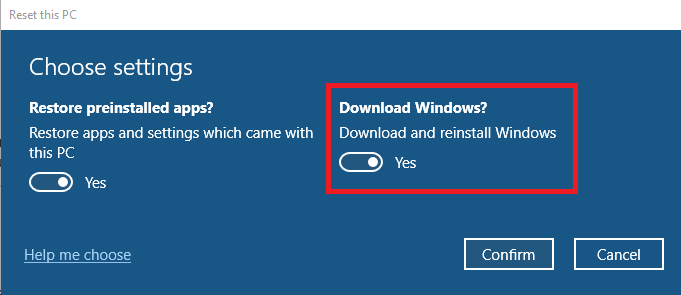
During the process, the wizard also offers you to download the latest version of Windows from the cloud, and then upgrade.
- The option is available in Settings > Recovery > Reset this PC in Windows 11.
- If you are on Windows 10, navigate to Settings > Update and Security > Recovery > Reset this PC.
I hope the post was easy to follow, and you were able to resolve the Windows Update Error 0x800f0905.
Related:
- Windows Update Standalone Installer Error 0x8007000d
- Windows Update Standalone Installer Error 0x80096002
How Do I Know if My Windows Update Is Corrupted?
If you are unable to install Windows update, or unable to download it, the update keeps failing in between, then it’s a hint that Windows Update is corrupted. The best way to restart the process is to delete everything in the Software Distribution folder and redownload everything.
Will Resetting PC Fix Corrupted Files?
It helps when you do not have any other option, and should be used when you are unable to next major update. You can use the Reset this PC option, followed by downloading the latest version of Windows using the cloud option.
Is It Better to Reset or Reinstall Windows?
Reset is a better option because it will save a lot of time, and also ensure the data on the PC is wiped clean. While both are eventually the same process, Reset option doesn’t need you to be around.
How Do I Fix a Corrupted Windows Update?
The best fix is using the Troubleshooter tool available in Windows along with DISM and SFC tools. They will replace everything that is corrupted. You can also follow the manual method, but that will involve deleting files from System Folders so make sure you clearly understand before doing it.
Если установщик обнаружил ошибку 0x800f0905, не стоит бежать и переустанавливать систему. Причины и способы исправления мы рассмотрим в этой статье.
Причины ошибки
Причиной является повреждение файла обновления или повреждение системных файлов. А причины повреждения файлов могут быть следующими:
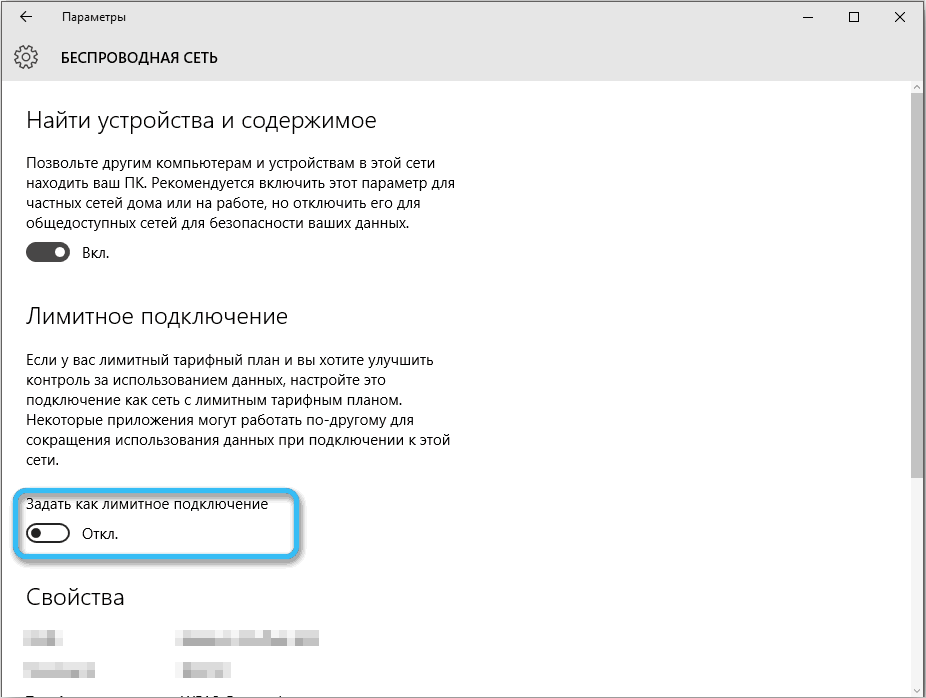
- Нестабильное интернет-соединение во время загрузки обновления. Если вы находитесь вдали от города и пользуетесь интернетом через мобильный телефон, раздавая Wi-Fi, или используете 4G модем, вероятность загрузить повреждённый файл обновления намного выше. Не забывайте ставить на мобильные интернет-соединения опцию «Лимитное подключение». И пока вы будете пользоваться таким подключением, система не будет пытаться загружать свои обновления через него.
- Системные файлы могут повреждаться от того, что ваш жёсткий диск начинает потихоньку умирать или вы очень часто принудительно выключаете компьютер из розетки, не давая системе корректно завершить работу. Не делайте так больше! Всегда корректно завершайте работу компьютера и примерно раз в полгода проверяйте жёсткий диск на наличие ошибок. Если у вас SSD, тем более нельзя принудительно выключать питание. SSD диски более чувствительны к таким вещам.
Как исправить 0x800f0905
В зависимости от того, что послужило причиной повреждения файлов, способы исправления будут разными.
Нестабильное интернет-соединение
Если у вас нет возможности подключиться к нормальному интернету, дайте системе попытаться обновиться ещё раз.
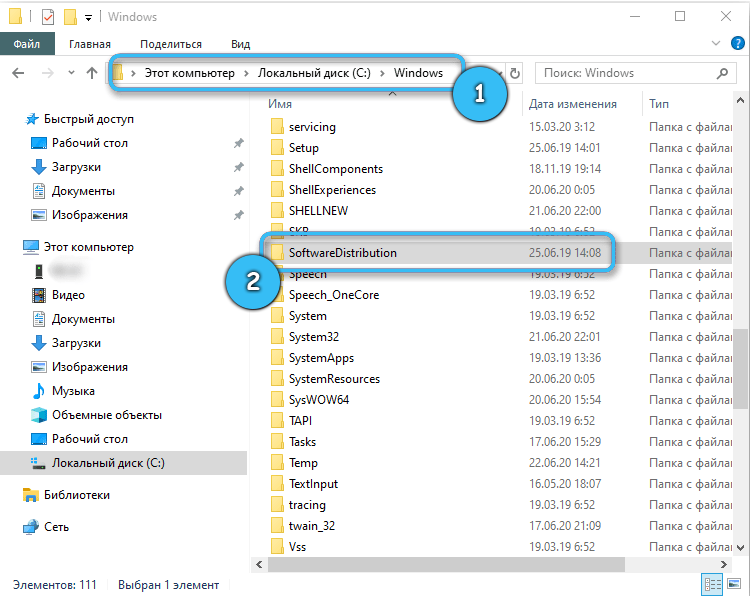
Если не поможет, удалите содержимое папки c:\windows\SoftwareDistribution, чтобы удалить загруженные, но повреждённые файлы обновления. Система их перекачает при повторной попытке обновления.
ВАЖНО. Удаляйте именно содержимое папки SoftwareDistribution, а не саму папку во избежание непредсказуемых проблем.
Повреждение системных файлов
Если вышеобозначенные способы не решили проблему, скорее всего, у вас повреждены системные файлы. Вам поможет следующее:
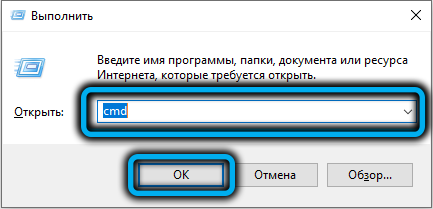
- На клавиатуре зажмите сочетание клавиш win+r.
- Наберите cmd и нажмите ОК или Enter.
- Откроется консоль. В консоли наберите: Sfc/scannow
- Нажмите Enter. Дождитесь окончания сканирования системных файлов.
- После этого попытайтесь запустить обновление.
- Если не удастся, попробуйте вот эту команду: DISM/Online /Cleanup-Image /RestoreHealth.
Альтернативные способы решения проблемы
Используйте апдейтер от Microsoft
Чтобы решить проблему с помощью апдейтера, сделайте следующее:
- В зависимости от операционной системы скачайте подходящую программу для Windows 10 (можно просто обновить через саму систему) или Windows 11.
- После соглашения с текстом лицензии появится диалог с вариантами последующих действий. Нажмите «Обновить этот компьютер».
- Следуйте дальнейшим инструкциям на экране.
Сбросьте службы обновления через командную строку
Для того, чтобы сбросить службы обновления через командную строку, следует совершить следующее:
- Откройте командную строку. Windows+r, cmd, Enter.
- Выполните последовательно следующие команды, нажимая Enter после каждой:
net stop bits
 net stop wuauserv
 net stop appidsvc
 net stop cryptsvc
 Del “%ALLUSERSPROFILE%\Application Data\Microsoft\Network\Downloader\*.*”
 rmdir %systemroot%\SoftwareDistribution /S /Q
 rmdir %systemroot%\system32\catroot2 /S /Q
 regsvr32.exe /s atl.dll
 regsvr32.exe /s urlmon.dll
 regsvr32.exe /s mshtml.dll
 netsh winsock reset
 netsh winsock reset proxy
 net start bits
 net start wuauserv
 net start appidsvc
 net start cryptsvc
После этого проверьте обновления.
Используйте средство устранения неполадок
Для того, чтобы это сделать, выполните следующие действия:
- Зажмите win+I.
- Перейдите на вкладку обновление и безопасность.
- В списке нажмите устранение неполадок.
- Нажмите дополнительные средства центра устранения неполадок.
- В списке что диагностировать нажмите центр обновления windows.
- Следуйте инструкциям на экране.
Заключение
После всего вышесказанного дадим вам ещё несколько советов:
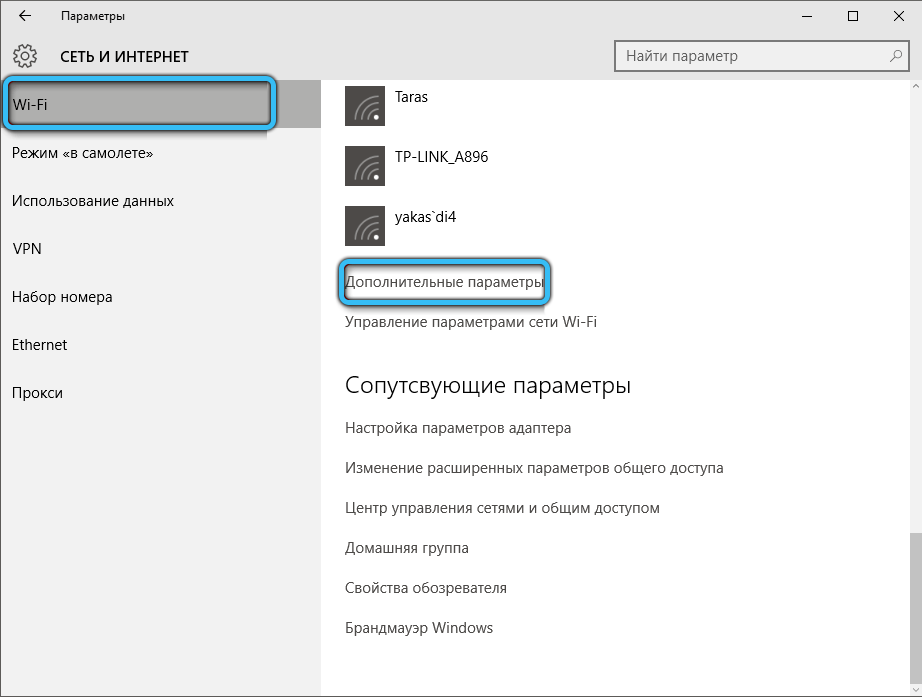
- Помечайте нестабильные интернет-соединения как лимитные подключения в параметрах. Для этого зайдите в параметры по win+i, сеть, Wi-Fi, свойства подключённой сети и поставьте флажок задать как лимитное подключение. Лимитное подключение можно настроить и для Ethernet.
- Берегите свой жёсткий диск или SSD. Регулярно проверяйте его на ошибки, чтобы избежать повреждения системных файлов или иных данных. Проверяйте на ошибки с помощью встроенных средств и сторонних программ. С помощью встроенных средств:
- Всегда корректно завершайте работу своего компьютера. Не выключайте принудительно из розетки особенно если у вас SSD.
Мы надеемся, что эта статья оказалась полезной для вас. Пишите в комментариях вопросы, если что-то не понятно.
Ошибка с кодом 0x800f0905, появляющаяся в Windows 11, свидетельствует о невозможности продолжить установку обновлений и отображается в окне инсталлятора. Существует несколько причин, по которым возникает подобная трудность. Чаще всего это связано с некорректной работой Центра обновления, однако иногда находится связь с электропитанием или поврежденными системными файлами.
Способ 1: Запуск системной утилиты
Пока нельзя точно сказать, насколько штатный инструмент устранения неполадок в новой версии Windows работает лучше, однако в данном случае его запуск вполне целесообразен. Вам не придется вручную перезапускать службы и выполнять стандартные действия проверки, поскольку все это будет осуществлено автоматически после запуска системного инструмента.
-
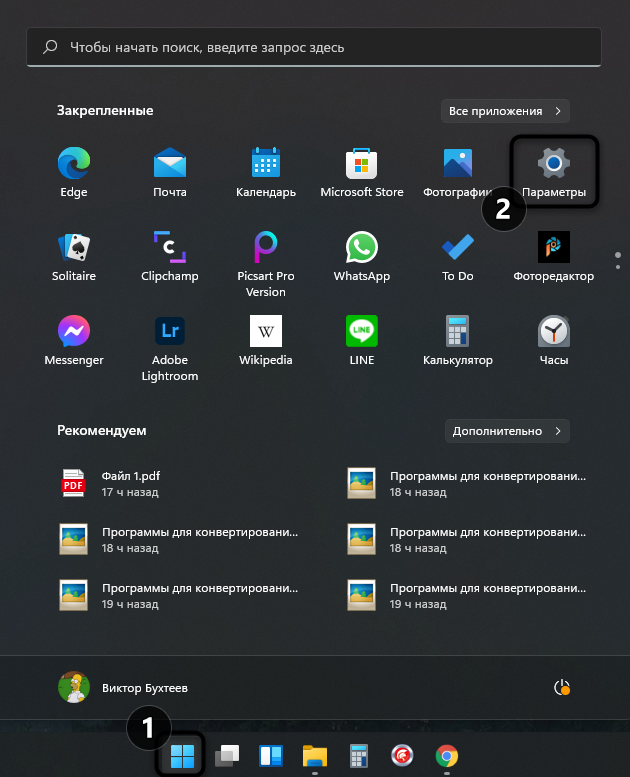
Откройте меню «Пуск» и нажмите по значку «Параметры».
-
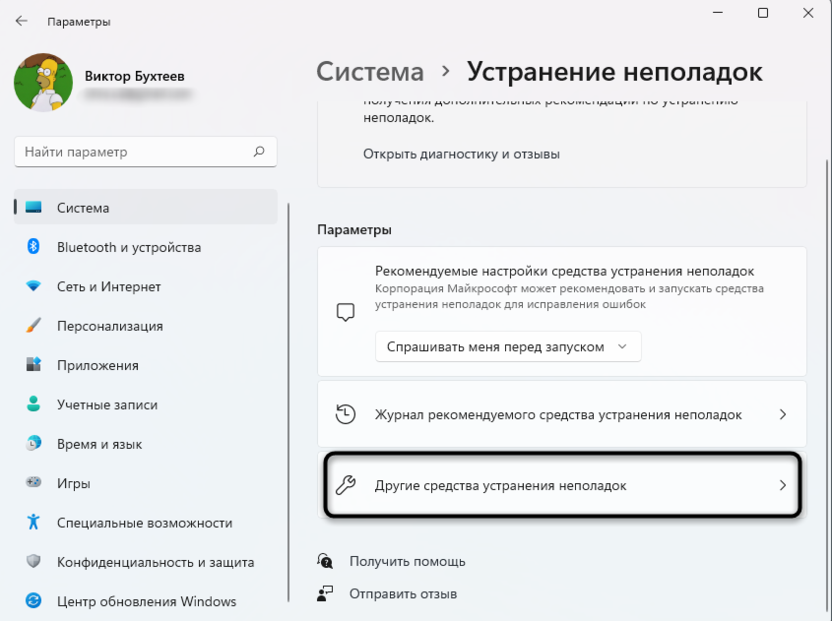
В разделе «Система» найдите плитку «Устранение неполадок» и щелкните по ней ЛКМ.
-
Далее перейдите в «Другие средства устранения неполадок».
-
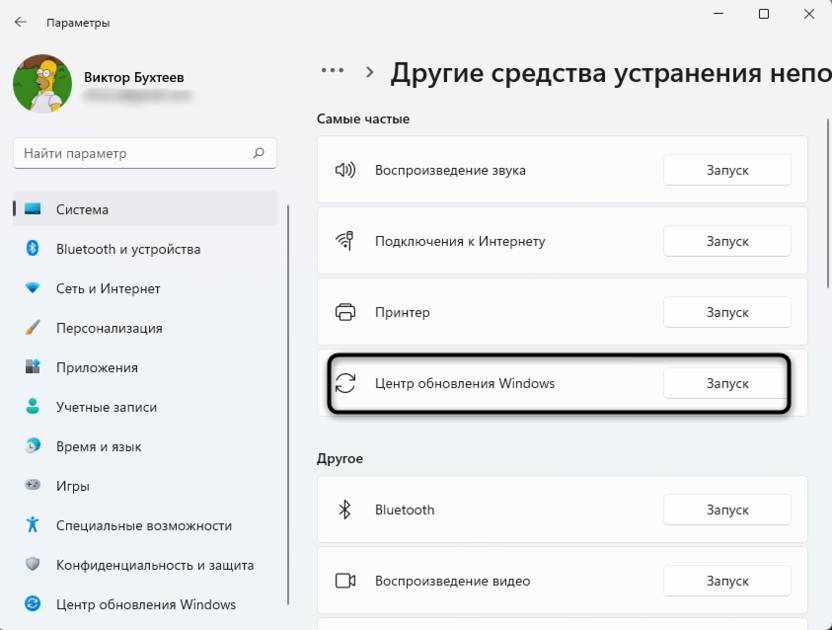
Напротив надписи «Центр обновления Windows» нажмите кнопку «Запуск».
В новом окне примите все условия, чтобы завершить исправление. После этого снова запустите установку апдейтов и проверьте, установятся ли они на этот раз.
Комьюнити теперь в Телеграм
Подпишитесь и будьте в курсе последних IT-новостей
Подписаться
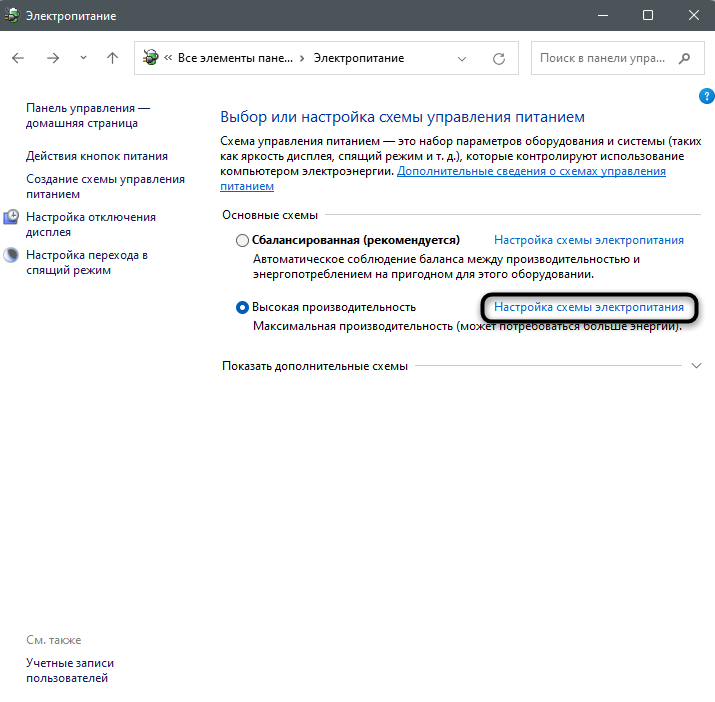
Способ 2: Настройка схемы электропитания
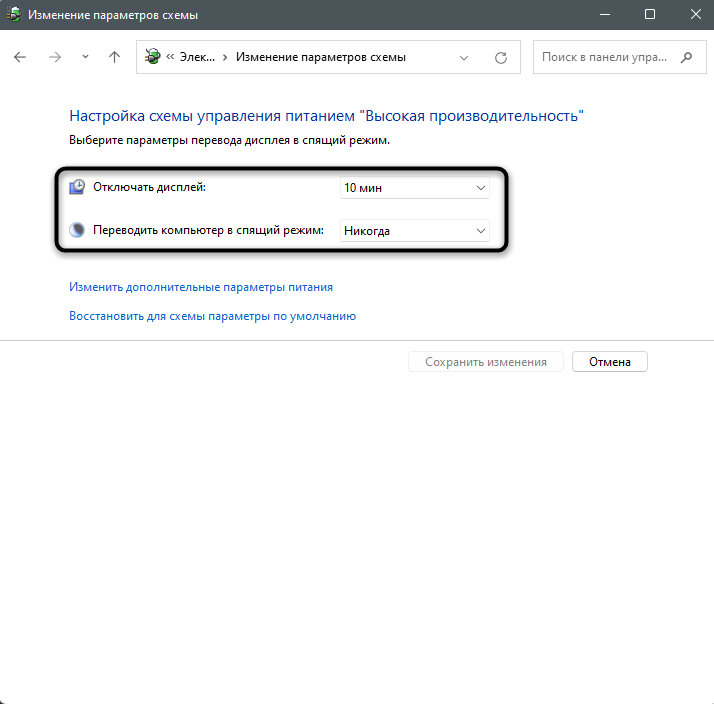
По большей части этот метод актуален для обладателей ноутбуков, ведь часто рассматриваемая ошибка появляется сама во время автоматической установки обновлений, если процесс не был завершен из-за того, что устройство перешло в спящий режим. Вам стоит отредактировать настройки электропитания, чтобы у ОС было достаточно времени на проведение всех манипуляций.
-
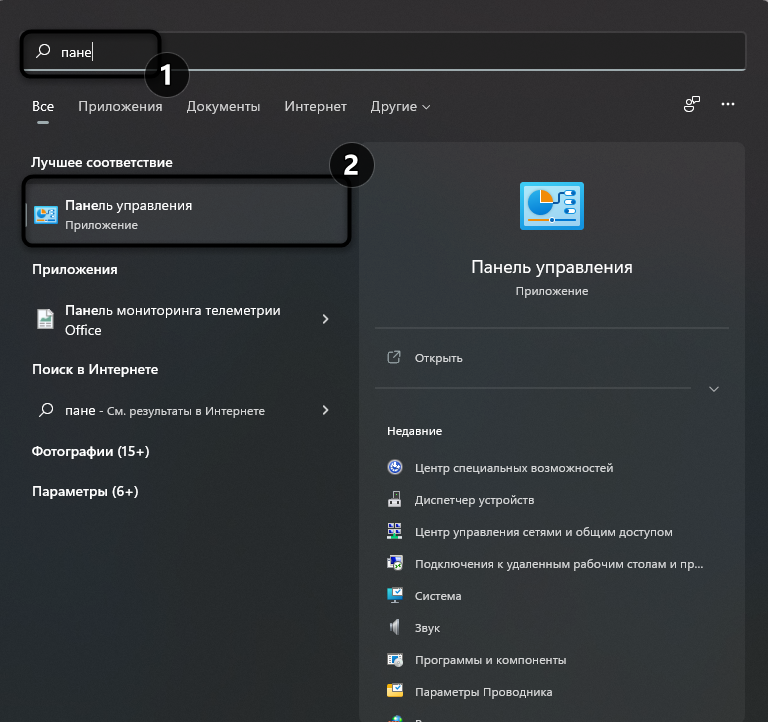
Откройте «Пуск» и через поиск отыщите приложение «Панель управления».
-
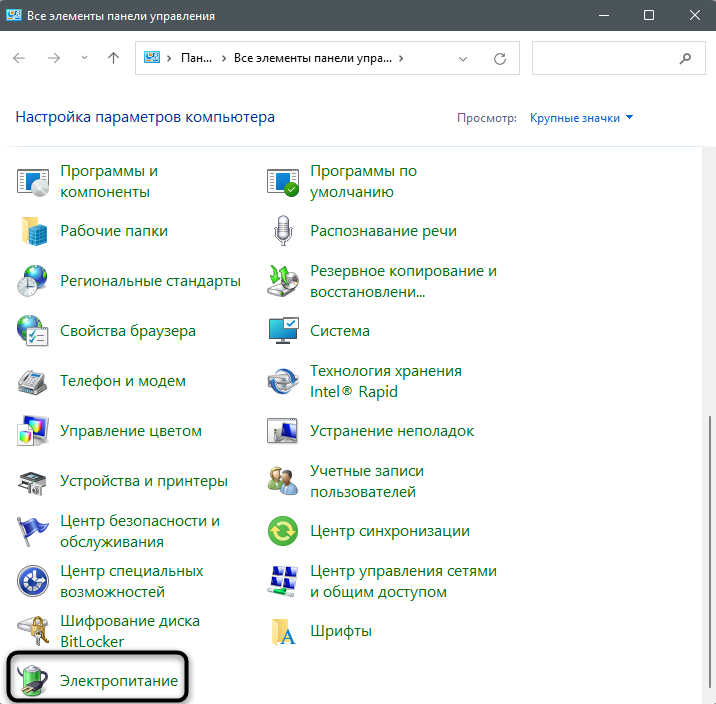
В нем вас интересует раздел «Электропитание».
-
Найдите текущую установленную схему (она будет отмечена маркером) и нажмите по ссылке «Настройка схемы электропитания».
-
Вы можете на время отменить перевод ПК или лэптопа в спящий режим, чтобы проверить, как это скажется на инсталляции обновлений. Позже просто вернитесь в данное меню, чтобы установить подходящие для вас параметры.
Способ 3: Сброс компонентов Центра обновления
Данный метод более сложный, поскольку требует ручного ввода множества команд в консоли, однако часто он оказывается эффективным. Выполняемые действия подразумевают сброс всех компонентов Центра обновления Windows, что приводит к нормализации работы этого средства.
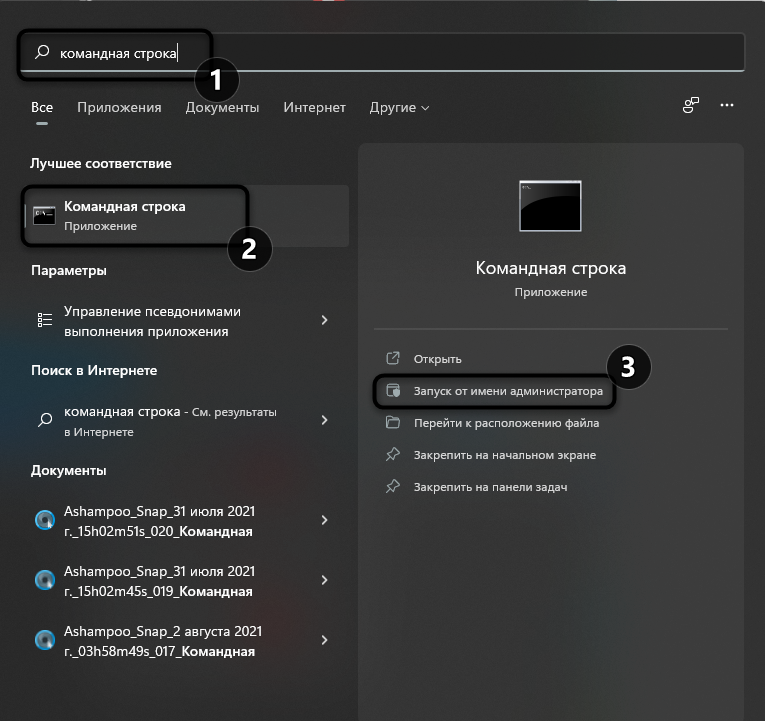
В первую очередь запустите «Командную строку» от имени администратора любым удобным для вас образом. Например, отыщите приложение через «Пуск» и выберите справа соответствующий вариант открытия.
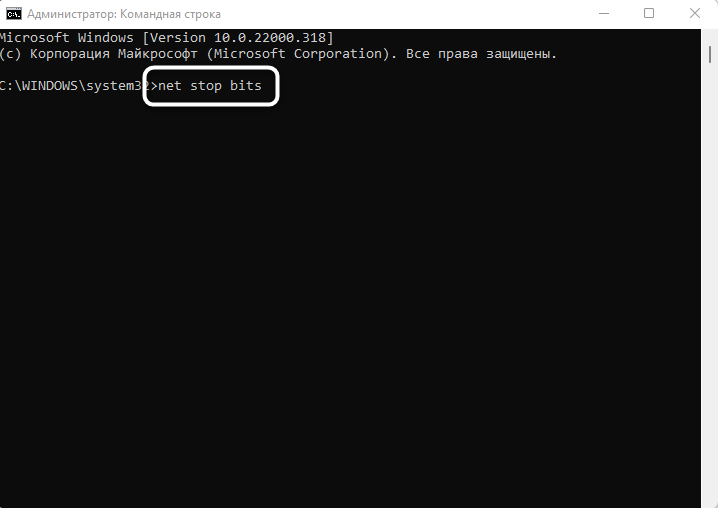
Теперь нужно остановить службы, отвечающие за обновление, поскольку без этого не получится сбросить настройки. Введите по очереди команды net stop bits и net stop wuauserv.
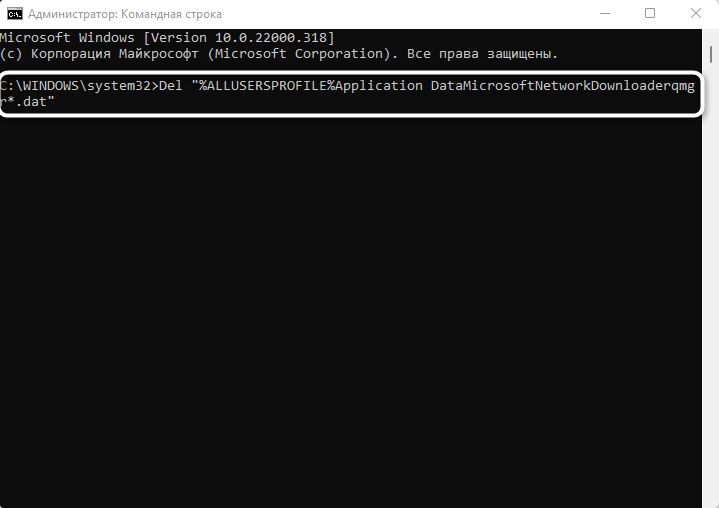
Далее введите Del “%ALLUSERSPROFILE%Application DataMicrosoftNetworkDownloaderqmgr*.dat», чтобы в соответствующей папке удалить временные файлы.
Заранее нужно переименовать некоторые важные папки, изменения в которых могут оказаться критичными. Для этого поочередно введите три приведенные ниже команды:
Ren %Systemroot%\SoftwareDistribution\DataStore DataStore.bak

Ren %Systemroot%\SoftwareDistribution\Download Download.bak

Ren %Systemroot%\System32\catroot2 catroot2.bak
Запомните пути к каталогам, чтобы в случае необходимости переименовать их обратно, восстановив тем самым работу компонентов Центра обновления.
Следующая задача – сброс служб до изначального состояния. Поскольку целевых служб всего две, то и команд будет такое же количество. По очереди введите их и активируйте в той же консоли.
sc.exe sdset bits D:(A;;CCLCSWRPWPDTLOCRRC;;;SY)(A;;CCDCLCSWRPWPDTLOCRSDRCWDWO;;;BA)(A;;CCLCSWLOCRRC;;;AU)(A;;CCLCSWRPWPDTLOCRRC;;;PU)

sc.exe sdset wuauserv D:(A;;CCLCSWRPWPDTLOCRRC;;;SY)(A;;CCDCLCSWRPWPDTLOCRSDRCWDWO;;;BA)(A;;CCLCSWLOCRRC;;;AU)(A;;CCLCSWRPWPDTLOCRRC;;;PU)
Осталась муторная часть – произвести повторную регистрацию DLL-файлов, чтобы восстановить нормальную работу компонентов Центра обновления. Для этого понадобится через консоль перейти к необходимому каталогу, введя cd /d %windir%\system32
Ниже вы видите список всех команд, которые нужно ввести по очереди. Они зарегистрируют соответствующие библиотеки. Если после ввода одной из них на экране появляется ошибка или информация о том, что файл уже есть в ОС, просто следуйте далее.
regsvr32.exe atl.dll

regsvr32.exe urlmon.dll

regsvr32.exe mshtml.dll

regsvr32.exe shdocvw.dll

regsvr32.exe browseui.dll

regsvr32.exe jscript.dll

regsvr32.exe vbscript.dll

regsvr32.exe scrrun.dll

regsvr32.exe msxml.dll

regsvr32.exe msxml3.dll

regsvr32.exe msxml6.dll

regsvr32.exe actxprxy.dll

regsvr32.exe softpub.dll

regsvr32.exe wintrust.dll

regsvr32.exe dssenh.dll

regsvr32.exe rsaenh.dll

regsvr32.exe gpkcsp.dll

regsvr32.exe sccbase.dll

regsvr32.exe slbcsp.dll

regsvr32.exe cryptdlg.dll

regsvr32.exe oleaut32.dll

regsvr32.exe ole32.dll

regsvr32.exe shell32.dll

regsvr32.exe initpki.dll

regsvr32.exe wuapi.dll

regsvr32.exe wuaueng.dll

regsvr32.exe wuaueng1.dll

regsvr32.exe wucltui.dll

regsvr32.exe wups.dll

regsvr32.exe wups2.dll

regsvr32.exe wuweb.dll

regsvr32.exe qmgr.dll

regsvr32.exe qmgrprxy.dll

regsvr32.exe wucltux.dll

regsvr32.exe muweb.dll

regsvr32.exe wuwebv.dll
Осталась всего пара простых действий. Первое подразумевает сброс утилиты Winsock, за что отвечает команда ниже.
netsh winsock reset
Теперь вы можете запустить отключенные ранее службы:
net start bits

net start wuauserv
На этом весь процесс взаимодействия с консолью завершен. Дождитесь, пока обновления начнут устанавливаться автоматически или запустите инсталляцию самостоятельно через параметры.
Способ 4: Ручная установка обновления
Пока что работу Windows 11 нельзя назвать идеальной, поэтому есть вероятность, что самостоятельно исправить некорректную работу Центра обновления не получится. В таком случае проще установить недостающий апдейт самостоятельно, сделав свою ОС актуальной, и надеяться на то, что теперь все будет работать корректно.
-
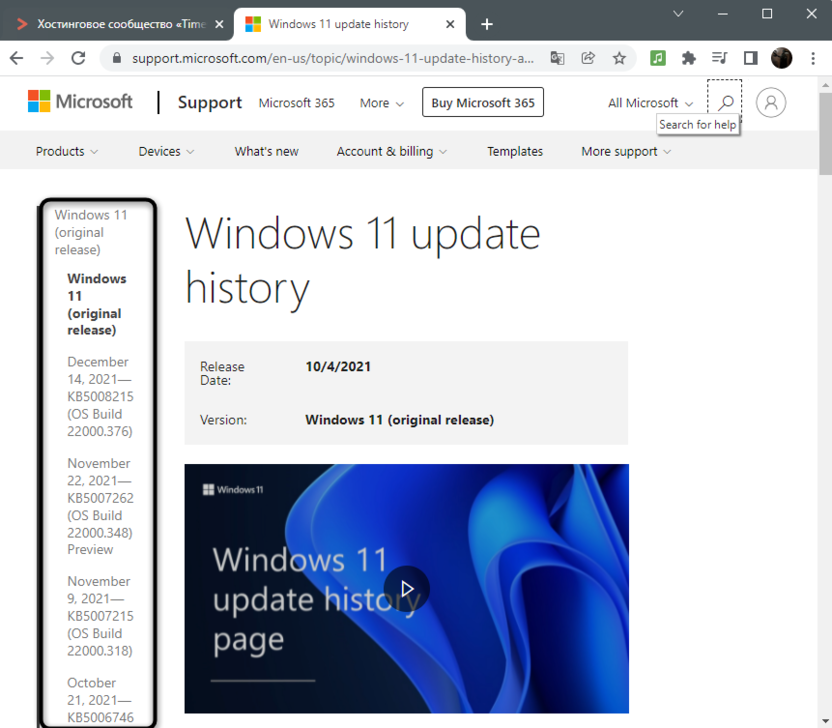
Для начала откройте страницу версий Windows 11 и посмотрите, какая сборка была последней. Она имеет соответствующий номер, начинающийся с букв KB.
-
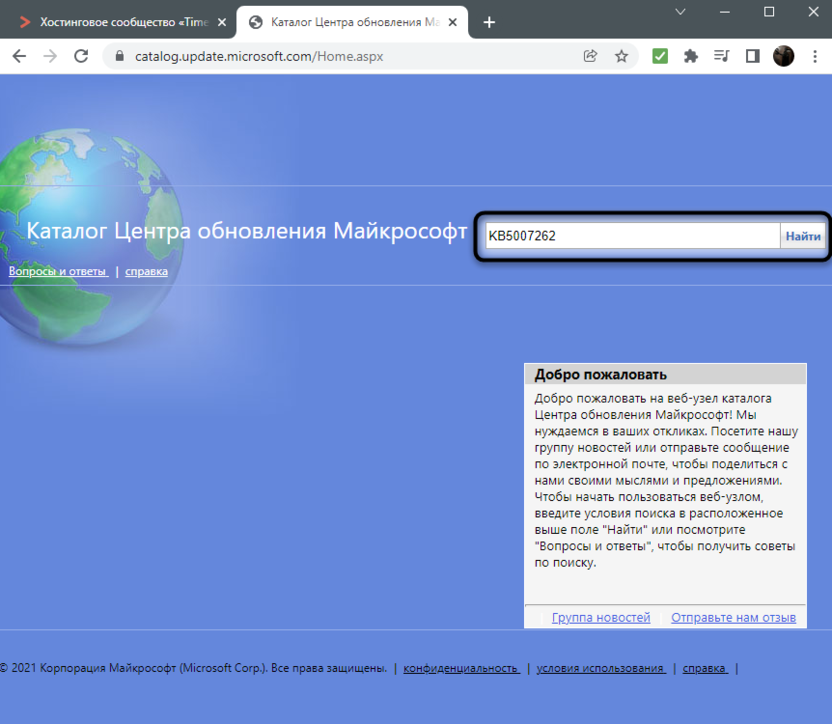
После этого перейдите к Каталогу Центра обновления Майкрософт и введите этот номер в поиске.
-
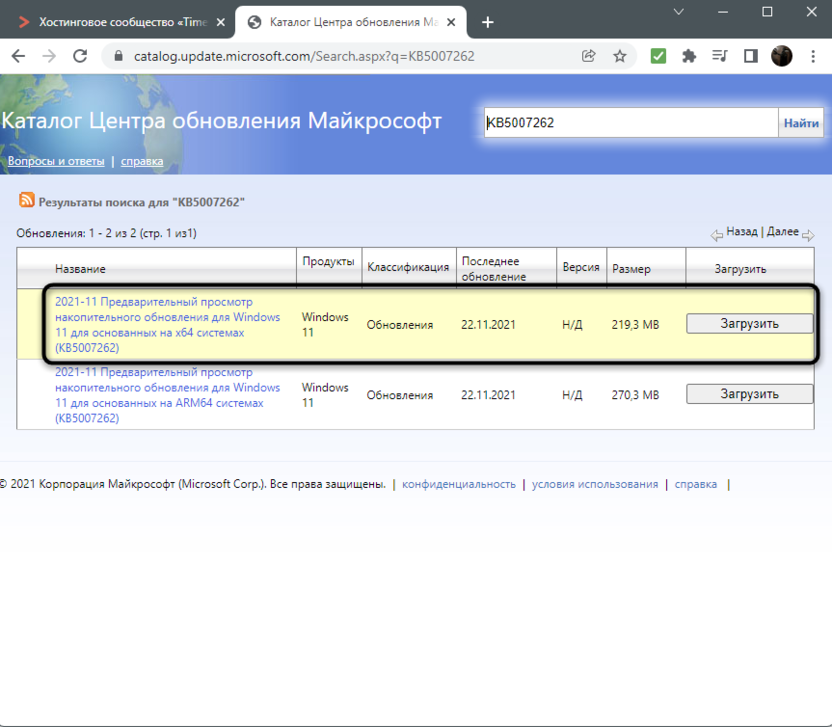
Найдите обновление и нажмите на «Загрузить».
-
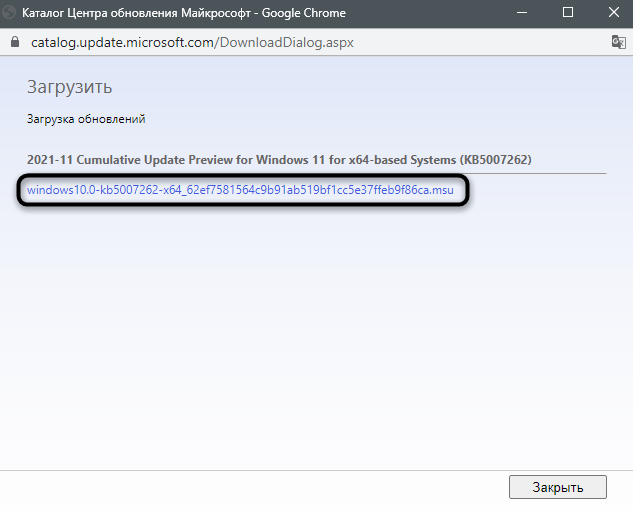
Если откроется новое окно, щелкните по ссылке для начала загрузки исполняемого файла, после чего откройте его и дождитесь завершения установки.
Отмечу, что в Google Chrome скачать файл не получилось, загрузка просто не начинается, а вот в Microsoft Edge все прошло успешно.
Вместо заключения
Как панацею от всех проблем в Windows многие советуют запускать команду sfc /scannow, чтобы проверить целостность системных файлов. Я же рекомендую делать это только в том случае, если ничего из приведенного выше не помогло, и ошибка 0x800f0905 все равно появляется. Если вы являетесь обладателем пиратской сборки Windows 11, возможно, проблема именно в ней, поскольку разработчик внес в нее изменения, чтобы обновления просто не устанавливались.
