Некоторые пользователи сталкиваются с ошибкой 0X800F0982, когда пытаются установить отложенные либо кумулятивные обновления для ОС Windows 10. Наиболее часто подобная ошибка возникает при установке KB4493509, KB4493509 и KB4489899, однако с ней можно столкнуться и при установке других апдейтов, по крайней мере, если верить утверждениям в сети.
Причины появления 0X800F0982
- Типичный глюк Центра обновления. Рассматриваемая ошибка может являться самым обычным глюком Центра обновления, о котором, по всей видимости, Майкрософт уже давно знают. В такой ситуации необходимо воспользоваться функционалом системного средства устранения неполадок.
- Службы Центра обновления повисли. Появление ошибок в Центре обновления можно ждать в том случае, если компоненты последнего зависли и больше не могут выполнять возложенные на них задачи. Сброс компонентов ЦО — надежное решение.
- Поврежденные системные файлы. Повреждение системных файлов не всегда приводит к проблемам с обновлением ОС, однако такое вполне возможно. Вы можете всецело обойти ошибку 0X800F0982, запустив принудительную установку обновлений через терминал PowerShell.
Решение ошибки 0X800F0982

Решение №1 Запуск средства устранения неполадок
Ошибка 0X800F0982 может быть следствием самого обычного бага в работе Центра обновления Windows. Поэтому давайте не будем с вами спешить — воспользуемся системным средством устранения неполадок. Дабы запустить данное средство на своем ПК, вам нужно:
- нажать на клавиатуре комбинацию WIN+I, чтобы открыть окошко «Параметры»;
- перейдите в раздел «Обновление и безопасность», потом — в подраздел (или вкладку) «Устранение неполадок»;
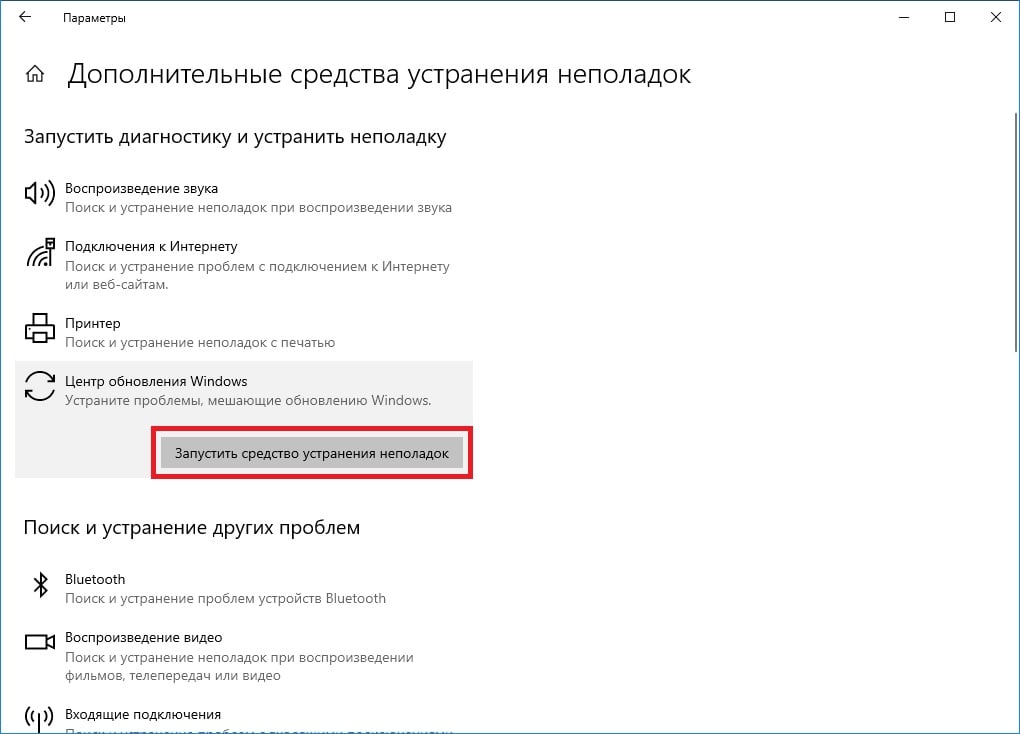
- кликнуть на пункт «Дополнительные средства устранения неполадок»;
- выбрать в списке средств пункт «Центр обновления Windows» (находится в разделе диагностики и устранения неполадок);
- нажать на кнопку «Запустить средство устранения неполадок»;
- следовать инструкциям от средства в новом диалоговом окошке;
- перезагрузить ПК, когда работа со средством будет закончена.
К сожалению, в некоторых случаях средство устранения неполадок не находит никаких проблем с Центром обновления, даже если те безоговорочно существуют.
Решение №2 Сброс компонентов Центра обновления
Центр обновления Windows — это гигантский механизм, который состоит из множества самых разных компонентов. Если хотя бы один из этих компонентов перестанет функционировать так, как было задумано Майкрософт, Центр обновления не сможет нормально находить и устанавливать свежие обновления. К счастью, существует процесс, способный вернуть все компоненты ЦО к их первоначальному состоянию, тем самым разрешив неполадки с обновлением ОС.
Итак, вам необходимо сделать на своем ПК следующее:
- Нажмите комбинацию клавиш WIN+R, чтобы открыть диалоговое окошко «Выполнить».
- Вставьте в пустую строку окна значение «CMD» и нажмите комбинацию CTRL+SHIFT+ENTER.
Заметка: CTRL+SHIFT+ENTER запускает различные приложения от имени администратора.
- Вызвав Командную строку, выполните в ней следующий ряд команд:
- net stop bits
- net stop wuauserv
- net stop cryptsvc
- Del «%ALLUSERSPROFILE%\Application Data\Microsoft\Network\Downloader\qmgr*.dat»
- Ren %Systemroot%\SoftwareDistribution\DataStore DataStore.bak
- Ren %Systemroot%\SoftwareDistribution\Download Download.bak
- Ren %Systemroot%\System32\catroot2 catroot2.bak
- sc.exe sdset bits D:(A;;CCLCSWRPWPDTLOCRRC;;;SY)(A;;CCDCLCSWRPWPDTLOCRSDRCWDWO;;;BA)(A;;CCLCSWLOCRRC;;;AU)(A;;CCLCSWRPWPDTLOCRRC;;;PU)
- sc.exe sdset wuauserv D:(A;;CCLCSWRPWPDTLOCRRC;;;SY)(A;;CCDCLCSWRPWPDTLOCRSDRCWDWO;;;BA)(A;;CCLCSWLOCRRC;;;AU)(A;;CCLCSWRPWPDTLOCRRC;;;PU)
- cd /d %windir%\system32
- regsvr32.exe atl.dll
- regsvr32.exe urlmon.dll
- regsvr32.exe mshtml.dll
- regsvr32.exe shdocvw.dll
- regsvr32.exe browseui.dll
- regsvr32.exe jscript.dll
- regsvr32.exe vbscript.dll
- regsvr32.exe scrrun.dll
- regsvr32.exe msxml.dll
- regsvr32.exe msxml3.dll
- regsvr32.exe msxml6.dll
- regsvr32.exe actxprxy.dll
- regsvr32.exe softpub.dll
- regsvr32.exe wintrust.dll
- regsvr32.exe dssenh.dll
- regsvr32.exe rsaenh.dll
- regsvr32.exe gpkcsp.dll
- regsvr32.exe sccbase.dll
- regsvr32.exe slbcsp.dll
- regsvr32.exe cryptdlg.dll
- regsvr32.exe oleaut32.dll
- regsvr32.exe ole32.dll
- regsvr32.exe shell32.dll
- regsvr32.exe initpki.dll
- regsvr32.exe wuapi.dll
- regsvr32.exe wuaueng.dll
- regsvr32.exe wuaueng1.dll
- regsvr32.exe wucltui.dll
- regsvr32.exe wups.dll
- regsvr32.exe wups2.dll
- regsvr32.exe wuweb.dll
- regsvr32.exe qmgr.dll
- regsvr32.exe qmgrprxy.dll
- regsvr32.exe wucltux.dll
- regsvr32.exe muweb.dll
- regsvr32.exe wuwebv.dll
- netsh winsock reset
- net start bits
- net start wuauserv
- net start cryptsvc
- Перезагрузите ПК.
Вам придется затратить довольно много времени на ввод команд, даже если вы будете пользоваться буфером обмена (с нюансами, но он работает в Командной строке). Но не хотите ли вы сэкономить свое время, воспользовавшись способом, так сказать, для ленивых? Вам придется провести лишь несколько минут в системном Блокноте, и дело в шляпе. Итак, вот что вам нужно сделать:
- Создайте в удобном для вас месте самый обычный текстовик (ПКМ→Создать→Текстовый документ).
- Скопируйте в буфер обмена следующий скрипт:
:: Run the reset Windows Update components.
:: void components();
:: /*************************************************************************************/
:components
:: —— Stopping the Windows Update services ——
call :print Stopping the Windows Update services.
net stop bitscall :print Stopping the Windows Update services.
net stop wuauservcall :print Stopping the Windows Update services.
net stop appidsvccall :print Stopping the Windows Update services.
net stop cryptsvccall :print Canceling the Windows Update process.
taskkill /im wuauclt.exe /f
:: —— Checking the services status ——
call :print Checking the services status.sc query bits | findstr /I /C:»STOPPED»
if %errorlevel% NEQ 0 (
echo. Failed to stop the BITS service.
echo.
echo.Press any key to continue . . .
pause>nul
goto :eof
)call :print Checking the services status.
sc query wuauserv | findstr /I /C:»STOPPED»
if %errorlevel% NEQ 0 (
echo. Failed to stop the Windows Update service.
echo.
echo.Press any key to continue . . .
pause>nul
goto :eof
)call :print Checking the services status.
sc query appidsvc | findstr /I /C:»STOPPED»
if %errorlevel% NEQ 0 (
sc query appidsvc | findstr /I /C:»OpenService FAILED 1060″
if %errorlevel% NEQ 0 (
echo. Failed to stop the Application Identity service.
echo.
echo.Press any key to continue . . .
pause>nul
if %family% NEQ 6 goto :eof
)
)call :print Checking the services status.
sc query cryptsvc | findstr /I /C:»STOPPED»
if %errorlevel% NEQ 0 (
echo. Failed to stop the Cryptographic Services service.
echo.
echo.Press any key to continue . . .
pause>nul
goto :eof
):: —— Delete the qmgr*.dat files ——
call :print Deleting the qmgr*.dat files.del /s /q /f «%ALLUSERSPROFILE%\Application Data\Microsoft\Network\Downloader\qmgr*.dat»
del /s /q /f «%ALLUSERSPROFILE%\Microsoft\Network\Downloader\qmgr*.dat»:: —— Renaming the softare distribution folders backup copies ——
call :print Deleting the old software distribution backup copies.cd /d %SYSTEMROOT%
if exist «%SYSTEMROOT%\winsxs\pending.xml.bak» (
del /s /q /f «%SYSTEMROOT%\winsxs\pending.xml.bak»
)
if exist «%SYSTEMROOT%\SoftwareDistribution.bak» (
rmdir /s /q «%SYSTEMROOT%\SoftwareDistribution.bak»
)
if exist «%SYSTEMROOT%\system32\Catroot2.bak» (
rmdir /s /q «%SYSTEMROOT%\system32\Catroot2.bak»
)
if exist «%SYSTEMROOT%\WindowsUpdate.log.bak» (
del /s /q /f «%SYSTEMROOT%\WindowsUpdate.log.bak»
)call :print Renaming the software distribution folders.
if exist «%SYSTEMROOT%\winsxs\pending.xml» (
takeown /f «%SYSTEMROOT%\winsxs\pending.xml»
attrib -r -s -h /s /d «%SYSTEMROOT%\winsxs\pending.xml»
ren «%SYSTEMROOT%\winsxs\pending.xml» pending.xml.bak
)
if exist «%SYSTEMROOT%\SoftwareDistribution» (
attrib -r -s -h /s /d «%SYSTEMROOT%\SoftwareDistribution»
ren «%SYSTEMROOT%\SoftwareDistribution» SoftwareDistribution.bak
if exist «%SYSTEMROOT%\SoftwareDistribution» (
echo.
echo. Failed to rename the SoftwareDistribution folder.
echo.
echo.Press any key to continue . . .
pause>nul
goto :eof
)
)
if exist «%SYSTEMROOT%\system32\Catroot2» (
attrib -r -s -h /s /d «%SYSTEMROOT%\system32\Catroot2»
ren «%SYSTEMROOT%\system32\Catroot2» Catroot2.bak
)
if exist «%SYSTEMROOT%\WindowsUpdate.log» (
attrib -r -s -h /s /d «%SYSTEMROOT%\WindowsUpdate.log»
ren «%SYSTEMROOT%\WindowsUpdate.log» WindowsUpdate.log.bak
):: —— Reset the BITS service and the Windows Update service to the default security descriptor ——
call :print Reset the BITS service and the Windows Update service to the default security descriptor.sc.exe sdset wuauserv D:(A;;CCLCSWLOCRRC;;;AU)(A;;CCDCLCSWRPWPDTLOCRSDRCWDWO;;;BA)(A;;CCDCLCSWRPWPDTLCRSDRCWDWO;;;SO)(A;;CCLCSWRPWPDTLOCRRC;;;SY)S:(AU;FA;CCDCLCSWRPWPDTLOCRSDRCWDWO;;WD)
sc.exe sdset bits D:(A;;CCLCSWLOCRRC;;;AU)(A;;CCDCLCSWRPWPDTLOCRSDRCWDWO;;;BA)(A;;CCDCLCSWRPWPDTLCRSDRCWDWO;;;SO)(A;;CCLCSWRPWPDTLOCRRC;;;SY)S:(AU;FA;CCDCLCSWRPWPDTLOCRSDRCWDWO;;WD)
sc.exe sdset cryptsvc D:(A;;CCLCSWLOCRRC;;;AU)(A;;CCDCLCSWRPWPDTLOCRSDRCWDWO;;;BA)(A;;CCDCLCSWRPWPDTLCRSDRCWDWO;;;SO)(A;;CCLCSWRPWPDTLOCRRC;;;SY)S:(AU;FA;CCDCLCSWRPWPDTLOCRSDRCWDWO;;WD)
sc.exe sdset trustedinstaller D:(A;;CCLCSWLOCRRC;;;AU)(A;;CCDCLCSWRPWPDTLOCRSDRCWDWO;;;BA)(A;;CCDCLCSWRPWPDTLCRSDRCWDWO;;;SO)(A;;CCLCSWRPWPDTLOCRRC;;;SY)S:(AU;FA;CCDCLCSWRPWPDTLOCRSDRCWDWO;;WD):: —— Reregister the BITS files and the Windows Update files ——
call :print Reregister the BITS files and the Windows Update files.cd /d %SYSTEMROOT%\system32
regsvr32.exe /s atl.dll
regsvr32.exe /s urlmon.dll
regsvr32.exe /s mshtml.dll
regsvr32.exe /s shdocvw.dll
regsvr32.exe /s browseui.dll
regsvr32.exe /s jscript.dll
regsvr32.exe /s vbscript.dll
regsvr32.exe /s scrrun.dll
regsvr32.exe /s msxml.dll
regsvr32.exe /s msxml3.dll
regsvr32.exe /s msxml6.dll
regsvr32.exe /s actxprxy.dll
regsvr32.exe /s softpub.dll
regsvr32.exe /s wintrust.dll
regsvr32.exe /s dssenh.dll
regsvr32.exe /s rsaenh.dll
regsvr32.exe /s gpkcsp.dll
regsvr32.exe /s sccbase.dll
regsvr32.exe /s slbcsp.dll
regsvr32.exe /s cryptdlg.dll
regsvr32.exe /s oleaut32.dll
regsvr32.exe /s ole32.dll
regsvr32.exe /s shell32.dll
regsvr32.exe /s initpki.dll
regsvr32.exe /s wuapi.dll
regsvr32.exe /s wuaueng.dll
regsvr32.exe /s wuaueng1.dll
regsvr32.exe /s wucltui.dll
regsvr32.exe /s wups.dll
regsvr32.exe /s wups2.dll
regsvr32.exe /s wuweb.dll
regsvr32.exe /s qmgr.dll
regsvr32.exe /s qmgrprxy.dll
regsvr32.exe /s wucltux.dll
regsvr32.exe /s muweb.dll
regsvr32.exe /s wuwebv.dll:: —— Resetting Winsock ——
call :print Resetting Winsock.
netsh winsock reset:: —— Resetting WinHTTP Proxy ——
call :print Resetting WinHTTP Proxy.if %family% EQU 5 (
proxycfg.exe -d
) else (
netsh winhttp reset proxy
):: —— Set the startup type as automatic ——
call :print Resetting the services as automatics.
sc.exe config wuauserv start= auto
sc.exe config bits start= delayed-auto
sc.exe config cryptsvc start= auto
sc.exe config TrustedInstaller start= demand
sc.exe config DcomLaunch start= auto:: —— Starting the Windows Update services ——
call :print Starting the Windows Update services.
net start bitscall :print Starting the Windows Update services.
net start wuauservcall :print Starting the Windows Update services.
net start appidsvccall :print Starting the Windows Update services.
net start cryptsvccall :print Starting the Windows Update services.
net start DcomLaunch:: —— End process ——
call :print The operation completed successfully.echo.Press any key to continue . . .
pause>nul
goto :eof
:: /*************************************************************************************/
- Далее кликните на пункт «Файл» в строке меню окна Блокнота и выберите пункт «Сохранить как…».
- Задайте новенькому файлу произвольное имя, например, «Ленивый_сброс_ЦО», и измените его расширение с «.txt» на «.bat».
Заметка: изменение расширение является критически важным шагом в данном методе — не забывайте об этом!
- Выберите нужно вам расположение на компьютере, например, Рабочий стол, и нажмите на кнопку «Сохранить».
- Перейдите к файлу «Ленивый_сброс_ЦО.bat», нажмите на него ПКМ и выберите опцию «Запуск от имени администратора».
- Дождитесь завершения сброса компонентов Центра обновления, после чего нажмите на любую кнопку на клавиатуре, чтобы закрыть окошко Командной строки.
- Перезагрузите компьютер.
Как только закончите восстанавливать Центр обновления, попытайтесь обновить свою ОС еще раз. Возможно, ошибка 0X800F0982 исчезла.
Решение №3 Принудительная установка обновления через PowerShell
Если вышеуказанное решение не принесло желаемого результата, то вы можете всецело обойти 0X800F0982 в Центре обновления своей Windows, принудительно установив проблемное обновление через PowerShell. Не особо углубляясь в подробности, PowerShell — это более функциональная версия старой-доброй Командной строки.
Чтобы запустить принудительную установку обновления для своей Windows 10, вам нужно сделать следующее:
- Нажмите на клавиатуре комбинацию WIN+R.
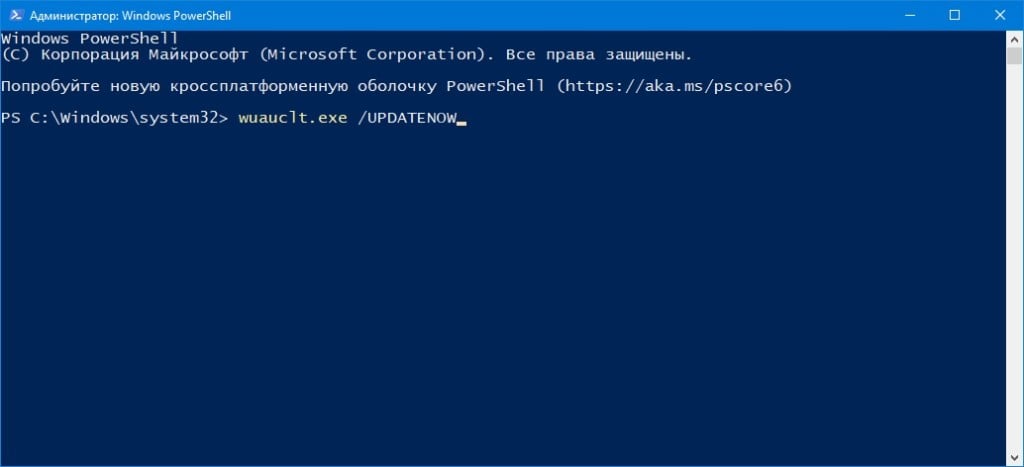
- Пропишите в пустую строку «POWERSHELL» и нажмите комбинацию CTRL+SHIFT+ENTER.
- Вставьте в терминал команду «wuauclt.exe /UPDATENOW» и нажмите Enter.
- Подождите завершения установки обновлений, после чего перезагрузите ПК.
В случае использования PowerShell вы в принципе не должны увидеть ошибки 0X800F0982.
Итак, вы загружаете последнюю сборку Windows 10/11, выпущенную Microsoft, и пока все идет гладко. Однако, прежде чем процесс обновления может быть завершен, все останавливается. Вместо обновленной операционной системы Windows вы получаете только ошибку.
Мы знаем, насколько неприятной может быть эта ситуация. Итак, если вы ищете способ устранить ошибку, то это правильное место. Мы создали это руководство специально для вас.
Центр обновления Windows важен для обеспечения безопасности вашего компьютера. Это утилита, которая находит, загружает и устанавливает последние обновления для вашей операционной системы. Однако, какой бы важной ни была его роль, иногда он может застрять или сломаться в процессе. Следовательно, он может отображать код ошибки 0x800f0982.
Код ошибки Центра обновления Windows 0x800f0982 — это проблема, которая может возникнуть, когда пользователи устанавливают или загружают обновления. Это может произойти по ряду причин, но часто это происходит из-за того, что у пользователя недостаточно свободного места на жестком диске на его компьютере. Проблема также может возникнуть из-за следующего:
- Служба обновления Windows отключена.
- Вы используете устаревшую версию Windows 10/11.
- В системном каталоге есть поврежденные файлы.
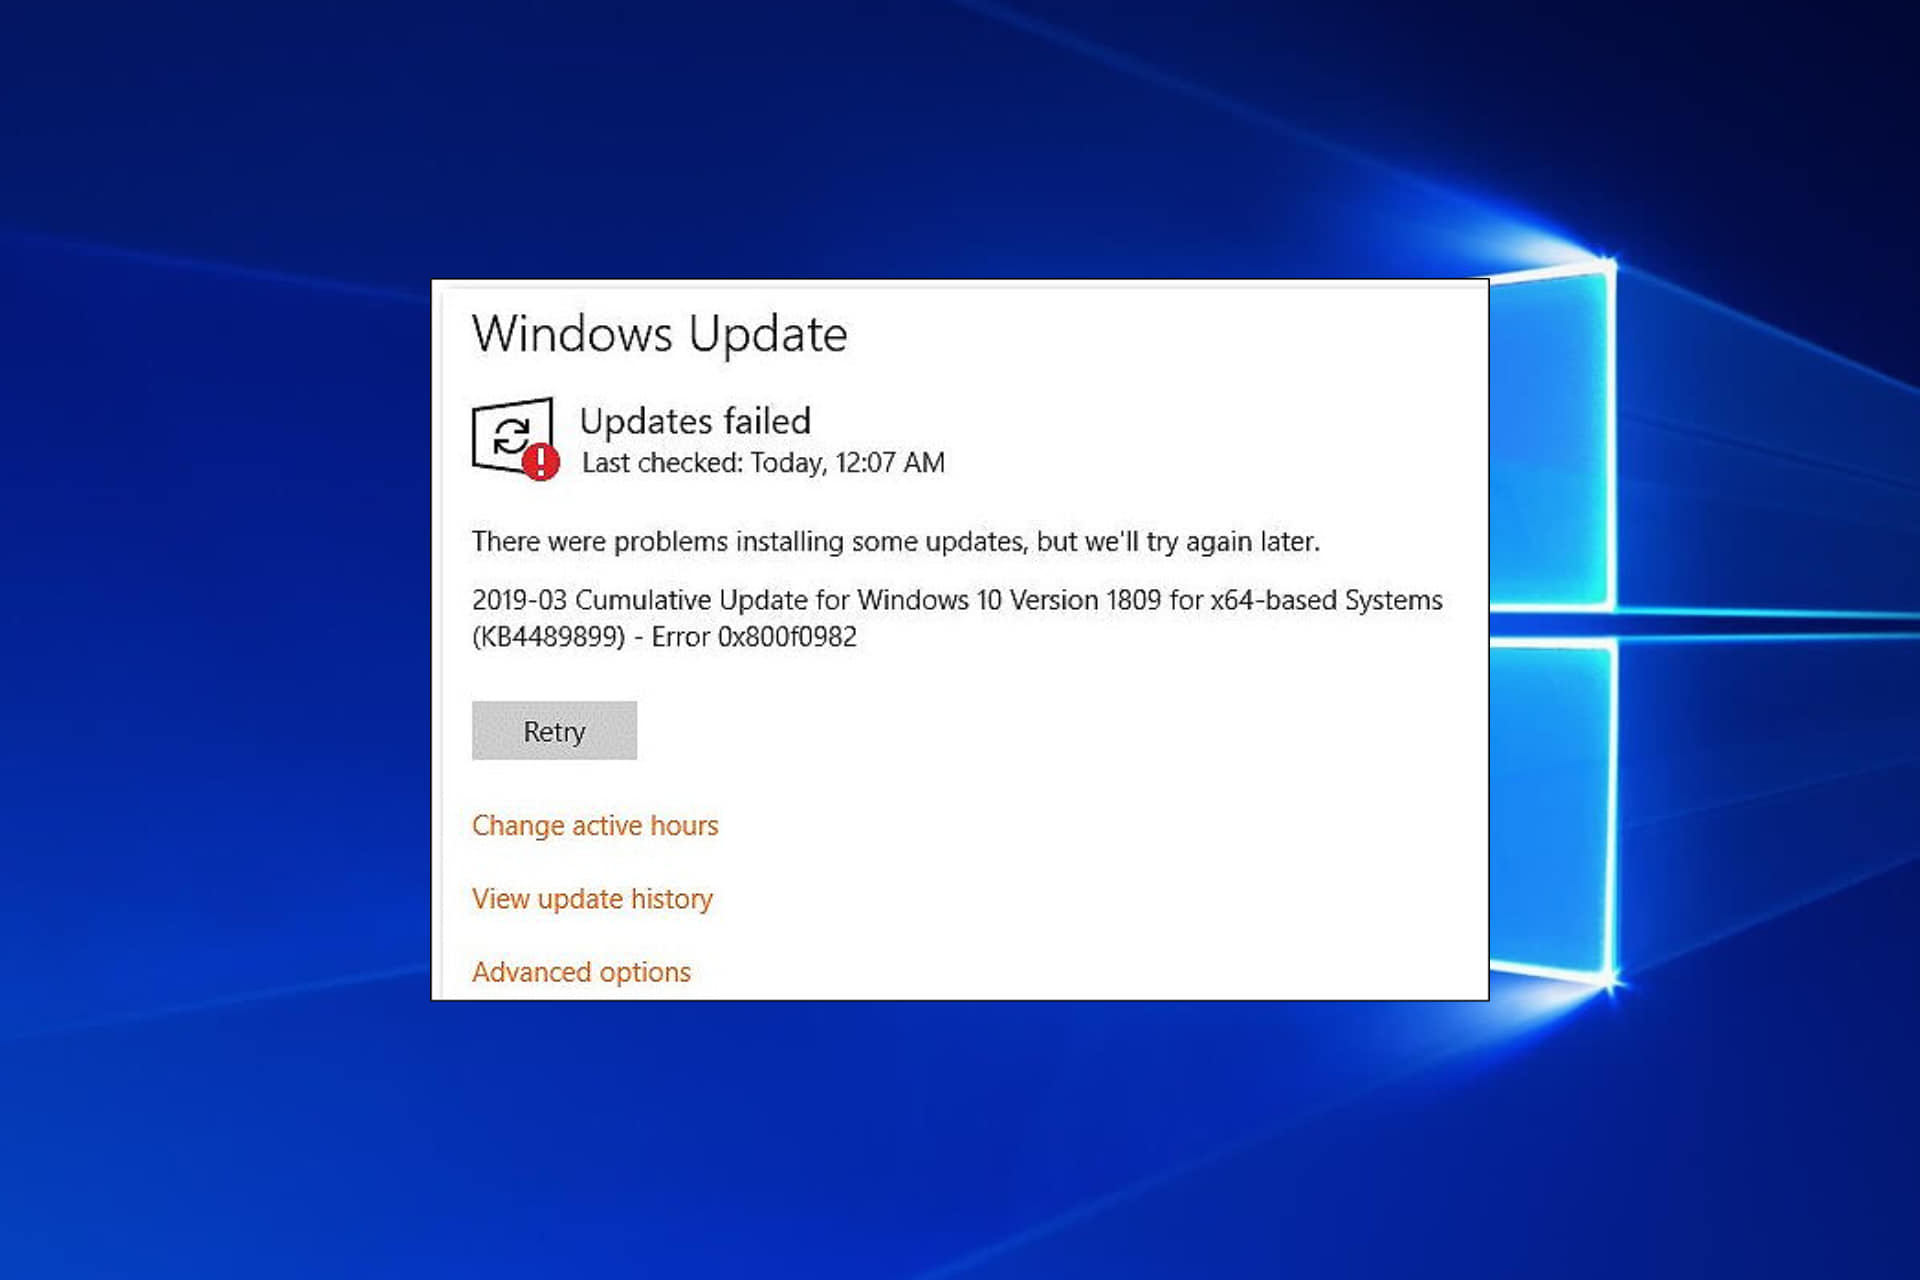
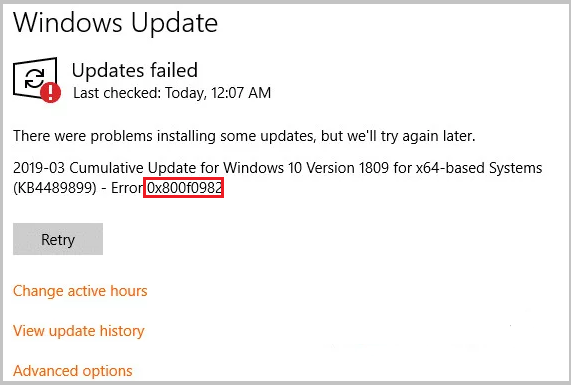
По словам затронутых пользователей, проблема обычно связана с обновлениями KB4493509, KB4489899 и KB4493509. Иногда появляется сообщение: «При установке некоторых обновлений возникли проблемы, но мы попробуем позже».
Как исправить ошибку 0x800f0982 в Windows 10/11
Что делать, если Центр обновления Windows завершается с ошибкой 0x800f0982? Что вы должны сделать? Ниже приведены некоторые проверенные исправления, которые пробовали другие затронутые пользователи, что позволило им успешно установить ожидающее обновление.
Исправление 1. Запустите средство устранения неполадок Центра обновления Windows.
Средство устранения неполадок Центра обновления Windows — отличный инструмент, который может решить любые проблемы, связанные с компонентами обновления. Он автоматически просканирует вашу систему и найдет проблему. Итак, все, что вам нужно сделать, это нажать на правильный вариант, и он позаботится обо всем за вас.
Однако стоит отметить, что в Windows 10/11 есть множество других инструментов, предназначенных для устранения распространенных сбоев обновления. Хотя запуск средства устранения неполадок не гарантирует устранения проблемы, оно, безусловно, является хорошей отправной точкой.
Чтобы использовать средство устранения неполадок Центра обновления Windows для исправления кода ошибки 0x800f0982, выполните следующие действия:
- Запустите утилиту «Выполнить», нажав клавиши Windows + R.
- Введите «ms-settings: Troubleshoot» (без кавычек) в текстовое поле и нажмите Enter. Вы перейдете на вкладку «Устранение неполадок» в приложении «Настройки».
- Здесь перейдите в правый раздел и прокрутите вниз до раздела «Начало работы». Нажмите кнопку Центра обновления Windows.
- В появившемся меню нажмите кнопку «Запустить средство устранения неполадок».
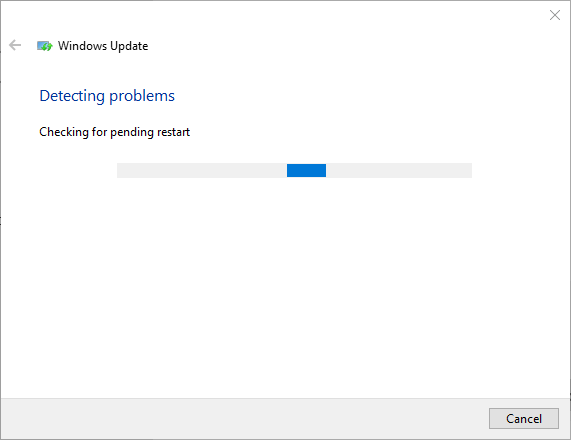
- Затем запустится средство устранения неполадок, которое автоматически начнет сканирование вашей системы на наличие проблем. Дождитесь завершения сканирования.
- После завершения сканирования средство устранения неполадок предложит стратегии исправления, которые могут помочь с ошибкой, с которой вы сейчас имеете дело. Если вы согласны с рекомендацией, нажмите кнопку «Применить это исправление».
- После завершения действия перезагрузите компьютер и проверьте, решена ли проблема.
Исправление 2: сброс компонента WU
Если вы подозреваете, что проблема вызвана сбоем в самой утилите Центра обновления Windows, сброс компонента WU может помочь.
Компонент WU, также называемый службой WU, является частью утилиты Центра обновления Windows. Он отвечает за проверку доступных обновлений, их загрузку при необходимости и последующую установку на ваш компьютер. Когда эта служба имеет проблемы или не работает должным образом на вашем компьютере, могут возникнуть такие последствия, как ошибки при попытке загрузить обновление или установить новое программное обеспечение, что потребует перезапуска процесса.
Чтобы сбросить этот компонент, вот краткое руководство:
- Нажмите клавиши Windows + R, чтобы открыть утилиту «Выполнить».
- Введите «cmd» (без кавычек) в текстовое поле и одновременно нажмите клавиши Ctrl + Shift + Enter. Это запустит командную строку с повышенными привилегиями.
- В командной строке введите приведенные ниже команды в рекомендованном порядке, чтобы сбросить компонент WU.
- чистая остановка
- чистая остановка cryptSvc
- чистые стоповые биты
- чистая остановка msserver
- ren C:\Windows\SoftwareDistribution SoftwareDistribution.old
- ren C:\Windows\System32\catroot2 catroot2.old
- чистый старт
- чистый старт cryptSvc
- чистые стартовые биты
- чистый старт msserver
- После этого выйдите из командной строки и перезагрузите компьютер.
- Проверьте, устранена ли проблема.
Исправление 3. Принудительная установка обновления с помощью PowerShell
Если сброс компонента WU не избавляет от ошибки 0x800f0982, вы можете использовать PowerShell для принудительной установки обновления.
Windows PowerShell — это мощная утилита для написания сценариев и автоматизации из командной строки, которая позволяет вам управлять ОС Windows. Вы можете использовать его для системного администрирования, сетевого программирования, автоматизации задач и других задач. Вы также можете использовать его для устранения ошибок, связанных с Центром обновления Windows.
Вот как использовать его для загрузки и установки любого доступного обновления Windows:
- Запустите диалоговое окно «Выполнить» с помощью клавиш Windows + R.
- Введите «powershell» (без кавычек) в текстовое поле и нажмите клавиши Ctrl + Shift + Enter. Это откроет окно PowerShell с повышенными привилегиями.
- В Windows PowerShell введите команду «wuauclt.exe /UPDATENOW» (без кавычек) и нажмите Enter, чтобы принудительно установить обновление.
- После установки обновления перезагрузите компьютер и проверьте, не ожидает ли обновление обновления в утилите Центра обновления Windows.
Исправление 4: используйте средство проверки системных файлов
В некоторых случаях ошибка возникает из-за повреждения системных файлов. Чтобы исправить эти файлы, все, что вам нужно, это средство проверки системных файлов.
Средство проверки системных файлов — это инструмент в Windows, который может выявлять и заменять отсутствующие, поврежденные или неправильно установленные системные файлы. Если есть проблемы с реестром, тоже может пригодиться. Эта утилита может помочь в устранении неполадок, не прибегая к радикальным мерам, таким как переустановка Windows.
Чтобы использовать эту утилиту для устранения кода ошибки 0x800f0982, выполните следующие действия:
- Введите «командная строка» (без кавычек) в строку поиска и щелкните правой кнопкой мыши наиболее подходящий результат.
- Выберите «Запуск от имени администратора».
- Если вас попросят подтвердить ваше действие, нажмите кнопку «Да».
- Теперь должно появиться окно командной строки. Введите «sfc /scannow» (без кавычек) и нажмите клавишу Enter.
- На этом этапе средство проверки системных файлов должно начать процесс сканирования и восстановления. После этого перезагрузите компьютер и попробуйте установить обновление еще раз.
Исправление 5: выполните сканирование DISM
Если сканирование SFC не помогает, попробуйте запустить сканирование системы обслуживания образов развертывания и управления ими (DISM). Это не менее удобная утилита, которая может обнаруживать и устранять любые проблемы с файлами образов вашей системы. Это инструмент командной строки, который можно использовать как для диагностики, так и для восстановления в системах Microsoft Windows.
Выполните следующие действия, чтобы выполнить сканирование DISM:
- Щелкните правой кнопкой мыши меню Windows и выберите «Выполнить».
- В текстовом поле введите «cmd» (без кавычек) и одновременно нажмите клавиши Ctrl + Shift + Enter.
- Если появится запрос мастера управления доступом пользователей, нажмите кнопку «Да».
- Теперь в командной строке введите «DISM/Online/Cleanup-Image/RestoreHealth» (без кавычек) и нажмите Enter.
- Инструмент DISM теперь начнет сканирование вашей системы на наличие любого поврежденного образа системы и применит необходимые исправления.
- Как только это будет сделано, перезагрузите компьютер и установите обновление еще раз.
Исправление 6: установите обновление вручную
Если вы считаете, что проблема связана с определенной базой знаний, вы можете загрузить ее вручную из официального каталога Центра обновления Майкрософт. Это хранилище обновлений программного обеспечения, как связанных, так и не связанных с безопасностью. Это простой способ убедиться, что вы используете последние версии установленных приложений на вашем ПК или устройстве. Вы также можете найти новые приложения в этом каталоге, которые доступны для скачивания.
Чтобы скачать проблемную базу знаний здесь, следуйте этим инструкциям:
- Посетите официальный каталог обновлений Microsoft.
- Введите номер КБ в поле поиска.
- Откроется новая веб-страница со всеми обновлениями, связанными с вашим поиском. Нажмите кнопку «Загрузить» рядом с нужным вам патчем.
- После загрузки установите его на свое устройство.
- Перезагрузите компьютер и посмотрите, устранена ли ошибка.
Исправление 7. Очистите папки SoftwareDistribution и System Resources.
Возможно, код ошибки 0x800f0982 отображается из-за того, что в вашей системе есть неудаленные файлы обновлений. Они могут мешать процессу установки, сбивая с толку службу обновления Windows. Именно поэтому специалисты предлагают время от времени удалять их, чтобы избежать конфликтов.
Однако, прежде чем вы сможете продолжить и удалить эти ненужные файлы, вам необходимо остановить важные службы Windows: службу обновления Windows и фоновую интеллектуальную службу. Подробное руководство о том, что делать, см. ниже:
- Нажмите клавиши Windows + X, чтобы открыть меню Power User.
- Выберите Командная строка (Администратор) из списка.
- Нажмите кнопку «Да» при появлении запроса UAC.
- Выполните следующие команды:
чистая остановка
команды чистых стоповых битов
Примечание. Обязательно нажимайте клавишу Enter после каждого из них.
- Затем сверните окно командной строки и запустите проводник Windows.
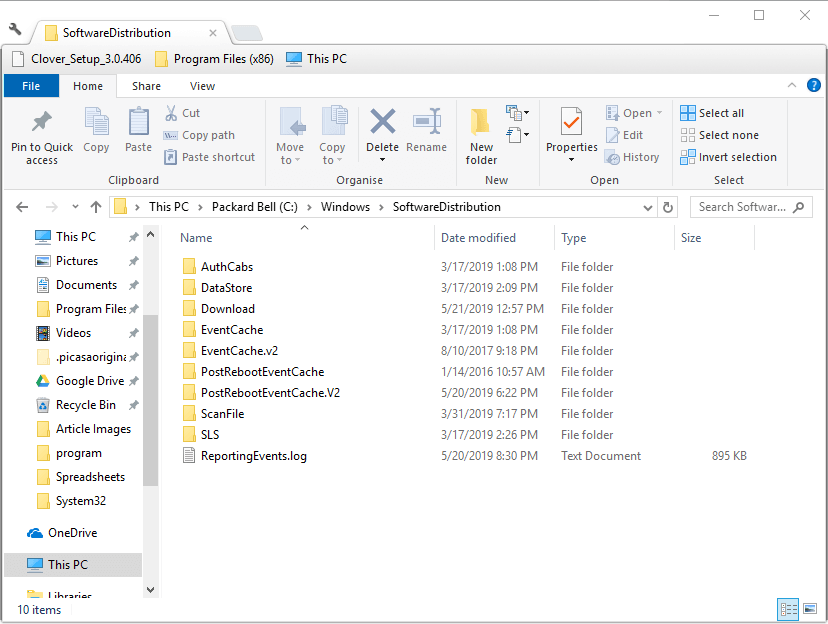
- Перейдите в папку SoftwareDistribution, перейдя в папку Windows и выбрав SoftwareDistribution.
- Удалите все в этой папке.
- Затем вернитесь в основную папку Windows и нажмите «Системные ресурсы». Удалите все внутри папки. Если вы получили предупреждение, просто проигнорируйте его или нажмите кнопку «Да».
- После удаления содержимого обеих папок перезапустите две службы, которые вы отключили ранее. Для этого откройте окно командной строки и выполните следующие команды:
чистый старт
чистые стартовые биты
Примечание. Обязательно нажимайте Enter после каждого.
- На этом этапе перезагрузите компьютер и проверьте, сохраняется ли ошибка.
Исправление 8: удалите и переустановите языковые пакеты
Языковой пакет можно использовать, когда вы используете приложение или вводите текст в строку поиска любого приложения в Windows 10/11. Это позволяет пользователям вводить текст с помощью символов желаемого языка вместо того, чтобы заменять их символами или цифрами.
Теперь, как языковой пакет связан с ошибкой? По мнению некоторых затронутых пользователей, код ошибки 0x800f0982 может быть вызван отсутствующим языковым пакетом. Итак, это то, что вы можете проверить и проверить.
Вот как действовать с этим исправлением:
- Перейдите в меню «Пуск» и выберите «Настройки».
- Перейдите к разделу «Время и язык» и нажмите «Язык».
- Разверните раздел «Предпочитаемый язык» и выберите язык, который вы хотите удалить.
- Нажмите кнопку «Удалить» рядом с ним.
- Закрыть настройки.
- Снова откройте окно «Настройки» и перейдите во «Время и язык».
- Выберите язык.
- Затем перейдите в раздел «Предпочитаемые языки» и нажмите «Добавить язык».
- Выберите язык, который вы недавно удалили.
- Нажмите «Параметры» и нажмите кнопку «Загрузить», чтобы начать установку языка.
- Выйдите из приложения «Настройки» и снова установите обновление.
Исправление 9: включить службу установщика модулей Windows
Если вы исчерпали все возможные средства, но все еще безрезультатно, вы можете вместо этого включить службу установщика модулей Windows. Это важный компонент Windows, который получает обновления и устанавливает их. Если вы случайно отключили его, то процесс обновления Windows может завершиться ошибкой.
Вот как включить эту службу:
- Запустите командную строку с повышенными привилегиями, введя «cmd» (без кавычек) в поле поиска и щелкнув правой кнопкой мыши наиболее подходящий результат. Щелкните Запуск от имени администратора.
- При появлении запроса UAC нажмите «Да», чтобы продолжить.
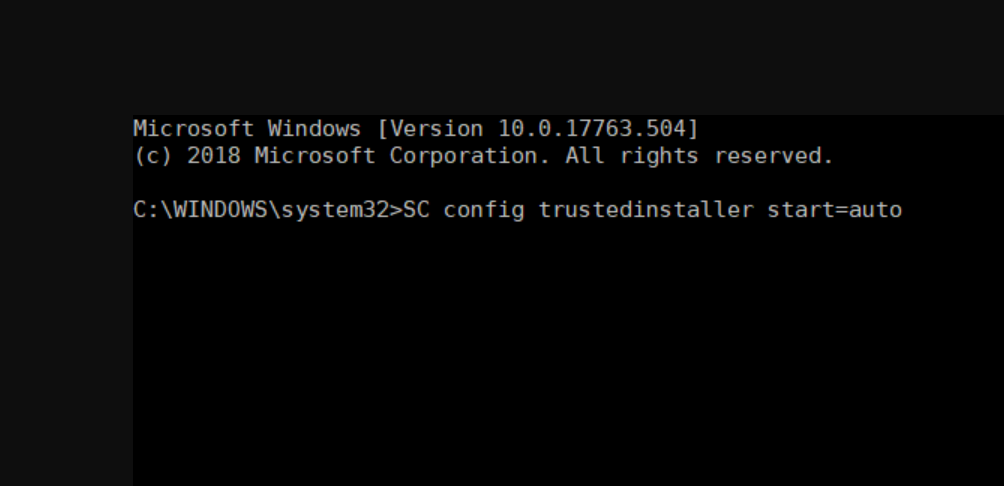
- В командной строке введите команду «SC config trustinstaller start = auto» (без кавычек).
- Нажмите Enter.
- Теперь вы только что включили службу установщика обновлений Windows. Теперь должен начаться процесс обновления.
- Перезагрузите систему, чтобы применить изменения.
Подведение итогов
Если вы получаете код ошибки 0x800f0982 при попытке установить новое обновление в Windows 10/11, не волнуйтесь! Есть много способов устранить эту проблему, и мы познакомим вас с некоторыми из них прямо сейчас.
Первое, что пробует большинство людей, — использовать средство устранения неполадок Центра обновления Windows, которое может работать в зависимости от вашей версии ОС. Если он по-прежнему не работает после нескольких безуспешных запусков средства устранения неполадок, сброс компонента WU может помочь. Конечно, есть множество других исправлений, которые вы можете попробовать! Подробное руководство см. в приведенных выше решениях.
Get rid of this error and get back to installing updates in a few minutes
by Matthew Adams
Matthew is a freelancer who has produced a variety of articles on various topics related to technology. His main focus is the Windows OS and all the things… read more
Updated on
- PC users have reported receiving the Windows Update Error 0x800f0982 on Windows 10.
- The 0x800f0982 error comes up when users attempt to install new updates.
- Solutions for this error include running the built-in Windows troubleshooter and clearing the Software Distribution folder.
Windows users have posted on forums about an update error that occurs when they try to download and install the KB4494441, KB4489899, and KB4482887 updates.
The full error message reads as follows: Updates failed… 2019-05 Cumulative Update for Windows 10 Version 1809 for x64-based Systems (KB4494441) – Error 0x800f0982.
Thus, users can’t install the update referenced within the error message.
If you’re wondering how to fix the Windows Update error 0x800f0982 on Windows 10 and Windows 11, keep reading. We have researched the best solutions for this install error, that will get it solved in a few minutes.
How can I fix the Install Error 0x800f0982?
- How can I fix the Install Error 0x800f0982?
- 1. Run the Windows Update Troubleshooter
- 2. Start the Windows Modules Installer Service
- 3. Clear the SoftwareDistribution Folder
- 4. Download the Required Updates From the Microsoft Update Catalog
1. Run the Windows Update Troubleshooter
- First, try running the Windows Update troubleshooter. That troubleshooter can fix issues pertaining to the Windows Update service and its downloads. To open the troubleshooter, follow the guidelines below.
- Press the Type here to search button to launch Cortana.
- Input ‘troubleshoot’ as the keyword in Cortana’s Type here to search box.
- Select Troubleshoot settings to open the Settings app’s Troubleshoot tab.

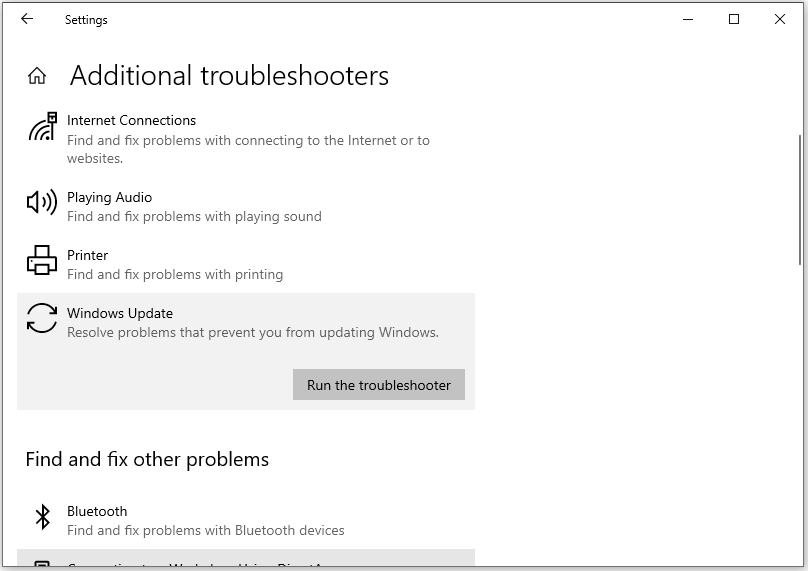
- Next, click Windows Update and Run the troubleshooter to open the window in the snapshot directly below. Thereafter, the troubleshooter might apply some fixes to resolve error 0x800f0982.

Firstly, run the Windows Update troubleshooter. The built-in troubleshooter usually deals with all kinds of update error codes.
2. Start the Windows Modules Installer Service
1. Open the Windows Search box.
How we test, review and rate?
We have worked for the past 6 months on building a new review system on how we produce content. Using it, we have subsequently redone most of our articles to provide actual hands-on expertise on the guides we made.
For more details you can read how we test, review, and rate at WindowsReport.
2. Type cmd in the search box.
3. Open an elevated Command Prompt by right-clicking Command Prompt and selecting Run as administrator.
4. Next, input the following command, and then press the Enter button to run it:SC config trustedinstaller start=auto
5. Restart your PC.
Alternatively you can also fix the install error 0x800f0982 by starting the Windows Modules Installer Service via the Command Prompt.
The Windows Modules Installer service needs to be on to for users to update the platform. Thus, some users might need to turn on the Windows Modules Installer to fix the error.
3. Clear the SoftwareDistribution Folder
This is how users can clear the SoftwareDistribution folder.
- First, enter ‘cmd’ in Cortana’s search box.
- Right-click Command Prompt to select the Run as administrator context menu option.
- Input ‘net stop wuauserv’ and press Enter.
- Then enter ‘net stop bits’ in the Prompt’s window, and press the Return key.
- Press the Windows key + E keyboard shortcut, which opens File Explorer.
- Then open the C:> Windows > SoftwareDistribution folder path in File Explorer.

- Press the Ctrl + A hotkey, which will select all the SoftwareDistribution folder content.
- Then press File Explorer’s Delete button.
- Open the Command Prompt again.
- Enter ‘net start wuauserv’ in the Prompt, and press the Return key.
- Input ‘net start bits’ and press Enter.
- Restart Windows.
The SoftwareDistribution folder might include corrupted update components. Clearing that folder will refresh the update components and potentially fix Error 0x800f0982.
- Fix: Update error 0x800f0922 on Windows 10/11 [Install Failed]
- Windows 11 adds more apps to the share links feature
4. Download the Required Updates From the Microsoft Update Catalog
This is more of a workaround than a resolution for the install error – 0x800f0982 on Windows 10. Users can also download specific updates from the Microsoft Update Catalog instead and manually install them.
Open the Microsoft Update Catalog page, and then enter the update number that error 0x800f0922 arises for in the search box there.
Then you can download a compatible update that matches the search keyword entered. After downloading, click the update’s MSU file to install it.
There’s a good chance that one of the above resolutions will fix error 0x800f0982 for most users. However, some of the resolutions in our post about Windows Update not working on Windows 10 might also help you in resolving the error 0x800f0982.
We hope you managed to fix your install error – 0x800f0982 using our guide. Let us know in the comments section whether you have any questions about this topic.
![]()
-
Home
-
News
- How to Fix the Windows Update Error Code 0x800f0982?
By Charlotte | Follow |
Last Updated
Some people encounter the Windows update error code 0x800f0982 when they try to update their Windows OS. This error bothers them a lot. If you encounter the same error, you can read this post, which is provided by MiniTool Partition Wizard, to get some useful solutions.
Causes of the Windows Update Error Code 0x800f0982
The Windows update error code 0x800f0982 is an error that may arise when users are installing or downloading updates. This error can be caused by various reasons. Here are some of the possible reasons:
- You don’t have enough hard disk space available on your machine.
- The Windows Update service is offline.
- You’re using an outdated version of Windows 10/11.
- There are corrupted files in your system directory.
Way 1. Run the Windows Update Troubleshooter
The built-in Windows update troubleshooter is very helpful to help you fix Windows update errors. So, if you encounter the Windows update error code 0x800f0982 on your PC, you can try running the Windows update troubleshooter. Here’s the way:
- Press the Windows and I keys simultaneously to open the Settings window.
- Go to Update & Security > Troubleshoot.
- Click the Additional troubleshooters link.
- Select Windows Update and click Run the troubleshooter.
- Once the process is complete, restart your PC and check if the error is fixed.
Way 2. Start the Windows Modules Installer Service
The Windows Modules Installer Service is a system process that constantly checks for available Windows updates and installs them for you. If you disabled it by accident, you can try enabling it to fix the error. Here’s how to start this service:
- Open the search window, and type “cmd” in the search box.
- Right-click it and select Run as administrator.
- Type “SC config trustedinstaller start=auto” and press Enter.
- Once done, restart your PC.
Way 3. Clear the SoftwareDistribution and System Resources Folder
The undeleted Windows update files may bother the installation process and cause the Windows update error code 0x800f0982. In this case, you can try the following steps:
Step 1. Run Command Prompt as administrator.
Step 2. Run the below commands one by one (Make sure to press Enter after each command):
- net stop wuauserv
- net stop bits commands
Step 3. Minimize the Command Prompt window and launch the Windows Explorer window.
Step 4. Go to Windows > SoftwareDistribution, and delete all the files in this folder.
Step 5. Back to the Windows folder, and then open the System Resources folder. Next, delete all the files in this folder.
Step 6. After that, open the Command Prompt window and run the following commands:
- net start wuauserv
- net start bits
Step 7. Once done, restart your computer and check if the update error is fixed.
Way 4. Uninstall and Reinstall the Language Packs
According to some users who encounter the same error, the missing language pack could also be one of the main reasons that may cause the error code 0x800f0982. If you also experience this update error, you can try the following steps to fix it:
- Open the Settings window, and go to Time & Language > Language.
- Expand the Preferred Language section and select a language you want to remove.
- Click Remove and exit the Settings
- Next, repeat the first step again to enter the Language window.
- Go to Preferred languages and click Add a language.
- Select the language you have recently removed.
- Click the Next and Install buttons to reinstall it again.
- Once done, try updating Windows again and check if the error is fixed.
Way 5. Reset the Windows Update Components
If the error still exists, you can try resetting the Windows update components to fix the Windows update error code 0x800f0982. To do that, you can follow the guide in this post: How to Reset Windows Update Components in Windows 11/10?
Way 6. Using wuauclt Command in PowerShell
If resetting the Windows update components unable to help you fix the Windows update error code 0x800f0982, you can try using wuauclt command in PowerShell to bypass the error entirely by forcing the update via PowerShell. Here’s how to do it:
- Press Windows and X simultaneously, and select Windows PowerShell (Admin) from the pop-up menu.
- Type “wuauclt.exe /updatenow” and press Enter to force the pending update to install.
- After that, restart your computer and check if the error code 0x800f983 is fixed.
Way 7. Run SFC and DISM Scan
If you suspect the corrupted system files on your PC cause the Windows update error code 0x800f0982, you can try running SFC and DISM to scan and fix the error. If you don’t know how to use SFC and DISM scans, you can refer to these posts:
- The Detailed Information about System File Checker Windows 10
- How To Use The DISM Restore Health Command To Repair Windows
- How To Use The DISM Command Tool In Windows 11
Way 8. Install the Microsoft Update Manually
If none of the above ways can help you fix the Windows update error 0x800f0982, you can try installing the Microsoft update manually. To do that, you can refer to this post: [Tutorial] How to Download & Install Windows 10 Updates Manually.
In Conclusion
How to fix the Windows update error code 0x800f0982? Now, I believe that you already know the answer. If you know of any better solutions to this error, please share them with us in the following comment zone.
About The Author

Position: Columnist
Charlotte is a columnist who loves to help others solve errors in computer use. She is good at data recovery and disk & partition management, which includes copying partitions, formatting partitions, etc. Her articles are simple and easy to understand, so even people who know little about computers can understand. In her spare time, she likes reading books, listening to music, playing badminton, etc.
During the download of the latest Windows 10/11 build, the process may abruptly stop, resulting in an error and preventing the completion of the update.
We know how frustrating this situation can be. So, if you are on the lookout for a way to resolve the error, then this is the right place. We have created this guide just for you.
What Is the Error Code 0x800f0982?
Windows Update is important in maintaining your computer’s security. It is a utility that finds, downloads, and installs the latest updates for your operating system. However, no matter how crucial its role is, it can sometimes get stuck or break during the process. Consequently, it may display the Error Code 0x800f0982.
The Windows Update Error Code 0x800f0982 is a problem that may arise when users are installing or downloading updates. This can happen for any number of reasons, but it’s often due to the user not having enough hard disk space available on their machine. The issue may also happen because of the following:
- The Windows Update service is offline.
- You’re using an outdated version of Windows 10/11.
- There are corrupted files in your system directory.
According to affected users, the issue is usually associated with the KB4493509, KB4489899, and KB4493509 updates. It sometimes comes with a message which says, “There were problems installing some updates, but we’ll try again later.”
How to Fix the Error 0x800f0982 on Windows 10/11
What if Windows Update ends with the Error 0x800f0982? What should you do? Below are some verified fixes that other affected users have tried, allowing them to install the pending update successfully.
Fix 1: Run the Windows Update Troubleshooter
The Windows Update troubleshooter is a great tool that can fix any problems related to update components. It will automatically scan your system and find the issue. So, all you need to do is click on the correct option and it will take care of everything for you.
However, it is worth noting that Windows 10/11 has a lot of other tools that are designed to resolve common update failures. Although running the troubleshooter does not guarantee that the problem is resolved, it surely is a good starting point.
To use the Windows Update Troubleshooter to fix the 0x800f0982 error code, follow these steps:
- Launch the Run utility by pressing the Windows + R keys.
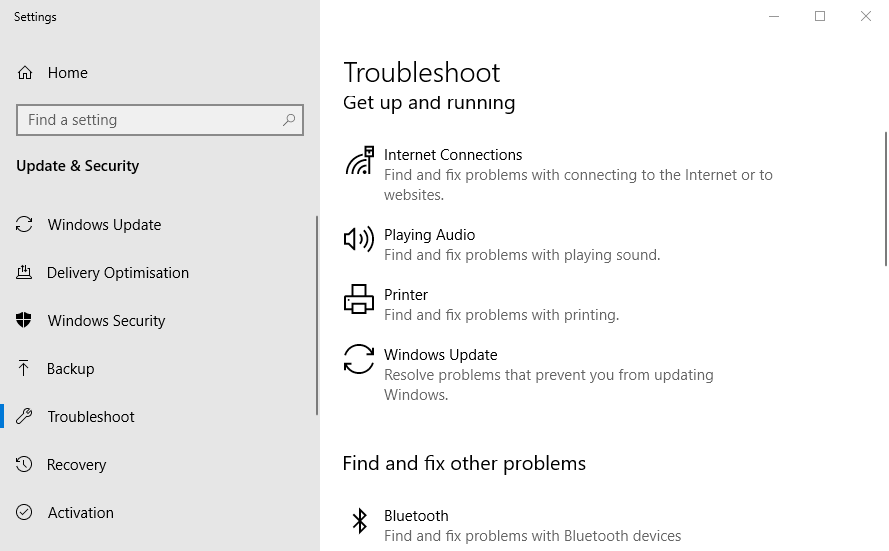
- Type “ms-settings:troubleshoot” (no quotes) into the text field and hit Enter. This will take you to the Troubleshooting tab of the Settings app.
- Here, navigate to the right section and scroll down to the “Get up and running” section. Hit the Windows Update button.
- In the menu that appears, click the “Run the Troubleshooter” button.
- The troubleshooter will then launch and automatically start to scan your system for any problems. Wait until the scan is complete.
- Once the scan is finished, the troubleshooter will suggest repair strategies that may help with the error you’re currently dealing with. If you agree with a recommendation, click the “Apply This Fix” button.
- Once the action is completed, restart your computer and check if the issue is resolved.
Fix 2: Reset the WU Component
If you suspect that the issue is triggered by a glitch in the Windows Update utility itself, then resetting the WU component may do the trick.
The WU component, also called the WU service, is a part of the Windows Update utility. It is responsible for checking available updates, downloading them if necessary, and then installing them on your computer. When this service has issues or isn’t running properly on your computer there can be consequences such as errors while trying to download an update or install new software which would require a restart of the process.
To reset this component, here’s a quick guide:
- Press the Windows + R keys to open the Run utility.
- Type “cmd” (no quotes) into the text field and press the Ctrl + Shift + Enter keys simultaneously. This will launch an elevated Command Prompt.
- Into Command Prompt, enter the commands below in their recommended order to reset the WU component.
- net stop wuauserv
- net stop cryptSvc
- net stop bits
- net stop msiserver
- ren C:\Windows\SoftwareDistribution SoftwareDistribution.old
- ren C:\Windows\System32\catroot2 catroot2.old
- net start wuauserv
- net start cryptSvc
- net start bits
- net start msiserver
- Once done, exit the Command Prompt and restart your computer.
- Check if the issue has been fixed.
Fix 3: Force Install the Update Using PowerShell
If resetting the WU component does not get rid of the 0x800f0982 error, then you can use PowerShell to force install the update.
Windows PowerShell is a powerful command-line scripting and automation utility that enables you to control the Windows OS. You can use it for system administration, network programming, task automation, and others. You can also use it to resolve Windows Update-related errors.
Here’s how to use it to download and install any available Windows update:
- Launch the Run dialog box using the Windows + R keys.
- Type “powershell” (no quotes) into the text field and press the Ctrl + Shift + Enter keys. This will open an elevated PowerShell window.
- On Windows PowerShell, type “wuauclt.exe /UPDATENOW” (no quotes) command and hit Enter to force the installation of the update.
- Once the update is installed, restart your computer and check if the update is still pending in the Windows Update utility.
Fix 4: Use the System File Checker
In some cases, the error occurs because system files are damaged. To fix these files, all you need is the System File Checker.
The System File Checker is a tool in Windows that can identify and replace missing, corrupted, or improperly installed system files. If there are problems with the registry, it may also be of use. This utility can help troubleshoot issues without having to take drastic measures like re-installing Windows.
To use this utility to resolve the 0x800f0982 error code, here are the steps to take:
- Type “command prompt” (no quotes) into the search bar and right-click on the most relevant result.
- Select Run as Administrator.
- If asked to confirm your action, hit the Yes button.
- Now, the Command Prompt window should appear. Type “sfc /scannow” (no quotes) and hit the Enter key.
- At this point, the System File Checker should start the scan and repair process. Once done, restart your computer and try to install the update once again.
Fix 5: Perform a DISM Scan
If performing an SFC scan doesn’t help, then try running a Deployment Image Servicing and Management (DISM) scan. This is an equally handy utility that can detect and repair any issues with your system’s image files. It is a command-line tool that can be used for both diagnostic and repair purposes on Microsoft Windows systems.
Follow the steps below to perform a DISM scan:
- Right-click on the Windows menu and select Run.
- Into the text box, input “cmd” (no quotes) and hit the Ctrl + Shift + Enter keys simultaneously.
- If prompted by the User Access Control wizard, hit the Yes button.
- Now, on Command Prompt, type “DISM /Online /Cleanup-Image /RestoreHealth” (no quotes) and hit Enter.
- The DISM tool will now begin scanning your system for any damaged system image and apply the necessary fixes.
- Once it’s done, restart your computer and install the update one more time.
Fix 6: Install the Update Manually
If you think that a specific KB is causing the problem, you can download it manually from the official Microsoft Update Catalog. It is a repository of software updates, both security and non-security related. It’s an easy way to make sure you’re using the latest versions of installed applications on your PC or device. You can also find new apps in this catalog that are available for download.
To download the problematic KB here, follow these instructions:
- Visit the official Microsoft Update Catalog.
- Input the KB number into the search field.
- A new web page will be displayed with all the updates related to your search. Hit the Download button next to the patch you need.
- Once downloaded, install it on your device.
- Restart your computer and see if the error has been resolved.
Fix 7: Clear the SoftwareDistribution and System Resources folders.
It is possible that the error code 0x800f0982 is showing because there are undeleted update files on your system. They may be interfering with the installation process, confusing the Windows update service. That is why experts suggest deleting them every now and then to avoid conflict.
However, before you can proceed and delete these unneeded files, you need to stop to important Windows services: the Windows Update Service and the Background Intelligent Service. For a detailed guide on what to do, see below:
- Press the Windows + X keys to launch the Power User menu.
- Select Command Prompt (Admin) from the list.
- Hit the Yes button when prompted by the UAC.
- Run the following commands:
net stop wuauserv
net stop bits commands
Note: Make sure to hit the Enter key after each one of them.
- Next, minimize the Command Prompt window and launch the Windows Explorer.
- Navigate to the SoftwareDistribution folder by going to the Windows folder and selecting SoftwareDistribution.
- Delete everything in this folder.
- Next, go back to the main Windows folder and click System Resources. Delete everything inside the folder. If you get a warning, just ignore it or hit the Yes button.
- After deleting the contents of both folders, restart the two services you disabled earlier. Do this by opening the Command Prompt window and running the following commands:
net start wuauserv
net start bits
Note: Make sure you hit Enter after each one.
- At this point, reboot your computer and check if the error persists.
Fix 8: Uninstall and Reinstall the Language Packs
A language pack can be used when you are using an app or typing into the search bar of any application on Windows 10/11. It allows users to input text with their desired language’s characters instead of having them replaced by symbols or numbers.
Now, how is a language pack associated with the error? According to some affected users, the 0x800f0982 error code may be caused by a missing language pack. So, it’s something that you may want to test and verify.
Here’s how to proceed with this fix:
- Go to the Start menu and select Settings.
- Navigate to Time and Language and click Language.
- Expand the Preferred Language section and select a language that you want to remove.
- Hit the Remove button next to it.
- Close Settings.
- Open the Settings window again and go to Time and Language.
- Choose Language.
- Next, go to Preferred Languages and click Add a Language.
- Select the language you have recently removed.
- Click Options and hit the Download button to begin installing the language.
- Exit the Settings app and install the update again.
Fix 9: Enable the Windows Module Installer Service
If you’ve exhausted all possible means but still to no avail, you can enable the Windows Module Installer service instead. This is an important Windows component that fetches updates and installs them. If you have accidentally disabled it, then the Windows update process may fail.
Here’s how to enable this service:
- Launch an elevated Command Prompt by typing “cmd” (no quotes) into the search box and right-clicking on the most relevant result. Click Run as Administrator.
- When prompted by the UAC, hit Yes to proceed.
- On Command Prompt, type “SC config trustedinstaller start=auto” (no quotes) command.
- Hit Enter.
- Now, you have just enabled the Windows Update Installer service. The update process should now start.
- Restart your system to apply the changes.
Wrapping Up
If you are getting the Error Code 0x800f0982 when trying to install a new update on Windows 10/11, then don’t worry! There are many ways that this problem can be eliminated and we’ll walk you through some of them right now.
The first thing that most people try is using the Windows Update troubleshooter, which may work depending on your version of OS. If it still doesn’t work after running the troubleshooter multiple times without success, resetting the WU component might do the trick. Of course, there are a plethora of other fixes you can try! Refer to the solutions above for a detailed guide.
Give us some love and rate our post!