Download Windows Speedup Tool to fix errors and make PC run faster
Windows users when trying to update their computer by Windows Update Standalone Installer or any when trying to install a different Windows component through Windows Installer may at times see the following error.
Windows Update Standalone Installer
Installer encountered an error: 0x800B0101
A required certificate is not within its validity period when verifying against the current system clock or the timestamp in the signified file.

In this article, we are going to fix Windows Update Error 0X800B0101 on Windows 11/10 with the help of some simple solutions.
More often than not, you will see this error if the date & time on your computer is incorrect. However, there are some other solutions as well that we will see hereinafter.
These are the things you can do to fix Windows Update Error 0x800B0101 on Windows 11/10.
- Correct the Date & Time
- Clear SoftwareDistribution folder contents
- Clear catroot2 folder contents
- Clear pending.xml file
- Run SFC and DISM
Let us talk about them in detail.
1] Correct Date & Time
Self-explanatory from the error message itself, this error is because of an incorrect date & time. Therefore, we need to correct both these entities and see if it fixes the issue.
You can follow the given steps to correct the date & time.
- Launch Run(Win + R), type “timedate.cpl”, and hit Enter.
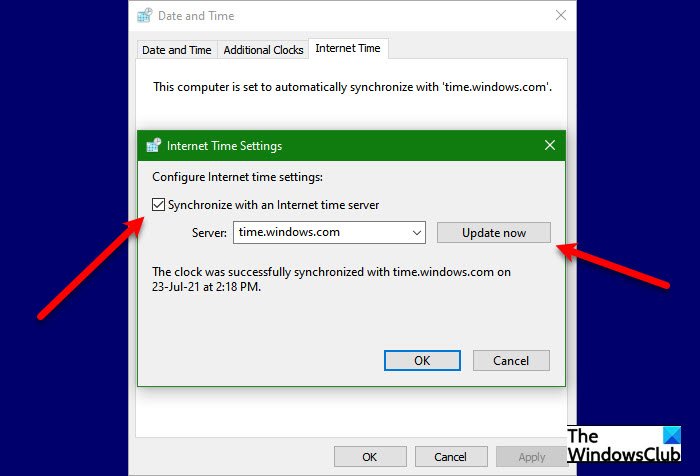
- Go to the Internet Time tab and click Change Settings.
- Make sure that “Synchronize with an Internet time server”, Server is set to time.windows.com, and click Ok.
- Go to the Date & Time tab, click Change time zone, and make sure the time zone is set correctly.
Now, reboot your computer and check if the issue persists.
2] Clear SoftwareDistribution folder content
If changing date and time is to no avail, try clearing SoftwareDistribution folder contents and check if the issue is fixed.
Launch Command Prompt as an administrator, and run the following command to pause the Windows Update service.
net stop wuauserv
Now, run the following command to pause Background Intelligent Transfer Service
net stop bits
Hit Win + R, paste the following location, and hit Enter.
C:\Windows\SoftwareDistribution
Delete all the content of the SoftwareDistribution folder and check if the issue persists.
3] Clear Cartoot2 folder content
If the issue persists, try clearing Cartoot2 folder content. Do this and check if the issue persists.
4] Clear pending.xml file
Open an elevated Command Prompt window, type the following, and hit Enter:
Ren c:\windows\winsxs\pending.xml pending.old
This will rename the pending.xml file to pending.old. Now try again.
5] Run SFC and DISM
The error can be because of a corrupted system file and running SFC and DISM will fix the issue. So, launch Command Prompt as an administrator and run the following commands one after the other is completed.
sfc /scannow
Dism /Online /Cleanup-Image /ScanHealth
After running these commands, check if the issue persists.
Why does my Windows 11/10 Update keep failing?
There can be many reasons why Windows 10 update keeps failing. Corrupted updated file, driver conflict, multiple updated queued, and more. But if you are seeing error 0x800B0101, you can fix the error with the aforementioned solutions.
How to update Windows 10/11?
The best way to update Windows 11/10 is via the Settings app. Launch Settings by Win + I, and go to Update & Security > Check for updates. This way you can update your computer if there is an update available.
Yusuf is an Engineering graduate from Delhi. He has written over 1000 technical articles and has knowledge of programming languages including Java, and C++, and technologies such as Oracle 12C and MsSQL. Troubleshooting Windows is his favorite past-time.
Ошибки в операционной системе Windows могут быть разными, но одна из наиболее распространенных и раздражающих — это ошибка 0x800b0101. Эта ошибка часто возникает в Windows 11 и может привести к зависанию или некорректной работе системы. Однако, не паникуйте! В этой статье мы расскажем вам, как исправить ошибку 0x800b0101 в Windows 11.
Первым шагом для исправления ошибки 0x800b0101 является обновление операционной системы. Проверьте наличие доступных обновлений и установите их, если они есть. Обновления могут содержать исправления, которые помогут решить проблему с ошибкой 0x800b0101.
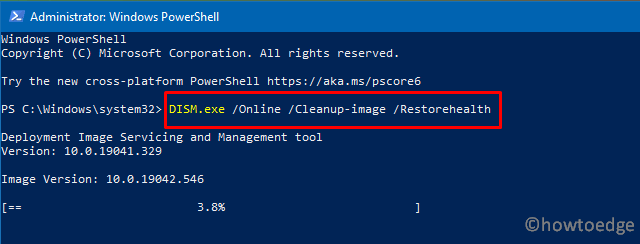
Если обновления не помогли, следующим шагом будет выполнение команды DISM (Deployment Image Servicing and Management). Эта команда проверяет целостность системных файлов и может помочь восстановить поврежденные или отсутствующие файлы. Для выполнения команды DISM откройте командную строку от имени администратора и введите следующую команду: dism /online /cleanup-image /restorehealth.
Примечание: выполнение команды DISM может занять некоторое время. Пожалуйста, дождитесь завершения процесса и не прерывайте его.
Если команда DISM не помогла решить проблему, вы можете попробовать выполнить команду SFC (System File Checker). Команда SFC также проверяет целостность системных файлов и может исправить их. Для выполнения команды SFC откройте командную строку от имени администратора и введите следующую команду: sfc /scannow.
Если ни одна из вышеперечисленных методик не помогла решить проблему с ошибкой 0x800b0101, возможно, причина заключается в установленных программных конфликтах или неправильной конфигурации системы. В этом случае рекомендуется обратиться за помощью к специалистам или посетить официальный сайт поддержки операционной системы Windows.
Содержание
- Проблема и ее причины
- Решение 1: Проверьте наличие обновлений Windows
- Решение 2: Проверьте системное время и дату
- Решение 3: Проверьте настройки интернет-соединения
- Решение 4: Отключите антивирусное программное обеспечение
- Решение 5: Запустите инструмент проверки файловой системы
- Решение 6: Обратитесь к службе поддержки Microsoft
Проблема и ее причины
Ошибка 0x800b0101 в Windows 11 возникает в результате неудачной проверки цифрового сертификата или подписи файла при установке обновлений или приложений.
Главные причины возникновения этой ошибки:
- Цифровой сертификат удостоверяющего центра, который выдает сертификаты для проверки файлов, может быть отозван или недействителен.
- Системное время и дата на устройстве могут быть неверными, что приводит к ошибке при проверке сертификатов.
- Пользователь может использовать прокси-сервер, который блокирует доступ к проверке цифрового сертификата.
- Системные файлы или реестр могут быть повреждены из-за вредоносных программ или других проблем.
- Проблемы с подключением к Интернету могут привести к невозможности получить достаточно информации для проверки цифрового сертификата.
Решение 1: Проверьте наличие обновлений Windows
Для проверки наличия обновлений Windows выполните следующие действия:
- Откройте «Настройки» Windows, нажав комбинацию клавиш Win + I.
- В открывшемся окне «Настройки» выберите раздел «Обновление и безопасность».
- На левой панели выберите «Windows Update».
- На правой панели нажмите кнопку «Проверить наличие обновлений».
Windows начнет проверку наличия новых обновлений. Если доступны какие-либо обновления, они будут загружены и установлены автоматически. Подождите, пока процесс обновления завершится.
После завершения обновления перезагрузите компьютер и проверьте, исчезла ли ошибка 0x800b0101 в Windows 11. Если ошибка не исчезла, переходите к следующему решению.
Решение 2: Проверьте системное время и дату
Ошибку 0x800b0101 в Windows 11 можно исправить, проверив и корректируя системное время и дату вашего компьютера. Некорректные настройки времени и даты могут привести к проблемам с проверкой цифровой подписи обновлений системы, что вызывает данную ошибку.
Чтобы проверить системное время и дату:
| Шаг 1: | Щелкните правой кнопкой мыши по значку «Часы» на панели задач и выберите «Настройки даты/времени». |
| Шаг 2: | Убедитесь, что включен параметр «Автоматически настраивать дату и время». Если он отключен, включите его, чтобы система автоматически корректировала время и дату. |
| Шаг 3: | Если автоматическая настройка даты и времени включена, но время и дата все равно неверны, то нажмите на кнопку «Изменить» и установите правильное время и дату вручную. |
| Шаг 4: | После внесения изменений нажмите кнопку «Применить» и закройте окно настроек даты и времени. |
После этого перезагрузите компьютер и проверьте, исправилась ли ошибка 0x800b0101. Если ошибка все еще возникает, перейдите к следующему решению.
Решение 3: Проверьте настройки интернет-соединения
Если вы столкнулись с ошибкой 0x800b0101 в Windows 11, важно проверить настройки вашего интернет-соединения. Неправильные настройки могут быть причиной проблем с обновлениями системы и появлением данной ошибки. Вот несколько шагов, которые вы можете предпринять для проверки и исправления настроек соединения:
- Проверьте физическое подключение интернет-кабеля или Wi-Fi адаптера к компьютеру. Убедитесь, что все кабели надежно подключены и не повреждены.
- Проверьте настройки вашего Wi-Fi маршрутизатора. Убедитесь, что он работает корректно и окружающая среда не вызывает помехи для его сигнала.
- Перезагрузите маршрутизатор и компьютер. Иногда простая перезагрузка может решить проблемы с соединением.
- Проверьте настройки прокси-сервера. Если вы используете прокси-сервер для доступа в Интернет, убедитесь, что настройки прокси-сервера указаны корректно.
- Проверьте настройки брандмауэра или антивирусного программного обеспечения. Они могут блокировать подключение к серверам обновлений. Попробуйте временно отключить антивирусное программное обеспечение или настроить исключения для Windows Update.
- Проверьте настройки сетевого адаптера. Убедитесь, что ваш сетевой адаптер настроен на использование автоматической настройки IP-адреса и DNS-серверов.
- Попробуйте использовать другое интернет-соединение. Если у вас есть возможность, попробуйте подключиться к другой сети Wi-Fi или использовать подключение через мобильные данные.
После проверки и, при необходимости, внесения изменений в настройки интернет-соединения, попробуйте запустить обновление системы снова. В большинстве случаев это помогает исправить ошибку 0x800b0101 и успешно выполнить обновление Windows 11.
Решение 4: Отключите антивирусное программное обеспечение
Если вы продолжаете сталкиваться с ошибкой 0x800b0101, может быть полезным временно отключить свое антивирусное программное обеспечение. Некоторые антивирусные программы могут блокировать установку обновлений системы, что может вызывать эту ошибку.
Чтобы отключить антивирусное программное обеспечение, следуйте инструкциям, соответствующим вашей программе:
- Если у вас установлен Windows Defender, перейдите к разделу «Настройки» панели управления и выберите «Обновление и безопасность». Затем кликните на «Защита от вредоносного программного обеспечения» и отключите реальную защиту временно.
- Если у вас установлен другой антивирус, найдите его значок в системном трее или иконке на рабочем столе. Щелкните правой кнопкой мыши по значку и найдите опцию «Защита» или «Настройки». В зависимости от выбранной программы, вы можете увидеть возможность временно отключить защиту.
После того как вы временно отключили антивирусное программное обеспечение, попробуйте повторно выполнить обновление системы Windows 11. Если ошибка 0x800b0101 больше не возникает, это указывает на то, что ваше антивирусное программное обеспечение было причиной проблемы. В этом случае, вы можете обратиться к разработчику вашего антивируса для получения дальнейшей поддержки и рекомендаций.
Решение 5: Запустите инструмент проверки файловой системы
- Откройте командную строку с повышенными привилегиями, щелкнув правой кнопкой мыши по значку «Пуск» и выбрав «Командная строка (администратор)».
- В командной строке введите следующую команду и нажмите Enter:
sfc /scannow. - Дождитесь завершения процесса проверки и восстановления файлов. Это может занять некоторое время.
- Перезагрузите компьютер и проверьте, исчезла ли ошибка 0x800b0101.
Если ошибка все еще остается, попробуйте выполнить следующее решение.
Решение 6: Обратитесь к службе поддержки Microsoft
Если вы все еще сталкиваетесь с ошибкой 0x800b0101 и не можете ее устранить, самым надежным решением может быть обращение к службе поддержки Microsoft. Они смогут предоставить вам более подробные рекомендации и действия для исправления данной ошибки.
Чтобы связаться со службой поддержки, вы можете использовать официальный веб-сайт Microsoft или позвонить по телефону технической поддержки. Перед обращением убедитесь, что у вас есть все необходимые сведения о вашей операционной системе и ошибке 0x800b0101, чтобы помочь техническим специалистам лучше понять проблему и предложить наиболее подходящее решение.
We usually give direct download links to Windows Updates on this blog, so users can install the updates manually on multiple systems, saving Internet bandwidth. Some users have reported that they encounter an error code 0x800b0101 when trying to install Windows Update using an MSU file.
The issue can be resolved by changing a few things, such as running Windows Update troubleshooter, changing the system date and time, and performing SFC and DISM scans. This will ensure the integrity of your system files and the accuracy of your system clock.
In this article, we will discuss all these topics in detail.
Table of contents
- Windows Update Standalone Installer 0x800b0101 Error
- Fix Windows Update Standalone Installer Error 0x800b0101
- Run Windows Update Troubleshooter
- Correct System Date and Time
- Clear Software Distribution folder
- Scan for Corrupted System Files
- Repair Windows image
- Remove Expired Certificates
- Closing Words
Windows Update Standalone Installer 0x800b0101 Error

Users often encounter a prompt such as the above stating the following:
Windows Update Standalone Installer Installer encountered an error: 0x800B0101 A required certificate is not within its validity period when verifying against the current system clock or the timestamp in the signified file.
This error occurs when you try to manually install a standalone Windows update package (.msu file).
An MSU file is installed using the Windows Update Standalone Installer (WUSA) utility. This utility is placed in the %windir%\System32 directory in Windows. If you do not install a Windows update, it throws an error with the relevant error code.
Fix Windows Update Standalone Installer Error 0x800b0101
We have listed the following methods you can mitigate this error in Windows. Since the issue can occur due to several different reasons, any one of these methods could work for you.
Run Windows Update Troubleshooter
Both Windows 11 and 10 come with a pre-installed troubleshooter for several different services and features of the OS. This troubleshooter can be executed automatically to check for Windows Update issues, and then suggest the necessary action to be taken.
To run this troubleshooter, navigate to the following:
Settings app >> System >> Troubleshoot >> Other troubleshooters
Click Run in front of Windows Update.

The troubleshooter will now launch. It will then display any identified issues and ask you to take the appropriate action(s). It is recommended that you perform the necessary actions and see whether the issue is resolved.
Correct System Date and Time
The error message claims it is having trouble verifying the timestamp for the associated certificate. It may be possible that your system’s time or date is out of sync and needs to be corrected. Follow the steps below to do so:
- Open the Date and Time settings by typing in timedate.cpl in Run.
- From the window, switch to the Internet Time tab, and then click Change settings.

- From the Internet Time Settings pop-up, check the box next to “Synchronize with an Internet Time Server,” select time.windows.com from the drop-down menu, and then click Update now. Click OK when done.
- Back in the Date and Time window, click Apply and Ok.


Now restart your computer and try reinstalling the Windows update.
Clear Software Distribution folder
The Software Distribution folder can be found in C:\Windows. This folder contains temporary files within a sub-folder (download) that are required to install a Windows update. Quite often, a Windows update fails to install and experiences an error code because of these corrupted files. In this case, these temporary files need to be removed, and the update process needs to be started from the top.
Navigate to the following location using File Explorer:
C:\Windows\SoftwareDistribution\Download
Now, select all the items by using the Ctrl + A shortcut keys. Then delete all selected items using the Del key while holding down on the Shift key to remove them permanently.

Once removed, restart the computer and try reinstalling the Windows update.
Scan for Corrupted System Files
Windows comes with a built-in tool to fix system files that may have been corrupted. This tool is the System File Checker (SFC), which automatically repairs corrupted system files that may be redundantly available on your PC, or have just gone missing. What it does is replace any damaged or missing files.
Perform the following to run the tool:
- Launch Windows PowerShell with administrative privileges and then enter the following command:
sfc /scannow - Now allow some time for the command to fully run and scan your PC, and make any fixes if possible along the way.

- Restart the computer.

Once done, check if you can now install the Windows update. If not, perform the next step to rule out system file corruption.
Repair Windows image
Deployment Image Servicing and Management (DISM) also fixes your Operating System automatically, like the SFC scan.
To begin the scan, launch Command Prompt with administrative privileges and enter the following 3 commands, one after the other:
DISM.exe /Online /Cleanup-image /Scanhealth
DISM.exe /Online /Cleanup-image /Checkhealth
DISM.exe /Online /Cleanup-image /Restorehealth

It can take a few minutes for the commands to execute completely. Do not close the Command Prompt and allow them ample time to run.
Once completed, check to see if the issue has been resolved.
Remove Expired Certificates
Digital certificates are used to authenticate software that is who they claim to be, not an imposter. Each certificate is valid until a certain time, after which they expire and need to be renewed (usually automatically). However, expired and faulty certificates can cause the Windows Update Standalone Installer to fail and throw an error.
In that case, the certificate needs to be removed. Follow the steps below to remove expired certificates:
We suggest you create a system restore point if a critical system certificate is removed.
- Open the Certificate Management Console by typing in certlm.msc in Run.
- From the left pane, navigate to the following:
Certificates - Local Computer >> Trusted Root Certification Authorities >> Certificates - Now, in the right pane, look for the expired certificate (using the Expiration Date column), right-click it, and then click Delete from the context menu.

- Repeat the last step until all expired certificates are removed.
- Restart the computer.

Once the computer restarts, check to see if the issue has been resolved.
Closing Words
There are a bunch of errors and error codes associated with Windows updates. Most of them, however, are solved by certain troubleshooting techniques. Applying these methods can save you from repairing, resetting, or redoing your entire operating system.
That is why we strongly recommend that you implement all of the methods given above to try and mitigate the issue.
Recently, a few users complained of not being able to update their Windows using Update Standalone Installer on account of an error code 0X800B0101. Though this issue is restricted to Windows 10, it may occur on Windows 11 as well. When you encounter this issue on your PC, you may receive an error message as well.
The error message resembles the following –
Windows Update Standalone Installer
Installer encountered an error: 0x800B0101
A required certificate is not within its validity period when verifying against the current system clock or the timestamp in the signified file.
Why do Windows updates fail on error 0X800B0101?
After looking into this particular issue thoroughly, we came to know that this is an update-related issue and may occur because of the following reasons –
- Incorrect Date & Time
- Hardware or driver conflicts
- Installed a corrupted update or application
- Presence of pending.xml files
- Corrupt Windows Cache folders
If you are getting an error code 0X800B0101 while updating Windows, check if the date & time are correct on your PC. In case you found this not matching with the locale where you live, configure this immediately. Restart your device and check if you can now update Windows 11/10 without getting into any glitches.
If the error persists even after correcting the date & time, go through the below set of solutions sequentially –
1] Run Windows Update Troubleshooter
Whenever you get into any update-related issue on your PC, troubleshoot Windows using an in-built tool “Update Troubleshooter”. You may access and run this tool by following the steps outlined below –
- Press Win + I to open Settings.
- Select “System > Troubleshoot > Other troubleshooters” in Windows 11.
- On the next screen, click the Run button beside Windows update.

- When the troubleshooter window pops in, hit Next and follow the on-screen instructions.
Note: If you are on Windows 10, press Win + I, and follow this route instead –
Settings (Win + I) > Update & Security > Troubleshoot > Additional troubleshooters
- On the next screen, click to expand Windows update and hit the option – Run the troubleshooter.

This program will run to find any issues that exist inside your computer and resolves them.
2] Uninstall Third-party apps
If you had lately installed some third-party application on your PC and this error starts appearing afterward, you must have installed a conflicting app. What you can do now is open Control Panel and remove all recent programs from your device.
There remain some residual or leftover files even after uninstalling programs from your system. To get rid of such files in Windows, reboot your PC once. Sign back into your device and check if the error 0X800B0101 resolves by now.
3] Run SFC and DISM scans
There’s one more problem with installing third-party apps on the computer. A problematic app is known to cause problems as it interferes with the core system files and makes them corrupt. In order to fix this issue, you may try performing SFC and DISM scans. Here’s how to do this –
- First of all, right-click on the Windows icon and select Windows Terminal (Admin).
- If you are still on Windows 10 operating system, select Windows PowerShell (Admin) instead.
- On the elevated console, type the following, and press Enter.
sfc /scannow
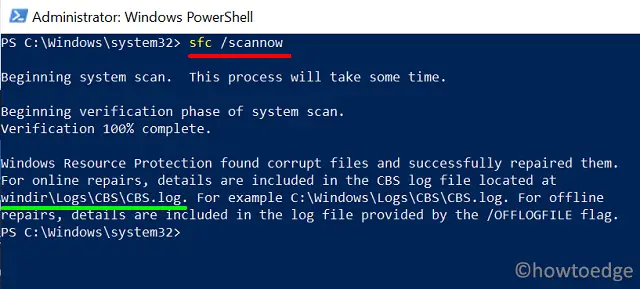
- Wait for 10-15 minutes while the SFC scan reaches 100%.
- Next, run the DISM code to find and fix any problem with Windows 11/10 Image.
Dism /Online /Cleanup-Image /ScanHealth
- The DISM scan also takes 15-20 minutes, so wait patiently.
4] Clear Pending .XML file
The presence of pending.xml files may also cause this exception error 0X800B0101 in Windows. In order to resolve this issue, you may rename the pending.xml file to something pending.old.
To do this, open Command Prompt as an administrator and execute the code below
Ren c:\windows\winsxs\pending.xml pending.old
Restart your PC and check if this resolves the issue that you were dealing with before.
5] Repair outdated drivers to fix Error 0X800B0101
If you hadn’t installed any driver updates for a long time on your computer, errors like 0X800B0101 are bound to occur one time or another. What you can do now is download and install optional updates and see if it resolves the issue.
6] Purge Windows Cache folders
SoftwareDistribution and Catrrot2 are two cache folders that contain all the essential information of recent updates. It is supposed for us to purge these folders frequently. If you hadn’t cleared these folders for a long time, try purging them for once. Here’s how this process goes –
- Launch the Run dialog by pressing Win + R.
- Type “
services.msc” and press Enter to open the Services window. - Scroll down to Windows update, right-click over it, and hit Stop.
- Next, stop these services as well – Background Intelligent Transfer Service and Cryptographic Services.
- After you stopped these services successfully, purge the Windows Cache folders. You may find these folders at the below location –
SoftwareDistribution - C:\Windows
Catroot2 - C:\Windows\System32

- After you reach out to the respective folder, press Ctrl + A to select all items.
- Use Ctrl + X to cut all the selected items and paste them (Ctrl + V) at some other location.
- Alternatively, you may also rename these folders to
SoftwareDistribution.oldandCatroot2.oldas well. - After purging or renaming the Windows cache folders, restart all the services that you have stopped earlier.
Reboot your PC next so that changes made come into effect from the next logon.
How do I update Windows 11/10?
The best way to update Windows 11/10 is through the update section under Settings. You may access the Settings page by clicking Win + I. After then, click Update & Security and hit Check for updates.
If this doesn’t display any pending updates, you may check the Windows update history page for the latest cumulative updates. Following this way, you need to manually download the pending updates and install them on your computer.