Ошибка 0x80073CF9 может проявляться у пользователей Windows 8/8.1/10 во время установки или обновления установленного приложения в Магазине Windows. Сообщение ошибки, в большинстве случаев, выглядит так:
Попробуйте еще раз
Произошла ошибка.
Код ошибки: 0x80073CF9
В общем, сообщение ошибки не предоставляет какой-то важной информации о возникшей с Магазином Windows проблеме. Появившись, ошибка 0x80073CF9 заблокирует главный функционал Магазина Windows до тех пор, пока проблема не будет решена. Именно решением этой ошибки мы и займемся в данной статье. Всего мы рассмотрим четыре метода: использование утилиты SFC, создание папки AUInstall или AppReadiness, сброс Магазина Windows и удаление определенной записи в Реестре Windows. Итак, давайте начнем.
Методы решение ошибки 0x80073CF9

Метод №1 Использование SFC
Ошибка 0x80073CF9 может являться результатом повреждения системных файлов, которые непосредственно участвую в работе Магазина Windows 8 и 10. Что именно стало причиной их повреждения — невероятно сложно определить. Однако, вы можете попытаться восстановить системные файлы с помощью предназначенной для этого утилиты под названием System File Checker.
Итак, для запуска этой утилиты, вам потребуется выполнить следующие шаги:
- Нажмите Windows+S.
- Впишите«Командная строка».
- Нажмите ПКМ на результат и выберите «Запустить от имени администратора».
- Впишите sfc /scannow и нажмите Enter.
- Дождитесь окончания работы утилиты System File Checker, а затем перезагрузите компьютер.
Снова зайдите в Магазин Windows. Попробуйте скачать или обновить какое-то приложение, чтобы проверить наличие ошибки 0x80073CF9. Если все пройдет нормально — дело заключалось в повреждениях системных файлов. Если же ошибка все еще присутствует, то давайте двигаться дальше.
Метод №2 Создание папки AUInstallAgent/AppReadiness
Если вы столкнулись с ошибками при использовании Магазина Windows(а в нашем случае — это ошибка 0x80073CF9), то рекомендуется проверить наличия в системе папки AUInstallAgent(или AppReadiness). Данная папка является очень важной для корректной работы Магазина Windows. Если она отсутствует в вашей системе по той или иной причине — это может вызвать некоторые проблемы, например, ошибку 0x80073CF9.
Пройдите в директорию C:\Windows\ и попробуйте найти папку AUInstallAgent(или AppReadiness). Если ее нет, то создайте ее в этой директории и перезагрузите свой компьютер. Зайдя повторно в систему, проверьте наличие ошибки 0x80073CF9 в Магазине Windows. В большинстве случаев, данный способ наиболее часто помогает пользователям при появлении этой проблемы.
Метод №3 Сброс кэша Магазина Windows
Если все вышеперечисленные методы не смогли принести положительного результата при решении ошибки 0x80073CF9, то, возможно, что-то не так с приложением самого Магазина Windows на вашем компьютере. Зачастую, виновником ситуации становятся накопления кэша приложения.
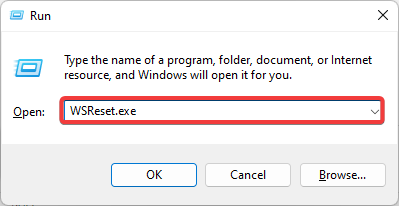
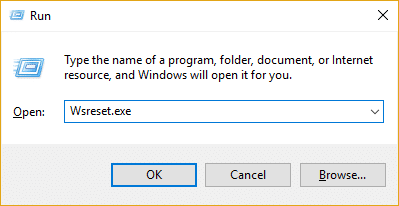
Сброс кэша Магазина Windows можно выполнить всего за несколько секунд: нажмите Windows+R. Затем впишите WSReset.exe и нажмите Enter. Во время очистки кэша Магазин Windows может закрываться и открываться. Как только очистка кэша будет завершена, перейдите в Магазин и проверьте наличие ошибки 0x80073CF9.
Метод №4 Удаление ключа
У нас с вами остался последний метод, в котором мы будем удалять определенный ключ из Реестра Windows. Однако, перед удалением, мы настоятельно рекомендуем вам создать резервную копию Реестра, так как, в некоторых случаях, модификация Реестра может привести к нестабильности и критическому сбою во время работы операционной системы.
Итак, нажмите Windows+R, чтобы открыть утилиту «Run…». Теперь пропишите Regedit.exe и нажмите Enter, чтобы открыть Редактор Реестра Windows. Открыв окно редактора, найдите в нем ключ HKEY_LOCAL_MACHINE\Software\Policies\Microsoft\Windows\Appx\AllowAllTrustedApps = 1 и удалите его из реестра. Завершив удаление ключа, закройте Редактор Реестра и перезагрузите свой компьютер. Данный метод помог некоторым из пользователей при борьбе с ошибкой 0x80073CF9, и мы надеемся, что он вам точно также поможет.
Cleaning the system cache is an easy fix for this
by Ivan Jenic
Passionate about all elements related to Windows and combined with his innate curiosity, Ivan has delved deep into understanding this operating system, with a specialization in drivers and… read more
Updated on
- The error code 0x80073cf9 is one of the many issues associated with the Store but not one to avoid easily.
- Error 0x80073cf9 stops you from installing apps; sometimes, only a complete reboot will rid you of it.
- In our article, we list all known methods to solve the 0x80073cf9 Microsoft Store error.
- One logical step is to get your system back to a point in time before encountering the error, and we will show you how to do so.

The error code 0x80073cf9 in Windows is usually triggered when you try to install a new application from the Microsoft Store.
This error code prevents you from installing the app and will give you two options. You may either relaunch or cancel the installation process, but unfortunately, neither option will work.
The Microsoft Store error 0x80073cf9 may also appear when you try to update an application to make it suitable for Windows 10.
We will show you how to permanently fix this issue and prevent it from happening again.
What does error 0x80073CF9 mean?
If you get this error message, it signifies that Windows 10 is preventing you from installing specific programs.
Most users who experienced this error said it is not a widespread issue since some users may experience it while installing specific applications. However, others say they cannot access the Store because of error code 0x80073cf9.
There could be a variety of reasons that trigger this error, including:
- Problematic applications – Some third-party software may trigger the error, so you must uninstall the app.
- Malware infection – In this case, you will need a full computer scan to eliminate any malware or virus on the computer.
- Compatibility issues with antivirus software – Third-party antivirus software may not be compatible with the OS. Therefore, we suggest temporarily disabling it or switching to a different solution in this case.
- Microsoft Store apps – Windows comes with a built-in store troubleshooter. So it would help if you run it to resolve the problem.
Users have faced different variations of this 0x80073cf9 error, including in games and applications like Sea of Thieves, Intune, Autopilot, Minecraft, Game Pass, and Forza Horizon 5.
How we test, review and rate?
We have worked for the past 6 months on building a new review system on how we produce content. Using it, we have subsequently redone most of our articles to provide actual hands-on expertise on the guides we made.
For more details you can read how we test, review, and rate at WindowsReport.
This is not an exhaustive list of triggers, but regardless, using the solutions we recommend would help fix the issue.
How do I fix the error code: 0x80073cf9?
- What does error 0x80073CF9 mean?
- How do I fix the error code: 0x80073cf9?
- 1. Clean the cache
- 2. Uninstall problematic apps
- 3. Use specialized software to repair Store apps
- 4. Use System Restore
- 5. Create the AUInstallAgent folder
- 6. Disable your antivirus
- 7. Turn off your firewall
- 8. Run the Microsoft Store troubleshooter
- How do I fix the 0x80073cf9 Microsoft Store error on Windows 11?
- How do I run WSReset EXE?
1. Clean the cache
1. Open the Run dialog using Windows + R.
2. Paste the script below inside the Run dialog box: WSReset.exe
3. Hit Enter to run the command.
4. The Windows Store command prompt should appear; wait for it to disappear automatically.
5. Check whether the issue persists.
The first easy fix you should try out to solve code: 0x80073cf9 is to clear your Windows PC’s cache. You can easily do this via the Run dialog.
2. Uninstall problematic apps
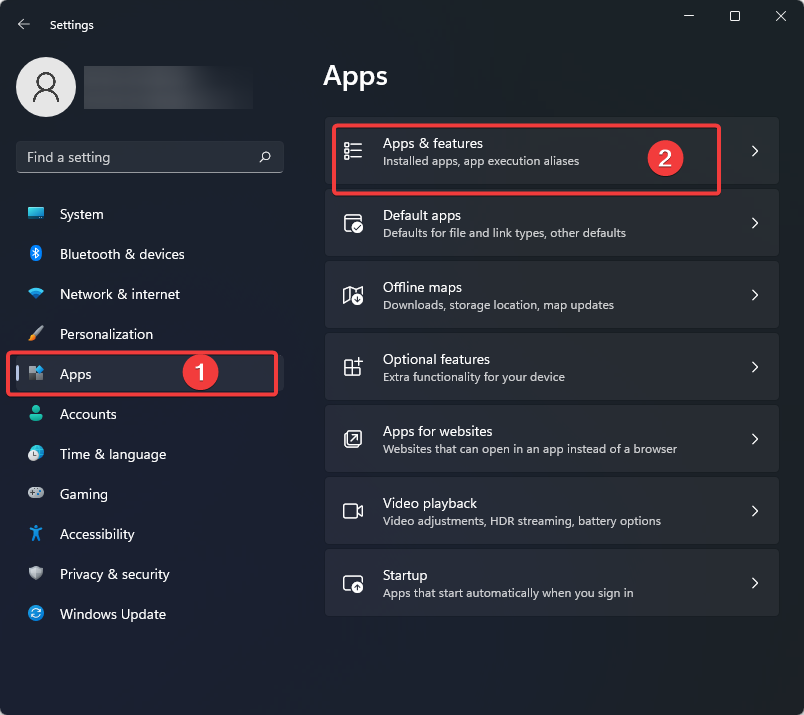
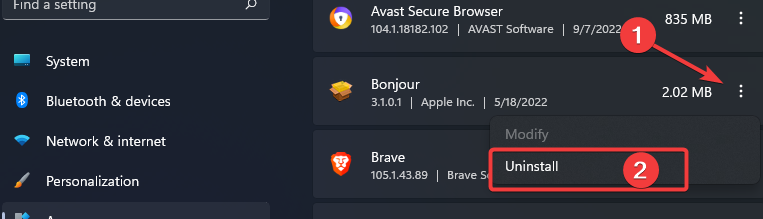
- Open up the Settings app.
- Click on Apps on the left pane, then select Apps & features from the right.

- Scroll down to your most recently added app, click on the ellipses and select Uninstall.

3. Use specialized software to repair Store apps
Although updating your system is always a good idea, things can go south. For example, there have been numerous instances when Windows updates caused issues, from incompatibility between system features to outdated drivers, etc.
4. Use System Restore
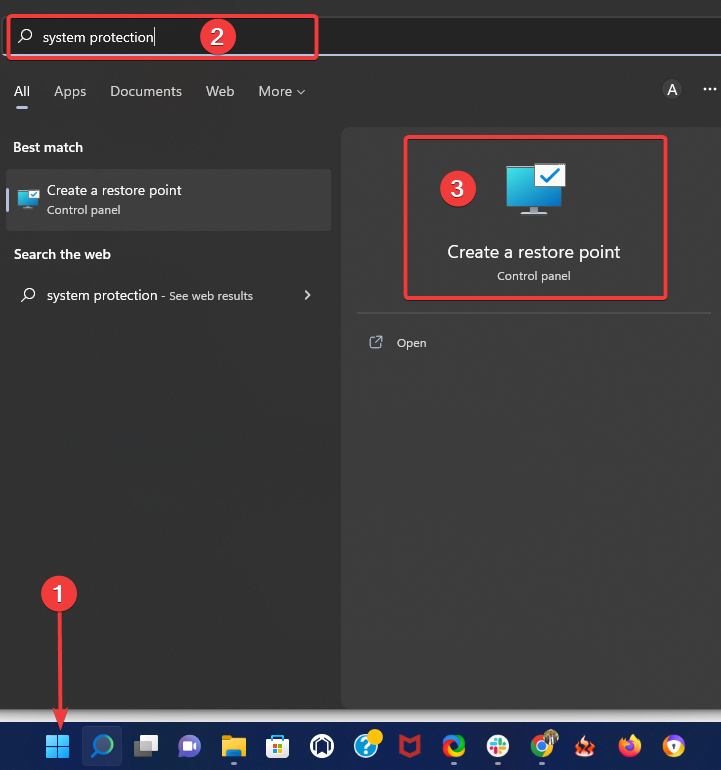
- Click the Start menu, type system protection, and select the Create a restore point app.

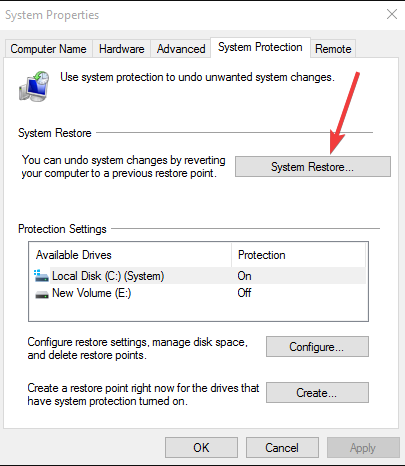
- Click on the System Restore button.

- On the restore window, click the Next button.
- Select a restore point, and click Next again.

- You will need to follow the screens’ instructions to complete the process.

Note: Before performing the system restore, we suggest you write down the apps you installed so that you can get them back after this process.
5. Create the AUInstallAgent folder
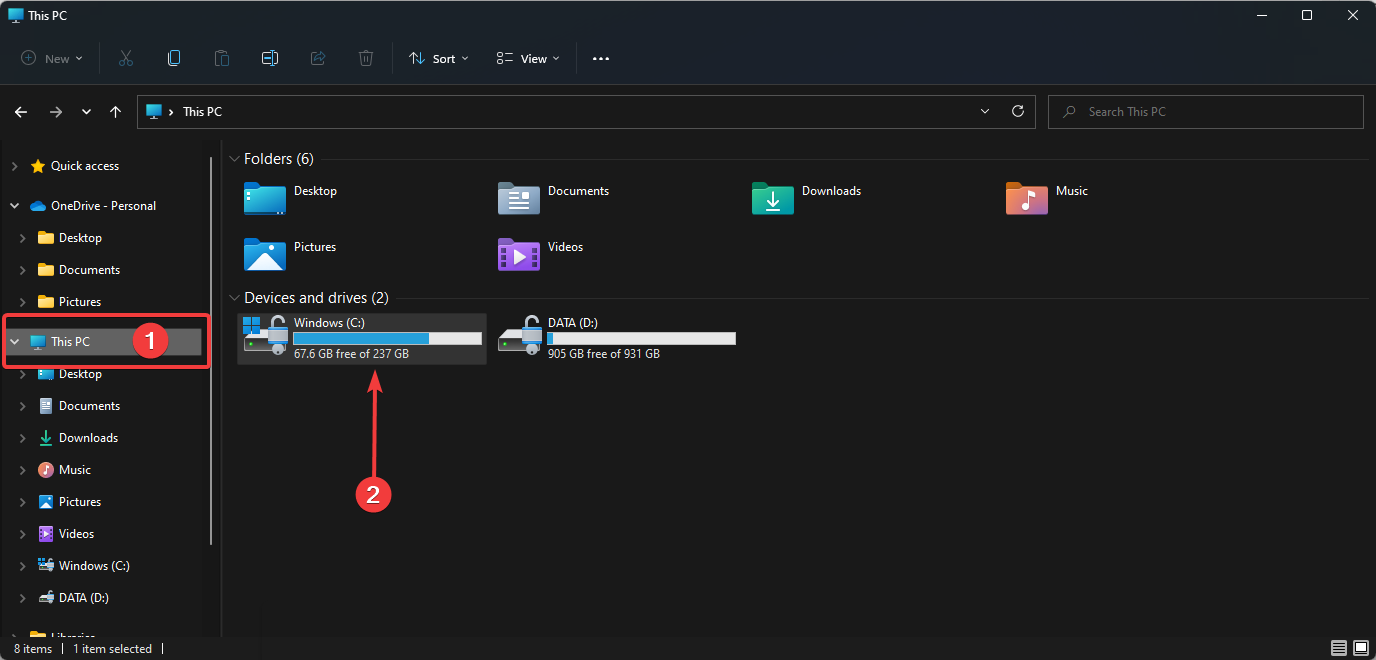
- Open the File Explorer, click on This PC, and select the partition where you have Windows 10 installed.

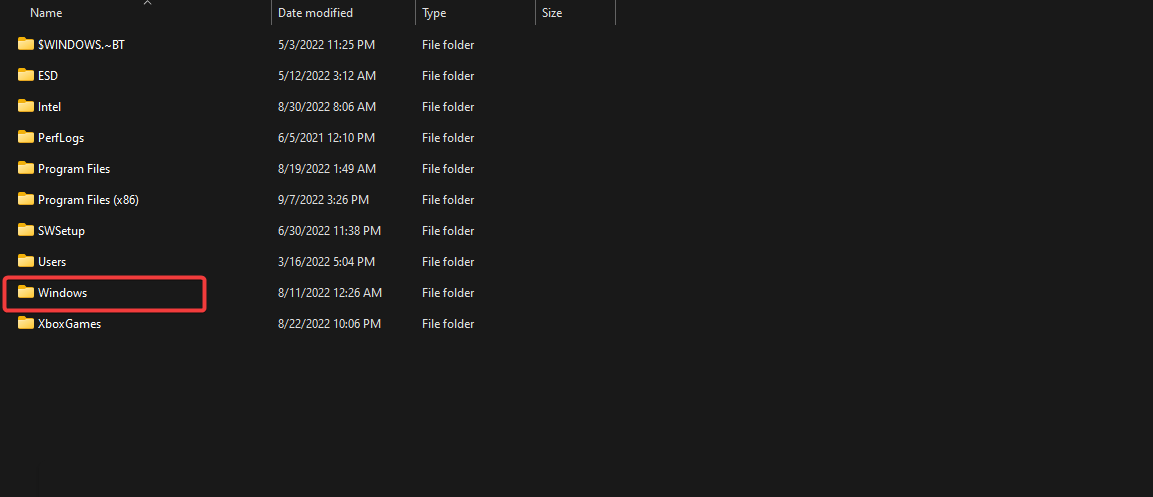
- Double-click on the Windows folder you have in the partition.

- Check the Windows folder and see if you have another folder named AUInstallAgent.

- If you don’t have the AUInstallAgent folder, you need to right-click the Windows directory and create a new folder with that name.
- Then reboot the Windows 10 device.
- Fix: This Alias Cannot be Added to Your Account Error on Windows 11
- How to fix the Thinkpad if it Won’t Wake Up
- Fix: Control Panel is Not Showing All Programs on Windows 11
6. Disable your antivirus
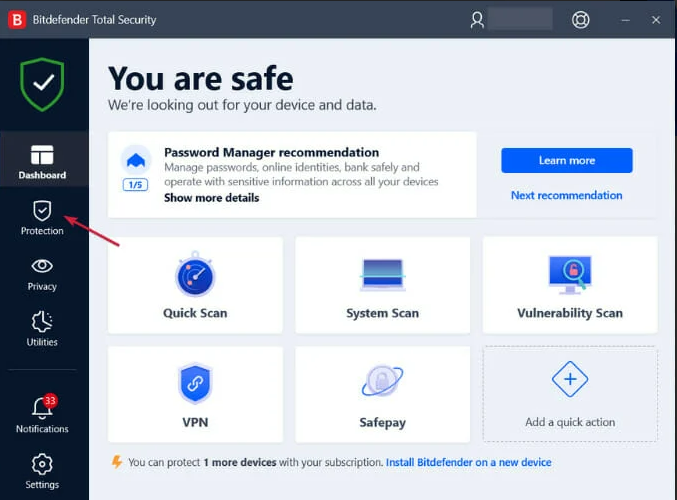
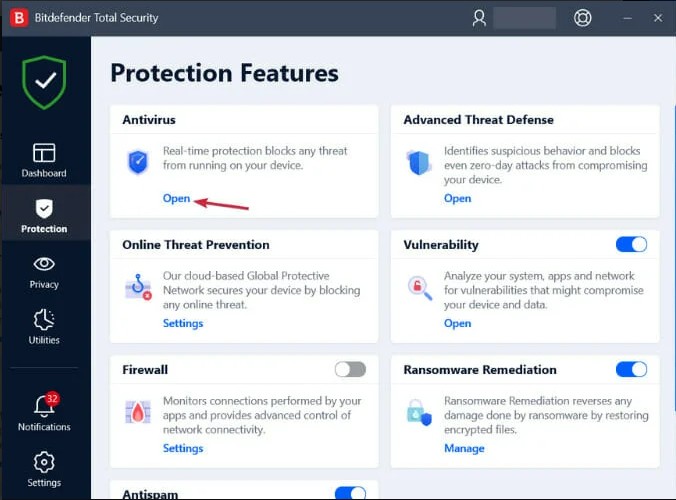
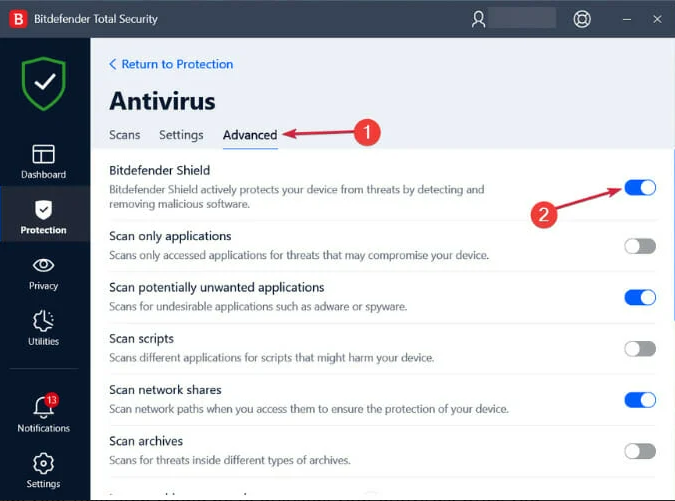
- Open the third-party antivirus and access the Protection or Security menu. We offer Bitdefender as an example, but all antiviruses can be disabled from their menus.

- Click the Open button under antivirus.

- Lastly, select the Advanced tab and click the switch to turn off Bitdefender Shield.

- Check if the 0x80073cf9 error still exists.
If you have an antivirus, you need to disable it and check if your apps install correctly afterward.
If they install correctly, it is an issue related to your antivirus, as it blocks the app installation process.
7. Turn off your firewall
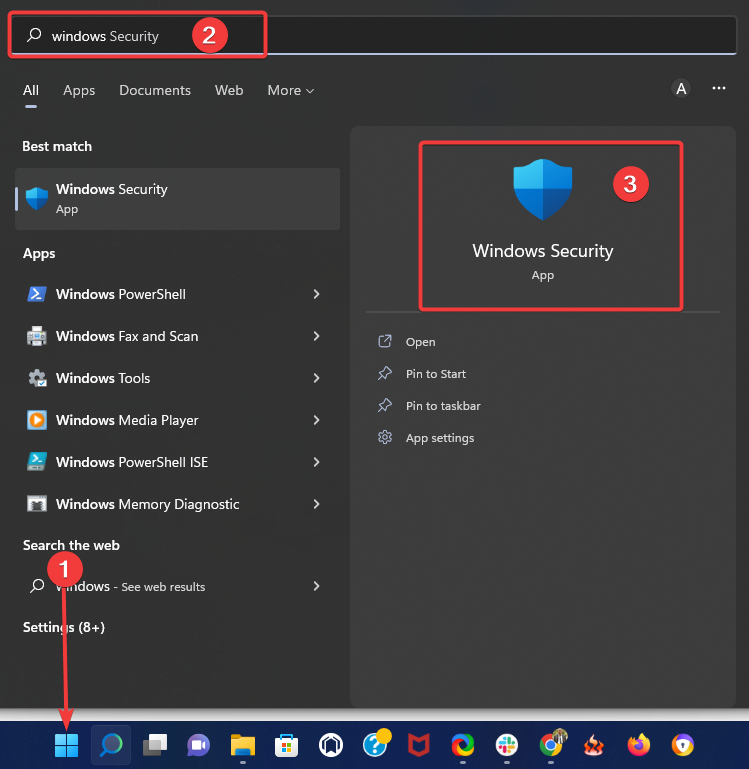
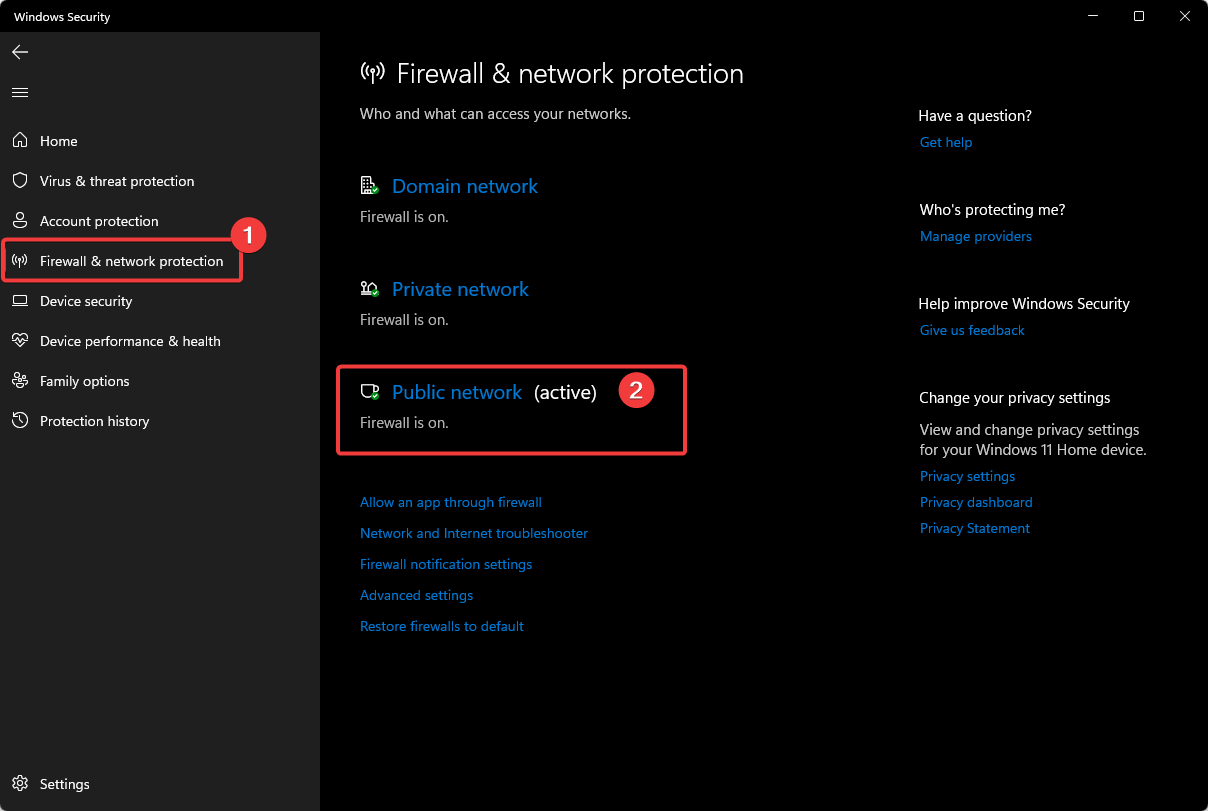
- Click the Start button, type windows security, then select the Windows Security app.

- Click Firewall & network protection in the left pane, then select Public network from the right pane.

- Toggle off Microsoft Defender Firewall.
- Check if the 0x80073cf9 error still exists.
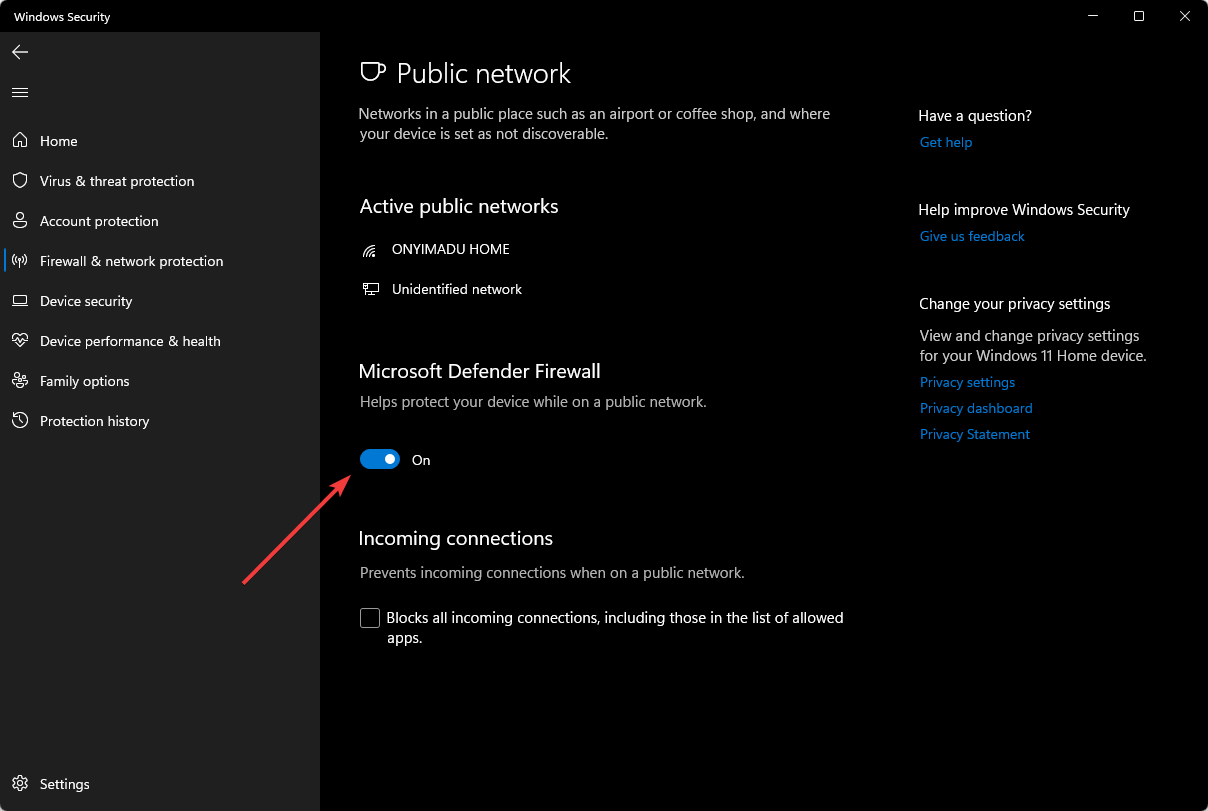
Your firewall may also trigger the annoying Microsoft Store error 0x80073cf9. As a result, one of the quickest and safest solutions is to disable it.
Once you’ve disabled your firewall, download and install the app that initially triggered this error code, and then you can re-enable your firewall.
8. Run the Microsoft Store troubleshooter
If the problem persists, try running Windows 10’s built-in troubleshooter. This tool can fix general technical issues affecting your Microsoft Store Apps.
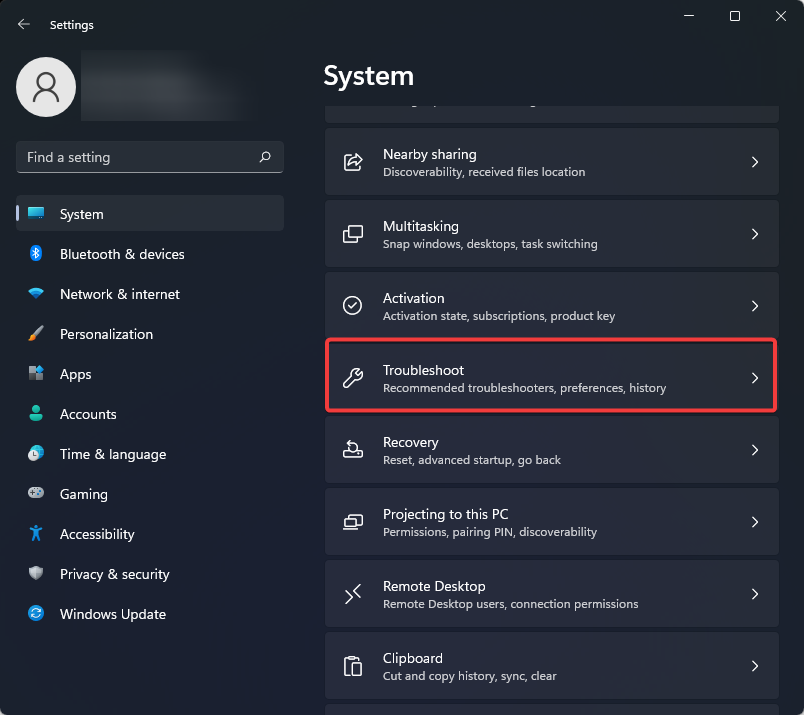
- Open the Settings app, scroll through the right pane and click on Troubleshoot.
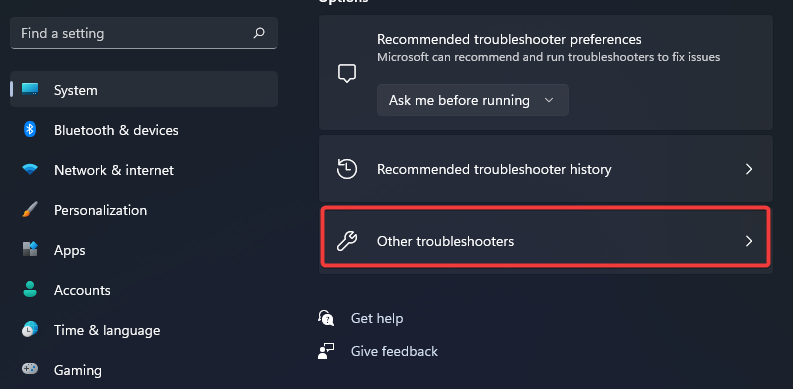
- Click on Other troubleshooters.

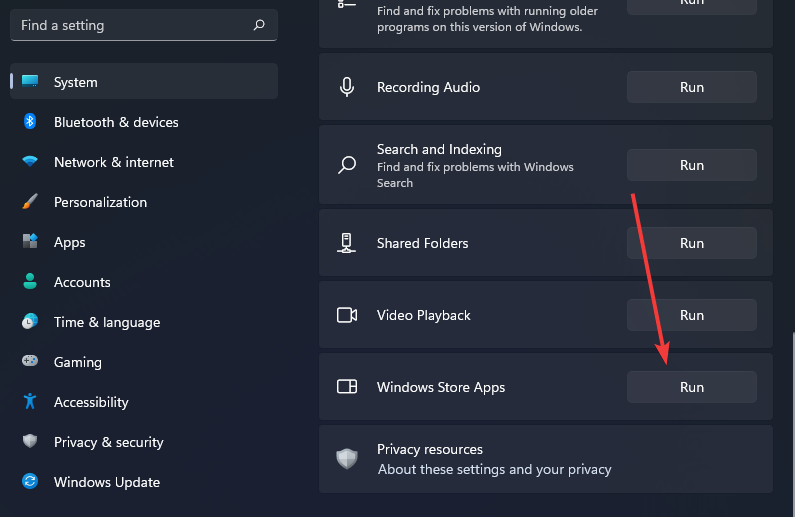
- Scroll down to Windows Store Apps and click Run.

How do I fix the 0x80073cf9 Microsoft Store error on Windows 11?
Except for a few minor differences, the abovementioned steps will work in Windows 10 and 11. Since, on both OS versions, users experience the code: 0x80073cf9 error for the same reasons.
It would help if you only adapt the solutions to your specific situation. So, for example, if you get this error after installing a new Windows 11 application, you should uninstall it.
Other solutions that will also work on Windows 11 include:
- Disabling your antivirus
- Deactivating your firewall
- Using specialized restore tools
How do I run WSReset EXE?
- Open the Run dialog using Windows + R.
- Paste the script below and hit Enter.
WSReset.exe
- The Windows Store command prompt should appear; wait for it to disappear automatically.

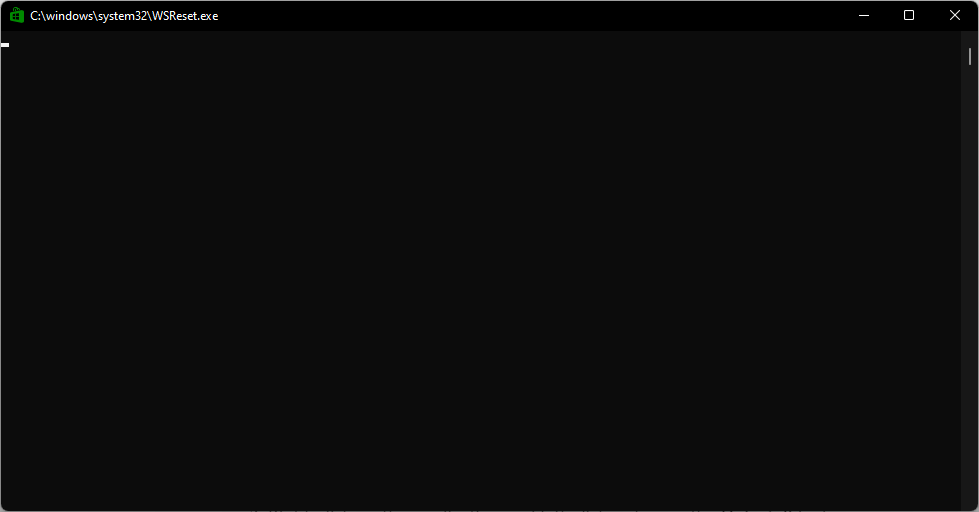
Running this tool is an easy way of clearing the Microsoft Store app cache on Windows 10 and 11.
There you go; these are a few options that you can try to fix the error code 0x80073cf9 and get back to your daily activity.
These solutions will work if you encounter the error messages error 0x80073cf9 this app couldn t be installed, 0x80073cf9 intune, and HRESULT: 0x80073CF9.
As always, we have not written these fixes in any particular order, so you should try what seems the most appropriate to your specific situation.
If you have any questions, let us know in the comments below.
![]()
На чтение 5 мин. Просмотров 3.2k. Опубликовано
Когда вы получаете ошибку 0x80073cf9 в Windows 8 или Windows 10, это обычно происходит при попытке установить новое приложение из Магазина Microsoft. Этот код ошибки в основном не позволяет вам установить приложение, и он даст вам два варианта. Вы можете либо снова запустить процесс установки, либо отменить его.

К сожалению, какой бы вариант вы ни выбрали, он не будет работать. Код ошибки 0x80073cf9 также может появляться при попытке обновить приложение, чтобы оно подходило для Windows 8 или Windows 10. Если вы попытаетесь перезагрузить компьютер с Windows 8 или Windows 10, это может сработать в редких случаях. Но если вы будете следовать Шаги, перечисленные ниже, вы увидите, как навсегда решить эту проблему и предотвратить ее повторение.
Содержание
- Исправить ошибку Windows Store 0x80073cf9
- 1. Синхронизация лицензий
- 2. Удалите проблемные приложения
- 3. Создайте папку AUInstallAgent
- 4. Отключите антивирус
- 5. Отключите брандмауэр
- 6. Запустите средство устранения неполадок Магазина Windows.
- 7. Используйте Восстановление системы
Исправить ошибку Windows Store 0x80073cf9
- Синхронизация лицензий
- Удалить проблемные приложения
- Создайте папку AUInstallAgent
- Отключи свой антивирус
- Выключите брандмауэр
- Запустите средство устранения неполадок Магазина Windows
- Использовать восстановление системы
1. Синхронизация лицензий
- Нажмите и удерживайте кнопку «Windows» на клавиатуре.
- После того, как вы попадете на стартовый экран, вам нужно будет щелкнуть левой кнопкой мыши или нажать на «Магазин Windows», который у вас есть.
- После того, как вы попадете в магазин Windows, вам нужно будет нажать и удерживать кнопку «Windows» и кнопку «I».
- Щелкните левой кнопкой мыши на «Обновления приложений».
-
Щелкните левой кнопкой мыши или нажмите «Синхронизировать лицензии здесь».

- Позвольте ему выполнить свою работу и перезагрузите устройство Windows 8 или Windows 10.
- Попробуйте установить приложение или обновить приложение и посмотреть, появляется ли по-прежнему это сообщение об ошибке.

2. Удалите проблемные приложения
- Перейдите на начальный экран в Windows 8 или Windows 10, как вы сделали выше.
- Найдите приложение, с которым у вас проблемы.
-
Щелкните правой кнопкой мыши на приложении и щелкните левой кнопкой мыши или нажмите на функцию «Удалить».
- Щелкните левой кнопкой мыши или нажмите «Магазин Windows» на начальном экране после удаления приложения.
- Введите название приложения, которое вы удалили, и установите его снова из Магазина Windows.

- СВЯЗАННЫЕ: Полное исправление: Магазин Windows не работает в Windows 10
3. Создайте папку AUInstallAgent
- Щелкните левой кнопкой мыши значок «Рабочий стол» на начальном экране.
- Откройте значок «Мой компьютер», дважды щелкнув по.
- Откройте раздел, в котором установлена Windows 8 или Windows 10.
- Дважды щелкните папку «Windows», которая находится в разделе.
-
В папке Windows проверьте и проверьте, есть ли у вас другая папка с именем «AUInstallAgent».
Примечание. Если у вас нет папки «AUInstallAgent», вам нужно щелкнуть правой кнопкой мыши в каталоге «Windows» и создайте новую папку с таким именем. - После того, как вы создали папку, вам нужно перезагрузить устройство Windows 8 или Windows 10.
- Проверьте и посмотрите, есть ли у вас эта проблема.
4. Отключите антивирус
Если у вас есть антивирус, вам нужно будет отключить его и проверить правильность установки приложений после этого. Если они установлены правильно, то это проблема, связанная с вашим антивирусом, так как он блокирует процесс установки приложения.
- СВЯЗАННО: что делать, когда антивирус блокирует файлы EXE против вашей воли
5. Отключите брандмауэр
Ваш брандмауэр может также вызвать раздражающую ошибку Microsoft Store 0x80073cf9. В результате, одним из самых быстрых и безопасных решений является его отключение. После того, как вы отключили брандмауэр, загрузите и установите приложение, которое первоначально вызвало этот код ошибки, а затем вы можете снова включить брандмауэр.
6. Запустите средство устранения неполадок Магазина Windows.
Если проблема сохраняется, попробуйте запустить встроенное средство устранения неполадок Windows 10. Этот инструмент может исправить общие технические проблемы, влияющие на приложения Магазина Windows. Чтобы запустить его, перейдите в «Настройки»> «Обновление и безопасность»> «Устранение неполадок»> выберите «Приложения Магазина Windows» и запустите средство устранения неполадок.

7. Используйте Восстановление системы
- Нажмите и удерживайте кнопку «Windows» и кнопку «X».
- Вам нужно будет щелкнуть левой кнопкой мыши на функцию «Система», которую вы видите на экране.
- Теперь, когда вы открыли «Системную панель управления», вам нужно щелкнуть левой кнопкой мыши по функции «Защита системы», которая есть у вас в левой части этого окна.
-
Щелкните левой кнопкой мыши или нажмите на кнопку «Восстановление системы», которая есть в окне.
-
Вам нужно будет следовать инструкциям на экране и выбрать предыдущую точку восстановления, чтобы восстановить настройки системы до того, как они были до того, как вы получили это сообщение об ошибке.
Примечание. Перед тем, как выполнить Восстановление системы Я предлагаю вам записать приложения, которые вы установили после создания точки восстановления, чтобы вы могли установить их снова после завершения этого процесса.

Итак, вот несколько вариантов, которые вы можете попробовать, чтобы исправить код ошибки 0x80073cf9 и вернуться к своей повседневной деятельности. Если у вас есть какие-либо вопросы, сообщите нам об этом в комментариях ниже.
Download Windows Speedup Tool to fix errors and make PC run faster
Windows Store might be one of the most used applications on Windows 10 – but it does come with its share of problems. While Microsoft has been trying to improve upon it with every update, users still report many errors. One of the more common errors is – Try that again, Something went wrong, The error code is 0x80073CF9, in case you need it.
Error code 0x80073CF9 denotes Severity Failure when you go on to download, install or update Windows apps.If you receive error code 0x80073CF9, here is what you need to do to fix the problem.
1] SFC scan
Run an SFC scan as it can help to repair corrupt system files.
2] Switch from wireless to wired connection
At times, downloads don’t work right with wireless connections. Try connecting your system to the network hard-wired and resume the download. If it doesn’t connect to the wired connection directly, try the following steps:
1] Press Win + R to open the Run window. Type the command ncpa.cpl and press Enter to open the Network Connections window.
2] Right-click on your wireless network and select Disable. This would disable the wireless network and the system would be forced to connect to the wired network.
Check if it helps resolve the issue or move to the next solution.
3] Create the AppReadiness folder
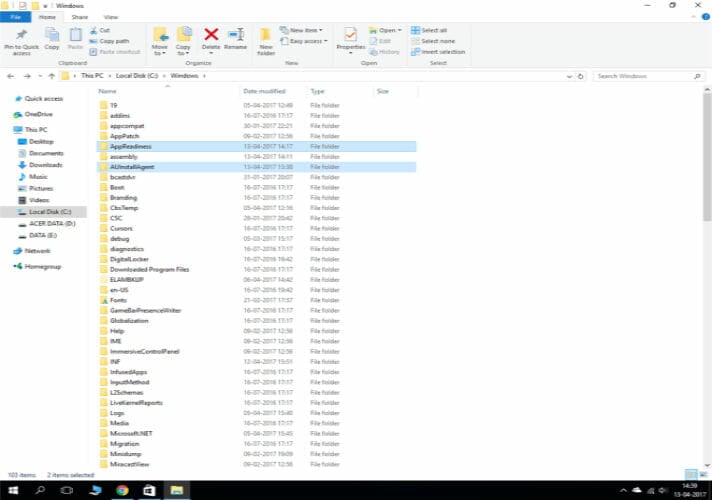
1] Go to C:\Windows, where C: is the system drive.
2] Right-click anywhere in the open space and select New > Folder.
3] Name the new folder AppReadiness.
4] Open the folder and make sure the path to the folder should be C:\Windows\AppReadiness where C: is the system drive.
Windows Store will save data in this folder. When it was absent, the Store iss unable to create it on its own, an issue which has been corrected now.
4] Allow the Store access to the Packages folder
This error also occurs when the AppReadiness folder is created, but the Windows Store does not have enough permissions to write to the Packages folder there.
1] The Packages folder is located on the path: C:\ProgramData\Microsoft\Windows\AppRepository. This path might have a few hidden folders. In case you are unable to find them, go to the View tab and check Hidden items.
2] Making changes to the AppReadiness folder needs Administrator permissions. Right-click on the folder and select Properties.
3] In the Security tab, click Advanced and then Continue.
4] Allow full access to SYSTEM.
5] Click on Apply and then OK to save the settings and restart the system.
More suggestions here – Error 0x80073cf9 while installing Apps from Windows Store.
Hope this helps!
Karan is a B.Tech, with several years of experience as an IT Analyst. He is a passionate Windows user who loves troubleshooting problems and writing about Microsoft technologies.
When you try to install apps on Windows Store, you may face Error Code 0x80073cf9, which can be very frustrating as Windows Store is a reliable source to install apps. If you try to install 3rd party apps from any other source, you risk your machine to malware or infections but what other option you have if you cannot install apps from Windows Store. Well, that’s where you’re wrong this error can be fixed, and that’s what exactly we are going to teach you in this article.

Something happened, and this app couldn’t be installed. Please try again. Error code: 0x80073cf9
There is no single cause as to why this error occurs so that various methods can fix this error. Most of the times it completely depends on the user machine configuration as to which method might work for them, so without wasting any time, let’s see how to fix this error.

Table of Contents
Make sure to create a restore point just in case something goes wrong.
Method 1: Create A Folder AppReadiness
1. Press Windows Key + R then type C:\Windows\ and hit Enter.
2. Find the folder AppReadniess in the Windows folder, if you can’t follow the next step.
3. Right-click in an empty area and select New > Folder.
4. Name the newly created folder as AppReadiness and hit Enter.

5. Reboot your PC to save changes. Again try to access the Store, and this time it might work perfectly.
Method 2: Reinstall Windows Store
1. Open Command Prompt as an Administrator.

2. Run below PowerShell command
Get-AppxPackage -AllUsers| Foreach {Add-AppxPackage -DisableDevelopmentMode -Register “$($_.InstallLocation)\AppXManifest.xml”}

3. Once done, close command prompt and Restart your PC.
This step re-register Windows Store apps which should automatically Fix Windows 10 Store Error 0x80073cf9.
Method 3: Create a folder AUInstallAgent
1. Press Windows Key + R then type C:\Windows\ and hit Enter.
2. Find the folder AUInstallAgent in the Windows folder, if you can’t then follow the next step.
3. Right-click in an empty area and select New > Folder.
4. Name the newly created folder as AAUInstallAgent and hit Enter.

5. Reboot your PC to save changes. This step may fix Windows 10 Store Error 0x80D05001 or 0x80073cf9 but if it didn’t then continue.
Method 4: Allow Full System Access to Packages in AppRepository
1. Press Windows key + R then type C:\ProgramData\Microsoft\Windows\ and hit Enter.
2. Now double click on AppRepository folder to open it, but you will receive an error:
You have been denied permission to access this folder.

3. This means you need to take ownership of this folder before you can access it.
4. You can take ownership of the folder via the following method: How To Fix Destination Folder Access Denied Error.
5. Now you need to give the SYSTEM account, and the APPLICATION PACKAGES account full control on the folder C:\ProgramData\Microsoft\Windows\AppRepository\Packages. To this follow the next step.
6. Right-click on the Packages folder and select Properties.
7. Select the Security tab and then click Advanced.

8. In Advanced Security Settings, click Add and click on Select a principal.

9. Next, type “ALL APPLICATION PACKAGES” (without quote) in the field Enter the object name to select and click OK.

10. Now, on the next window check mark Full control and then click OK.

11. Do the same with the SYSTEM account. Reboot your PC to save changes.
Method 5: Rename Software Distribution Folder
1. Press Windows Key + Q to open Charms Bar and type cmd.
2. Right-click on cmd and select Run as Administrator.
3. Type these commands and hit enter:
net stop wuauserv
ren c:\windows\SoftwareDistribution softwaredistribution.old
net start wuauserv
exit

4. Reboot your PC to saves changes and again try to download updates.
Method 6: Run DISM (Deployment Image Servicing and Management)
1. Press Windows Key + X then select Command Prompt(Admin).

2. Enter the following command in cmd and hit enter:
Important: When you DISM you need to have Windows Installation Media ready.
DISM.exe /Online /Cleanup-Image /RestoreHealth /Source:C:\RepairSource\Windows /LimitAccess
Note: Replace the C:\RepairSource\Windows with the location of your repair source

3. Press enter to run the above command and wait for the process to complete; usually, it takes 15-20 minutes.
NOTE: If the above command doesn't work then try on the below:
Dism /Image:C:\offline /Cleanup-Image /RestoreHealth /Source:c:\test\mount\windows
Dism /Online /Cleanup-Image /RestoreHealth /Source:c:\test\mount\windows /LimitAccess
4. After the DISM process is complete, type the following in the cmd and hit Enter: sfc /scannow
5. Let System File Checker run and once it’s complete, restart your PC.
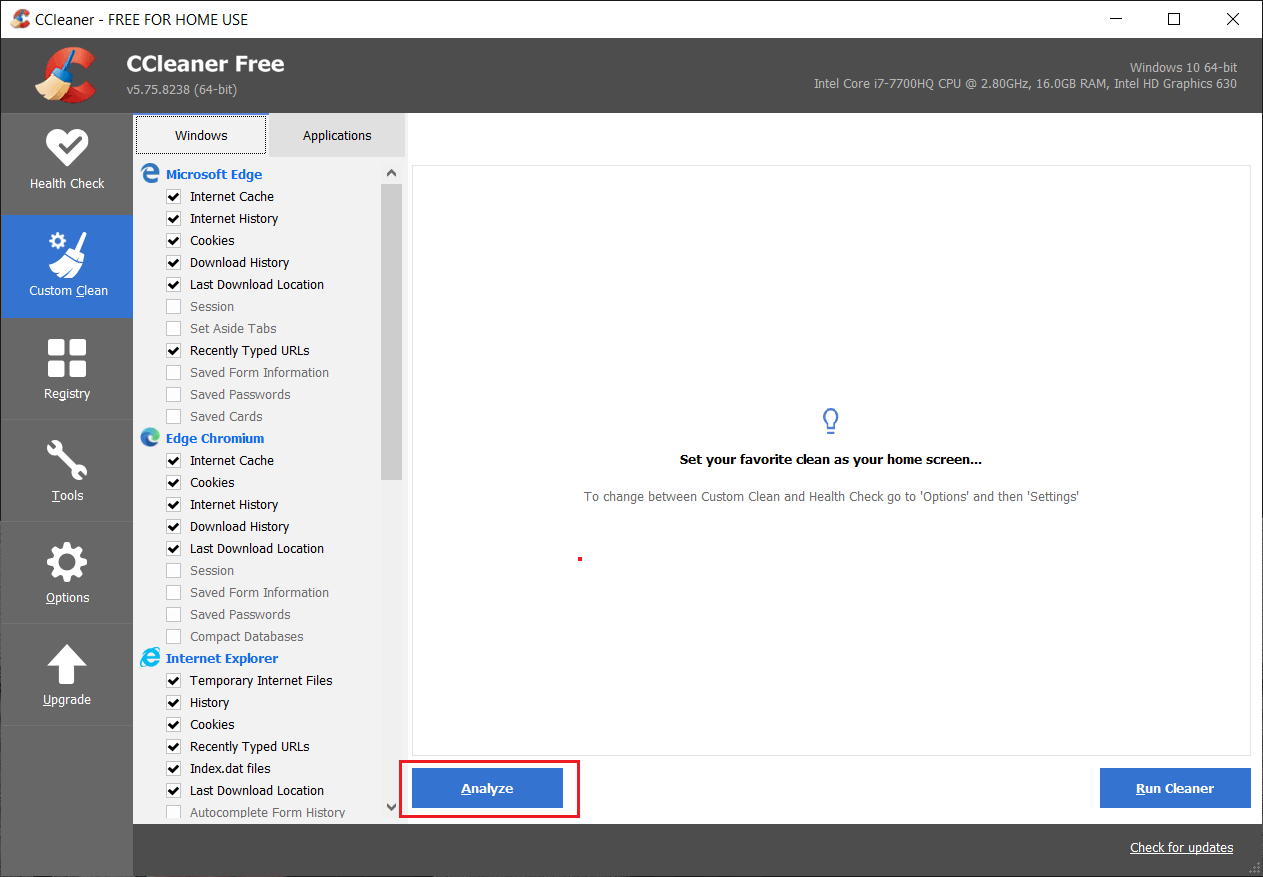
Method 7: Run CCleaner and Malwarebytes
1. Download and install CCleaner & Malwarebytes.
2. Run Malwarebytes and let it scan your system for harmful files. If malware is found, it will automatically remove them.

3. Now run CCleaner and select Custom Clean.
4. Under Custom Clean, select the Windows tab and checkmark defaults and click Analyze.
5. Once Analyze is complete, make sure you’re certain to remove the files to be deleted.
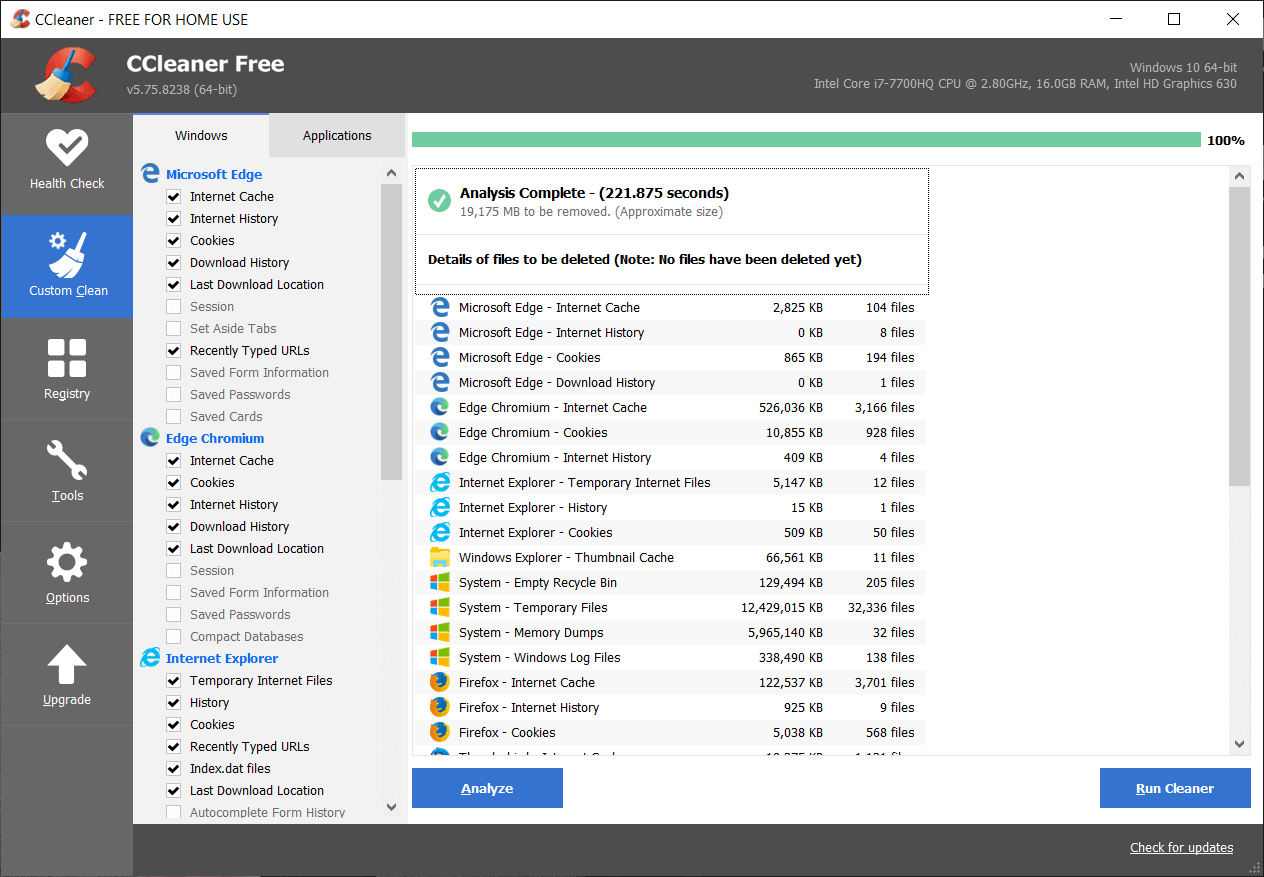
6. Finally, click on the Run Cleaner button and let CCleaner run its course.
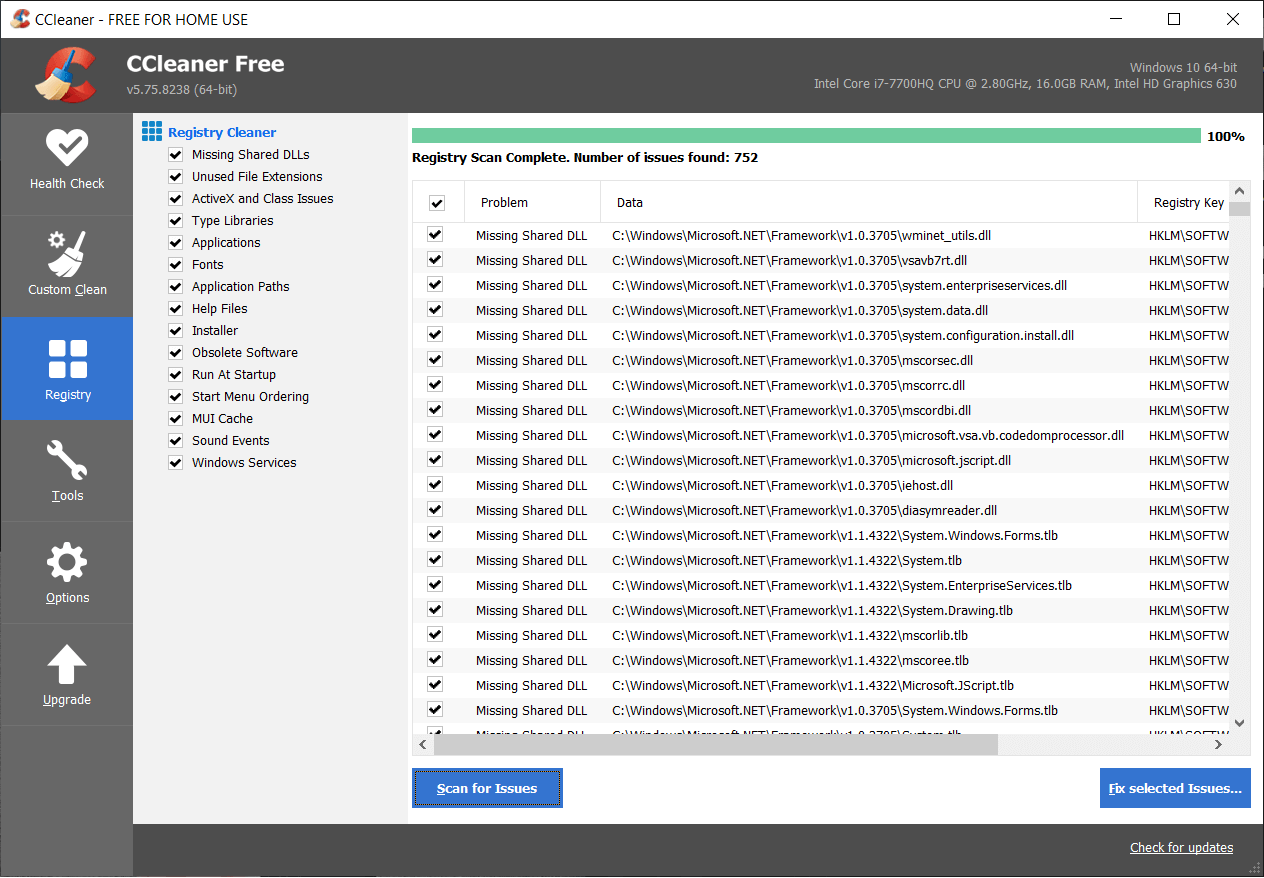
7. To further clean your system, select the Registry tab, and ensure the following are checked:
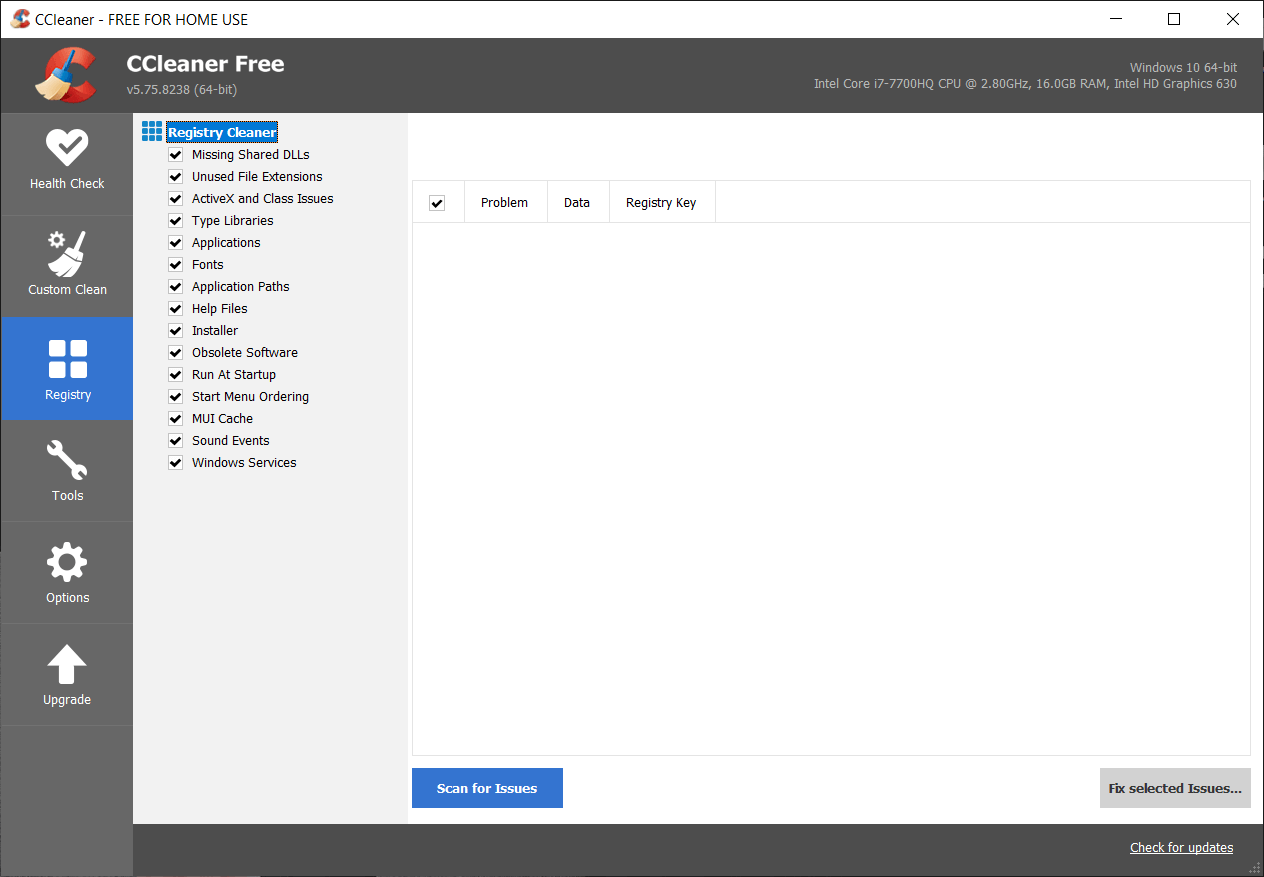
8. Click on the Scan for Issues button and allow CCleaner to scan, then click on the Fix Selected Issues button.
9. When CCleaner asks “Do you want backup changes to the registry?” select Yes.
10. Once your backup has completed, click on the Fix All Selected Issues button.
11. Restart your PC to save changes.
Method 8: Clear Windows Store cache
1. Press Windows Key + R then type Wsreset.exe and hit enter.
2. One the process is finished restart your PC.
Method 9: Run Windows Update and Windows Store Apps troubleshooter
1. Type troubleshooter in the Windows Search bar and click on Troubleshooter.

2. Next, from the left window, pane select View all.
3. Then from the Troubleshoot computer problems list select Windows Update.
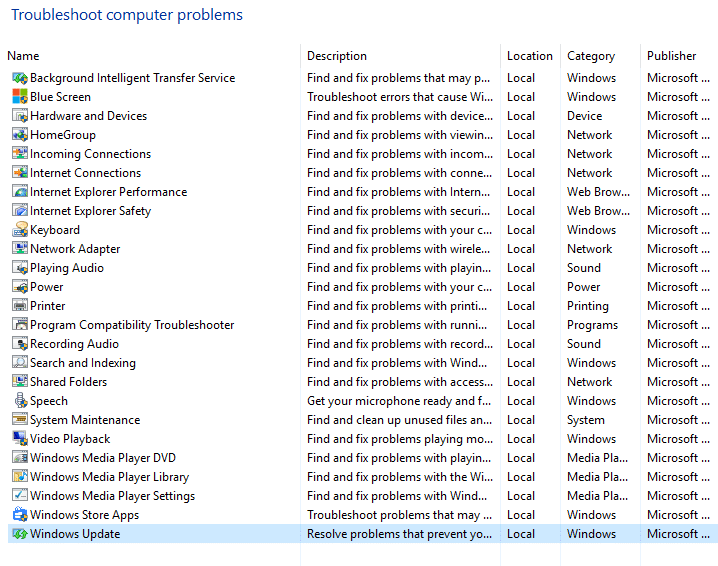
4. Follow on-screen instruction and let the Windows Update Troubleshoot run.
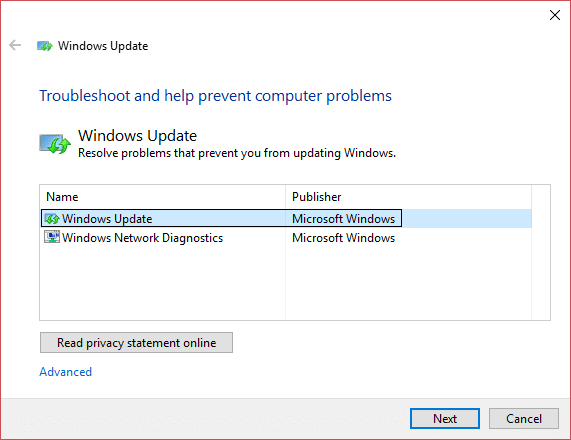
5. Now again go back to the View all window but this time select Windows Store Apps. Run the troubleshooter and follow on-screen instructions.
6. Restart your PC and again try to install apps from Windows Store.
Recommended:
- Fix Office Activation Error Code 0xC004F074
- Perform Clean boot in Windows
- Fix Windows 10 Update error 0x8000ffff
- Windows Explorer has stopped working [SOLVED]
That’s it you have successfully Fix Windows 10 Store Error 0x80073cf9 but if you still have any queries regarding this post feel free to ask them in comment’s section.